
Written by Terence Jeong✏️
I want you to close your eyes. That’s right, close your eyes and imagine. Imagine a world where you never have to enter your card details ever again. Gone are the days when you’d have to pull out your wallet to check your credit card number, gone are the days when you’d have to remember your expiry date, and gone are the days when you’d have to fill out checkout forms.
OK, now open them. How did that feel? Great? Well, that is exactly what the JavaScript Payment Request API hopes to fulfill.
What is the Payment Request API? That is what I am here to tell you. Hopefully, by the end of this article, you will have an understanding of the following:
- Why the Payment Request API exists
- What the Payment Request API is
- The goals of the Payment Request API
- The basics of making a payment using the API
Why does the Payment Request API exist?
To answer that question, let’s do a little role playing, shall we? See the person below? that’s Rondo the hairdresser. Rondo has a website and wants to sell his hair products. In the Payment API world, Rondo is known as the merchant.

See this happy lady? Her name is Sasha, and she wants to buy some hair products off Rondo. In the Payment API world, Sasha is known as the user.

Sasha goes to Rondo the Hairdresser’s website via a browser and finds the exact product she is looking for! She is super excited and clicks the Buy Now button, and then suddenly her face drops… She is greeted with this:
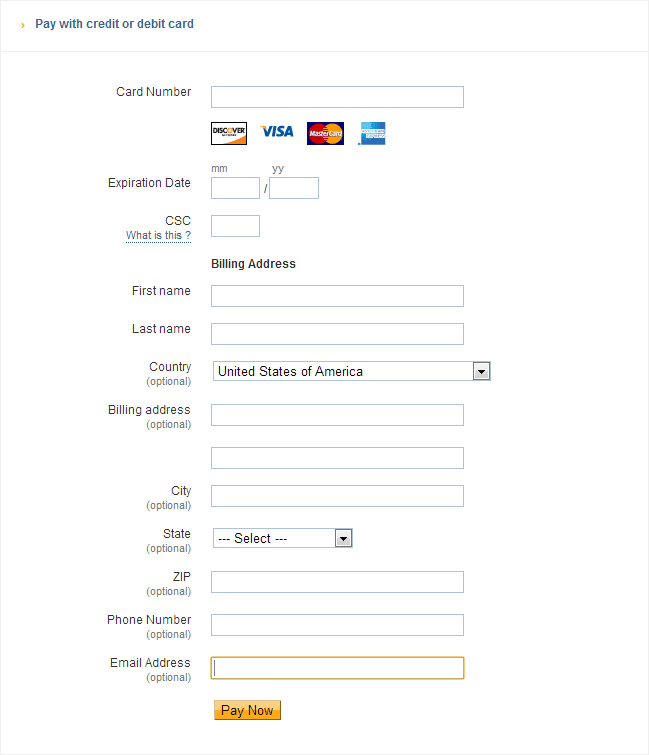
Sasha can’t remember her credit card details, her wallet is downstairs, she really can’t be bothered to input her shipping address for the 100th time, and she is on her mobile. She decides to abandon her cart.
The Payment Request API exists to solve the ever-growing problem of users abandoning their shopping carts because the checkout process is long and tedious.
There have been some solutions, such as Autofill, which will pre-fill the form for you. Developers from Google have “found that forms and payments are completed 25 percent more when autofill is available, increasing odds for conversion. We started solving the problem already with Autofill, but now we’re talking about a more comprehensive solution called the Payment Request API.”

What is the Payment Request API?
So we know that the Payment Request API exists to make the checkout process simpler, but what is the Payment Request API? At its core, the Payment Request API is a system that is meant to eliminate checkout forms. Let’s break down what that system looks like.
The Payment Request API allows the browser (user agents) to act as an intermediary between three parties in a transaction:
- The payee (the merchant): This would be Rondo the Hairdresser, the merchant who requests to be paid.
- The payer (the user): This would be Sasha, a user that makes a purchase at Rondo’s online store.
- The payment method: How Sasha will pay Rondo.
It aims to make the checkout process easier by the browser (user agent) reusing stored payments and address information. These are then passed onto the merchant (Rondo the Hairdresser) without the need for an HTML form.
So what does this look like? Let’s have a look at the image below, shall we? This is the item that Sasha wanted to buy off Rondo. For demonstration purposes, Rondo’s website is now using the Payment Request API.

Now, watch what happens when Sasha clicks the Click to buy button.
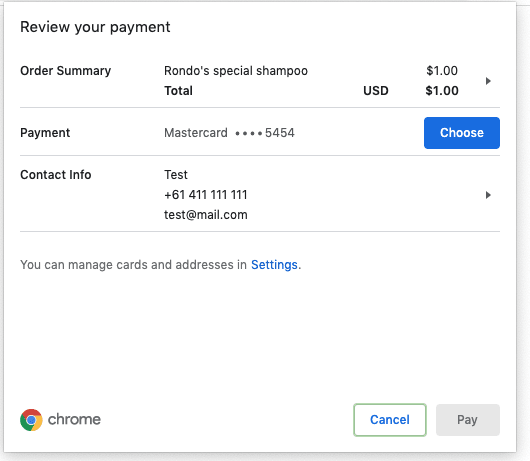
Isn’t that wonderful? Since the browser already has the necessary payment information about the user, they can simply choose their payment details_._
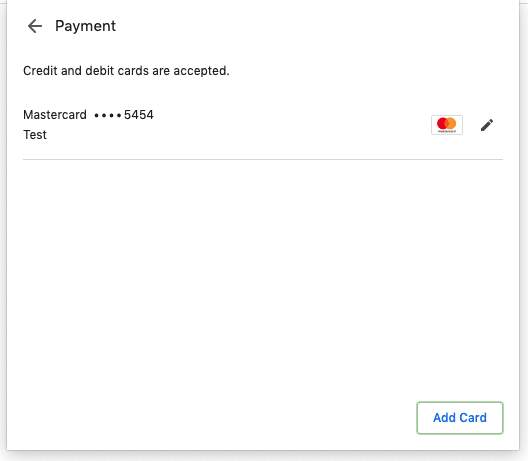
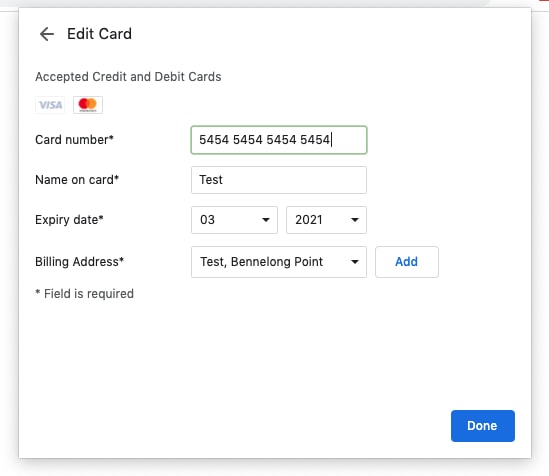
Sasha can even add or edit the cards that are stored in her browser.
After selecting the card she wants to pay with, she can finally click the Pay button.

Although this is a trivial example, we can already see the benefits that the Payment Request API provides:
- A fast purchase experience: The browser remembers the user’s details, and they no longer have to fill out the same information for different sites
- Consistent user experience: The UI is controlled by the browser, making it consistent throughout
- Credentials management: The user can change their shipping address and card details directly in the browser. These details can then be synced to other devices such as mobiles and tablets!
Let’s recap, shall we? When I ask you what the Payment Request API is, I hope your answer is something along the lines of:
The Payment Request API is a system designed to eliminate checkout forms. It allows the browser (user agent) to act as an intermediary between the merchant (Rondo the Hairdresser), the user (Sasha), and the payment method.
Great job, I love your answer! This is a great answer that you can use to impress people at your next barbecue.
On a higher level, I want you to understand what the Payment Request API system is. The Payment Request API system creates a standard for how the checkout flow should work on the web. The Payment Request API system enables the following:
- A native interface for users to select their payment method, shipping address, and contact information in a fast and secure way
- For us developers, a standardized API for getting the user’s payment preferences
- Since the browser is the intermediary, it provides secure, tokenized payments to the web via HTTPS
- It always returns a payment credential that the merchant (Rondo) can use to be paid (credit card, etc.)
Please note that the Payment Request API is not a new payment method, and it does not work directly with payment processors.
What are the goals of the Payment Request API?
Great! I hope you have a better understanding of what the Payment Request API is. We touched on it in the previous section, but I want to crystallize the goals of the Payment Request API.
The Payment Request API is under development by the W3C Web Payments Working Group. The goal of this group is to “create a universal cross-browser standard for any website to accept any form of payment.”
From the W3.org website, the goals of the Payment Request API are to:
- Allow browsers to act as an intermediary between a merchant, user, and payment method (they tell me reiteration is the key to retention)
- Effortlessly support different secure payment methods
- Standardize the communication flow as much as possible
- Eventually support every browser on any device
I know we have mentioned this previously, but I think it is a good idea to have it firmly in your minds since in the next section we will build our own checkout flow using the Payment Request API.
The basics of making a payment using the API
OK, so now that we have some understanding of the Payment Request API, let’s get our keyboard dirty and have a deep dive, shall we? The code for our demo is available in the CodeSandbox below.
Whenever we use the Payment Request API, we need to create a PaymentRequest object. This object is usually created after a user action, such as clicking a button — e.g., Sasha clicking Buy Now on one of Rondo the Hairdresser’s products.
So what is the PaymentRequest object? The PaymentRequest object allows the website to trade information with the browser as the user is providing information to complete the transaction.
The PaymentRequest object is created by using the PaymentRequest() constructor. The constructor takes two required parameters and one option parameter.
const paymentObject = new PaymentRequest(methodData, details, options);
Let’s look at the arguments the PaymentRequest object takes. This is a brief overview, and more can be found here.
-
methodData– This is an array of objects for the payment methods that the merchant’s website accepts. Rondo the Hairdresser would be concerned with what is in this object since it determines how his users will pay for his products. -
details– This is a JavaScript object that contains information regarding the specific payment. This includes total payment amount, shipping, tax, etc. -
options(optional) – This is a JavaScript object that allows you to control the behaviour of the browser on what to capture from the user.
OK, great! Now that we have a basic idea of how to create a PaymentRequest object, let’s see how that might look in code. For this demo, I have gone with using React, but since this is all vanilla JavaScript, it can be used in any library or framework of your choice.
For Rondo the Hairdresser, he has an array of products that he is selling:
const storeItems = [
  {
    id: "order-1",
    label: "Shampoo",
    amount: 10
  },
  {
    id: "order-2",
    label: "Conditioner",
    amount: 15
  },
  {
    id: "order-3",
    label: "Hair Wax",
    amount: 7
  }
];
As you can see, he has three products for sale, each with the following properties: id, label, and amount.
Rondo takes the array of items and maps over them like so:
import React, { useState } from "react";
import "./styles.css";

const storeItems = [
  {
    id: "order-1",
    label: "Shampoo",
    amount: 10
  },
  {
    id: "order-2",
    label: "Conditioner",
    amount: 15
  },
  {
    id: "order-3",
    label: "Hair Wax",
    amount: 7
  }
];

function App() {
  const [items] = useState(storeItems);
  return (
    <div className="App">
      <h1>Rondo The Hairdresser's Store</h1>
      <div>
        <h2>Items for sale</h2>
        <ul className="items">
          {items.map((item, index) => (
            <li>
              <p className="items__label">{item.label}</p>
              <span>${item.amount}</span>
              <button
                className="items__button"
                type="button"
              >
                Click to buy
              </button>
            </li>
          ))}
        </ul>
      </div>
    </div>
  );
}
That produces the following UI:
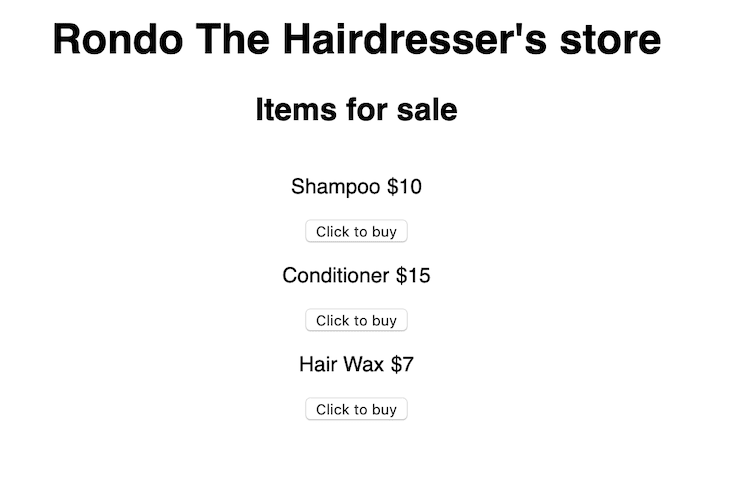
Wow, doesn’t that website look fantastic! But there is a problem. In the code above, the Buy Now button has no onClick handler. As stated above, we generally need a user action to start the creation of a PaymentRequest object. Let’s add that in, shall we?
async function buyItem(item) {
  try {
  } catch (e) {
    return;
  }
};

function App() {
  const [items] = useState(storeItems);
  return (
    <div className="App">
      <h1>Rondo The Hairdresser's Store</h1>
      <div>
        <h2>Items for sale</h2>
        <ul className="items">
          {items.map((item, index) => (
            <li>
              <p className="items__label">{item.label}</p>
              <span>${item.amount}</span>
              <button
                className="items__button"
                onClick={() => buyItem(item)}
                type="button"
              >
                Click to buy
              </button>
            </li>
          ))}
        </ul>
      </div>
    </div>
  );
}
Great! Now our button has a function, called buyItem, which can be used to create our PaymentRequest object. So let’s jog our memory of what our PaymentRequest object will need.
const paymentObject = new PaymentRequest(methodData, details, options);
OK, so it needs methodData — let’s create that. Remember, the methodData array is an array of objects that determines what payments Rondo the Hairdresser’s website accepts. The methodData array object looks something like this:
return [
  {
    supportedMethods: "basic-card",
    data: {
      supportedNetworks: ["visa", "mastercard"],
      supportedTypes: ["debit", "credit"]
    }
  }
];
The supportedMethods field is a single DOMString. Depending on what value is selected here, it will change the meaning of the data field.
The data field is a serializable object that provides optional information that might be needed by the supported payment methods.
We can see that Rondo the Hairdresser’s website accepts basic debit and credit payments from Visa and Mastercard. More information regarding the methodData object can be found here and here.
Great! Now it needs the details object. I think it will be a good idea to create a function that takes one of Rondo’s products from the store item array to build the details object.
function buildShoppingCart(item) {
  return {
    id: item.id,
    displayItems: [
      {
        label: item.label,
        amount: {
          currency: "AUD",
          value: item.amount
        }
      }
    ],
    total: {
      label: "Total",
      amount: {
        currency: "AUD",
        value: item.amount
      }
    }
  };
}
There’s a fair bit going on here, so let’s break it down, shall we? The buildShoppingCart function takes one of the store items and uses it to build the details object. As mentioned previously, The details object provides information about the specific payment. Let’s look at some of the fields mentioned above:
-
total– This is the total of the payment request -
displayItems– An array of optional line items that the browser may display. This isn’t just limited to the item price; it can include tax, shipping, and others. -
Id– An identifier on the payment request, this is optional and if not supplied the browser will make one.
More options such as shippingOptions and modifiers can be found here.
Finally, the options parameter. This parameter, pardon the pun, is optional. This is a JavaScript object that allows you to control the behavior of the browser on what to capture from the user.
options is quite simple and looks something like this:
const options = {
  requestPayerName: true,
  requestPayerEmail: true,
  requestPayerPhone: true,
  requestShipping: false,
  shippingType: 'shipping'
};
Let’s have a look at the fields:
-
requestPayerName– A Boolean indicating whether the browser should collect the payer’s name and submit with payment request. -
requestPayerEmail– A Boolean indicating whether the browser should collect the payer’s email and submit with payment request. -
requestPayerPhone– A Boolean indicating whether the browser should collect the payer’s phone number and submit with payment request. -
requestShipping– A Boolean indicating whether the browser should collect the user’s shipping address and submit with payment request. If this is set to true, the appropriateshippingTypeshould be set. -
shippingType– Lets you determine how the UI refers to shipping. For example, you would say “shampoo delivery” not “shampoo shipping.”
Fantastic! Now armed with how to create a PaymentRequest object, let’s finish our buyItem function so Sasha can buy an item off Rondo’s website! Let’s take a look at the code below:
async function buyItem(item) {
  const paymentMethods = [
    {
      supportedMethods: "basic-card",
      data: {
        supportedNetworks: ["visa", "mastercard"],
        supportedTypes: ["debit", "credit"]
      }
    }
  ];
  try {
    const paymentObject = buildShoppingCart(item);
    const payment = new PaymentRequest(paymentMethods, paymentObject, options);
    // Show the UI
    const paymentUi = await payment.show();
    //If payment is successful, run here
    await paymentUi.complete("success");
  } catch (e) {
    console.log("e", e);
    return;
  }
}
OK, great! So we have successfully built our PaymentRequest object and we can now run certain methods on it. After the object we have called the .show method. This method initiates the payment request and returns a promise. If successful, it will return with a PaymentResponse object, in our case called paymentUi.
This PaymentResponse object provides the developer with access to details they need to complete after the payment completes. This can range from getting an email address to contact the customer, a customer’s phone number, shipping address, etc.
In our example, we call paymentUi.complete() to indicate that the interaction has finished. After this we can add further code to handle the next steps, such as redirecting the user to another page, etc.
From a user perspective (i.e., Sasha’s perspective), after she clicks the button, she is greeted with the following.
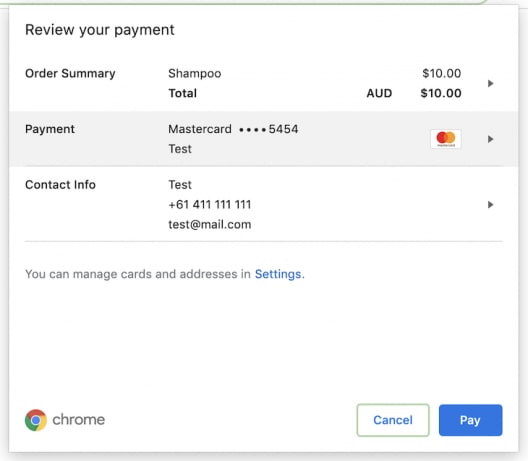
When Sasha clicks Pay, she will then have completed the payment process and the job of the Payment Request API is complete — hopefully she enjoys her shampoo.
Conclusion
In conclusion, I hope you learned how powerful the Payment Request API can and will be and are inspired to dig further. This is just an introduction, and more information can be found here and here. The code can also be found by clicking here.
Plug: LogRocket, a DVR for web apps

LogRocket is a frontend logging tool that lets you replay problems as if they happened in your own browser. Instead of guessing why errors happen, or asking users for screenshots and log dumps, LogRocket lets you replay the session to quickly understand what went wrong. It works perfectly with any app, regardless of framework, and has plugins to log additional context from Redux, Vuex, and @ngrx/store.
In addition to logging Redux actions and state, LogRocket records console logs, JavaScript errors, stacktraces, network requests/responses with headers + bodies, browser metadata, and custom logs. It also instruments the DOM to record the HTML and CSS on the page, recreating pixel-perfect videos of even the most complex single-page apps.
Try it for free.
The post Cashing in on the JavaScript Payment Request API appeared first on LogRocket Blog.

Latest comments (0)