
Introduction
In this brief tutorial, I’ll be walking you through the process of deploying your React app on Netlify. There are 3 ways on how to deploy React applications to Netlify but in this tutorial, we will be focusing on just two.
Prerequisites
At the end of this tutorial, you should be able to successfully deploy your React applications to Netlify but before that, there are a few things you should do or know. These are:
Have basic knowledge of version control system (GitHub, GitLab, Bitbucket )
Have a Netlify account
Know how to create React applications.
Creating a React Application
React is a JavaScript library that is used for building fast and interactive user interfaces. In order to create a react application, we'd be using the create-react-app library and the name of our app can be anything but I'd be using "my-react-app" (just for the purpose of this tutorial). From our terminal we will the command below:
npx create-react-app my-react-app
cd my-react-app
npm start
After running this command, we should get the out below.
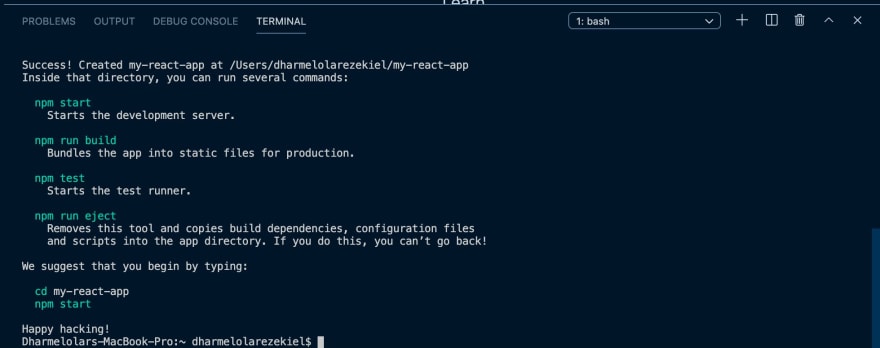
This command installs all the necessary packages for creating our React application. We will not be making any changes to this app as it is assumed that we already know how to create react apps.
After doing this you need to run this command on your terminal.
npm run build
What this command does is that helps to optimize our site. It creates a script that can be used to run our application.
Deploying React app.
1.Using Netlify Drag and Drop Feature.
Using the drag and drop feature for deployment is really easy but first, you need to create an account on Netlify. If you already have one that’s fine and if you don’t just visit netlify and sign up using any of the available options.

After signing up, you should see a replica of the image above. All you have to do after this is just drag and drop your folder. Since you already ran the "npm run build" command everything should work just fine.

As you can see from the image, our site has been deployed. You can now customize the site.
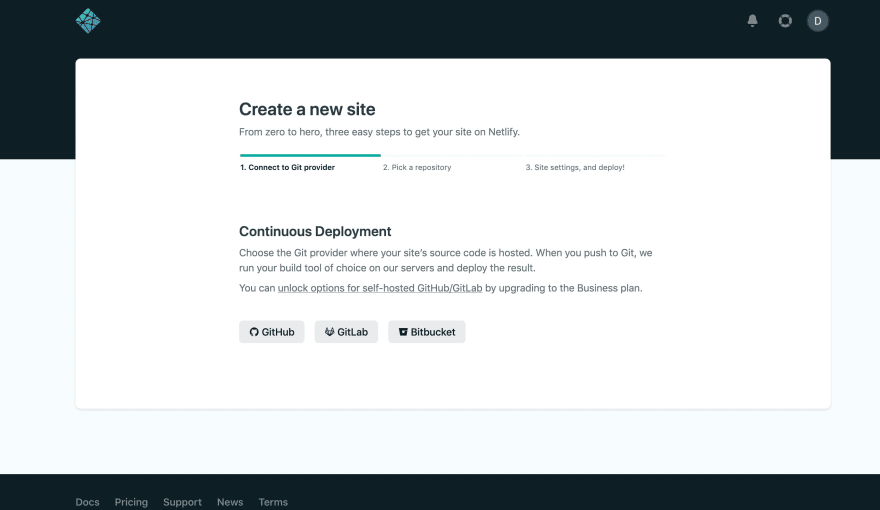
2.Using GitHub from Netlify's UI
In order to use this method, we'd need to push to Github first. Again I won't be talking about how to push code to GitHub since it is assumed that we already know our way around it.
First, we would need to sign in to Netlify with our already created GitHub account. Our dashboard should look like the image below.

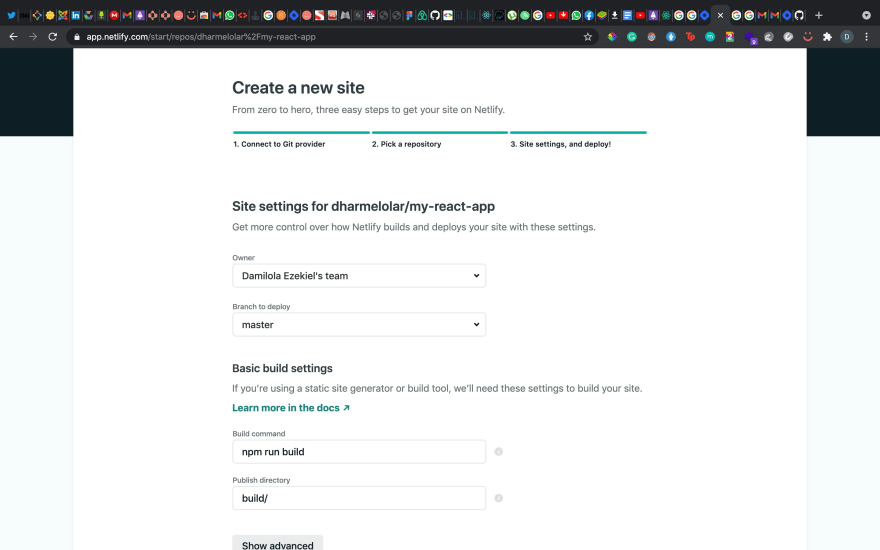
We can go ahead and click the "new site from git" button and this will take you to another page where you have to select the version control you would be using. Since we're using GitHub in this tutorial, you'll click on GitHub and then Netlify will do some authorizations. After doing this, Netlify will display the repositories available on your GitHub and ask you to confirm the one you want to deploy.

After selecting the repository to deploy, we need to specify some basic build settings. Although our React app already comes with the necessary build steps since we already ran the npm-run-build command. But if we did not do this before we need to specify the build settings. the image below can serve as a guide. When all this is done, you can hit the deploy site button and that's it!!! Our React app has been deployed.

Top comments (0)