Photo by Erik Mclean on Unsplash
It can be pretty common to just have some images bundled up in the repository. Taking into consideration the size of said images can be incredibly important to lower the size of the entire page/web app.
There are plenty of services online that can be used to optimize images but Github directly has access to a method of optimization!
In this short tutorial, I’ll quickly go over how to set it up in your repo, this entire process should take under 5 minutes!
Marketplace
Within the Github marketplace, which can be accessed from the top bar of Github, you can access a variety of different tools for your repository! One of which is the ImgBot.
As per the description: “Imgbot is a friendly robot that optimizes your images and saves you time. Optimized images mean smaller file sizes without sacrificing quality.”
Great! Once you’re on the page you can set up the plan. As a disclaimer, ImgBot does have paid plans for private repos but for public repos it is completely free!
After selecting the plan you can complete the installation, as an aside you can also select which repositories you specifically want to install it to.
Pull request
After installing the ImgBot it will automatically create a pull request after analyzing all the images.
It’ll even tell you exactly how much the images were reduced by:
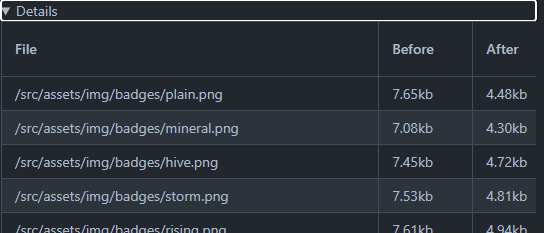
And within detail it’ll give a breakdown of every single image that was altered:
The way the ImgBot optimizes every file can be different but to give an example here are two files:
For a PNG file it reduces the size:
Meanwhile, for an SVG it takes away all the empty space and essentially minifies it:
Afterward, it’s just reviewing all the changes and accepting the PR merge into the main branch, as easy as that!
Let me know how it goes in the comments below or if you have any other optimizations for images.
More content at RelatableCode
Originally published at https://relatablecode.com on December 26, 2021.


Top comments (0)