
Most of us often like to learn and share our knowledge digitally through articles, videos, podcast, live sessions etc.
— Articles are the simplest, easiest and impactful way of doing so.
Among many alternatives for readers like medium, hubPages, dev.to etc. Dev seems to be more popular among software developers. So in this article we will be talking about dev.to.
dev.to (or just Dev) is a platform where software developers write articles, and take part in discussions and build their professional profile. It value supportive and constructive dialogue in the pursuit of great code and career growth of all members.
For whom this article is?
Do you write blogs on dev.to or planning to do so?
Do you want to setup your own identity(website) without investing much time in infra setup?
Do you believe in write once and use at multiple places?
If above questions seems familiar to you, this article is for you.
What are the challenges we face in order to setup our own blog website?
From where to get theme?
How to build my website?
How to update content of my website?
Where to host it?
How to deploy it?
How to keep it up to date with my public blogging profile (dev.to)?
How to maintain it?
Simplest solution to all above problems — **Stackbit.
Stackbit — Combine any Theme, Site Generator and CMS to use git hosting and Netlify for deployment without complicated integrations.
So let’s start with your blogging website setup. Follow below steps to create your website before your Maggie is ready. Your 2min starts now-
Open **Stackbit **and login.
Select your favourite theme.

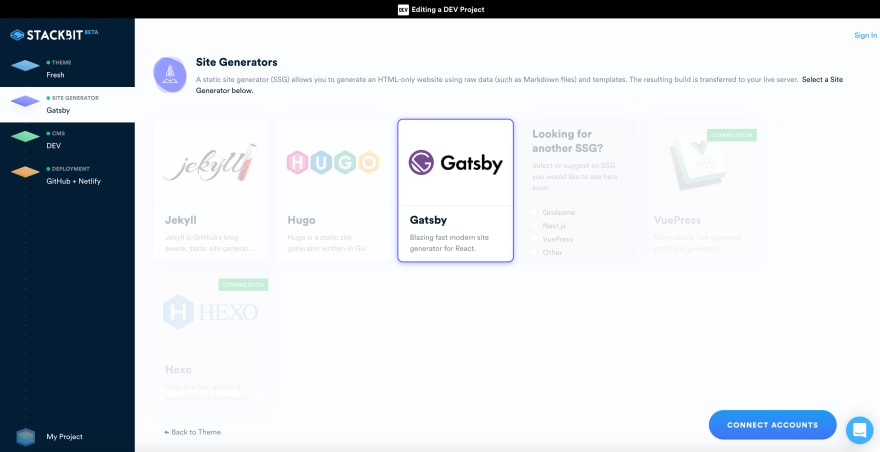
- Select any site generator. Mine favourite is Gatsby.
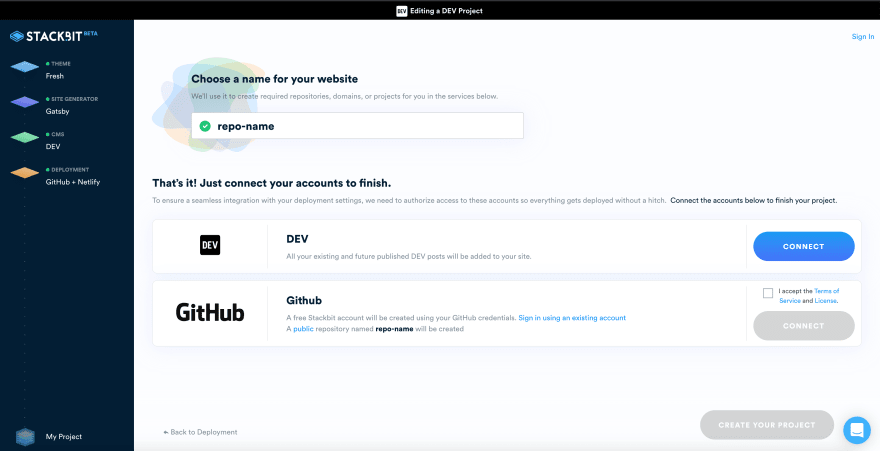
Enter repo-name, repo with preferred name will be created in your Github account. Github will be used for hosting your website.
Connect with your dev.to and G*ithub* account.
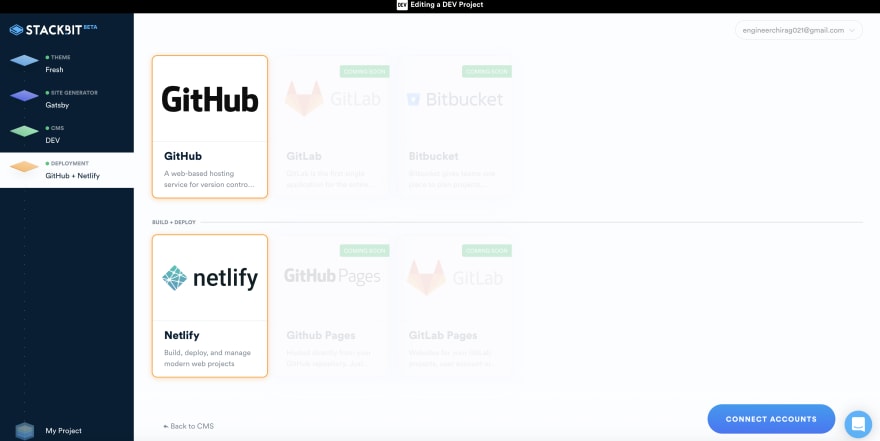
- Click on CREATE YOUR PROJECT it will ask you to signup on Netlify, which will be used for deployment.
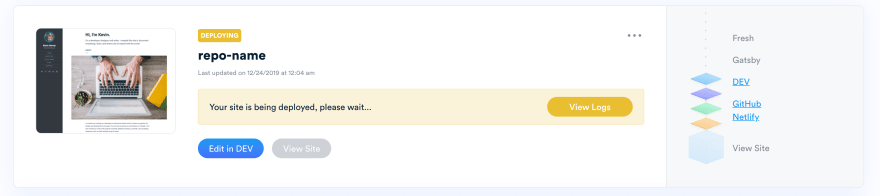
- That’s all. Netlify is deploying your website. Meanwhile check if your Maggie is ready ;).
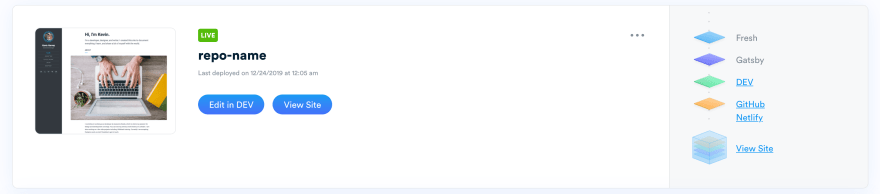
Yuppie, your website is ready, click on ‘Visit Site’. For me my website was live before my Maggie. Do share your own experience in comments.
From now Netlify will take care of new post in dev.to or change in your repo on Github and will auto build & deploy it for you.
Wrapping up
Woo! That’s all about setting up your personal blog from dev.to, looking forward to hear about your Maggie challenge. Stay tuned to my future articles.
Was this article helpful for you? Let me know in the comments below if you have any questions or thoughts! I’d love to hear them :)
Thanks for reading. Did this article help you in any way? If I did, I hope you consider sharing it you might just help someone who felt the same way you did before reading the article. Thank you.
Sharing makes you bigger than you are. The more you pour out, the more life will be able to pour in.**

Top comments (1)
Nice Blog! Found it informative