Heya!
Previously in this series:
- Part 1: Setup of Electron + React w/ Typescript;
- Part 2: Created the Tray icon with menu;
Part 3: The Alarm window
In this part we will create the App Manager and the Alarm Window, first we will create the App Manager, after setup the Alarm window in electron and than we will start to develop our view in React.
Setup the App Manager
Create a file called AppManager.ts under the electron folder, after let's create the class AppManager where we will be able to store the electon elements (Window's and Tray).
./src/electron/AppManager.ts
import { AlarmWindow } from './AlarmWindow';
import { TrayMenu } from './TrayMenu';

export type ManagerTypes = AlarmWindow;

class AppManager {
  private trayMenu!: TrayMenu;
  private windowManager: Map<string, ManagerTypes> = new Map();

  setTray(tray: TrayMenu): void {
    this.trayMenu = tray;
  }

  getTray(tray: TrayMenu): TrayMenu {
    return this.trayMenu;
  }

  setWindow(name: string, element: ManagerTypes): void {
    this.windowManager.set(name, element);
  }

  getWindow(name: string): ManagerTypes {
    const element = this.windowManager.get(name);
    if (element) {
      return element;
    }
    throw new Error(`[AppManager] - Element with name ${name} doesn't exist!`)
  }

  deleteWindow(name: string): void {
    this.windowManager.delete(name)
  }
}

export const appManager = new AppManager();
Now let´s break it down!
In this piece of code we are importing the classes from our TrayMenu and our AlarmWindow (Not yet created!) to create a types.
import { AlarmWindow } from './AlarmWindow';
import { TrayMenu } from './TrayMenu';

export type ManagerTypes = AlarmWindow;

...
Here we are creating the variable to store tray and other to store our windows, and method to get, set and delete the windows.
...
class AppManager {
  private trayMenu!: TrayMenu;
  private windowManager: Map<string, ManagerTypes> = new Map();

  setTray(tray: TrayMenu): void {
    this.trayMenu = tray;
  }

  getTray(tray: TrayMenu): TrayMenu {
    return this.trayMenu;
  }

  setWindow(name: string, element: ManagerTypes): void {
    this.windowManager.set(name, element);
  }

  getWindow(name: string): ManagerTypes {
    const element = this.windowManager.get(name);
    if (element) {
      return element;
    }
    throw new Error(`[AppManager] - Element with name ${name} doesn't exist!`)
  }

  deleteWindow(name: string): void {
    this.windowManager.delete(name)
  }
}
...
We instantiate this class a single time, because we don't need more than one and because we need to access it from multiple files.
export const appManager = new AppManager();
Setup the Alarm Window
Create a file and name it AlarmWindow.ts under the electron folder. The next code we already learned about it in one of the previous episodes.
./src/electron/AlarmWindow.ts
import { app, BrowserWindow } from 'electron';

export class AlarmWindow {
  public readonly window: BrowserWindow;

  constructor() {
    this.window = this.createWindow();
  }

  createWindow(): BrowserWindow {
    const window = new BrowserWindow({
      width: 300,
      height: 600,
      show: false, // This will the window hidden in launch time.
      webPreferences: {
        nodeIntegration: true
      }
    })

    // Load our index.html
    window.loadURL(`file://${app.getAppPath()}/index.html`)
    return window;
  }
}
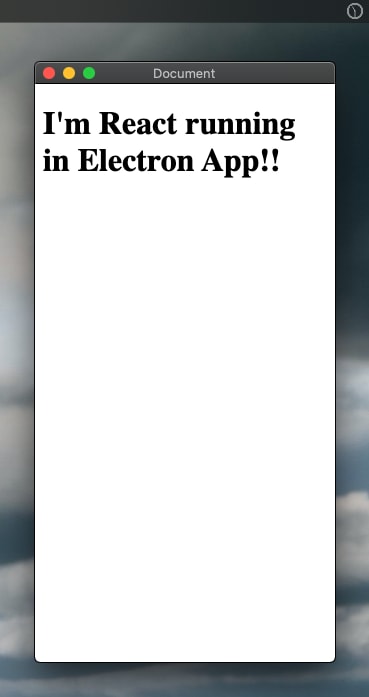
If we run our application at this point and click the Tokei button in the Tray Menu we will get the following result.
The Alarm View
Finally we will start using react. In this part of the tutorial we want the view to have a list of all alarms created with the option of turning on and off, we also want a button to add a new one.
Note: I will no post the SCSS in here. I will always leave a link to it.
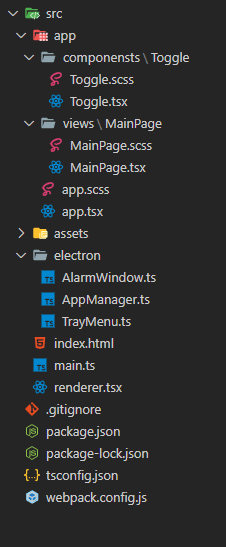
Create a new following folder structure:
The MainPage should look like this:
./src/app/views/MainPage/MainPage SCSS
import React from 'react';
import './MainPage.scss';
import Toggle from '@/app/componensts/Toggle/Toggle';

type Alarm = {
  label: string;
  message: string;
  time: string;
}

const MainPage = () => {
  // This will be deleted later,
  // is just used to mock some data.
  const mockAlarms = [
    {
      label: 'Alarm',
      message: 'Some text message!',
      time: '10:50',
    },
    {
      label: 'Alarm 2',
      message: 'Some text message!',
      time: '07:50',
    },
    {
      label: 'Alarm 3',
      message: 'Some text message!',
      time: '18:50',
    },
  ];

  return (
    <div className="main-page">
      <div className="main-page__header">
        <h3> Alarms </h3>
        <button> + </button>
      </div>
      <ul className="alarms-holder">
          {
            mockAlarms.map((alarm: Alarm) => (
              <li className="alarm-item">
                <div>
                  <p className="alarm-item__time">
                    { alarm.time}
                  </p>
                  <p className="alarm-item__label">
                    { alarm.label}
                  </p>
                </div>

                <div className="alarm-item__toggle">
                  <Toggle/>
                </div>
              </li>
            ))
          }
        </ul>
    </div>
  );
}

export default MainPage;
As you can see in the above code, we are importing a component, lets create it:
./src/app/components/Toggle/Toggle SCSS
import React from 'react';
import './Toggle.scss';

type ToggleProps = {
  checked?: boolean;
  handler?: () => void;
}

const Toggle = ({
  handler = () => {},
}: ToggleProps) => {
  return (
    <label className="toggle">
      <input type="checkbox"
        onChange={handler}
      />
      <span className="slider"></span>
    </label>
  );
}

export default Toggle;
Finally, good to app.ts update it calling the MainPage:
import React from 'react';
import './app.scss';
import MainPage from './views/MainPage/MainPage';

const App = () => {
  return (
    <div className="app">
      <MainPage></MainPage>
    </div>
  );
}

export default App;
If we run our app should look like this:
Conclusion
Now we have everything setup, in the next episode we will create the alarm functionality, the fun will start!!
Repository: Tokei - Part 3 Branch
Part 4 - Alarm Functionality [Coming in September]


Top comments (1)
How can I compile and have a windows installer?
pds: Good tutorial