Setting Up Your Own Image Transform Service
Create optimized/transformed images for pennies by leveraging the power of AWS Lambda to create your own Serverless Image Handler
Andrew Welch / nystudio107

Image transforms are a necessary part of modern web development, because we want to deliver optimally sized image srcsets to the client browser.
Whether you’re using a server-rendered website or a JAMstack setup, image manipulation is something that needs to be done as a part of the process.
Even if you’re using something like Gatsby JS, the work of transforming images still needs to be done, it just moves to build time. We’re just changing where it gets done.
Many CMS’s and other server-side rendered technologies have image transforms built into them. However this essentially means that you’re self-hosting processor-intensive image transforms on the same server that you’re using to serve up your website.
If you haven’t run into issues self-hosting image transforms, rest assured that you eventually will.

This is not a recipe for success in terms of serving up your website in a performant manner. I’ve seen some webservers fall over if the image transform cache is ever broken, due to the CPU power required to re-create the transformed images.
Additionally, most built-in image transform systems do not include an image optimization phase.
For more information on the how’s and why’s of image optimization, check out my Creating Optimized Images in Craft CMS article or the comprehensive Essential Image Optimization article from Addy Osmani.
Because image transforms are so processor intensive, services like Imgix and Cloudinary allow you to offload the work to their scalable servers. Both services are excellent, but they also cost money, and often do more than we actually need.
Enter AWS Serverless Image Handler
Amazon AWS has offered a Serverless Image Handler for a while that allows you to spin up an AWS Lambda function to create your own private little image transform service that is inexpensive, fast, and is fronted by the CloudFront content delivery network (CDN).
AWS Lambda is part of the new wave of “serverless” functions that allow you to run code in the cloud without provisioning or maintaining a server. It’s inexpensive, and hassle-free, which is a fantastic combo in my book.
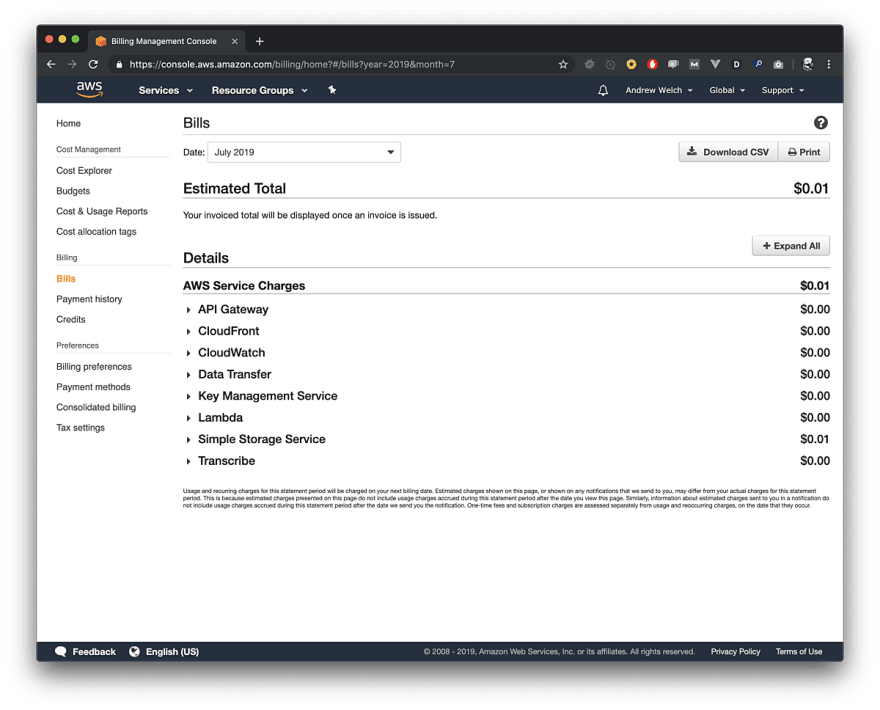
Here’s what the AWS Lambda pricing looks like:

For many smaller sites, you may never leave the free tier.
Under the hood, the AWS Serverless Image Handler uses Sharp JS, which is a Node JS package built on highly performant libvips image processing library. Here’s an overview what it looks like:

You can look at all of the code under the hood if you want, but the nice thing is that you don’t have to.
Setting up an AWS Serverless Image Handler
The wonderful part of all of this is that you can set up your own AWS Lambda function without having to do a deep dive in how it all works.
You’ll need some minor experience with AWS, and maybe some soothing music while you wade through the AWS UI/UX, but that’s it!
This works because you can spin up your service via AWS CloudFormation that uses prefab templates for the creation of a stack that comprises your setup. This means it’s essentially point and click to set everything up on the server side:
- You need to have an Amazon AWS account; if you don’t have one, get one
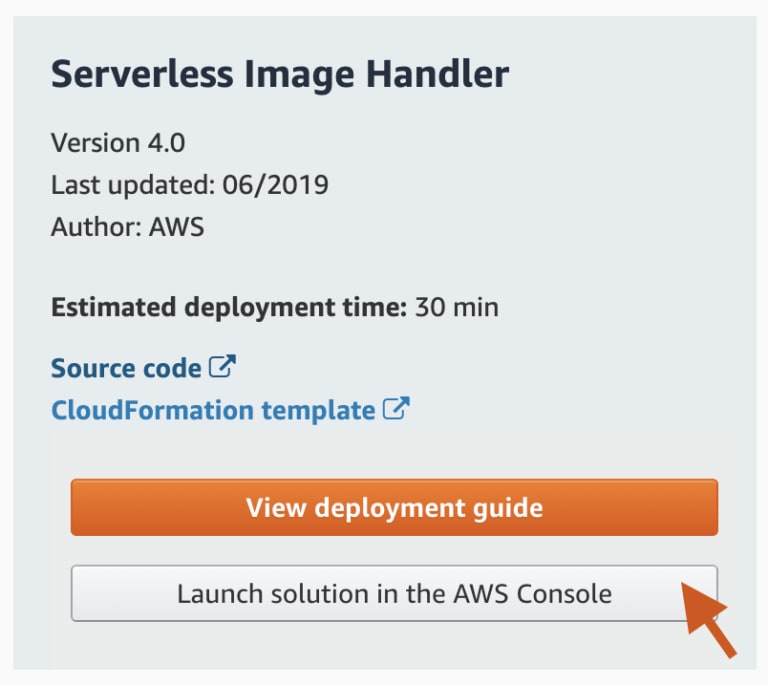
- Go to the Serverless Image Handler page, and click on Launch Solution in AWS Console** , t**hen go through the template setup:
1. SPECIFY TEMPLATE
You won’t need to change anything here, unless you want to use your own customized template. Click Next to proceed.

2. SPECIFY STACK DETAILS
Here there might be a few things you might choose to change (don’t worry, you can go back and change these later, too):
- CORS Options — If you want to enable CORS, you can configure it here
- Image Sources — You need to list the AWS S3 Buckets that the Serverless Image Handler can access
- Demo UI — This will cause it to set up a demo UI you can play with to test your API. This is optional, but I think useful when you’re getting started. You can delete the Demo resources later on
Click Next to proceed.

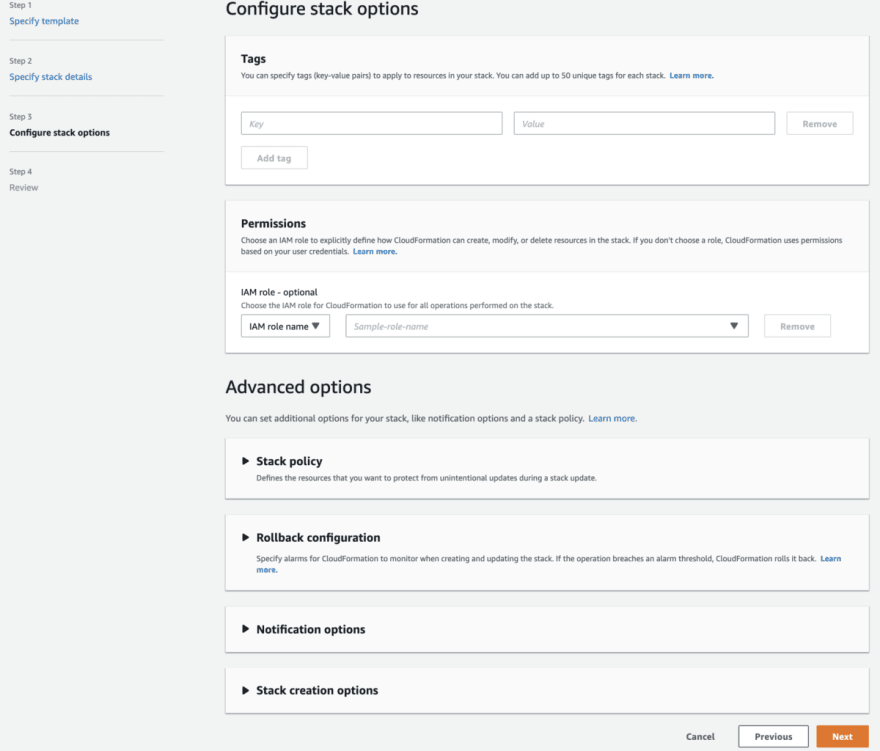
3. CONFIGURE STACK DETAILS
You won’t need to change anything here, unless you have a more involved AWS setup in terms of permissions & policies. Click Next to proceed.
4. REVIEW
There’s nothing to change here, you can just see an overview of what you’re going to create. Click Next to proceed after checking the I acknowledge that AWS CloudFormation might create IAM resources with custom names checkbox.

If you run into issues, use the Serverless Image Handler Deployment Guide as the canonical source.
Using an AWS Serverless Image Handler
Now that you’ve spun up your service, assuming you set up the Demo UI as well, you’ll have the following CloudFront distributions set up:

- Image handler distribution — this is your Serverless Image Handler distribution that you’ll access from your frontend code to get your optimized, transformed images
- Website distribution for solution — this is a distribution created by the Demo UI so you can play with
While this will create an S3 bucket for you if you create the Demo UI, any S3 buckets that you need for your actual website/webapp are up to you to create.
Just make sure you then add them to your CloudFormation stack. Typically your S3 buckets should be completely private, and you set up CloudFront distributions as gateways to the S3 buckets.
Pro tip: You don’t really want to serve static assets like images out of an S3 bucket, it’s intended for storage, not distribution. Use a CDN distribution layer on top of S3, such as CloudFront.
Pro tip: if you don’t see a particular service in AWS that you know you have created, make sure you’re in the correct Region.
If you copy the URL to the Demo UI Website distribution for solution you’ll get a playground you can use to play around:

So the fun thing about the API is that all you need to do is create a JSON blob of options:
{
  "bucket": "images.nystudio107",
  "key": "Octagon-Titlarks-House-02.jpg",
  "edits": {
    "resize": {
      "width": 500,
      "height": 300,
      "fit": "cover"
    },
    "grayscale": true,
    "flip": true
  }
}
Here are the important top-level keys in the JSON:
- bucket — This is the id of the S3 bucket that the source image is in
- key — This is the path to the source image in the S3 bucket
- edits — A JSON-ified version of the Sharp JS API, containing the changes you want applied to the image
Then in whatever programming language you’re using, you just convert the JSON to a string, and then base64 encode it into a URL:
https://d3dvp96ru4zk60.cloudfront.net/eyJidWNrZXQiOiJpbWFnZXMubnlzdHVkaW8xMDciLCJrZXkiOiJPY3RhZ29uLVRpdGxhcmtzLUhvdXNlLTAyLmpwZyIsImVkaXRzIjp7InJlc2l6ZSI6eyJ3aWR0aCI6NTAwLCJoZWlnaHQiOjMwMCwiZml0IjoiY292ZXIifSwiZ3JheXNjYWxlIjp0cnVlLCJmbGlwIjp0cnVlfX0=
There’s an example of how to do this via JavaScript in the scripts.js that is created in your Demo UI S3 bucket. Other languages are similarly trivial to do it in.
All of the options that are implemented in the Sharp JSAPI are available to you! All of your transform options that would normally be chained functions in Sharp JS just are in JSON format in the edits key.
You can resize, crop, rotate, tint, sharpen, and a whole bunch of other image manipulations, including converting between formats such as jpeg, webp, png, and tiff.
You have exquisite control over the exact encoding methods should you want it, and by default, all images are optimized for size.
Craft CMS Serverless Image Handler
The solution described here works with any frontend/backend setup that you might be using.
However, if you’re using Craft CMS, the ImageOptimize plugin allows you to switch the Transform Method used site-wide to whatever you want, from built-in Craft image transforms to Imgix image transforms.
Version 1.6.0 has added a Sharp transform method that works with the aforementioned setup:

The nice thing about it is that you can change over to using different Transform Methods with zero template changes.
Wrapping Up!
That’s all it takes to create your own AWS Serverless Image Handler! Try it for a personal/demo site to gain confidence in how to set things up, and then away you go.
It really is very inexpensive compared to services:
Yes, you’ll have to wade through a bit of AWS UX/UI that’s not fun, and learn a bit about AWS permissions… but I think it’s absolutely worth the effort.
Whether you’re using a server-rendered solution, a JAMstack solution, or something like Gatsby, you’ll benefit. No matter where the work of image transforming is done, a Serverless Image Handler will speed up the process.

Not only will you be able to offload CPU intensive image optimization/transformation to your AWS Lambda function, but you probably can then downsize your server (assuming you have one).
Additionally, you’ll be learning a bit of AWS in the process, which is a good thing to be familiar with in our business.
Happy transforming!
Further Reading
If you want to be notified about new articles, follow nystudio107 on Twitter.
Copyright ©2020 nystudio107. Designed by nystudio107

Top comments (0)