Welcome!!!
Have you been curious to try out ASP.Net Core? Maybe you heard it's cross-platform, meaning you can now write an API in C# on a Linux OS. Maybe you're looking to try another back-end framework/language. Whatever the case is, I'm glad you're here. I won't teach you everything about C# or .Net Core, but I will give you a quick walk through of creating an API so that you can get a feel for ASP.Net Core and C#.
In this post I'll be showing you how to create a simple API using C# and .Net Core. The API I'll create is for a to do list (I know, real original). However, if this post goes well I'll write a second part that introduces how to use PostgreSQL as the db for the API.
Prerequisites
Here's what you'll need if you want to follow along.
- .Net Core
- Postman or any other client to test out an API
- Code editor of choice, I'll be using Visual Studio Code
- Some familiarity with using a terminal
- Some familiarity with using Postman
Let's Get Started
Before we begin, I have to tell you that I am running Pop! OS, which is a Linux distro. Remember earlier, I mentioned that .Net Core is cross platform, so you can run it on Windows, Mac, or Linux. This means that regardless of your OS, you should be able to follow along.
Check for .Net Core
In your terminal, run
dotnet --version
like so, and you should see that you have the latest version installed. Looks like I'm running 3.1.201.

Create the project
If you have .Net Core installed, let's proceed. To create the project run the following command in the directory/folder where you want to the project to be created
dotnet new webapi -o dotnetcoreTodoApi
The -o flag is how we name the project, feel free to change the name of your project.

Open the project in your editor
You should be looking at something like this

If you see that popup thing that I have, you can just click the "Yes" option. If you're in Visual Studio Code, I would suggest getting the C# extension as well.
Run the demo API
When you create a webApi project it comes with a small weather app API that you can demo. To try it out, run
dotnet run
I'm using the integrated terminal in VS Code in the gif below.
If you click the link, it will open up http://localhost:5001 in your browser, just append /WeatherForecast to the url and you will see the response from the Api.
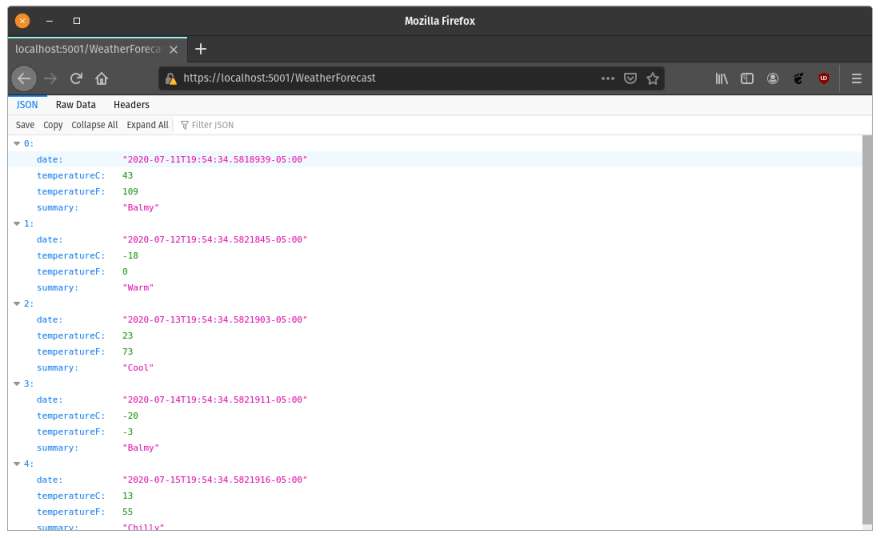
You may be wondering why you had to append /WeatherForecast to the url in order to see something. That's due to this syntax here in the WeatherForecastController.cs file that can be found in the Controllers folder.

See where it says [Route("[controller]")] on line 11, basically that syntax means to use the controller name as the route name. Anyway, let's move on.
oh btw, you can stop the Api by running ctrl+c in your terminal
Create a todo model
Before we create our Api controller, we'll create a model.
First, let's create a models folder.
Now create the model class.
Create the controller
Friendly reminder, anytime you make a change to the api, you will need to stop the project if it's running and start it again to see the changes.
Now that we have a model, we can create the controller. This can be accomplished by renaming the WeatherController to TodoController. I replaced the code in the WeatherController with the following:
using System;
using System.Collections.Generic;
using System.Linq;
using System.Threading.Tasks;
using Microsoft.AspNetCore.Mvc;
using Microsoft.Extensions.Logging;
using models;

namespace dotnetcoreTodoApi.Controllers
{
    [ApiController]
    [Route("[controller]")]
    public class TodoController : ControllerBase
    {

        protected List<Todo> todoList = new List<Todo>();


        private readonly ILogger<TodoController> _logger;

        public TodoController(ILogger<TodoController> logger)
        {
            _logger = logger;
            var initialTodo = new Todo();
            initialTodo.Id = 1000;
            initialTodo.Title = "Learn C#";
            initialTodo.Description = "Gotta start somewhere";
            initialTodo.IsComplete = false;
            todoList.Add(initialTodo);
        }

        [HttpGet]
        public IEnumerable<Todo> Get()
        {
            return todoList;
        }
    }
}
I've created a List of type Todo (which is the model) called todoList that will hold our list of todo's.
I've also added our first method which is simply called Get. This method returns the todoList.
In the constructor I populate todoList with a single todo called initialTodo. This will give us something to return when we use the Get method.
Use the Get method
Run the dotnet run command in the terminal, then open up Postman (or whatever tool you want to use to test the API).

So far, so good!
Add post method
We have a way to get all todo items in our list, now let's add a way method to add to the list.
Add this below the Get Method:
// Add a Todo Item
        [HttpPost]
        public string AddTodo(Todo todoItem)
        {
            todoList.Add(todoItem);

            return $"Added '{todoItem.Title}' to the list.";
        }
This method takes in one parameter called todoItem that is of type Todo. The todoItem is then added to our list, and return a string that let's us know the item was added.
Use the post method
Back in Postman let's create the Post request and test it out.

Awesome!
Get todo by id
Now that we can add to the list, let's create the method to get an item by it's id.
Add this method to the TodoController.
        //Get Todo by Id
        [HttpGet("{id}")]
        public ActionResult<Todo> GetTodoItem(long id)
        {
            var todoItem = todoList.Find(x => x.Id == id);
            if (todoItem != null)
            {
                return todoItem;
            }
            else
            {
                return NotFound();
            }
        }
This method takes in an id to find the todo item that you're looking for. The id is basically a query parameter that we append to the url. In the method we test to see if a todo with the id that we supply exists. If the todo does exist, it is returned to us, if it does not exist, we return the NotFound method.
Use Get by id method
Let's test this out in Postman. We know we have a todo with the id of 1000, so let's try to get that first.

That works!
Now let's pass in an id that we know doesn't exist.

Great! The 404 status was sent back just like we expected.
Delete a todo
Let's add a method to delete a todo item.
Add this to the TodoController.
        [HttpDelete("{id}")]
        public string DeleteTodo(int id)
        {
            var todoItem = todoList.Find(x => x.Id == id);
            if (todoItem != null)
            {
                todoList.Remove(todoItem);
                return $"Todo item '{todoItem.Title}' was successfully deleted.";
            }
            else
            {
                return $"Could not find a todo with id {id.ToString()}";
            }
        }
We are passing in an id just like we did in the GetTodoItem method. This time we look in the todoList for the item and remove it if it exists. If the item does not exist, we send a friendly message saying so.
Use the Delete method
First I will try to delete a todo item that doesn't exist.

Cool! It works!
Now let's try to delete the todo item that has the id of 1000.

Nice! It works just as expected.
Conclusion
If you enjoyed this post please let me know. If you're interested in me doing a second part to this post where I introduce PostgresSql and EntityFramework Core let me know.
Thanks!

Top comments (0)