Deploying code to production is scary and stressful. There's nothing worse than seeing an unexpected spike or dip in your metrics as soon as your code goes live. Your heart is racing as you quickly revert the commit. The site is broken and there's nothing you can do but wait 5+ agonizing minutes for your CI/CD pipeline to finish. And that's the best case scenario when a simple code revert is possible. Need to deal with rolling back database or infrastructure changes? Good luck with that.
Feature flags to the rescue!
Luckily, there's a better way to deploy code thanks to Feature Flags. With feature flags, your deploy is easy - the new code goes live, but everyone just continues getting the old experience initially. Feature flags decouple deployment and release. It's still possible to break things during deploy, but a lot less likely when no one is seeing the code right away.
Using remote configuration, you are able to instantly update which version of the code users see without a deploy. Maybe you start by only enabling it for you and your teammates while you click around and see if it's working. Then you can gradually roll it out to 100% of your users while you watch your metrics. If you do notice a bug, you can instantly just switch everyone back to the old code while you take your time debugging and fixing the problem.
By using feature flags, you just decreased your downtime from 5+ minutes to mere seconds and limited the impact to a small percent of your traffic. Plus, you decreased the stress levels of you and your teammates 100 fold, which is always a good thing.
Tutorial
In this tutorial, I'm going to walk through how to add feature flags as part of your development process. I'll be using a standard Next.js app and GrowthBook as the feature flagging platform.
GrowthBook is better known as an open source A/B testing platform, but it is also very capable at feature flagging. Other popular open source options are Unleash and FlagSmith. For paid platforms, there is LaunchDarkly and Split.io, although these can get prohibitively expensive for many teams.
Step 1: Next.js App
Let's start by getting a basic Next.js app running:
yarn create next-app
Then cd into the newly create directory and run:
cd my-app
yarn dev -p 4000
Note: Both GrowthBook and Next.js run on port 3000 by default, so we're making our Next.js app use 4000 instead to avoid conflicts.
Visit http://localhost:4000 and you should see the application running!
Step 2: GrowthBook Account
For this tutorial, we'll run GrowthBook locally, but you can also use a free cloud-hosted account at https://app.growthbook.io instead if you want.
git clone https://github.com/growthbook/growthbook.git
cd growthbook
docker-compose up -d
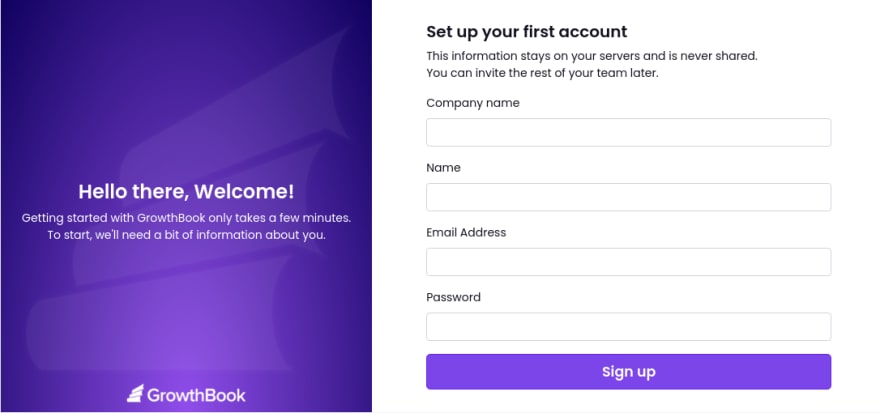
After that, visit http://localhost:3000 and create your first user account.
Step 3: Integrate the GrowthBook React SDK into our Next.js app
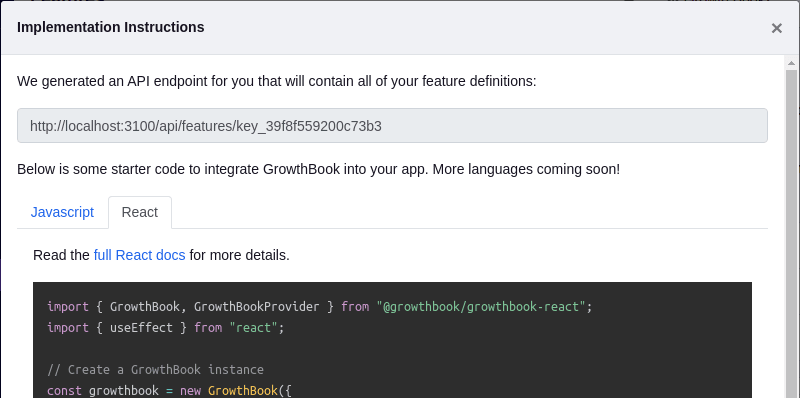
GrowthBook will generate some integration code for you, including a unique API endpoint to load your features from.
We first need to install the GrowthBook React SDK in our Next.js app:
yarn add @growthbook/growthbook-react
Then we can modify the generated React code to work with the Next.js framework. Modify the file pages/_app.js with the following contents:
import '../styles/globals.css'
import {
  GrowthBook,
  GrowthBookProvider
} from "@growthbook/growthbook-react";
import { useEffect } from "react";

const FEATURES_ENDPOINT =
  "http://localhost:3100/api/features/key_abc123";

// Create a GrowthBook instance
const growthbook = new GrowthBook({
  trackingCallback: (experiment, result) => {
    console.log("Viewed Experiment", experiment, result);
  }
})

export default function MyApp({
  Component,
  pageProps,
  router
}) {
  // Refresh features and targeting attributes on navigation
  useEffect(() => {
    fetch(FEATURES_ENDPOINT)
      .then((res) => res.json())
      .then((json) => {
        growthbook.setFeatures(json.features);
      });

    growthbook.setAttributes({
      "id": "123",
      "loggedIn": true,
      "deviceId": "abcdef123456",
      "employee": true,
      "company": "acme",
      "country": "US",
      "browser": navigator.userAgent,
      "url": router.pathname
    })
  }, [router.pathname])

  return (
    <GrowthBookProvider growthbook={growthbook}>
      <Component {...pageProps} />
    </GrowthBookProvider>
  )
}
Replace the FEATURES_ENDPOINT constant with the one you see in your instructions modal in GrowthBook.
In a real application, you would pull some of the targeting attributes from your authentication system or an API, but let's just leave them hard-coded for now.
Step 4: Create a Feature in GrowthBook
Back in the GrowthBook application, we can create a new feature. For this tutorial, we'll make a simple on/off feature flag that determines whether or not we show a welcome banner on our site.
The key we chose (welcome-message) is what we will reference when using the GrowthBook SDK.
We can now edit pages/index.js and conditionally render a welcome message based on the state of the feature:
Add an import statement:
import { IfFeatureEnabled } from "@growthbook/growthbook-react";
And then put your welcome message somewhere on the page:
  <IfFeatureEnabled feature="welcome-message">
    <p>I hope you enjoy this site and have a great day!</p>
  </IfFeatureEnabled>
If you refresh your Next.js app, you'll notice the welcome message is not rendered. This is because when creating the feature, we set the default value to off. At this point, we could safely deploy our change to production and not worry about breaking anything.
Step 5: Turn on the feature for your team
Now we can add rules to the feature to turn it on for specific groups of users.
In the hard-coded targeting attributes we set in pages/_app.js, we designated ourselves as an internal employee. Let's use this attribute to turn on the feature for the whole internal team:
Refresh your Next.js app and you should now see the welcome message appearing! (Note: it might take up to 30 seconds for the API cache to refresh).
If you change employee to false in pages/_app.js, you should see the welcome message disappear.
The best part about targeting attributes in GrowthBook is that they are evaluated entirely locally. Sensitive user data is never sent over the network and there is no performance penalty. Some other libraries require an HTTP request to evaluate a feature for a user and this is often a deal breaker.
Step 6: Gradually roll out to your users
After you test the new feature within your team, you probably want to start rolling it out to real users.
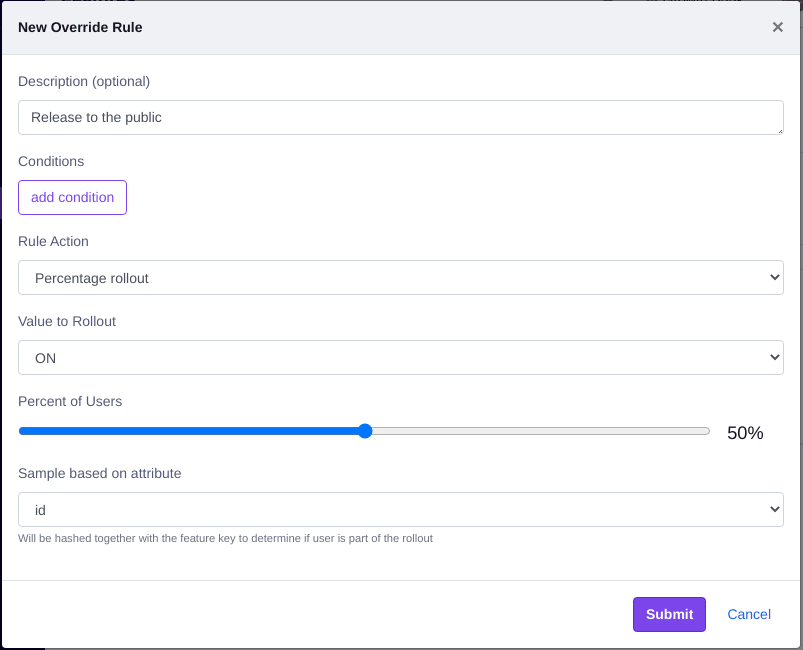
We can do that with another rule in GrowthBook:
In the targeting attributes in pages/_app.js, make sure employee is set to false. That will ensure you skip the first rule we made and fall into the second rollout rule.
The GrowthBook SDK uses deterministic hashing to figure out whether or not someone is included in a rollout. Basically, it hashes together the selected targeting attribute (id) and the feature key (welcome-message) and coverts it to a float between 0 and 1. If that float is less than or equal to the rollout percent, the user is included. This ensures a consistent UX and prevents one user from constantly switching between ON and OFF as they navigate your app.
Try changing the user id in the targeting attributes in pages/_app.js to a few different random strings and see what happens. You should notice about half of the time the welcome message shows up and half of the time it doesn't. The rollout is working!
Conclusion and Next Steps
Now you've seen how to set up and integrate GrowthBook into your Next.js application, use feature flags in your code, remotely enable the feature in GrowthBook based on targeting conditions, and gradually roll out the feature to your users.
Once you do the initial integration work, it only takes a few seconds to wrap your code in feature flags. Once you realize how easy and stress-free deploys can be, there's no going back.
Next Steps:
- Look at the GrowthBook React SDK docs for more ways to use feature flags in your code besides the
<IfFeatureEnabled>component - Read more about using features in GrowthBook, including how to use complex feature values (not just ON/OFF), run A/B tests, and analyze the impact of your features using data.
Happy feature flagging!


Top comments (1)
Nice Jeremy!