Hello guys! 🔥 I made a post about doing the 30 days of code and technical articles challenge last month, here's the article for the first project [ done yesterday ].
The source code for this article is available here on Github
Introduction
This article teaches how to build a scientific calculator using VueJS.
Here's a visual display of end result:
Let's get started.
Setup VueJS
For the sake of this tutorial, we will be using the Vue CLI for installation and setup, an alternative would be to reference Vue from a CDN
https://unpkg.com/vue
We can install the Vue CLI with this command:
$ npm install --global vue-cli
Next, let's create a new project:
$ vue init webpack-simple vueCalulator
After responding to a few terminal prompts, we would have set everything up.
Let's navigate into the working directory, install dependencies and start our application:
$ cd vueCalulator
$ npm install
$ npm run dev
Defining The Vue Components
Since we are building a calculator with two modes [ Basic and Advanced ], let's define two components to represent each one.
First, let's create a components folder in the src directory [ it's not necessary to do this but I like keeping a clean working directory ].
Next, we create two new Vue files in the components directory. We will call these files:
Advanced.vue

Basic.vue
The logic behind the different modes of this calculator is:
The root component [ App.vue ] will hold the input field while the
BasicandAdvancedcomponents will be toggled within the space beneath the input field.
Now let's get down to business!
Build the Basic component
Let's write the template, data, and methods that will reside within the Basic component.
The Basic template will hold calculator buttons that listen for click events on any of the buttons

We can see that the buttons are wrapped within a root div tag that calls a buttonClick method whenever a button is click.
Next, let's export and define the methods within our Basic component, we simply do this by writing a script tag:

In this script tag, we have not defined any data [ we don't need any on this component ], we have defined a single buttonClick method that catches click events, gets the innerText value and emits an event to the root component.
We need this method so that the root component can act on the buttons that are clicked when the calculator is in Basic mode.
Build the Advanced component
The Advanced component is very much like the Basic component in structure and logic.
First, let's write the template that will hold Advanced calculator buttons and listen for click events on any of the buttons.

Similar to the Basic component, we will not be defining any data within the data object, we will also emit an event to the root component whenever a button is clicked.

We can see that the buttonClickmethod in the Advanced component is exactly like the one in the Basic component.
Let's dig into the root component!
Lastly, let's connect the entire application together via the root component [ App.vue ].
The code structure for the root component is pretty straightforward.
Just as we did with the two children components, we need to define the template that will hold the input field and house the toggling of the other two components [ the children components mostly contain buttons for the calculator ].
The root template will have:
A mechanism to toggle between advanced and basic modes [using v-show]
An input field to display the punched digits
A housing tag for the children components [in this case, it is a div tag with a class called buttons']
Here's a visual display of the template code:

From this code, we can see that the Basic and Advanced components are nested within a div tag [with the class 'buttons'].
The root component registers an event listener to capture and act upon the emitted events by the children components.
Let's see how things are handled within the script section in the root component[:
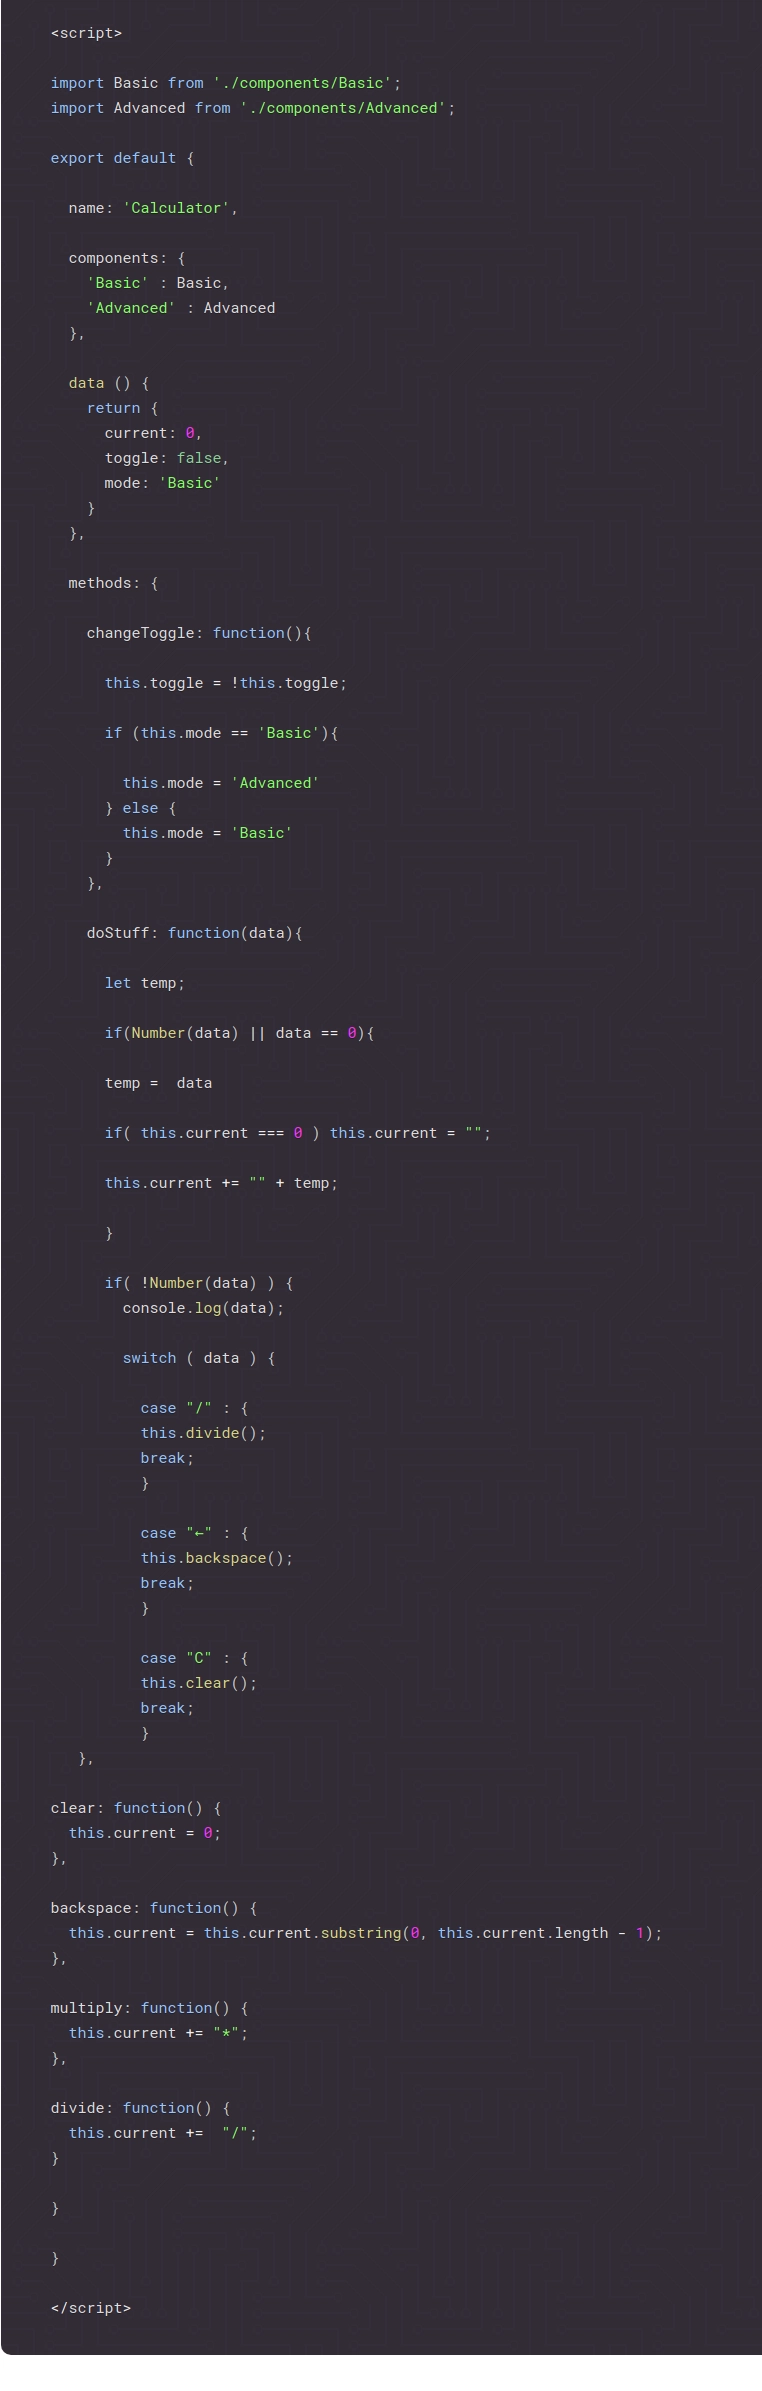
First, we import the basic and advanced components into the root component because we need to reference them.
Next, we declare the name of the application and create a components object (this is where we register the components).
In the data section, we register three key/value pair:
- current -- This keeps track of the current input value
- toggle -- This stores the current toggle value
- mode -- This stores the current mode
Next, we register a few methods :
The changeToggle is responsible for toggling between the Basic and Advanced mode and also updating the value of mode.
The doStuff method handles the events that are emitted by the children components. It receives a data parameter and pipes it through several cases. When a case is matched, it calls the right function to handle the mathematical calculations.
For this application to run correctly, there are a lot more mathematical functions defined, though they are not included in the snapshot.
Conclusion
Awesome! 🔥 That is all it takes to build a scientific calculator with VueJS.
The source code for this project is much longer than what is presented in these snapshots for brevity purposes.
To run this project locally, type in the following commands in a terminal.
-- clone the repository
git clone https://github.com/Jordanirabor/Scientific-Calculator-With-VueJS

-- navigate into the directory --
cd Scientific-Calculator-With-VueJS

-- install dependencies --
npm install

-- serve with hot reload at localhost:8080 --
npm run dev

-- build for production with minification --
npm run build
I'll be building and writing about another project tomorrow, stay tuned 🔥🔥🔥

Top comments (1)
Awesome project I will try this