We’re going to create a ToDo application using React in this tutorial. It is beginner friendly, so if all the react you’ve done is a ‘Hello World’, that’s okay. You can experience the app by yourself here. It is also embedded at the end of this post.

Tools to follow along
- NodeJS and npm: install from here, if you haven’t
- Install create-react app with
npm install create-react-app --global
Now, we’re good to go.
Create a new react app
The new react app is created with
View the code on Gist.
It’ll create a new folder react-todo with some files and folders.
The files and folders in react-todo
package.json contains the list of modules that application uses. Each module performs a function or a set of functions.
node_modules stores all packages that are listed in package.json.
src contains all React source code files.
public contains static files such as stylesheets and images.
Run this app with npm start
View the code on Gist.
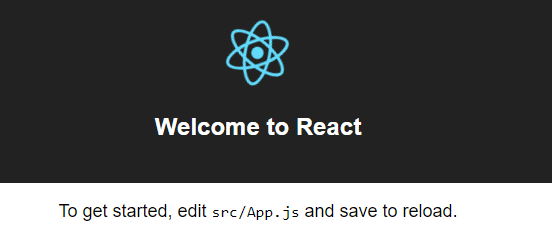
You’ll get a Welcome page…
As the instructions say, modify the App.js to make changes. App.js is rendered from the index.js file. Consider App.js as the container for all other components.
Experience the ToDo app below. Enter the task in the input box, click on add button to add to the list. To remove from the list, click on the todo to be removed.
Go to the App.js file in src . Remove everything from the return except the parent div. It looks like below
View the code on Gist.
All components will go inside the div in this return statement.
Creating the User Interface
Todo list is form and a display below as you’ve experienced above.
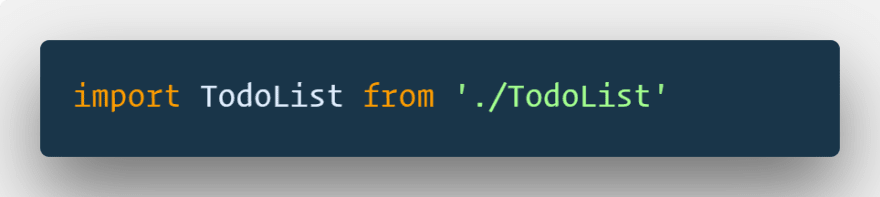
We create the component TodoList inside TodoList.js file in the src directory.
We import this is the App.js so that we can put this in the div we’re talking about.
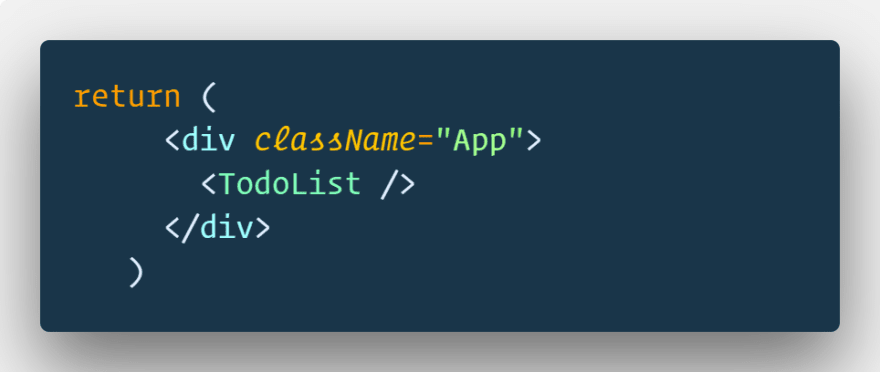
Also, put the TodoList in the div in return statement.
What’s in the TodoList?
View the code on Gist.
You might recognize some redundant divs, don’t worry we’re filling them in a while.
This component creates the form.
It looks like this…

Your output won’t same as mine because of the CSS. I secretly added the CSS to index.css file. It’s basic stuff and we’re not discussing about stylesheet after this. If you want your app styled like in the example, grab the index.css from here…
If you try to add the todo in this app, it’ll just reload the page. This is because the default behavior of the form is to submit to the same page.
Giving React Todo App a Life
We already have a lifeless todo app, which does nothing other than displaying itself.
Here’s what we’ll be doing:
- Adding items
- Displaying items
- Removing items
Adding Items
The input items are submitted when the form is submitted. To handle this operation, add the onSubmit to form tag in the TodoList.

This addItem should be handled at the App component. It is passed to other component as a prop.
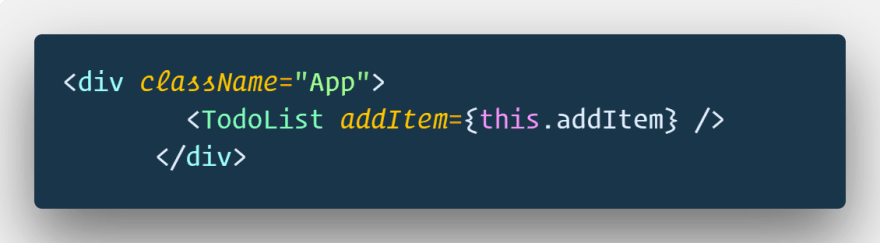
This must exist in App to pass. Create a addItem property in the App.
We could declare this as an old JavaScript (ES5) like function, but it won’t bind the form with it. We have to bind it manually through the constructor. I’d get rid of this using ES6 like syntax.
We still need the state to hold the array of items. The state makes it easy to render and elements on the page. All components using data will change automatically when the data in state changes.
We also need another state called currentItem to hold the current value in the memory. It is an object and it also has key along with the text. React uses this key internally to only render the components when there are multiple similar components. The todo list can not be rendered without key as there will be all lis.
Add constructor to the App. Also add addItem and handleInput to the same.
The addItem manages adding to the list, and handleInput manages the change in the input field.
This is what my App.js looks like…
View the code on Gist.
To get the input element we must have a way to refer to it. You might be excited to use querySelector, but the React doesn’t like that. While it’s totally valid, the idea of virtual DOM is not to directly interact with the DOM but the components in the DOM.
To refer to the input, we create a ref with inputElement = React.createRef(). Pass this to TodoList just like the addItem
inputElement = {this.inputElement}
Use it as ref = {this.props.inputElement} in the TodoList.

If you try the app at this moment, you can see it logs the message from addItem and then reloads. The reloading is the default behavior of the form submission.
To stop this behavior modify the addItem to the following.
View the code on Gist.
The preventDefault will prevent reloading on submitting the form.
Here’s all the data we pass to TodoList…
View the code on Gist.
addItem to handle click on add.
inputElement to refer to this element.
handleInput to handle data on input field on a change
currentItem to display the value of the state set to currentItem.
Here’s what my TodoList.js looks like…
View the code on Gist.
We’ll talk about eh ComponentDidUpdate in a while…
form on submit calls addItem
ref refers to current element.
value is stored as text in the currentElement object.
If you do not have onChange in the component, the field will be read only. We do not want this.
onChange calls handleInput and that’s next to discuss.
View the code on Gist.
The handleInput gets the event, it gets the value from the input box and sets the state to and object of currentItem. It has key as current data and text as the input data. The key is Date.now() which is the number of milliseconds from 1970 to now. It can only take a maximum of 1 input per millisecond. That’s enough for our case.
We need this object because we need to store this value to the array items when user submits the form.
View the code on Gist.
The addItem prevents default reload. It gets the value in input box from the state currentItem.
Since we do not want to add empty value to to our todo, we check for that. If it’s not empty, items array is destructured and newItem is added.
We have to set this items[] to the state, we call this.setSate. It also makes sense to reset the currentItem to clear the input box.
ComponentDidUpdate is one of the lifecycle methods in React. We’ve talked about all of them here. ComponentDidUpdate is called to focus on the input box referred by the inputElement reference. The component is updated on submitting the form. this.props.inputElement.current.focus() sets the focus in the input area so we can continue typing the next item in the todo list.
Displaying the Todos
We have all the todos in state, all we need is another component that can render these on the screen.
We’ll call this component TodoItems and pass all items as prop. 
Here’s what TodoItems looks like…
View the code on Gist.
The function createTasks returns li for each passed item. It uses the key we provided earlier. It will not work with key at this stage because React must be able to differentiate between the multiple items to re-render the appropriate one.
All these list items are saved to listItems using mapping function. This gets used in the ul in return statement.
Removing the todo
We have added the ToDo, we probably want to remove some.
We already have the displaying todos in the TodoItems.js, we make a small modification. Just add an onClick listener to deleteItem with the key.
View the code on Gist.
This executes deleteItem with the key as a parameter. The prop has to be passed from the App.
<TodoItems entries={this.state.items}deleteItem={this.deleteItem}/>
Create a new property in App.js as deleteItem.
View the code on Gist.
It filters the received key from the items state. Then sets the items to filtered items.
Experience the app yourself below.
<!-- iframe plugin v.4.3 wordpress.org/plugins/iframe/ -->
The post Create a ToDo app in React appeared first on ReactNinja.

Latest comments (0)