What is a Serverless site?
Serverless is a phrase that implies many of the difficulties you as the developer might face or have faced while managing and maintaining your sites server-side that have been largely removed. Serverless services facilitate developers with a huge spectrum of insanely amazing stuff and open up countless opportunities that would have been too expensive to deploy, manage, and sustain while using conventional server architectures. As a frontend developer with no backend or DevOps knowledge, how incredible is it to set up an API that manages all production traffic?
What is Netlify?
Netlify is an intuitive Git-based workflow and powerful serverless platform to build, deploy, and collaborate on web apps.
What is a form?
A form is a standard requirement for any business or personal portfolio since it provides a way through which users can reach out to the business. In most cases, it is found on the contact page of the website. In this tutorial, I will guide you on how you can set up a form using Netlify Forms.
Prerequisites
Before getting started, ensure you have the following:
- Basic understanding of HTML forms.
- A basic HTML form.
- Basic Knowledge on Git & GitHub.
- A starter Netlify account
Netlify's Pricing
It's definitely worth getting the pricing conversation out of the way before we get into the coding. Netlify offers a variety of plans to meet your needs. The plan you choose is by default determined by the size of your project. The starter Nelify plan is free to use, but the free plan only allows for 100 submissions per site each month. If you have a small website, whether if it is yours or a client's and they do not expect more than 100 submissions a month, this should be sufficient. Netlify also provides Pro, Business, and Enterprise plans. See the Pro, Business, and Enterprise plans pricing details.
Building the Form.
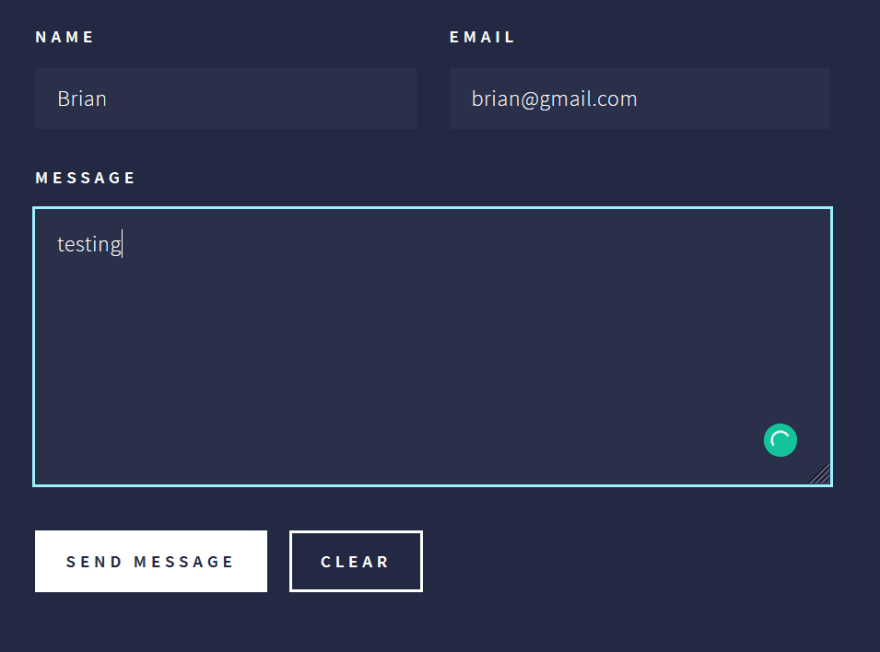
The ease with which Netlify forms can be implemented is a big part of their appeal. Consider a simple contact form that you may see on a standard website.
You can be as creative as you want with it. It's entirely up to you, whether you utilize Bootstrap or CSS. A contact form usually contains three fields: name, email, and message. For my contact form, I utilized a free HTML5 template from HTML5 app.net. After that, I made a GitHub repository and uploaded the code to GitHub. Finally, I set up Netlify to host the site. Here's how mine looks:

To add some functionality to it, simply add a data-netlify="true" attribute to the form element to make it function with Netlify.

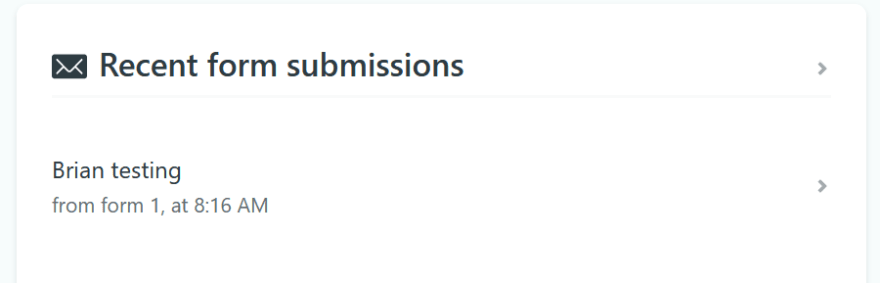
That's it for now. If you fillout the form....
.....it will redirect you to Netlify's default thank you page...

...and the form submission will be accessible from your Netlify dashboard.
Features of the advanced form
That was simple, although it might not be precisely what you were looking for. For example, you might wish to create a custom confirmation page and prevent robots(bots) from submitting your form. You may even submit the form using JavaScript instead of a conventional HTML form post. Or perhaps you might want to be notified when the form is submitted to your personal email address instead of having to read the submissions from your Netlify project's dashboard.
Each of these things are feasible, although I'll only go over a few of the options.
How to create a custom confirmation page?
Instead of using Netlify's standard confirmation page, you'll most likely want to create a customized one. To do so, simply add an action attribute to your form. The action must include the path to your site's form confirmation page in relation to the root. Please note that this is the route to the webpage, not the file path, whenever the website is generated.
You will then have to create a new HTML page and use any name of your own choosing. Then add a thank you message.

Now after you submit the form...

...You can then add some CSS styling to customize the page.
How to configure your form for additional spam filtering?
Askimet already runs a spam filter with Netlify Forms, but for additional spam protection, you can modify them. A honeypot field is supported, which can be used to recognize bot submission of a form. It's as simple as sipping margaritas on the beach! Simply include a field in your form that isn't accessible to the users and thereafter identifying the field's name in a data-netlify-honeypot="bot-field" property to the form tag.

The above action functions similar to adding a reCAPTCHA challenge protection to your form functions. To begin, add a data-netlify-recaptcha="true" attribute to your form element then a data-netlify-recaptcha="true" div within the form.

Below is the identical contact form after adding the reCAPTCHA challenge.

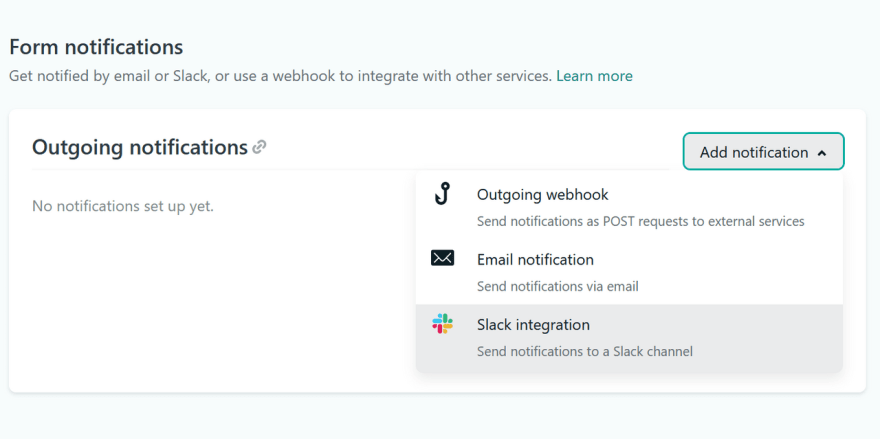
Configuring The Notification Settings.
When a form is submitted, you'll almost certainly want to be notified or enter the message into some form of workflow to handle it. In your project's Netlify dashboard, go over to Settings > Forms > Form notifications to configure this.
And thats it!
Conclusion
This article's goal was to provide you with the most comprehensive guide on creating serverless contact forms using Netlify. If you are intrigued to learn more about the subject check out Netlify's documentation. Also, if you have any queries help through Netlify support forums. I hope you found this article useful in creating a serverless contact form. Leave a like or share the article to reach a wider audience. Feel free to leave a remark or ask a question in the comment section.

Latest comments (0)