Windows Subsystem for Linux (WSL) allows you to run a Linux environment without having to dual boot your system or use a virtual machine. In this tutorial, we will look at creating a Flutter app using a Linux environment while fully inside Windows.
Note that you need to be running Windows 10 version 2004 and higher or Windows 11.
Install WSL2
Open your Windows PowerShell as an administrator and run the below command to install WSL2 and Ubuntu 20.04:
wsl --install
You may need to restart your computer when the installation completes.
After restarting your computer, open the Start menu and click the newly installed Ubuntu on Windows application. Enter a username and password to create a new Ubuntu user who will have administrative control whenever you need to run a sudo command.
When you have created your user, check the Windows File Explorer, and you will see a new Linux section that has all your Ubuntu files, including the home folder which we will work from most of the time. This means WSL2 is now fully installed, and we can run Linux commands without having to dual boot or use a virtual machine.

Install and Customize the Windows Terminal
Now we need a terminal to run these Linux commands. Install Windows Terminal or Windows Terminal (Preview) from the Windows Store if you do not have it already.
By default, it will open Windows PowerShell, but we can set it to use Ubuntu instead. Click the dropdown arrow next to the open PowerShell tab and go to Settings. Under Startup, change the default profile to Ubuntu so that every time you open the Windows Terminal, you can work seamlessly inside Ubuntu.

While in the Settings, we can also edit our starting directory to make it shorter and less clunky. Under the Profiles section, click Ubuntu and edit the starting directory to /home/your-user-name/ and save the changes.

Reopen your terminal, and you should see that the starting directory should be much shorter.
We are now ready to run actions inside our Ubuntu filesystem.
Install Flutter
Let's install Flutter on our newly operational Ubuntu system. In your terminal, make a Development folder.
mkdir Development
Then, go to the Flutter installation page and download the tar file to get started.
It is important to note that you will only be able to download the file in the Windows Downloads folder, but later on, we can enter our terminal and extract the file in the Development folder we just created in Ubuntu.
This is possible because the Ubuntu side considers Disk C (the disk where all Windows content is) a mounted drive, which means we can access all Windows side files in the /mnt folder. For example, getting to the Downloads folder on Windows through the terminal would look like this: /mnt/c/Users/your-username/Downloads.
To extract the Flutter tar file out of the Downloads folder in Windows into the Development folder in Ubuntu, enter your terminal and navigate into the Development folder:
cd Development
Then run the below command:
tar xf /mnt/c/Users/your-username/Downloads/flutter_linux_your-flutter-version-stable.tar.xz
Once the folder is extracted, add Flutter into your PATH by editing your shell's rc file. If you use Bash, run sudo nano $HOME/.bashrc, or if you use ZSH, run sudo nano $HOME/.zshrc and enter your password to edit your file.
Navigate to the bottom of the file and add the path where your Flutter folder is found. In this tutorial, Flutter is saved in the Development folder meaning our path will look like the below:
export PATH="$PATH:$HOME/Development/flutter/bin"
Save and exit your file and then run the below command to refresh your terminal and implement the changes:
source $HOME/.<rc file>
You can then run which flutter to confirm that the Flutter command now works in your terminal. If there are no errors, you can run the below command to make sure everything is working as it should:
flutter doctor
This will show a checklist that indicates what is working fine and what still needs installation. The checklist will show that we need Android Studio and Android SDKs installed next.
Install Android Studio
We will install Android Studio directly to our Ubuntu side. Go to the terminal in the home directory and create a Downloads directory.
mkdir Downloads
Go to the Android Studio downloads page and select the Linux platform.

It will open a popup for you to accept Android's terms and conditions. Scroll to the bottom, accept the terms and conditions, and then right-click the Download button and copy the download link.

In your terminal, go to your newly created Downloads folder and type the wget command followed by the download link you just copied to get the Android Studio tar file:
wget android-studio-download-link
When the download has finished, navigate to /usr/local/ and extract the Android Studio tar file which will create an android-studio folder for your user profile:
cd /usr/local/
tar xf ~/Downloads/android-studio-version-number-linux.tar.gz
Still inside the /usr/local directory, run android-studio/bin/studio.sh to launch Android Studio.
The first time you run Android Studio, an error about not being able to find SDKs may pop up. That error can be ignored because SDKs will be installed later.
When the installation guide comes up, you may choose to do the default installation or the custom installation that allows you to select file locations for the SDK. Accept all the prompts or select a location for the SDK and other folders and click the Finish button when done.
After Android Studio has installed the SDK and other core files, click the More Actions button on the application that opens up and select SDK Manager.

A page will open up where you can install the latest SDK Command-Line tools and Google Play services for our virtual devices.

The next stage is to create a virtual device to test our Flutter app.
If you try creating a virtual device right away, you will probably get an error about needing /dev/kvm installed before you can proceed. Learn about KVM and how to fix this error here.
Once you have installed KVM from the link above, you can proceed to create a virtual device. Cancel the SDK Manager if it is still open and click the More Actions button inside the original Android Studio window. Then click the Virtual Device Manager to start creating a virtual device.

Once the Virtual Device Manager opens, click the Create Device button and select a device you would like to use. For this tutorial, we will use a Pixel 2.

Click Next and select an Android version to download and use on the virtual device.

When you have downloaded and selected your preferred Android version, click Next and choose a name for your device. You can leave the default name or name it something else, and you can make as many different virtual devices as you need to.

Click Finish to complete the creation of the virtual device, and click the green play button to launch it.
Run flutter doctor again, and this time, every checkbox should be ticked, which means we have everything we need to get started with Flutter.
Coding Our Flutter App in Visual Studio Code
Next, we need to create a Flutter app and set up a code editor like Visual Studio Code (VS Code) so that we can begin coding our Flutter app.
Installing VS Code
A cool thing about WSL is that VS Code can be downloaded on the Windows side and still connect to files found on the Ubuntu side, so let's download VS Code for Windows.
When VS Code has been downloaded, install the Remote Development extension pack which will enable you to open folders in WSL, in containers, or through SSH. You may need to restart VS Code once the installation completes.
Next, we need to install extensions that can help with Flutter development. Install the Flutter and Dart extensions to get code snippets and Flutter support.
We can also install an emulator extension that allows us to effortlessly run our installed Android emulators without having to open Android Studio every single time, as that can be very slow.
Close Android Studio and the virtual device we opened earlier and install the Android iOS Emulator extension which will make emulator opening quick and easy.
Once the extension is installed, we need to give it the path to our emulator location so that it knows where to find our emulators.
Enter your VS Code settings by pressing Ctrl + , on your keyboard and click Extensions on the left side of the screen. Once the list of extensions opens up, click Emulator Configuration to open the settings for the emulator.

Fill in the Emulator: Emulator Path Linux text field with the path to your emulator inside the SDK folder. If you followed this tutorial, the path would be like below, but put the path that applies to you:
~/Android/Sdk/emulator
Cancel the Settings page and press Ctrl + Alt + e on your keyboard to run the extension.

Click View Android Emulators, and it will show a list of installed emulators in your system. Select the one you wish to use and it will open up, ready to be used without opening Android Studio.

Creating and running the Flutter app
To create your Flutter app, create a Projects directory using your terminal. Let's make our Projects directory inside the Development directory we made earlier.
cd ~/Development
mkdir Projects
cd Projects
When you are inside the Projects folder, create your Flutter app and open it in VS Code using the code below:
flutter create testapp
cd testapp
code .
It will start to download the WSL server, eventually opening the project in VS Code, and you can begin to code anything you want in your Flutter app.
To open the app in your emulator, go to the terminal under your project and type flutter run.
You can make changes to the app in VS Code, and those changes can be viewed instantly by pressing either r or R in the terminal.

Thanks for reading!

Top comments (7)
I wonder if we can create a Flutter web app from WSL2. I had a problem with the
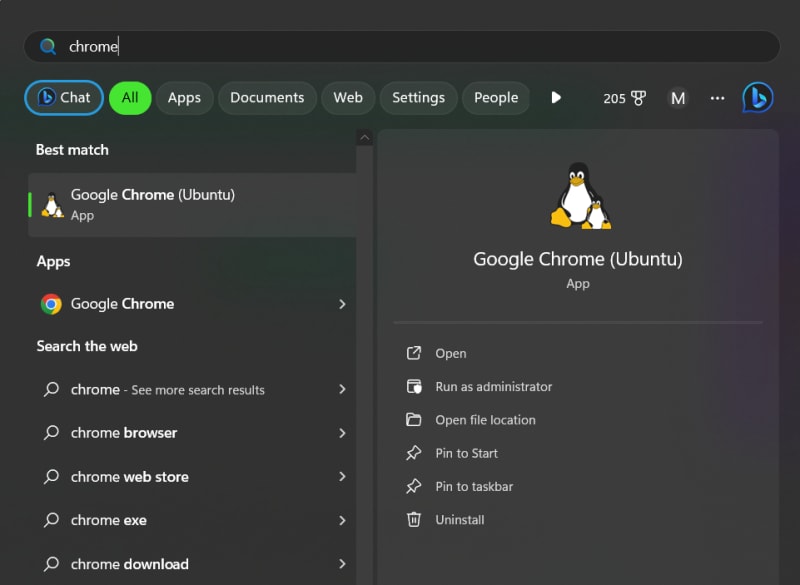
CHROME_EXECUTABLEdevice since the host was Windows but I wanted to develop it in WSL2. I've already tried to use themsedge.exefor Windows GUI, not the Linux one and got this error. I assume it has something to do with the file permission on Windows.I'm not sure about the file permissions. When building on the web, I use the Chrome app that comes from the Ubuntu install. It shows up when you search for Chrome in the Start menu
Then I do the Flutter run command and it launches in the browser.
Thanks for the tutorial. I followed it but got stuck at the step of running the emulator from VSC. When I click on View Android emulators then I get 3 errors:
I ran the suggested command in CMD and got "The system cannot find the path specified."
Error: spawn C:\WINDOWS\system32\cmd.exe ENOENT
Make sure your Windows path is set correctly! Example: C:\Users\Me\AppData\Local\Android\Sdk\emulator
Do you know how to resolve this?
I found out what my problem was. I didn't switch my VS Code environment to WSL. I installed all the extensions in VSC on the Windows side. I later realized that I needed to connect VSC to WSL by pressing F1 -> WSL: Connect to WSL. And then I installed the mentioned extensions. After that things worked fine.
I'm so sorry that I never responded to this. I didn't see any notifications and I never thought to keep checking this article for comments because I didn't expect I'd get any 😅
I'm glad you solved the issue though. Happy coding!
can't we test with our device as an emulator in wsl, I am facing difficulty in connecting my device to the vscode in wsl-server to use as an emulator
I was wondering if you could install Android Studio and its emulator on the Windows side and access them from WSL.