As GraphQL and serverless are becoming more popular, we will check out how to build such an application with serverless Ruby. The option proposed in this post is to use a simple GraphQL backend with a modern frontend framework (e.g. Vue or React) and use serverless Ruby to add custom business logic.
Table of Contents
- 3factor app architecture
- Serverless functions
- No infrastructure management
- Cost efficiency
- Reliability
- Cloud providers
- Our task
- Creating our first serverless function
- Adding an event trigger
- Let’s test this!
- Remote schemas
- Join the community
3factor app architecture
The proposed architecture in this blogpost is to use the 3factor app architecture (https://3factor.app/). We use Hasura for the realtime GraphQL and reliable eventing, and AWS lambdas for async serverless. To set up your GraphQL backend, read this tutorial: https://medium.com/@marion.schleifer/beginners-guide-to-graphql-api-d5ec68c69f69. In this post, we will focus on how to add serverless business logic on AWS using Ruby. The frontend integration is not covered in this, but you can read up on it here: https://medium.com/@marion.schleifer/how-to-connect-your-graphql-api-to-your-vuejs-frontend-61d8e8e455db.
Serverless functions
Serverless functions is code that runs in the cloud. We will use them together with Hasura event triggers. In the Hasura project, we can add event triggers that invoke a serverless function after a mutation (insert, update, delete). This can for example be used to do things like sending an email, adding a payment API or processing async business logic. With a serverless architecture, we get the following advantages:
No infrastructure management
If you run your code in the cloud, the responsibility for maintenance relies with the cloud provider which allows you to focus on the frontend without worrying about maintaining a server.
Cost efficiency
With all modern cloud providers, you can start for free. When you start to get more traffic, the costs are designed to scale. This means that you pay based on how many times your serverless functions are triggered.
Reliability
You can count on the cloud providers to make sure there are no (or only very short) down times. The common cloud providers are huge corporations that have built a gigantic infrastructure around their cloud services, and they ensure uptime.
Cloud providers
You can deploy your serverless functions to any cloud provider. Those that are most commonly used in combination with Hasura are the following:
- Glitch (simple, free, only JavaScript, best for prototyping)
- Google Cloud (Google, cost at scale, several languages)
- Azure (Microsoft, cost at scale, several languages)
- AWS (Amazon, cost at scale, several languages including Ruby)
Our task
In our Harry Potter API (https://medium.com/@marion.schleifer/beginners-guide-to-graphql-api-d5ec68c69f69), we have a movies table. We now want to write a serverless function that gets triggered when a new movie is inserted. All this function will do is send the title and the release date back to the server where we will inspect it. Let’s go ahead and get started.
Creating our first serverless function
As AWS is the only cloud provider that supports Ruby at this time, we’ll go with this one, because we all love Ruby, right? First, create an account on AWS if you don’t already have one. The first year will be free, so you don’t have to worry about costs, as long as you don’t have a huge amount of traffic on your functions.
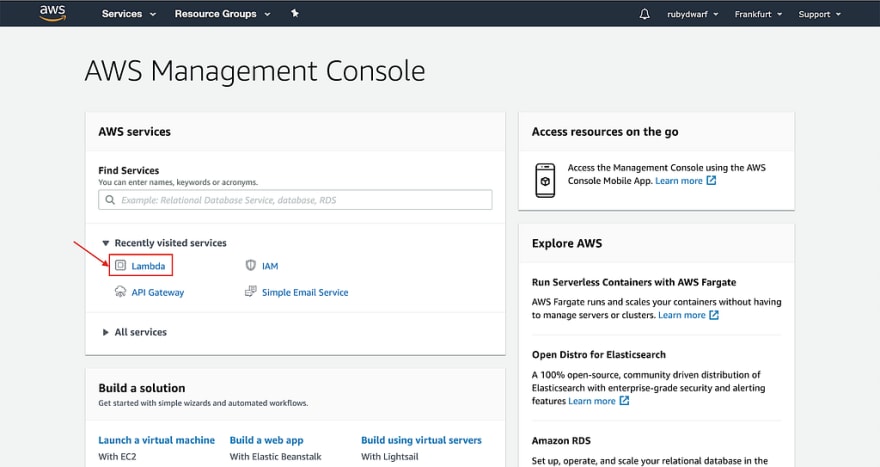
After logging in, go to the AWS Management Console and click on “Lambda”.
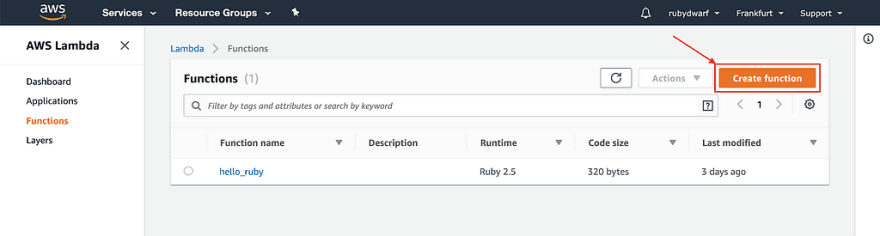
Now click on the button to create a new function:
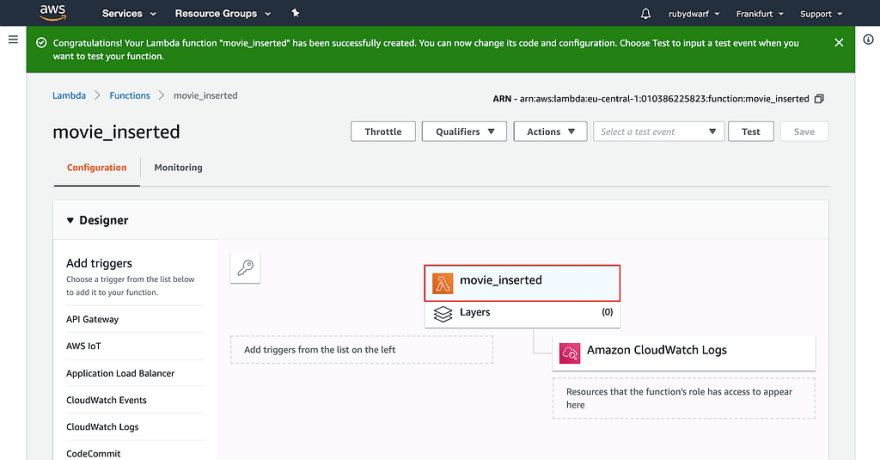
As we don’t have blueprints or existing repositories yet, we will author our function from scratch. Below, you can enter your function name (no spaces and small letters). We will call our function “movie_inserted” because we want it to be triggered whenever a new movie is inserted. As for the runtime, there is one Ruby version to choose from, and we will select “Ruby 2.5”.

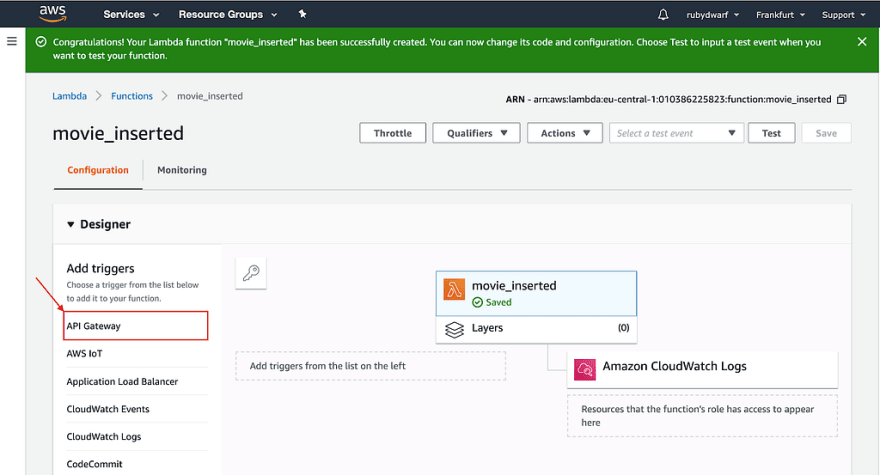
Now click on the button “Create function”. As you can see on the next page, our function was created:
When you scroll down, you can see the definition for our first AWS function.
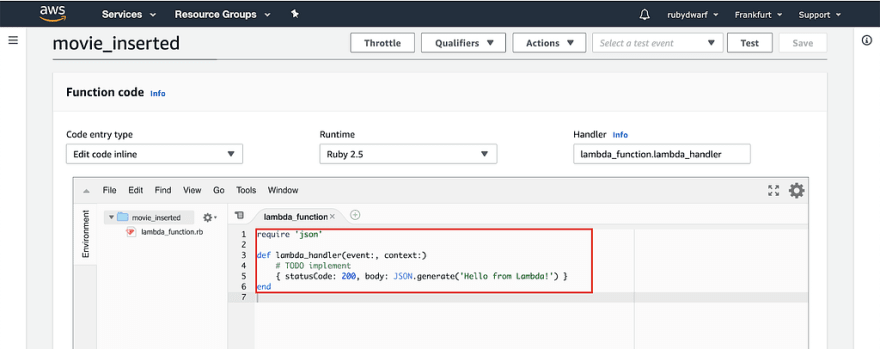
Inside the function, we want to read the movie information out of the event that is passed to the function. Then, we want to send the title and the release date from the newly inserted movie back to the server.
Let’s change the function to the following:
On the top right side, click the Save button.
Now we have a function, but we need to have an endpoint that can be called for the function to run. Let’s add an API Gateway:
When we scroll down, we can configure our trigger:
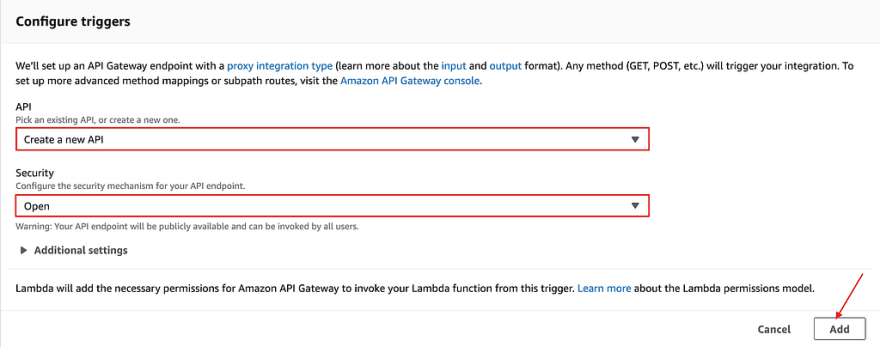
We will create a new API because we don’t have any existing ones yet. And we’ll have an open endpoint. In a real life project, you would have stronger authentication, for example with an access token. But we’ll keep it simple for now. When you added the trigger, you can save it on the top right corner.
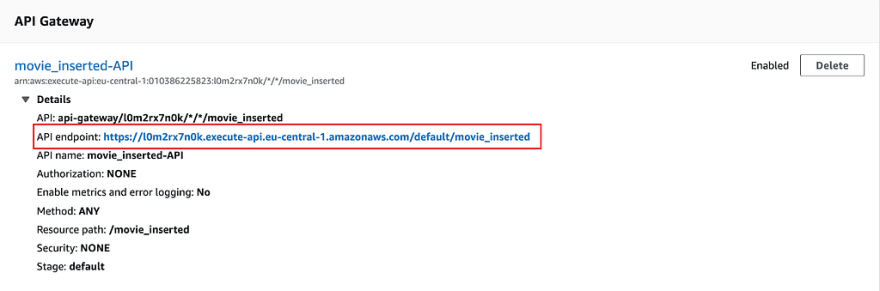
Once saved, you can see that an endpoint for the function invocation will be provided. Let’s copy this URL to the clipboard.
Adding an event trigger
Now it’s time to add an event trigger in our Hasura project that will be invoked whenever we insert a new movie. Open your API with the Hasura console and click on “Events” in the menu. On this page you find links to the documentation for serverless functions with different cloud providers that work with Hasura.

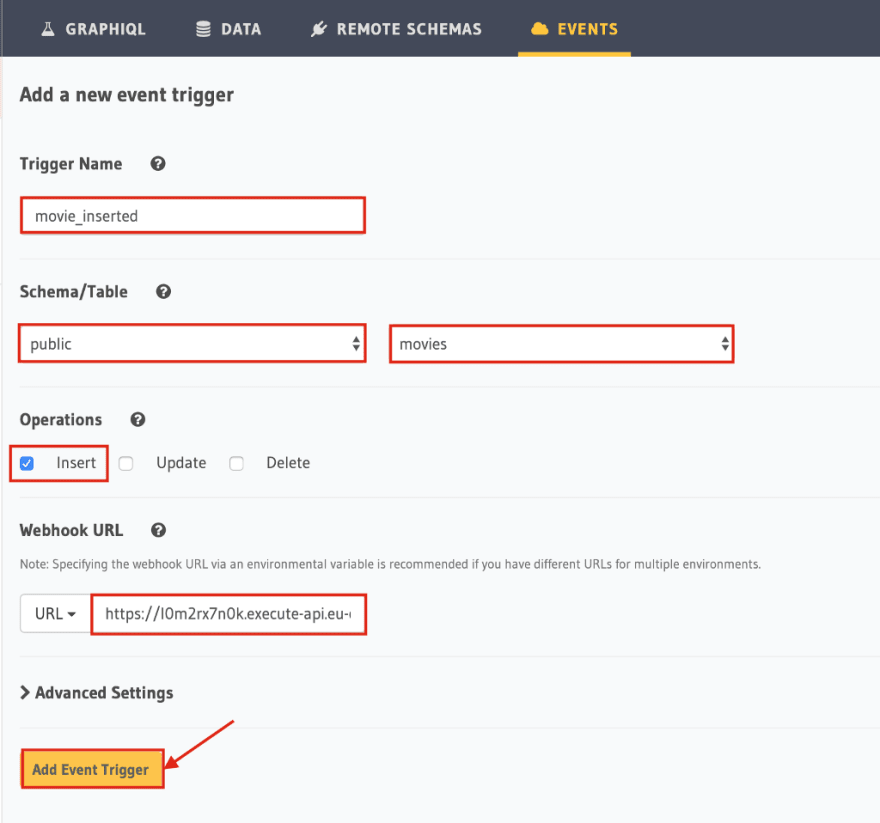
Next, we’ll add all the trigger information. Our trigger name is “movie_inserted”, like on AWS. The table is public and our database table that we want to trigger is the movies table. Also, we want the trigger to go off only when a new movie is inserted. Under “Webhook URL”, we paste the URL that we copied before on AWS. When we have all that, we can click on “Add Event Trigger”.
Let’s test this!
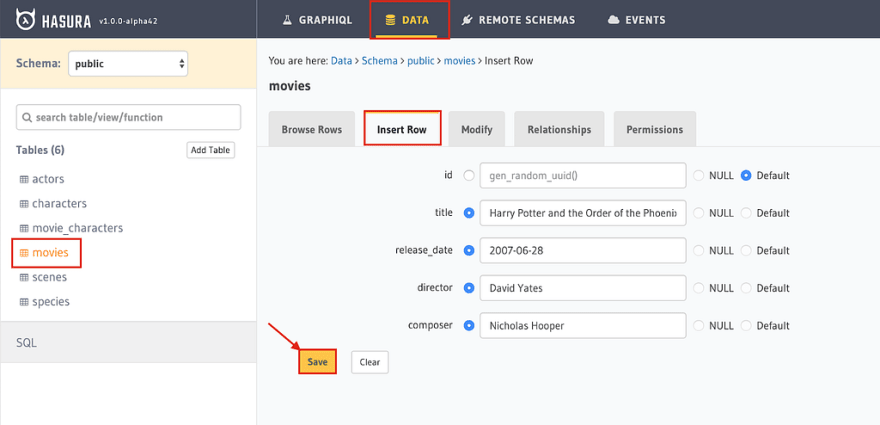
Now we want to test if this all works. In the Hasura console, let’s add a new movie.
When we now click on “Events”, we see that it worked:
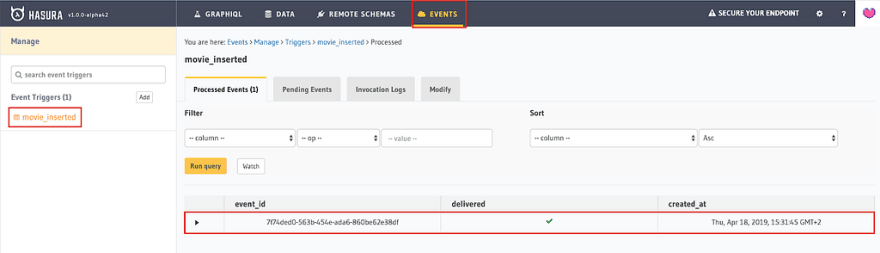
We can now expand the event and see under “Request” what is sent from Hasura to our cloud function. From there, we know the structure of the event and how to read out the information in the previous part. Under “Response”, we can see what is actually sent back to the server.

As we can see, it’s exactly the title and the release date from the movie that we just created. So the function works. Good job!
Remote schemas
Maybe you have an existing GraphQL API / service and you want to use a Hasura project on top of it. No problem! Hasura has you covered. It has the ability to merge remote GraphQL schemas and provide a unified GraphQL API. You can write new custom GraphQL resolvers in any language which can then be merged into Hasura. All you need to do is provide an API endpoint to Hasura to stitch the two GraphQL services together. This allows you to make all your API calls from one point. Let’s check out how to do this:

On the “Remote Schemas” tab, click on “Add” to add your existing GraphQL service.
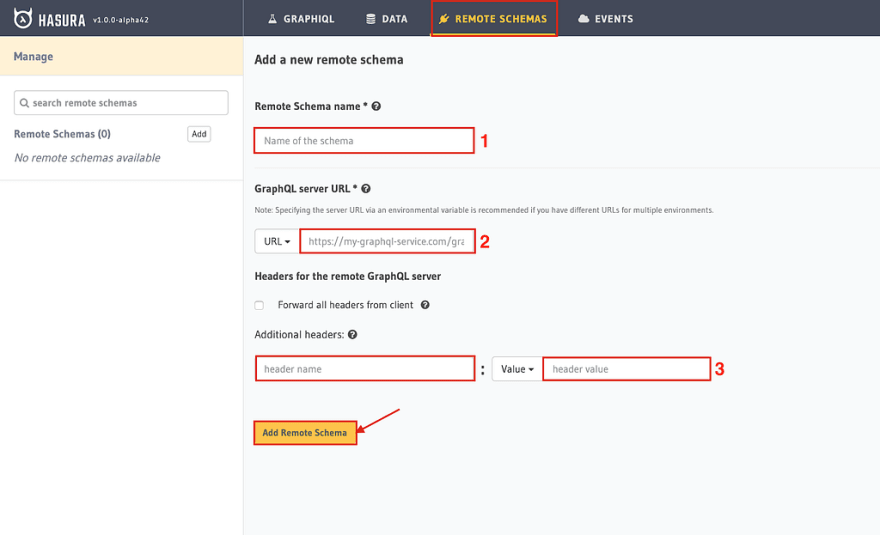
- Enter the name of your remote schema.
- Insert the URL, so that you can access your Hasura API from your linked GraphQL service.
- If you have additional headers (e.g. for authorization), you can insert them here.
When you are done, you can make requests to your remote server from your Hasura GraphQL API.
For more documentation on serverless functions, event triggers and remote schemas, read more on the Hasura documentation page:
Trigger webhooks on database events | Hasura GraphQL Engine
https://docs.hasura.io/1.0/graphql/manual/event-triggers/index.html
Remote schemas | Hasura 1.0 documentation
Join the community
Hasura is being used by a growing number of developers. Join the friendly community and keep up with updates.
If you want to start building your own projects with Hasura, you can join their discord channel here: https://discordapp.com/invite/hasura. There is already a pretty large community and you will get help very quickly.
🐦 Twitter: https://twitter.com/hasurahq
⭐️ Github: https://github.com/hasura/graphql-engine

Top comments (0)