For my CVD simulator I created two custom elements now called wc-js-shader-canvas and wc-glsl-shader-canvas (renamed from wc-cpu-shader-canvas and wc-gpu-shader-canvas previously). The idea was that you could give it an image path and inline some code and it would apply the resulting fragment shader. This time we'll try WebGPU. We've already gone over the WebGPU basics and I'm keeping the same API so this intro will be quick:
function loadImage(url) {
    return new Promise((res, rej) => {
        const image = new Image();
        image.src = url;
        image.onload = () => res(image);
        image.onerror = rej;
    });
}

export class WcWgslShaderCanvas extends HTMLElement {
    #image;
    #height = 240;
    #width = 320;

    static observedAttributes = ["image", "height", "width"];
    constructor() {
        super();
        this.bind(this);
    }
    bind(element) {
        this.createShadowDom = this.createShadowDom.bind(element);
        this.draw = this.draw.bind(element);
    }
    createShadowDom() {
        this.attachShadow({ mode: "open" });
        this.shadowRoot.innerHTML = `
            <style>
             :host {
                 display: block;
             }
            </style>
            <canvas width="${this.#width}px" height="${this.#height}px"></canvas>
            <div id="message"></div>
        `;
    }
    async connectedCallback() {
        this.createShadowDom();
        this.cacheDom();
        await this.draw();
    }
    cacheDom() {
        this.dom = {
            canvas: this.shadowRoot.querySelector("canvas"),
            message: this.shadowRoot.querySelector("#message")
        };
    }
    attributeChangedCallback(name, oldValue, newValue) {
        if (oldValue !== newValue) {
            this[name] = newValue
        }
    }
    async draw(){
        this.adapter = await navigator.gpu.requestAdapter();
        this.device = await this.adapter.requestDevice();
        this.context = this.dom.canvas.getContext("webgpu");

        this.context.configure({
            device: this.device,
            format: "bgra8unorm"
        });

        //2d position + uv
        const vertices = new Float32Array([
            -1.0, -1.0, 0.0, 1.0,
            1.0, -1.0, 1.0, 1.0,
            1.0, 1.0, 1.0, 0.0,

            -1.0, -1.0, 0.0, 1.0,
            1.0, 1.0, 1.0, 0.0,
            -1.0, 1.0, 0.0, 0.0
        ]);

        const vertexBuffer = this.device.createBuffer({
            size: vertices.byteLength,
            usage: GPUBufferUsage.VERTEX | GPUBufferUsage.COPY_DST,
            mappedAtCreation: true
        });

        new Float32Array(vertexBuffer.getMappedRange()).set(vertices);
        vertexBuffer.unmap();

        const shaderModule = this.device.createShaderModule({
            code: `
                struct VertexOut {
                [[builtin(position)]] position : vec4<f32>;
                [[location(0)]] uv : vec2<f32>;
                };

                [[stage(vertex)]]
                fn vertex_main([[location(0)]] position: vec2<f32>,
                            [[location(1)]] uv: vec2<f32>) -> VertexOut
                {
                    var output : VertexOut;
                    output.position = vec4<f32>(position, 0.0, 1.0);
                    output.uv = uv;
                    return output;
                }

                [[stage(fragment)]]
                fn fragment_main(fragData: VertexOut) -> [[location(0)]] vec4<f32>
                {
                    return vec4<f32>(1.0, 0.0, 0.0, 1.0);
                }
        `
        });

        const vertexBuffers = [{
            attributes: [
                {
                    shaderLocation: 0,
                    offset: 0,
                    format: "float32x2"
                },
                {
                    shaderLocation: 1,
                    offset: 8,
                    format: "float32x2"
                }
            ],
            arrayStride: 16,
            stepMode: "vertex"
        }];

        const pipelineDescriptor = {
            vertex: {
                module: shaderModule,
                entryPoint: "vertex_main",
                buffers: vertexBuffers
            },
            fragment: {
                module: shaderModule,
                entryPoint: "fragment_main",
                targets: [
                    {
                        format: "bgra8unorm"
                    }
                ]
            },
            primitive: {
                topology: "triangle-list"
            }
        };

        const renderPipeline = this.device.createRenderPipeline(pipelineDescriptor);
        const commandEncoder = this.device.createCommandEncoder();

        const clearColor = { r: 0, g: 0, b: 0, a: 1 };
        const renderPassDescriptor = {
            colorAttachments: [
                {
                    loadValue: clearColor,
                    storeOp: "store",
                    view: this.context.getCurrentTexture().createView()
                }
            ]
        };
        const passEncoder = commandEncoder.beginRenderPass(renderPassDescriptor);
        passEncoder.setPipeline(renderPipeline);
        passEncoder.setVertexBuffer(0, vertexBuffer);
        passEncoder.draw(6); //TODO need index buffer
        passEncoder.endPass();
        this.device.queue.submit([commandEncoder.finish()]);
    }
    set image(val) {
        loadImage(val)
            .then(img => {
                this.#image = img;
                this.draw();
            });
    }
    set height(val) {
        val = parseInt(val);
        this.#height = val;
        if (this.dom) {
            this.dom.canvas.height = val;
        }
    }
    set width(val) {
        val = parseInt(val);
        this.#width = val;
        if (this.dom) {
            this.dom.canvas.width = val;
        }
    }
}

customElements.define("wc-wgsl-shader-canvas", WcWgslShaderCanvas);
At this point we're just rendering a red square. Take note of the vertex format, its 2 2xf32s. I only care about the 2d position and UVs which are both 2-element vectors. I've stubbed the pixel shader to just output red.
Yup it's red. Ok now let's add a texture.
Textures
The example uses an texture that looks like this:
const texture = this.device.createTexture({
    size: {
        width: this.#image.width,
        height: this.#image.height,
        depth: 1
    },
    dimension: '2d',
    format: `rgba8unorm`,
    usage: GPUTextureUsage.COPY_DST | GPUTextureUsage.RENDER_ATTACHMENT | GPUTextureUsage.SAMPLED
});
We have to give it a lot of info. Most of this should be familiar. The size, the format (32-bit RGB). The usage is kinda weird but it works like the vertex buffer flags. We want to write to it so we use COPY_SRC. RENDER_ATTACHMENT means we can read it during the render pass. SAMPLED might also be called SHADER_READ as it seems like it got a rename. This flag makes this a constant in the shader program.
We made a texture on the GPU, now let's write to it.
device.queue.copyExternalImageToTexture({
  source: this.#image
}, {
  texture,
  mipLevel: 0
},
textureSize);
This makes enough sense. We use the queue to copy the source image into the the texture, making sure we write to the whole size and we're specifying the mip level incase we manually build mip-maps. There's another thing here though. this.#image needs to be a bitmap not an image element. The platform provides a handy method createImageBitmap to convert it (well any WebGPU capable browser) We us this in set image so that this.#image is a bitmap.
set image(val) {
    loadImage(val)
        .then(img => createImageBitmap(img))
        .then(bitmap => {
            this.#image = bitmap;
            this.draw();
        });
}
We also have to create something called a "sampler".
const sampler = this.device.createSampler({
    addressModeU: "repeat",
    addressModeV: "repeat",
    magFilter: "linear",
    minFilter: "nearest"
});
Like WebGL we need to set how the texture will scale and how the UVs repeat.
Now we need to get this to the shader. We do it with something called a bindGroup. This is a collection of resources that can be bound at the same time and all values passed to the render process need to be in one.
const bindGroup = this.device.createBindGroup({
    layout: renderPipeline.getBindGroupLayout(0),
    entries: [
        { binding: 0, resource: sampler },
        { binding: 1, resource: texture.createView() }
    ]
});
From the renderPipeline we query the shader to find the bindGroups. We'll explain this later but they are annotations [[group(x) binding(y)]] in the shader. Then we associate our resources with them. Note that textures are not directly passed in but rather a view on them (I don't know what the distinction is but maybe it means it's read-only?).
Then to use the bind group we pass it into the passEncoder
passEncoder.setBindGroup(0, bindGroup);
Finally we can get to the meat, the actual shader code.
Textures in Shaders
First we need to create variable bindings for the bind group:
[[group(0), binding(0)]] var my_sampler: sampler;
[[group(0), binding(1)]] var my_texture: texture_2d<f32>;
These correspond to the group and binding indices we used (really its the other way around, bind groups are defined by the shader code, we're just choosing which of the defined slots to fill on the outside but I thought it was a little easier to follow by setting up the bindGroups first). We've defined two items a sampler and texture_2d<f32>. Hopefully these make sense.
So how do we actually sample from a texuture? The textureSample function!
[[stage(fragment)]]
fn fragment_main(fragData: VertexOut) -> [[location(0)]] vec4<f32>
{
    return textureSample(my_texture, my_sampler, fragData.uv);
}
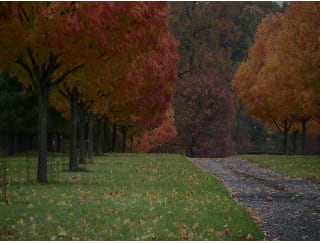
The first parameter is the texture, the second the sampler and the third is the UV coordinates. What you get is a vec4<f32> representing the color. In this case to simply show the image we output it directly.
A lot of work but we can draw images now. This pretty much ends the hard part. Next we want to let the user write their own shader. WebGPU for better or worse will make the component more flexible as we can edit the fragment shader and vertex shader in the same code and that's probably preferred to breaking it up and trying to mix external code with internal code like we did with the WebGL version.
const shaderModule = this.device.createShaderModule({
    code: this.textContent
});
This unfortunately doesn't work like it does for the other 2. The reason is because WGSL more aggressively uses < and > which are parsed as HTML. Even HTML decoding doesn't work because the DOM parser has helpfully add the ending tags. Without a lot of text cleanup to undo these operations we unfortunately can't just plop WGSL code between the tag. What we can do instead is to require that the content is nested in a script tag (with an unknown type) which will not be parsed.
<wc-wgsl-shader-canvas image="image.jpg">
    <script type="wgsl">
    [[group(0), binding(0)]] var my_sampler: sampler;
    [[group(0), binding(1)]] var my_texture: texture_2d<f32>;

    struct VertexOut {
        [[builtin(position)]] position : vec4<f32>;
        [[location(0)]] uv : vec2<f32>;
    };

    [[stage(vertex)]]
    fn vertex_main([[location(0)]] position: vec2<f32>, [[location(1)]] uv: vec2<f32>) -> VertexOut
    {
        var output : VertexOut;
        output.position = vec4<f32>(position, 0.0, 1.0);
        output.uv = uv;
        return output;
    }

    [[stage(fragment)]]
    fn fragment_main(fragData: VertexOut) -> [[location(0)]] vec4<f32>
    {
        return textureSample(my_texture, my_sampler, fragData.uv);
    }
    </script>
</wc-wgsl-shader-canvas>
Instead we pull it from the script tag:
this.dom.script = this.querySelector("script");
const shaderModule = this.device.createShaderModule({
    code: this.dom.script.textContent
});
Implementing a monochrome shader
[[stage(fragment)]]
fn fragment_main(fragData: VertexOut) -> [[location(0)]] vec4<f32>
{
    var achromatopsia = mat4x4<f32>(
        vec4<f32>(0.21, 0.72, 0.07, 0.0),
        vec4<f32>(0.21, 0.72, 0.07, 0.0),
        vec4<f32>(0.21, 0.72, 0.07, 0.0),
        vec4<f32>(0.0, 0.0, 0.0, 1.0)
    );
    return achromatopsia * textureSample(my_texture, my_sampler, fragData.uv);
}
WGSL doesn't seem to support 16-value constructors for matrices so we need to do it as a few vec4s.
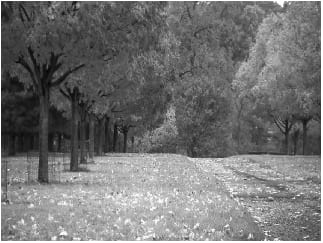
Hmmm...that's not right. Plus if I right click and save I get a black image so I had to screenshot it. Again row/column confusion rears it's ugly head. The vectors are columns, not rows like you would normal read it. I really wonder what the rational behind that was.
[[stage(fragment)]]
fn fragment_main(fragData: VertexOut) -> [[location(0)]] vec4<f32>
{
    var achromatopsia = mat4x4<f32>(
        vec4<f32>(0.21, 0.21, 0.21, 0.0),
        vec4<f32>(0.72, 0.72, 0.72, 0.0),
        vec4<f32>(0.07, 0.07, 0.07, 0.0),
        vec4<f32>(0.0, 0.0, 0.0, 1.0)
    );
    return achromatopsia * textureSample(my_texture, my_sampler, fragData.uv);
}
Fixed.
Globals
In the CVD sim we added the ability to add globals/uniforms. We can do that same for WebGPU.
//don't forget to add to observedAttributes!
#globals;
set globals(val) {
    val = typeof (val) === "object" ? val : JSON.parse(val);
    this.#globals = val;
    this.draw(); //this is bad because we're re-initing the whole pipeline each time.
}
Add the property that holds it. Now how to pipe it to the shader. Again with WebGPU everything is super manual so we will actually have to pack the uniform data into a buffer ourselves.
//passEncoder.setBindGroup(0, bindGroup);

if (this.#globals){
    const data = new Float32Array(this.#globals.flat());
    const buffer = this.device.createBuffer({
        size: data.byteLength,
        usage: GPUBufferUsage.UNIFORM | GPUBufferUsage.COPY_DST
    });
    this.device.queue.writeBuffer(buffer, 0, data);
    const uniformGroup = this.device.createBindGroup({
        layout: renderPipeline.getBindGroupLayout(1),
        entries: [
            {
                binding: 0,
                resource: {
                    buffer,
                    offset: 0,
                    size: data.byteLength
                }
            }
        ]
    });
    passEncoder.setBindGroup(1, uniformGroup);
}

//passEncoder.draw(6);
If we have globals then we can bind them. Unlike the other versions of the shader canvas we won't accept objects, only arrays. This is because names don't matter for WGSL just order and object properties are technically unordered. This also greatly simplifies things. If we expect all of the values are either floats or arrays of floats (which we are!) then we can just take the array of arrays and flatten it using .flat() (if you want to support nested arraies, and I don't know why you would, you need .flat(Infinity)). Next we create a buffer which we've seen previously and it'll be big enough to fit our data. This time instead of mapping we'll just directly write the data, this almost seems easier to me. writeBuffer takes the buffer, the offset and the values (optionally length). Next, we create a new bind group index 1 to attach to the shader, the resource this time is the buffer, the offset and size, pretty self-explanatory. Finally we set the bind group on the passEncoder.
Uniforms in the shader
WGSL is a bit strange with uniforms. At first I thought you could pass through different scalar values via bind groups similar to GLSL. This is not the case, all of your uniforms need to be in the form of a struct with proper annotation.
[[block]]
struct Uniforms {
    foo: f32;
};
This goes at the very top of the shader. I have no idea why [[block]] is necessary but it is. The struct itself is just a type over the buffer so the sizes of the elements need to match up (you can use annotations to change offsets too). Now we can actually do something with this.
        <wc-wgsl-shader-canvas image="image.jpg" globals='[0.5]'>
            <script type="wgsl">
            [[block]]
            struct Uniforms {
                foo: f32;
            };

            [[group(0), binding(0)]] var my_sampler: sampler;
            [[group(0), binding(1)]] var my_texture: texture_2d<f32>;
            [[group(1), binding(0)]] var<uniform> my_uniform: Uniforms;

            struct VertexOut {
                [[builtin(position)]] position : vec4<f32>;
                [[location(0)]] uv : vec2<f32>;
            };

            [[stage(vertex)]]
            fn vertex_main([[location(0)]] position: vec2<f32>, [[location(1)]] uv: vec2<f32>) -> VertexOut
            {
                var output : VertexOut;
                output.position = vec4<f32>(position, 0.0, 1.0);
                output.uv = uv;
                return output;
            }

            [[stage(fragment)]]
            fn fragment_main(fragData: VertexOut) -> [[location(0)]] vec4<f32>
            {
                return textureSample(my_texture, my_sampler, fragData.uv) * vec4<f32>(my_uniform.foo, my_uniform.foo, my_uniform.foo, 1.0);
            }
            </script>
        </wc-wgsl-shader-canvas>
Nets us:
All we're doing is reading from the texture and multiplying it by the value foo.
External Shader Source
This is easy, let's setup the src attribute to get the shader source externally if present.
//don't forget to update observedAttributes
#src;
set src(val) {
    fetch(val)
        .then(r => r.text())
        .then(txt => {
            this.#src = txt;
            this.draw(); //expensive
        });
}
And just update the shader generation:
const shaderModule = this.device.createShaderModule({
    code: this.#src ? this.#src : htmlDecode(this.dom.script.textContent)
});
Performance Improvement
I've noted a couple times that this.draw is expensive because we're setting up the entire pipeline. Let's fix that so that we boot in one step and then just modify the things that matter in draw.
I'm not going to go through all of it but it's basically moving one-time things to bootGpu (create vertex buffer and context), texture changes to updateTexture (texture and sampler creation), and shader changes to updateShader (create shader module) and everything else to draw and sharing things internally with private variables. There's also a ready-state pattern:
#ready;
#setReady;
constructor(){
  //...other stuff
  this.#ready = new Promise((res) => {
    this.#setReady = res;
  });
}
This lets us setup a promise but resolve it from the outside. We can use #setReady later in connectedCallback:
await this.bootGpu();
this.#setReady();
This allows us to set gaurds in updateTexture, updateShader, and draw:
async updateShader() {
  if(!this.#src && !this.dom.script) return;
  await this.#ready;
  // ... other stuff
}
So if the attributes trigger before the GPU is setup (and from my testing getting the adapter can take seconds) this leaves it waiting until the device is ready and it can proceed without error.
The optimization is pretty scattershot, moving things around and then seeing if it still works. It could still be improved but it at least gets us to the point where draws are cheaper. One of the main things to watch out for is that the commandEncoder can only be used once. I don't understand why but don't call it again after you call finish or you'll get weird errors so this has to be part of draw.
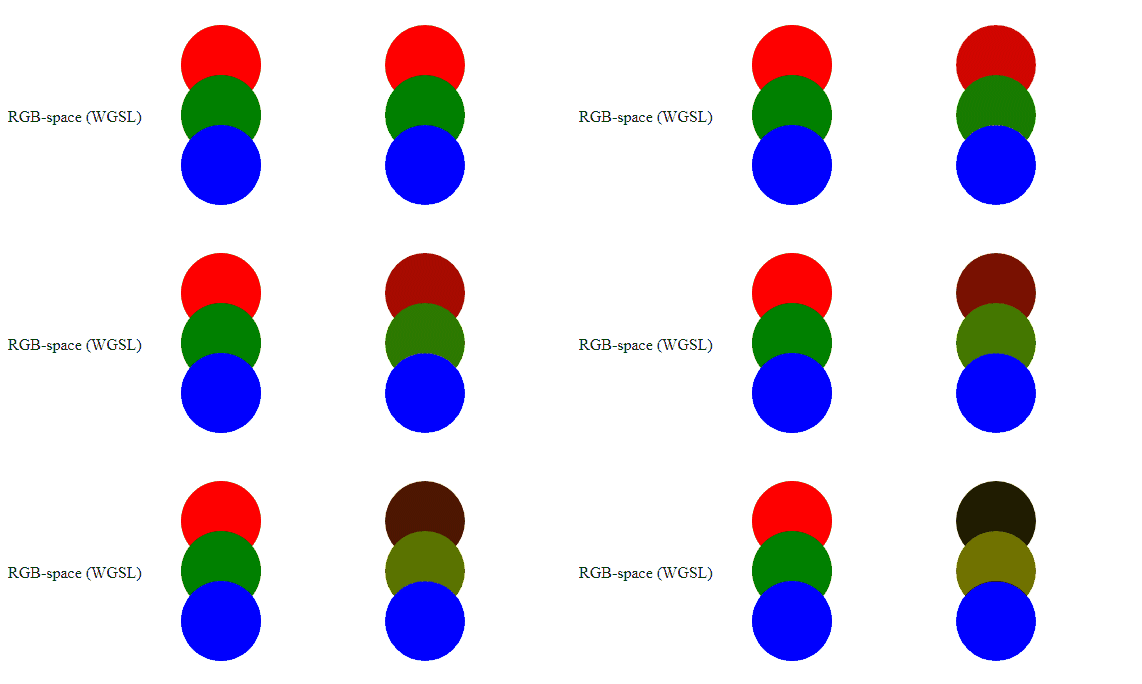
We can do the partial protanomaly shader.
You can view the full code here (sorry about the data url, I don't know of a better way to embed same origin images on codepen):


Latest comments (0)