Since I started looking at React, I've wondered whether it would be possible to create a multi-user game. The game would look a little like a Spectrum game that I used to play called: Trans-Am. I'm guessing most people reading this are not going to be old enough to remember this. Essentially, it marks the peak of car game development, and everything has been down hill ever since.
If you have no idea what I'm talking about then there's a demo of the game here.
I'm not going to try and emulate this exactly, I thought I'd use it as a basis to make a multi-player car game.
The GitHub repository for this post can be found here.
Create a React Application
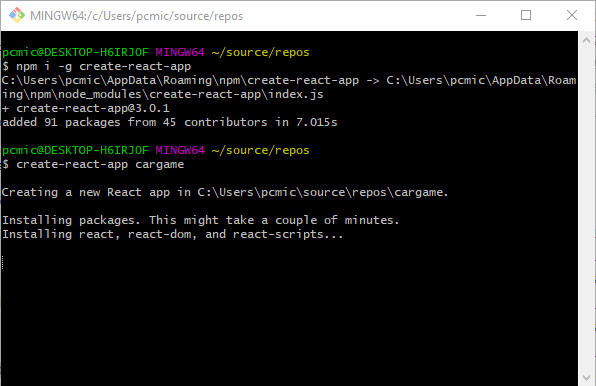
We'll start by creating a new React Application (see here for details):
Now we have the application, we'll need some game assets. If you want to use the same assets as me then feel free to pull my repository. However, at this stage, all you'll need is a square box and a green screen.
Game Layout
The next stage is to design the game layout; because this is React, we'll start with App.js. We'll delegate all of our game logic to a component called Game:
import React from 'react';
import './App.css';
import Game from './Components/Game';
function App() {
return (
    <div className="App">
        <Game />
    </div>
    );
}
export default App;
If you want to see, comprehensively what Game.Jsx looks like, then have a look at the latest version on GitHub. However, some of the highlights are the render method:
render() {
return <div onKeyDown={this.onKeyDown} tabIndex="0">
    <Background backgroundImage={backgroundImg}
    windowWidth={this.state.windowWidth} windowHeight={this.state.windowHeight} />
<Car carImage={carImg} centreX={this.state.playerX}
    centreY={this.state.playerY} width={this.playerWidth}
    height={this.playerHeight} />
</div>
}
This will probably change as to game progresses, but at the minute, it just renders to two constituent components. We're also responding to KeyDown here, so let's have a look at onKeyDown:
onKeyDown(e) {
switch (e.which) {
    case 37: // Left
        this.playerMove(this.state.playerX - this.SPEED, this.state.playerY);
        break;
    case 38: // Up
        this.playerMove(this.state.playerX, this.state.playerY - this.SPEED);
        break;
    case 39: // Right
        this.playerMove(this.state.playerX + this.SPEED, this.state.playerY);
        break;
    case 40: // Down
        this.playerMove(this.state.playerX, this.state.playerY + this.SPEED);
        break;
    default:
        break;
}

playerMove(x, y) {
this.setState({
    playerX: x,
    playerY: y
});
}
We're storing the players position in state; as I detailed here, this enables us to update the state and have React update the screen as it detects a change in the Virtual DOM.
Game Components
In an effort to stay as close as possible to React's preferred architecture, the components of the game (the background and the cars for now) will be, well, components. Background is easy:
import React from 'react';
function Background(props) {
const bgStyle = {
    width: `calc(${props.windowWidth}px)`,
    height: `calc(${props.windowHeight}px)`,
    top: 0,
    left: 0,
    position: 'absolute'
};
return (
    <img src={props.backgroundImage} style={bgStyle} />
);
}
export default Background;
We're basically just displaying an image here. One thing that's worth noting is that the windowWidth and windowHeight are properties, not state. They do exist as state in the Game component and, when they change, are updated there, and so updated here. The React guys call this Lifting State.
The car component is exactly the same idea:
import React from 'react';
function Car(props) {
const left = Math.round(props.centreX - (props.width / 2));
const top = Math.round(props.centreY - (props.height / 2));
const carStyle = {
    width: `calc(${props.width}px)`,
    height: `calc(${props.height}px)`,
    top: `calc(${top}px)`,
    left: `calc(${left}px)`,
    position: 'absolute',
    zIndex: 1
};
return (
    <img src={props.carImage} style={carStyle} />
);
}
export default Car;
There are a number of advantages to this idea of maintaining the state in a higher component; for example, this way, you can share a single state between components; however, the biggest advantage for us is that, while the components are, effectively, intelligent sprites, you can easily create an "EnemyCar" version of the Car component.
It's worth bearing in mind that, because the position of the car doesn't exist in this component as state, we wouldn't be able to change it here, even if we wanted to. The strategy to get around this is to have an update function passed in as a property (effectively a function pointer that you can call from within the child component).
In the next post, I'm going to update the movement so it's a little more car-like, and introduce some obstacles.
References
https://reactjs.org/docs/components-and-props.html
https://stackoverflow.com/questions/43503964/onkeydown-event-not-working-on-divs-in-react
https://stackoverflow.com/questions/37440408/how-to-detect-esc-key-press-in-react-and-how-to-handle-it/46123962
https://reactjs.org/docs/lifting-state-up.html
https://stackoverflow.com/questions/36862334/get-viewport-window-height-in-reactjs
Originally posted here.


Top comments (0)
Some comments may only be visible to logged-in visitors. Sign in to view all comments.