
It's been 9 months since the Python 3.7 Runtime on the new Google App Engine (2nd Generation GAE) has been made generally available (GA).
If you're thinking about migrating your GAE app from Python 2 to Python 3 or starting a new Python 3 GAE app from scratch, the necessary first step is to set up your local environment.
The requirements are:
- Python 3
- Java JDK (I recommend OpenJDK 11 from AdoptOpenJDK) - this is needed to run the Datastore or Firestore emulator (via Cloud SDK)
- Cloud SDK
I assume you know how to install all of these so I won't go step-by-step through it.
I recommend using PyCharm as the IDE and making use of virtual environments (which are very easy to configure via PyCharm).
Cloud SDK components
After you've installed Cloud SDK, make sure to have the following components enabled (instructions):
- Cloud SDK Core Libraries (core)
- gcloud app Python Extensions (app-engine-python)
- gcloud app Python Extensions - Extra Libraries (app-engine-python-extras)
- gcloud Beta Commands (beta)
- Cloud Firestore Emulator (cloud-firestore-emulator)
A basic Flask app
Let's start with a basic Flask web app.
First, create a requirements.txt file and add Flask in it. Then run this command to install Flask via PyPi:
pip install -r requirements.txt
Next, create a file called main.py and enter the following code in it:
import os
from flask import Flask

app = Flask(__name__)


@app.route("/")
def index():
    return "Hello World!"


if __name__ == '__main__':
    if os.getenv('GAE_ENV', '').startswith('standard'):
        app.run()  # production
    else:
        app.run(port=8080, host="localhost")  # localhost
Now right-click on the main.py file in PyCharm and select "Run". Alternatively, you can run it via the command line: python main.py.
Open your browser and go to http://localhost:8080. You should see Hello World! there.
HTML & CSS
If you'd like your web app to serve HTML files, create a folder called templates and a file called index.html in there (add some HTML code in it).
Then you can edit your index() handler to serve the HTML file instead of the Hello World! string:
from flask import Flask, render_template

app = Flask(__name__)


@app.route("/")
def index():
    return render_template("index.html")
For CSS files, you'll need to create a new folder in your root, called static and place your static files (CSS, JavaScript, images etc.) there.
app.yaml
Google App Engine requires you to have a configuration file called app.yaml for each of your web apps. Create this file in your root and add this code in it:
runtime: python37

handlers:
- url: /static
  static_dir: static
- url: /.*
  script: auto
Note that this file is not necessary for running your Flask app locally. But it is necessary for running the app on Google Cloud (Google App Engine).
At this point, your web app should look something like this: Basic GAE app (GitHub).
Guestbook
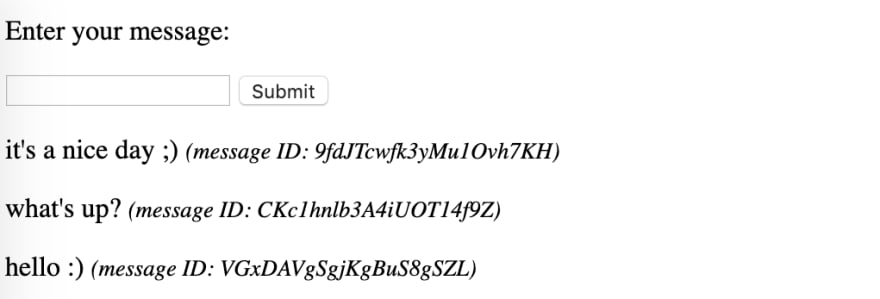
Let's say we want to build a simple guestbook which has the following elements:
- an input box where any website visitor could enter a message
- a list of messages added by the website visitors
The web app should look something like this:
Here's the HTML code for this:
<!DOCTYPE html>
<html lang="en">
    <head>
        <meta charset="UTF-8">
        <title>Guestbook</title>

        <link rel="stylesheet" href="/static/css/style.css">
    </head>

    <body>
        <h1>Simple GAE app with Firestore</h1>

        <p>
            Enter your message:

            <form method="post" action="/">
                <input type="text" name="message">
                <button type="submit">Submit</button>
            </form>
        </p>

        {% if messages %}
            {% for item in messages %}
                <p>{{ item.message }} <small><em>(message ID: {{item.id}})</em></small></p>
            {% endfor %}
        {% endif %}

    </body>
</html>
requirements.txt
This app uses Firestore as a database which requires a couple more PyPi packages to be added in your requirements.txt file and installed in your virtual environment:
Flask
google-cloud-firestore
mock
google-auth
The mock and google-auth libraries help us connect to the Firestore Emulator on localhost.
main.py
Let's start our main.py file by making a connection to the Firestore database:
import os
import mock
from flask import Flask, render_template, request
from google.cloud import firestore
import google.auth.credentials


app = Flask(__name__)

if os.getenv('GAE_ENV', '').startswith('standard'):
    # production
    db = firestore.Client()
else:
    # localhost
    os.environ["FIRESTORE_DATASET"] = "test"
    os.environ["FIRESTORE_EMULATOR_HOST"] = "localhost:8001"
    os.environ["FIRESTORE_EMULATOR_HOST_PATH"] = "localhost:8001/firestore"
    os.environ["FIRESTORE_HOST"] = "http://localhost:8001"
    os.environ["FIRESTORE_PROJECT_ID"] = "test"

    credentials = mock.Mock(spec=google.auth.credentials.Credentials)
    db = firestore.Client(project="test", credentials=credentials)
As you can see, connecting to the Firestore database on production (on Google Cloud) requires only one line of code: db = firestore.Client(). That's because Google Cloud will figure out on its own what your credentials to access the Firestore are.
However, if you want to run your web app locally and connect to the Firestore Emulator, you need a bit more code to set everything up (environment variables and mock credentials).
You can, of course, put this chunk of code in a separate file and make everything a bit prettier (like here), but for this simple example, we'll keep everything in a single Python file.
Now that you have the code for connecting to the Firestore Emulator ready, you can set up the index() handler:
@app.route("/", methods=["GET", "POST"])
def index():
    # get all messages from the Firestore
    messages_ref = db.collection(u'messages')  # a reference to the messages collection
    messages_gen = messages_ref.stream()  # messages generator: holds all message documents (these documents need to be converted to dicts)

    messages = []
    for message in messages_gen:
        message_dict = message.to_dict()  # converting DocumentSnapshot into a dictionary

        message_dict["id"] = message.id  # adding message ID to the dict, because it's not there by default
        messages.append(message_dict)  # appending the message dict to the messages list

    if request.method == "POST":
        # add message to Firestore
        message_ref = messages_ref.document()  # create a message document reference
        # now you can create or update the message document (set: if it exists, update it. If not, create a new one).
        message_ref.set({
            u'message': u'{}'.format(request.form.get("message")),
        })

    return render_template("index.html", messages=messages)

if __name__ == '__main__':
    if os.getenv('GAE_ENV', '').startswith('standard'):
        app.run()  # production
    else:
        app.run(port=8080, host="localhost", debug=True)  # localhost
Running the Firestore Emulator and the app
Before you can try out your Guestbook app, you need to start up the Firestore Emulator.
Open the Terminal and enter this line:
gcloud beta emulators firestore start --project test --host-port "localhost:8001"
Wait until the emulator starts. You can confirm it has successfully started by going to http://localhost:8001/ - if you see Ok, the emulator is on.
Now you can run your web app (like before) and try out your Guestbook app.
See the complete example here.
Conclusion
That's it - you've set up a simple Flask app that runs on localhost and uses the Firestore Emulator. If you'd like to deploy your web app on Google App Engine, follow these steps.
Let me know if you have any questions. :) For more examples, check out this GitHub repository.

Latest comments (0)