AppWrite aptly describes itself as "A self-hosted solution that provides developers with a set of easy-to-use and integrate REST APIs to manage their core backend needs."
Zapier, on other hand is "Zapier is a tool that helps you automate repetitive tasks between two or more apps—no code necessary. When an event happens in one app, Zapier can tell another app to perform (or do) a particular action". If you have used IFTTT or Integromat, then Zapier is kind of similar to them
Zapiers boasts tons of integration (3000+ Apps). With this, Zapier acts as one stop shop for integrating your app with any other from its ever-expanding list of apps. When both of these platforms work together, We are able to seamlessly build a service tailored for our need without investing too much time.
In this Tutorial, we will be exploring on using both of these services and make them work together to automate our life.
Prerequisite:
- AppWrite Installed & Running
- A Zapier Account (Signup at Zapier.com)
One you have created your account on Zapier.com, we need to signup for their dev platform called Zapier Platform from here: Zapier Platform. This allows us to add our own app/services on Zapier. So this is very necessary. Fill in any additional detail as required by Zapier. After which you should be good to go.
Building A Demo
In this tutorial, I will be integrating AppWrite with Google Sheets, where when a new user is Added on Appwrite, it will auto save its Name & Email in a new row on a Spreadsheet defined.
So, Let's start off by creating a new integration by clicking on Start a Zapier Integration. Fill in the details as per your choice and click create. I will be using dummy names for this demo to give an example.
After it is created, you will now be greeted by the dashboard about your newly created integration. Before hooking it up to AppWrite, we need to first Setup Authentication. You can set it up as per your requirements. For this demo I am choosing API for Authentication Method and leaving everything blank for now.
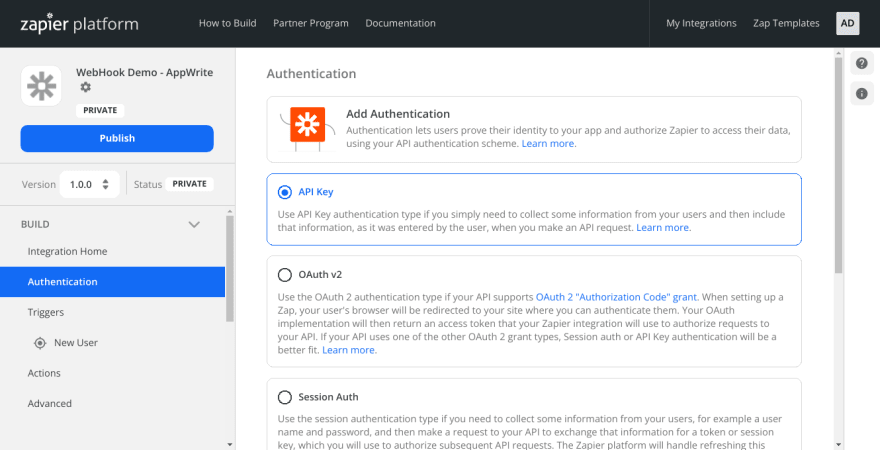
Next we will start creating a trigger. The trigger can be anything like a creation of new_user to addition of file to AppWrite Storage or something else. You can think of anything as your trigger, like user updating his pref, deletion of account etc. We will be using Instant Triggers as this allows Zap to be instantly executed without making Zapier poll for new data in fixed interval.
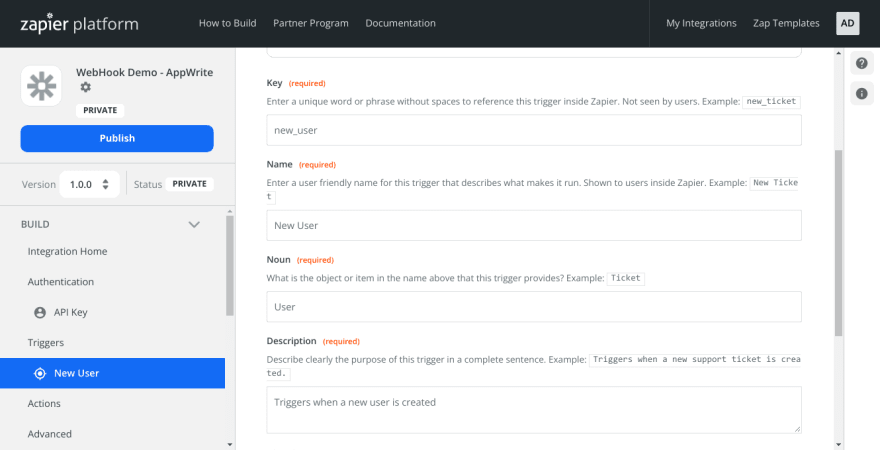
For this example, I am taking the trigger as new_user. Please Fill the details accordingly and click Save and Continue option to move ahead.
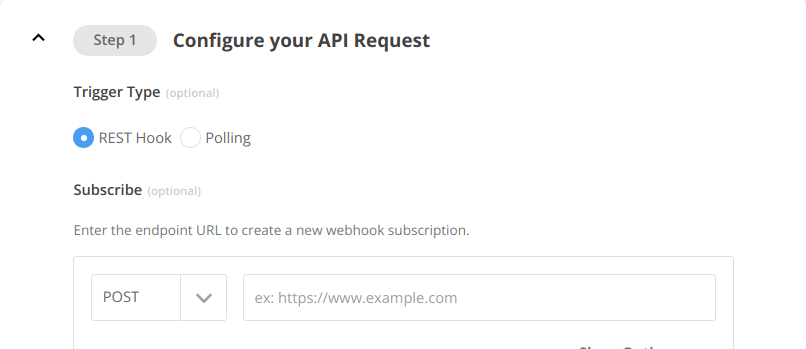
Next head to API configuration and set it and configure it as per your requirement. I have configured it as REST Hook with POST. Save the Trigger again.
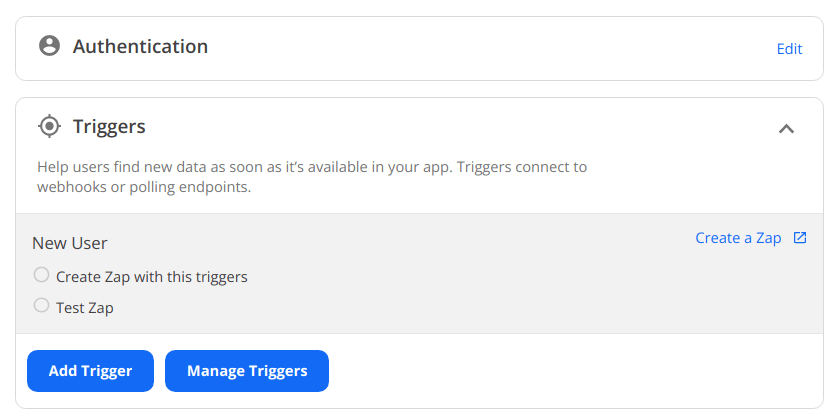
We should now an option to Create a Zap. In case the banner is not visible/missing, click on Integration Home to head back to your Integration Dashboard, then expand Triggers tab and then click Create A Zap button.
Select your App and the the trigger that you just created from the dropdown menu and click continue. You will be provided by your webhook URL Address. (something along hooks.zapier.com/etc)
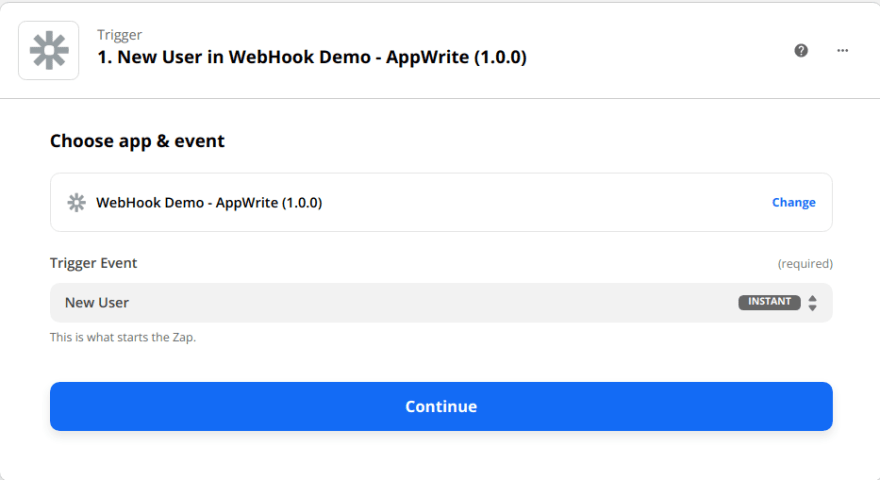
Now, We need to add this webhook to our App on Appwrite. Start AppWrite if not running already. Head to your AppWrite Dashboard, then Click on webhooks and click Add Webhook.
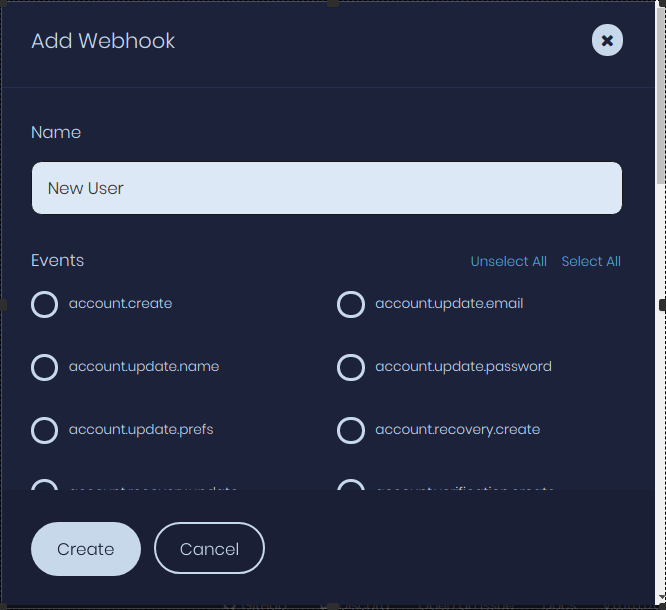
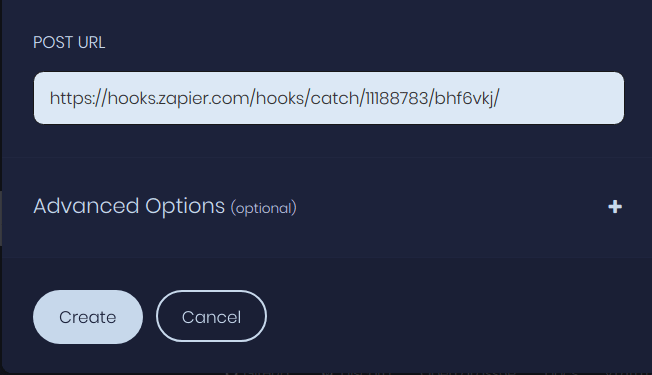
Define the Name and the Event for which the hook will trigger. The event here is the trigger when the Zapier should be Alerted. For our demo, it will be "New User" for name and user.create under Events. Under POST URL, we will be using the URL provided by Zapier. Finally click create the webhook.
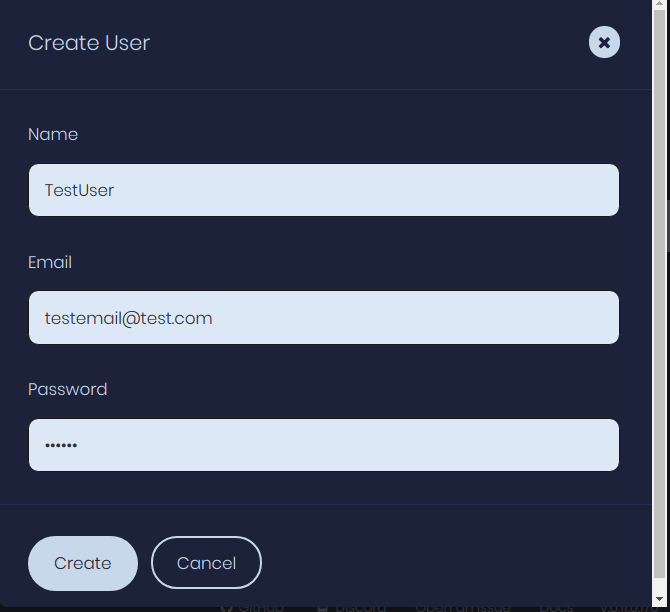
Let's, Head back to Zapier and click continue. It will ask you to test the trigger. (You can skip it if you want but I highly recommend it to test it) To test the webhook for our example App, I will add manually add a testuser on AppWrite Dashboard and check if the Event is Triggered which will result in the Webhook sending a Request to Zapier with the relevant data of event.
Heading back to Zapier again, click on Test Trigger button . If everything was implemented right then our request will show up. For the Demo, here is how the request looks like on Zapier when I added a New user.
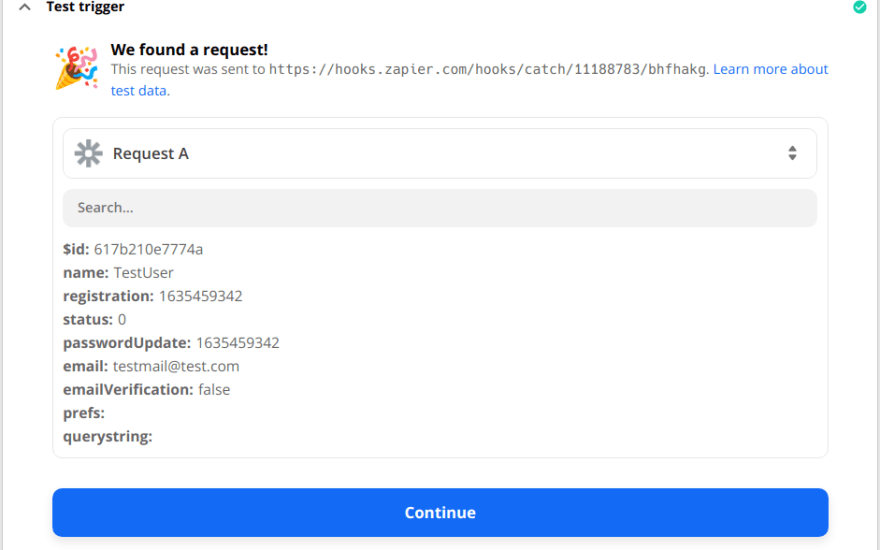
Click continue to finalize the trigger. (You can comeback anytime and change it as per the need)
Now, the main fun part comes here as you can chose any of the app/service (multiple will also work) you want to integrate with and setup it up accordingly. For eg, you can further filter the data of the Request and only make the action event trigger when particular conditions are met. You can just play around for hours and still be amazed on its flexibility with them too see what makes it your best workflow.
For this demo, Since I will be using Google Sheets, I will click on Google Sheets as my Action and the Event as Create Spreadsheet Row(s). By using this option, we can add data to multiple columns on the spreadsheet. Next, Authorize your google account and click continue.
Further, select the drive, then the spreadsheet on which the data is to be written & finally the worksheet. In end, my action looks something like this:
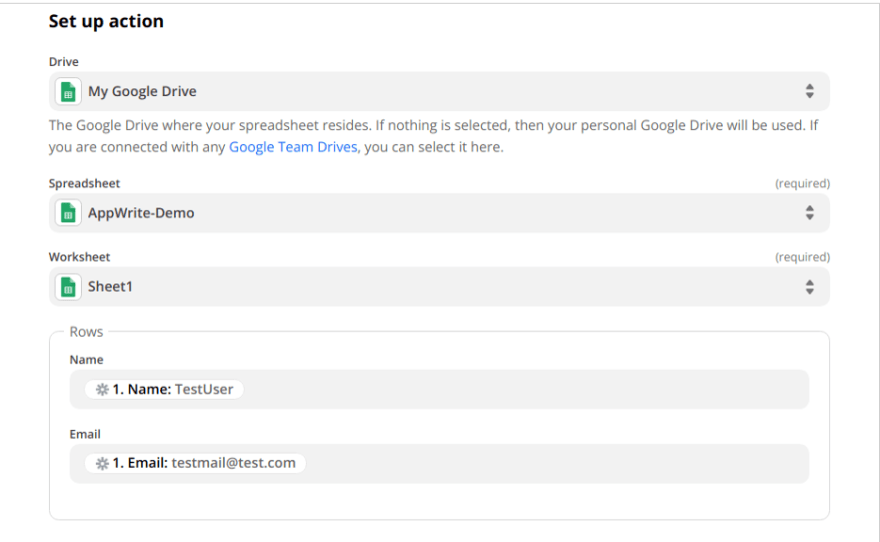
Finally click on Continue button and then click Test & Continue

Checking back and opening up the spreadsheet, we can see the data is written as we required.
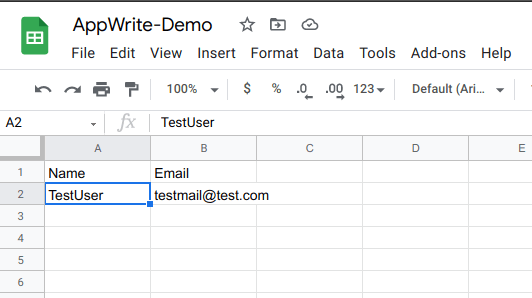
If you satisfied with the result, you can Turn On the Zap and decrease your manual workload or you can continue tweaking around and play with it.
Therefore, in this tutorial we learned on basic integration of Appwrite with Zapier and saw the vast capabilities we can have by having unlimited integration b/w your app and 3rd part services without coding each of them and having to keep up with their API Changes.
If you have any Queries, please feel to reach me.




Top comments (0)