At Netlify, we pride ourselves with being a remote first team. Despite being headquartered in San Francisco, many folks on the team live in different parts of the world, across a wide array of timezones. Meetings as a result happen online, via Google Meet, Zoom or Slack Calls depending on the type of meeting and the number of attendees involved. While having many platforms for meetings provides us with a great amount of flexibility over how to meet, it also introduces an additional cognitive burden over where a specific meeting is going to happen.
The truth is, calendars aren’t effective ways of keeping track of where a meeting happens, especially when they are online. Sure, they give you a great overview of all events in a day, week, month or year and provide much needed reminders when meetings happen. But because calendars serve as a general record of time, they aren’t optimized to reliably tell you where to go for a meeting. This is especially the case for online meetings. If you use Google Calendars, you may have noticed that calendar events don’t always link to an online meeting properly. Unless you use Google’s default conferencing software Google Meet, all other conferencing solutions are treated as external links. This means waiting on a redirect or clicking multiple times to access a meeting (annoying, right?).

meet.google.com is a tool created for Google Meet that directly addresses this problem. It provides a single place to view meetings as a list of events, assuming that they’re happening on Google Meet. Considering that most meetings happen over a variety of platforms like Slack Calls, Zoom and Blue Jeans to name a few, meet.google.com is limited in its use. To fix this, let’s build a clone of meet.google.com that displays all meetings regardless of platform.
The Application
Since our application pulls events directly from Google Calendar, we will be liaising with the Google Calendar API with the help of a couple of Netlify Functions, an easy and fast way to work with AWS Lambda functions without the fuss of dealing with API gateway. Because accessing the Google Calendar API requires accessing sensitive, user specific information, we must first ensure that requests are authenticated and authorized by a given user. Let’s dive into how we can make secure requests to the Google API.
Authentication and Authorization
Authentication is the process of verifying a user’s identity, while authorization is the process of defining what a specific user or application has access to. Granting access to a restricted resource requires both authentication and authorization. In short, you can’t view a protected resource unless your identity has been verified (authenticated), and you’ve been granted access to that resource (authorized).
When authenticating requests to modern APIs like the Google API, OAuth 2.0 is used. OAuth 2 is the standard protocol for token-based authentication and authorization on the web. The general flow of an OAuth flow is obtaining an access token, and using that access token to make requests to an API. In the context of Google API’s OAuth flow, an access token is generated via a Google consent screen. This token is then used to make any subsequent API requests to the authorized Google API endpoint. Here’s a breakdown of the steps in Google’s OAuth flow.
- Generate a unique URL to a Google consent screen and direct users there
- Redirect a user back to your application with a short lived code, if they grant consent
- Generate an access token using the short lived code
- Make a request to the Google API by appending the access token as an Authorization Bearer header
Now that we have a sense of the overarching auth flow when working with Google’s APIs, let’s put these steps into action.
Step 1: Generate a consent screen
To start, let’s generate our consent screen to send users to when first accessing our application. For this, we will create our first Netlify function.
To create a working function in Netlify, let's create a functions folder in our root directory and add a file to it called google-auth.js This file is where our OAuth code will live. The structure of a Netlify function is not much different from an AWS lambda function written in Node. You start by defining a handler, which the function uses to process events. When this is invoked, the runtime runs the handler and either returns or exits depending on whether or not the function was successful. The below code snippet illustrates a basic function that returns a message body of hello world.
exports.handler = async (event, context) => {
  return {
    statusCode: 200,
    headers: {
      "Access-Control-Allow-Origin": "*",
      "Access-Control-Allow-Credentials": true,
      "Cache-Control": "no-cache",
       "Content-Type": "text/html"
    },
    body: JSON.stringify({ msg: "hello, world" })
  };
}
In order to generate our consent screen URL, let’s modify our function to generate an OAuth instance. We’ll focus on the logic for generating our URL first before adding this to our function to reduce added complexity.
For our generate URL function, we will pull directly from the Nodejs quickstart docs for the Google Calendar API, specifically the getAccessToken function. In the snippet below we are using the googleapis node module to create an OAuth instance passing in our client id, secret and desired redirect uri. The redirect uri is the link we want to redirect users to once they grant our application access to their calendar data.
const { google } = require("googleapis");
/**
* Create an OAuth2 client with the given credentials, and then execute
* the given callback function.
* @param {Object} credentials The authorization client credentials.
* @param {function} callback The callback to call with the authorized
* client.
*/
function authorize() {
  const SCOPES = ["https://www.googleapis.com/auth/calendar.readonly"];
  oAuth2Client = new google.auth.OAuth2(
    `${CLIENT_ID_HERE}`,
    `${CLIENT_SECRET_HERE}`,
    `${REDIRECT_URIS_HERE}`
  );
  //generate
  const authUrl = oAuth2Client.generateAuthUrl({
    access_type: "offline",
    scope: SCOPES
  });

  return authUrl;
}
Worth noting in the above snippet is the SCOPES variable defined at the top of the function. This variable defines the scope of permissions or the level of authorization this application will have access to. Specifying the scope of our application is important because it limits the amount of information our application will have access to and is key to maintaining a user’s trust that an application will not be able to extend their scope of access.
Now that we have our main authorize function, let’s convert it to a Netlify function. We’ll start by instantiating our authorize function from before and set the return value to a variable called googleConsentURL. With this variable return value, we can then return it as JSON in the body of our function like so:
const { google } = require("googleapis");

exports.handler = async () => {
  const googleConsentURL = await authorize();
  return {
    statusCode: 200,
    headers: {
      "Access-Control-Allow-Origin": "*",
      "Access-Control-Allow-Credentials": true,
      "Cache-Control": "no-cache",
      "Content-Type": "text/html"
    },
    body: JSON.stringify({ googleConsentURL })
  };

  function authorize() {
    ... // code from earlier
  }
};
While our code thus far works, we have not accounted for a scenario when our authorize code fails. If our function were to fail in the current set up, it would stall and eventually timeout instead of exiting with an error as we might expect it to. To account for a failure condition, let’s wrap our function invocation in a try…catch block. This way, when there is an error in our function invocation, we can return a proper status code with a valid error message.
const { google } = require("googleapis");
exports.handler = async () => {
  let googleConsentURL;
  try {
    googleURL = await authorize();
  } catch (e) {
    return {
      statusCode: 500,
      headers: {
        "Access-Control-Allow-Origin": "*",
        "Access-Control-Allow-Credentials": true
      },
      body: JSON.stringify({
        error: e.message
      })
    };
  }
  return {
    statusCode: 200,
    headers: {
      "Access-Control-Allow-Origin": "*",
      "Access-Control-Allow-Credentials": true,
      "Cache-Control": "no-cache",
      "Content-Type": "text/html"
    },
    body: JSON.stringify({ googleConsentURL })
  };

  function authorize() {
    ... // code from earlier
  }
};
Now that we have our OAuth code in a function, we can easily invoke it and check for the return value using axios. Note that all Netlify functions are accessible on the same domain with the suffix, /.netlify/functions/FUNCTION-NAME, so we can simply call our function like so:
axios.get("/.netlify/functions/google-auth")
  .then(res => {
    console.log(res.data.googleConsentURL);
  })
  .catch(err => console.log(err))
Step 2: Redirect with code to generate access token
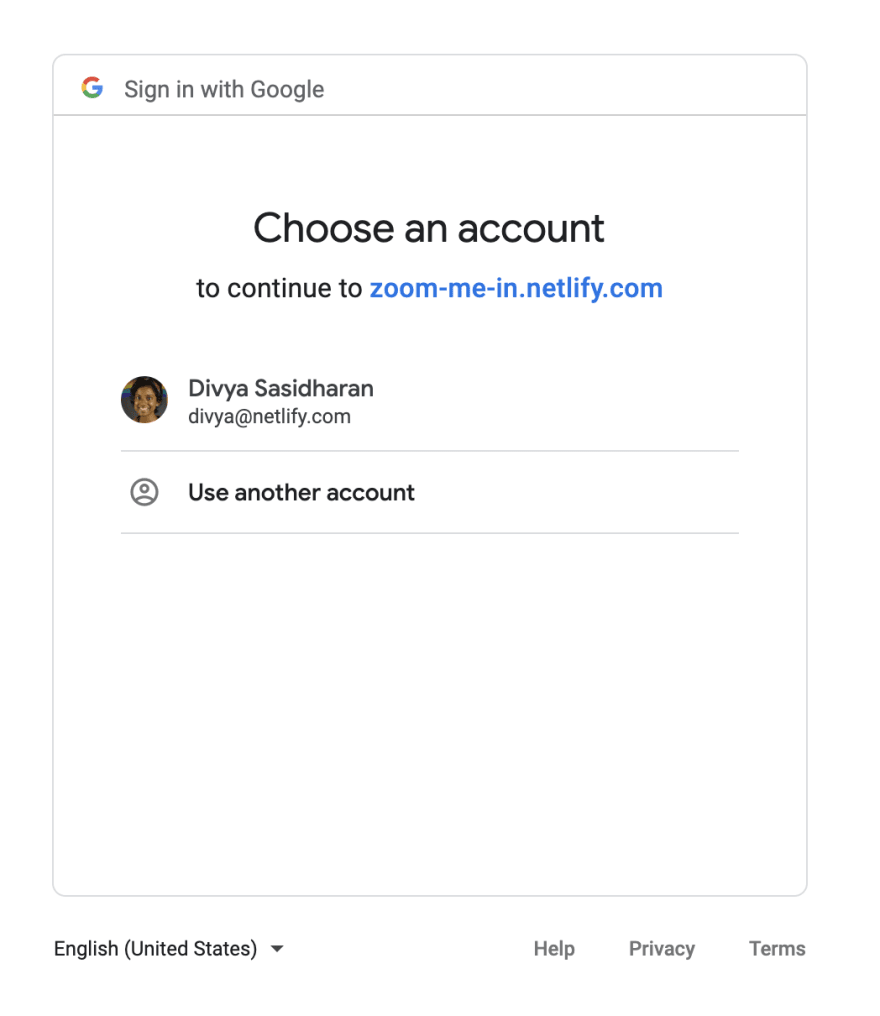
So far, we’ve generated a URL to a Google consent screen from which users will authorize our application access to their Google Calendar data. If we were to navigate to that link we’ll be taken through a typical google authentication workflow complete with 2FA (assuming you have 2FA set up) like the image below. On successful authentication, Google will redirect users back to the redirectURL specified when we first created the initial OAuth instance, remember that?.
For the redirect post Google sign in flow to work, we’ll have to make sure that the redirectURL is set in the Google console under Authorized redirect URIs (see image below). This redirect URL must match the redirectURI set in the initial OAuth instance. Once we have this set up, Google’s consent page will properly redirect a user with the code to generate an access token appended as a query string parameter. Assuming our redirect URI is https://zoom-me-in.netlify.com/.netlify/functions/fetch-calendar, our consent screen will return the following URL: https://zoom-me-in.netlify.com/.netlify/functions/fetch-calendar?code=CODE_TO_GENERATE_TOKEN_WILL_APPEND_HERE

Step 3: Get Access Token
Now that we have the proper code to generate an access token, we can move on to actually generating the access token we’ll need to make requests to Google Calendar API. To generate our token, we will once again lean on a Netlify function. In the previous step, you may have noticed that our redirect URL that we want Google to send users to post authentication is a function end point (/.netlify/functions/fetch-calendar). This is intentional since we want to streamline the process of authenticating a request to generating an access token without taking users through an extra step. The workflow we’ll be trying to achieve in this step is to grab the code, generate an access token and redirect a user back to the main application with the access token.
To generate our access token, we’ll start by grabbing the code appended to our URL. In our function handler code, we can access our query parameter easily via event.queryStringParameters. Since Google appends the code under the label, code, we can simply pull this code from the query string via its label, code i.e. params.code. With this code, we can now create an access token by calling oAuth2Client.getToken(code).
exports.handler = async event => {
  let params = event.queryStringParameters;
  const code = params.code;
  const token = await getAccessToken(code);

  async function getAccessToken(code) {
    const { CLIENT_SECRET, CLIENT_ID, REDIRECT_URIS } = process.env;

    let oAuth2Client = new google.auth.OAuth2(
      `${CLIENT_ID}`,
      `${CLIENT_SECRET}`,
      `${REDIRECT_URIS}`
    );

    const accessToken = await oAuth2Client.getToken(code);
    return accessToken;
  }
  return {
    statusCode: 200,
    headers: {
      "Access-Control-Allow-Origin": "*",
      "Access-Control-Allow-Credentials": true
    },
    body: JSON.stringify({ event: token.tokens.access_token })
  };
}
Notice that we’re re-instantiating an OAuth instance here similar to how we did in our previous function code? Since functions are by definition stateless, there is no way to share a variable between functions. Though we could save our client to an external data store of some form, the OAuth client generated is identical between the two functions and the code duplication here is so minimal that we can afford to duplicate this snippet.
At the moment, we’re returning a 200 status code for a successful access token generated. Though this would work in many other function situations, it isn’t ideal for our use case. Since our function was invoked via a redirect from Google and did not originate from our main application, there is no way to capture the return value from this function outside of this function. One way to make sure that we’re capturing the return value of this function while also maintaining a seamless authentication flow is to perform a redirect.
Let’s convert our current callback to a 302 redirect so a user is brought back to the main application on successful access token generation.
To redirect a user back to the main application, we’ll need the original URL a user came from, which also known as the referer URL. Thankfully, because we’re using a serverless function we can easily access this referer URL via the referer attribute in the event header.
Another thing to note when working with redirects is that generally redirects don’t support sending message bodies. This means that we can’t just send our access token in the event body and expect our main application to receive the token. To ensure that the token gets sent reliably, we’ll instead append our access token as a query string parameter.
exports.handler = async event => {
  let referer = event.headers.referer;
  ...
  return {
    statusCode: 302,
    headers: {
      "Access-Control-Allow-Origin": "*",
      "Access-Control-Allow-Credentials": true,
      "Cache-Control": "no-cache",
      Location: `${referer}?token=${token.tokens.access_token}`
    },
    body: JSON.stringify({})
  };
}
As a final step, let’s refactor our function a little to account for error states like we did in our earlier authentication function. We’ll wrap our invocation to the getAccessToken function in a try…catch block with the relevant status codes for each scenario like so:
exports.handler = async event => {
  let params = event.queryStringParameters;
  const code = params.code;
  let token;
  try {
    token = await getAccessToken(code);
  } catch (e) {
    return {
      statusCode: 500,
      headers: {
        "Access-Control-Allow-Origin": "*",
        "Access-Control-Allow-Credentials": true
      },
      body: JSON.stringify({
        error: "I AM AN ERROR MESSAGE"
      })
    };
  }

  async function getAccessToken(code) {
    ...
  }

  return {
    statusCode: 302,
    headers: {
      "Access-Control-Allow-Origin": "*",
      "Access-Control-Allow-Credentials": true,
      "Cache-Control": "no-cache",
      Location: `${referer}?token=${token.tokens.access_token}`
    },
    body: JSON.stringify({})
  };
}
Step 4: Fetch Events
Now that we have the proper access token, let’s finally make that request to the Google Calendar API. The end point for accessing our API looks something like this: https://www.googleapis.com/calendar/v3/calendars/primary/events?singleEvents=true&timeMax=${end.toISOString()}&timeMin=${start.toISOString()}. Because our request has to be authenticated, we’ll have to send over our access token in the Authorization: Bearer header.
We’ll use the axios library to make a GET request to the Calendar API and pass along the token as an Authorization header like so:
function getCalendarEvents() {
  var start = new Date();
  start.setHours(0, 0, 0, 0);
  var end = new Date();
  end.setHours(23, 59, 59, 999);

  axios
    .get(
      `https://www.googleapis.com/calendar/v3/calendars/primary/events?singleEvents=true&timeMax=${end.toISOString()}&timeMin=${start.toISOString()}&orderBy=startTime`, {
      headers: {
        Authorization: `Bearer ${this.token}`
      }
    })
    .then(res => {
      return res.data.items;
    })
    .catch(err => console.log(err))
}
Notice that the Google Calendar API endpoint takes in a timeMax and a timeMin as query string parameters. These parameters are handy to define the time frame of the events you’re fetching. Setting this allows you to more predictably fetch events from a calendar. In the code snippet above, we’re creating a 24 hour time frame for the current day, so we can accurately display events happening within the current day.
Improving the UX
Though everything works in theory, let’s smooth things out just a little to improve the user experience of our application. From the last function we created, we generated an access token and redirected back to the root of our application with that token appended as a query string parameter. Ideally, we would want our application to automagically fetch events if a token is present.
To get this working, let’s make it such that every time our main application mounts, it checks for a query string parameter called token. If the token is present, it grabs the token and makes a request, and if not, it generates a URL to the consent screen where users can run through the authentication flow. We’ll use Vue for our example here, but feel free to use your favorite frontend framework of your choice here.
<script>
  name: "zoomify",
  data() {
    return {
      url: null,
      token: null,
      events: []
    }
  },
  mounted() {
    if (window.location.search.indexOf("token") > -1) {
      this.token = this.geturlparams("token");
      this.getCalendarEvents();
    } else {
      axios.get("/.netlify/functions/google-auth").then(res => {
        this.url = res.data.redirectURL;
      });
    }
  },
  methods: {
    geturlparams(name) {
      // courtesy of https://stackoverflow.com/a/5158301/3216524 //
      var match = RegExp("[?&]" + name + "=([^&]*)").exec(
        window.location.search
      );
      return match && decodeURIComponent(match[1].replace(/\+/g, " "));
    },
    getCalendarEvents() {
      var start = new Date();
      start.setHours(0, 0, 0, 0);
      var end = new Date();
      end.setHours(23, 59, 59, 999);

      axios
        .get(
        `https://www.googleapis.com/calendar/v3/calendars/primary/events?singleEvents=true&timeMax=${end.toISOString()}&timeMin=${start.toISOString()}&orderBy=startTime`, {
          headers: {
            Authorization: `Bearer ${this.token}`
          }
        })
        .then(res => {
          return res.data.items;
        })
        .catch(err => console.log(err))
    }
}
</script>
Wrap up
Assuming everything works, you should see a screen like the one below displaying all events for the day. The demo below of course adds a couple of extra details for flair. If you’re interested in seeing those modifications alongside the code we covered here, feel free to check out the repo on GitHub here. Tally Ho!


Oldest comments (1)
Divya, thanks for sharing -- great article.
Is this an app that allow a user to access his own calendar data in this app or is this an app that a user gives his calendar data to the app?
(The former scenario is more like a typical application and the latter scenario is more like the calendly.com use case) Which scenario did you describe in your article?