
For many years, web projects have used Content Management Systems (CMS) to create and manage content, store it in a database, and display it using server-side rendered programming languages. WordPress, Drupal, Joomla are well-known applications used for this purpose.
One of the issues the traditional CMSes have is that the backend is coupled to the presentation layer. So, developers are forced to use a certain programming language and framework to display the information. This makes it difficult to reuse the same content on other platforms, like mobile applications, and here is where headless CMSes can provide many benefits.
A Headless CMS is a Content Management System not tied to a presentation layer. It's built as a content repository that exposes information through an API, which can be accessed from different devices and platforms. A headless CMS is designed to store and expose organized, structured content without concern over where and how it's going to be presented to users.
This decoupling of presentation and storage offers several advantages:
- Flexibility: Developers can present content on different devices and platforms using the same single source of truth.
- Scalability: Headless CMSes allow your content library to grow without affecting the frontend of your app and vice-versa.
- Security: You can expose only the data you want on the frontend and have a completely separate login for web administrators who edit the content.
- Speed: As data is consumed through an API, you can dynamically display data on pages without re-rendering the content.
In this article, I will show you how to create a Pet Adoption CRUD application. You will use a headless CMS, Strapi, for the backend, and React with Context Api. The application will display a list of pets with details related to each, and you will be able to add, edit or delete pets from the list.
Prerequisites
Before you can follow content properly, you need to have a basic understanding of the following.
- Basic knowledge of JavaScript ES6 syntax and features
- Basic knowledge of ReactJS terminology: JSX, State, Asynchronous JavaScript, etc.
- Basic understanding of Strapi - get started here.
- Basic understanding of Restful APIs.
Application Demo
CRUD stands for Create, Read, Update, and Delete. CRUD applications are typically composed of pages or endpoints. Most applications deployed to the internet are, at least, partially CRUD applications, and many are exclusively CRUD apps.
The image below resembles an application you will build in this article:

It has one Pet entity listed, a “Bird”, with details about that bird. You will be able to execute CRUD operations on that entity, such as:
-
Create:
- To perform a “Create” operation, i.e. to add a pet to the listing, you click on “Add Pet” button.
- Once you click on Add Pet, you’ll be redirected to a page similar to that below:

- Now, from the Add Pet page, you will have to fill in the pet details in each respective field.
- After that, you simply click ADD PET ENTRY button and that’s it! You have successfully created a pet entry.
-
Read:
- To “Read” all pet entries i.e to list all pets from the database. To execute this, in a nutshell, you need to loop through all the pet data using JavaScript.
- For example, the display shown under “Create” is just a ****loop in action displaying pet data except in a nice looking way.
-
Update:
- To Update a pet entry, i.e. to edit an already created pet entry, you have to click an Edit button.
- From the pet list, you will see a green pencil icon, see the circled icon below;

- The pencil icon is nothing more but an icon button, in this context, an “edit pet icon button”.
- Now, once you click that icon button you will be redirected to an Edit Page where you will re-enter pet details with alterations.
-
Delete:
- To delete a pet entry, you click on the bin icon located at the right side of the pencil icon.
- That bin icon is the icon button for “delete pet entry”, intuitive huh?
Headover to the next phase to first create a Strapi backend for your application.
Building the Backend Data Structure
To create, manage, and store the data related to the pets, we will use Strapi, an open-source headless CMS built on Node.js.
Strapi allows you to create content types for the entities in your app and a dashboard that can be configured depending on your needs. It exposes entities via its Content API, which you'll use to populate the frontend.
If you want to see the generated code for the Strapi backend, you can download it from this GitHub repository.
To start creating the backend of your application, install Strapi and create a new project:
npx create-strapi-app@latest pet-adoption-backend --quickstart
This will install Strapi, download all the dependencies and create an initial project called pet-adoption-backend.
The --quickstart flag is appended to instruct Strapi to use SQLite for the database. If you don't use this flag, you should install a local database to link to your Strapi project. You can take a look at Strapi's installation documentation for more details and different installation options.
After all the files are downloaded and installed and the project is created, a registration page will be opened at the URL http://localhost:1337/admin/auth/register-admin.
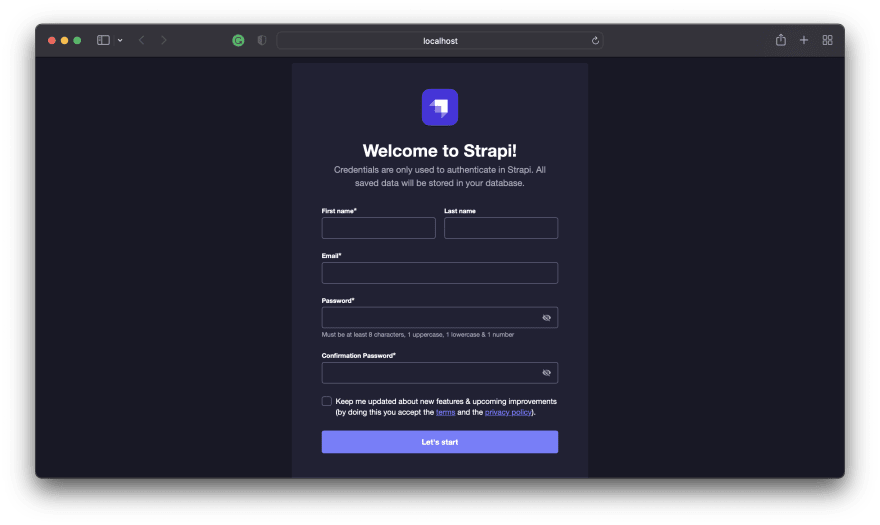
Complete the fields on the page to create an Administrator user.
After this, you will be redirected to your dashboard. From this page, you can manage all the data and configuration of your application.

You will see that there is already a Users collection type. To create a new collection type, go to the Content-Type Builder link on the left menu and click + Create new collection type. Name it pet.

After that, add the fields to the content type, and define the name and the type for each one. For this pet adoption application, include the following fields:
-
name(Text - Short Text) -
animal(Enumeration: Cat - Dog - Bird) -
breed(Text - Short Text) -
location(Text - Short Text) -
age(Number - Integer) -
sex(Enumeration: Male-Female)

For each field, you can define different parameters by clicking Advanced Settings. Remember to click Save after defining each entity.
Even though we will create a frontend for our app, you can also add new entries here in your Strapi Dashboard. On the left menu, go to the Pets collection type, and click Create new entry.

New entries are saved as "drafts" by default, so to see the pet you just added, you need to publish it.
Using the Strapi REST API
Strapi gives you a complete REST API out of the box. If you want to make the pet list public for viewing (not recommended for creating, editing, or updating), go to Settings, click Roles, and edit Public. Enable find and findone for the Public role.

Now you can call the [http://localhost:1337/pets](http://localhost:1337/pets) REST endpoint from your application to list all pets, or you can call http://localhost:1337/pets/[petID] to get a specific pet's details.

Using the Strapi GraphQL Plugin
If instead of using the REST API, you want to use a GraphQL endpoint, you can add one. On the left menu, go to Marketplace. A list of plugins will be displayed. Click Download for the GraphQL plugin.

Once the plugin is installed, you can go to http://localhost:1337/graphql to view and test the endpoint.
Building the Frontend
For the Pet List, Add Pet, Update Pet, and Delete Pet features from the application, you will use React with a Context API. A Context API is an easy to integrate state management solution, in-built to React. You do not need any third party tools using the Context API.
As my primary focus is to demonstrate creating a CRUD application using a headless CMS, I won't show you all the styling in this tutorial, but to get the code, you can fork this GitHub repository.
In addition to the Context API, you will also use an HTTP client library, Axios. This library use is to fetch data from the backend with the help of a readily available Strapi REST API.
First, create a new React application:
npx create-react-app pet-adoption
Once you've created your React app, install the required npm packages:
npm install @mui/material @emotion/react @emotion/styled @mui/icons-material axios
-
axiosconnects to the Strapi REST API. -
@mui/materiala React frontend UI library
Alright then, now that you have the above packages, move on to the next step to create an Axios base instance.
Setting up Axios Base Instance
There are many ways to set up Axios in a React application. In this tutorial, we are going to use the “Base Instance” approach.
Inside the src folder, create a separate helper http.js file, with code that will be used to interface with the Strapi REST API.
To set up an instance of Axios (Base Instance), you have to define two things:
- a default
URL(required) - in this context,http://localhost:1337/. - a request header - this is optional, since in this tutorial you do not have any authorization to do.
    import axios from 'axios';

    export default axios.create({
     baseURL: "http://localhost:1337/",
     headers: {
       "Content-type": "application/json",
     },
    });
Leave the instance file for now. You will import it later in our Pet Context for making HTTP requests.
Now, you need to create a store for all the data and functions for your application. To do that, create a file and name it PetContext.js in the directory: src/contexts/PetContext.js.
Since this file is going to make use of the Context API, the steps below will show you how to make use of the Context API to create a Pet Context.
Creating a Pet Context
There are three steps to create and implement a Context API in React:
Step 1: Create the Context
In this step, you are going to create a Context, PetContext.
Typically, in a React app you share data from one component from one component to another via prop drilling. Prop drilling, is the passing of data from one parent component to a child component via props. This is, without a doubt, limiting since you cannot share data to a component outside the parent-child branch.
Now, with the help of the Context API, you can create a Context in your App. This Context will help you share your in-app data globally irregardless of the tree structure in your React app.
In your file, PetContext.js, import createContext from 'react'.
Now, create a Context like in the code below:
    import React, { createContext } from 'react';

    // create Pet Context
    const PetContext = createContext();
Great!
Now, move on to the next step and create a provider for our newly created Pet Context.
Step 2: A Context Provider for the Pet Context
According to React, each Context you create must have a Provider. This provider is the one which takes values from your Context, and pass them to each component connected to your provider.
Create a Context Provider, PetProvider, and pass it an empty object (empty for now at-least) value as shown below:
    import React, { createContext } from 'react';

    // create Pet Context
    const PetContext = createContext({children});
    // create Pet Provider
    export const PetProvider = () => {
      const value = {};
      return(
        <PetContext.Provider value={value}>
          {children}
        </PetContext.Provider>
      )
    };
Lastly, you need consume any data you will pass down via the the provider to components connected to it. Headover to the next step to enable that.
Step 3: Connecting the Pet Context to Your Root App Component
Inorder to receive and use data from your Pet Context, you need to wrap or connect the PetProvider to a React root component, <App/>. This allows all the components in your app to have access to all the data they need from the Pet Context.
Navigate to your index.js file. Import PetProvider from PetContext.js and wrap it around the <App/> component:
    import React from 'react';
    import ReactDOM from 'react-dom/client';
    import './index.css';
    import App from './App';

    // contexts
    import { PetProvider } from './contexts/PetContext';

    const root = ReactDOM.createRoot(document.getElementById('root'));
    root.render(
      <React.StrictMode>
        <PetProvider>
          <App />
        </PetProvider>
      </React.StrictMode>
    );
Congrats! You have successfully created a Pet Context for your application.
All you have to do now is to add data to your Pet Context. In your PetContext.js file paste the following code:
    import React, { createContext, useContext, useEffect, useState } from 'react';
    import http from '../http';
    const PetContext = createContext();

    export const usePetContext = () => {
        return useContext(PetContext);
    };

    export const PetProvider = ({children}) => {
        const [pets, setPets] = useState("");
        const [nav_value, set_nav_value] = useState("PetList");
        const [petId, setPetId] = useState("");

        // add new pet
        const createNewPet = async (data) => {
            await http.post("/api/pets", data);
        };
        // update a pet entry
        const updatePet = async (petId, data) => {
            await http.put(`/api/pets/${petId}`, data);
        };
        // delete a pet entry
        const deletePet = async (petId) => {
            await http.delete(`/api/pets/${petId}`);
        };
        // change navigation value
        const changeNavValue = (value) => {
            set_nav_value(value);
        };
        // get pet id value
        const getPetId = (id) => {
            setPetId(id);
        };

        useEffect(()=>{
            const readAllPets = async () => {
                const response = await http.get("/api/pets");
                const responseArr = Object.values(response.data.data);
                setPets(responseArr);
            };
            return readAllPets;
        }, []);

        const value = {
            createNewPet,
            pets,
            updatePet,
            deletePet,
            changeNavValue,
            nav_value,
            getPetId,
            petId
        };

        // context provider
        return(
            <PetContext.Provider value={value}>
                {children}
            </PetContext.Provider>
        )
    };
Done?
Awesome, now for the final part create the following components in src/components/:
-
BottomNav.js- for in-app navigation. -
CreatePetEntry.js- a page with a form to add a new pet. -
EditPetEntry.js- a page for editing an already existing pet entry. -
PetList.js- page with a list of all pet data. -
PetListItem.js- a template component for displaying a single pet entry item. -
Interface.js- a component for rendering all the components.
Create a component for navigating to different parts of the app and name it BottomNav.js
Code for BottomNav.js component:
    import * as React from 'react';

    // core components
    import BottomNavigation from '@mui/material/BottomNavigation';
    import BottomNavigationAction from '@mui/material/BottomNavigationAction';

    // icons
    import {
        PetsOutlined,
        AddCircleOutline,
    } from '@mui/icons-material';

    // contexts
    import { usePetContext } from '../contexts/PetContext';

    export default function LabelBottomNavigation() {
        const { nav_value, changeNavValue } = usePetContext();
        const handleChange = (event, newValue) => {
            changeNavValue(newValue);
        };
        return (
            <BottomNavigation showLabels value={nav_value} onChange={handleChange}>
                <BottomNavigationAction
                    label="Pets"
                    value="PetList"
                    icon={<PetsOutlined />}
                />
                <BottomNavigationAction
                    label="Add Pet"
                    value="AddPet"
                    icon={<AddCircleOutline />}
                />
            </BottomNavigation>
        );
    };
Great!
Now, create PetListItem.js:
    import React, { useState } from 'react';

    // mui components
    import List from '@mui/material/List';
    import ListItemButton from '@mui/material/ListItemButton';
    import ListItemIcon from '@mui/material/ListItemIcon';
    import ListItemText from '@mui/material/ListItemText';
    import Collapse from '@mui/material/Collapse';

    // mui icons
    import { IconButton, ListItem } from '@mui/material';
    import {
        DeleteOutline,
        Edit,
        ExpandMore,
        ExpandLess,
        LabelImportantOutlined,
    } from '@mui/icons-material';

    // nav
    import { usePetContext } from '../contexts/PetContext';
    export default function PetListItem({ petType, id, petFieldData}) {
        const [open, setOpen] = useState(true);
        const { deletePet, changeNavValue, getPetId } = usePetContext();
        const handleClick = () => {
            setOpen(!open);
        };
        const handleEditButton = () => {
            getPetId(id);
            changeNavValue("EditPet");
        };
        return (
            <List
                sx={{ width: '100%', bgcolor: 'background.paper' }}
            >
            <ListItem
                secondaryAction={
                    <>
                        <IconButton onClick={handleEditButton} edge="end" aria-label="edit">
                            <Edit sx={{ color: 'green' }}/>
                        </IconButton>
                        <IconButton onClick={()=>deletePet(id)} edge="end" aria-label="delete" sx={{ padding: 2}}>
                            <DeleteOutline color="secondary"/>
                        </IconButton>
                    </>
                }
            >
                <ListItemButton disableRipple onClick={handleClick}>
                        <ListItemIcon>
                            <LabelImportantOutlined />
                        </ListItemIcon>
                        <ListItemText
                            primary={petType}
                            secondary="Name, Breed, Location, Age, Sex"
                        />
                        {open ? <ExpandLess /> : <ExpandMore />}
                </ListItemButton>
            </ListItem>
                <Collapse in={open} timeout="auto" unmountOnExit>
                    <List component="div" disablePadding>
                        {
                            petFieldData.map((item, i)=>(
                                <ListItemButton key={i} disableRipple sx={{ pl: 9 }}>
                                    <ListItemIcon>
                                        {item.icon}
                                    </ListItemIcon>
                                    <ListItemText primary={item.attrib} />
                                </ListItemButton>
                            ))
                        }
                    </List>
                </Collapse>
            </List>
        );
    };
Create PetList.js:
    import * as React from 'react';

    // mui components
    import Box from '@mui/material/Box';
    import CssBaseline from '@mui/material/CssBaseline';
    import List from '@mui/material/List';
    import Paper from '@mui/material/Paper';

    // custom components
    import BottomNav from './BottomNav';
    import PetListItem from './PetListItem';

    // data
    import { usePetContext } from '../contexts/PetContext';

    // icons
    import {
        PersonOutline,
        PetsOutlined,
        LocationOn,
        PunchClockOutlined,
        TransgenderOutlined,
    } from '@mui/icons-material';

    export default function PetList() {
        const { pets } = usePetContext();
        return (
            <Box sx={{ pb: 7 }}>
                <CssBaseline />
                <List>
                    {
                        pets && pets.map(
                            ({id, attributes: {name, animal, breed, location, age, sex}}, i)=>(
                            <PetListItem
                                key={i}
                                id={id}
                                petType={animal}
                                petFieldData={[
                                    {icon: <PersonOutline/>, attrib: name},
                                    {icon: <PetsOutlined/>, attrib: breed},
                                    {icon: <LocationOn/>, attrib: location},
                                    {icon: <PunchClockOutlined/>, attrib: age},
                                    {icon: <TransgenderOutlined/>, attrib: sex}
                                ]}
                            />
                        ))
                    }
                </List>
                <Paper sx={{ position: 'fixed', bottom: 0, left: 0, right: 0 }} elevation={3}>
                    <BottomNav/>
                </Paper>
            </Box>
        );
    };
Create EditPetEntry.js:
    import React, { useState, useEffect } from 'react';

    // mui components
    import {
        Typography,
        TextField,
        Box,
        Button,
        Paper
    } from '@mui/material';

    // mui icons
    import { Edit } from '@mui/icons-material';

    // custom components
    import BottomNav from './BottomNav';

    //axios
    import { usePetContext } from '../contexts/PetContext';
    export default function EditPetEntry() {
        // input data
        const [name, setName] = useState("");
        const [animal, setAnimal] = useState("");
        const [breed, setBreed] = useState("");
        const [age, setAge] = useState("");
        const [location, setLocation] = useState("");
        const [sex, setSex] = useState("");
        // edit req
        const { updatePet, petId } = usePetContext();
        const data = JSON.stringify({
            "data": {
                "name": name,
                "animal": animal,
                "breed": breed,
                "age": age,
                "location": location,
                "sex": sex
            }
        });
        const handleEditPet = () => {
            updatePet(petId, data);
        };
        return (
            <Box
                component="form"
                sx={{
                    '& .MuiTextField-root': { m: 1, width: '50ch' },
                    display: 'flex',
                    flexDirection: 'column'
                }}
                noValidate
                autoComplete="off"
            >
                <div>
                    <Typography variant="h3" gutterBottom component="div">
                        Edit Pet entry
                    </Typography>
                    <TextField
                        required
                        id="filled-name"
                        label="Name"
                        variant="outlined"
                        onChange={(e)=>setName(e.target.value)}
                    />
                    <TextField
                        required
                        id="filled-animal"
                        label="Animal"
                        variant="outlined"
                        helperText="Cat, Dog, Bird"
                        onChange={(e)=>setAnimal(e.target.value)}
                    />
                    <TextField
                        required
                        id="filled-breed-input"
                        label="Breed"
                        variant="outlined"
                        onChange={(e)=>setBreed(e.target.value)}
                    />
                    <TextField
                        required
                        id="filled-location-input"
                        label="Location"
                        variant="outlined"
                        onChange={(e)=>setLocation(e.target.value)}
                    />
                    <TextField
                        required
                        id="filled-age"
                        label="Age"
                        type="number"
                        variant="outlined"
                        onChange={(e)=>setAge(e.target.value)}
                    />
                    <TextField
                        required
                        id="sex"
                        label="Sex"
                        helperText="Male, Female"
                        variant="outlined"
                        onChange={(e)=>setSex(e.target.value)}
                    />
                </div>
                <div>
                    <Button variant="outlined" onClick={handleEditPet} startIcon={<Edit />}>
                        Edit Pet Entry
                    </Button>
                </div>
                <Paper sx={{ position: 'fixed', bottom: 0, left: 0, right: 0 }} elevation={3}>
                    <BottomNav/>
                </Paper>
            </Box>
        );
    }
Create CreatePetEntry.js:
    import React, { useState } from 'react';

    // mui components
    import {
        Typography,
        TextField,
        Box,
        Button,
        Paper
    } from '@mui/material';

    // icons components
    import { Add } from '@mui/icons-material';

    // custom components
    import BottomNav from './BottomNav';
    import { usePetContext } from '../contexts/PetContext';
    export default function CreatePetEntry() {
        // input data
        const [name, setName] = useState("");
        const [animal, setAnimal] = useState("");
        const [breed, setBreed] = useState("");
        const [age, setAge] = useState("");
        const [location, setLocation] = useState("");
        const [sex, setSex] = useState("");
        // axios
        const { createNewPet } = usePetContext();
        const data = JSON.stringify({
            "data": {
                "name": name,
                "animal": animal,
                "breed": breed,
                "age": age,
                "location": location,
                "sex": sex
            }
        })
        const handleCreateNewPet = () => {
            createNewPet(data);
        };
        return (
            <Box
                component="form"
                sx={{
                    '& .MuiTextField-root': { m: 1, width: '50ch' },
                    display: 'flex',
                    flexDirection: 'column'
                }}
                noValidate
                autoComplete="off"
            >
                <div>
                    <Typography variant="h3" gutterBottom component="div">
                        Add new Pet entry
                    </Typography>
                    <TextField
                        required
                        id="filled-name"
                        label="Name"
                        variant="filled"
                        onChange={(e)=>setName(e.target.value)}
                    />
                    <TextField
                        required
                        id="filled-animal"
                        label="Animal"
                        variant="filled"
                        helperText="Cat, Dog, Bird"
                        onChange={(e)=>setAnimal(e.target.value)}
                    />
                    <TextField
                        required
                        id="filled-breed-input"
                        label="Breed"
                        variant="filled"
                        onChange={(e)=>setBreed(e.target.value)}
                    />
                    <TextField
                        required
                        id="filled-location-input"
                        label="Location"
                        variant="filled"
                        onChange={(e)=>setLocation(e.target.value)}
                    />
                    <TextField
                        required
                        id="filled-age"
                        label="Age"
                        type="number"
                        variant="filled"
                        onChange={(e)=>setAge(e.target.value)}
                    />
                    <TextField
                        required
                        id="sex"
                        label="Sex"
                        helperText="Male, Female"
                        variant="filled"
                        onChange={(e)=>setSex(e.target.value)}
                    />
                </div>
                <div>
                    <Button onClick={handleCreateNewPet} variant="outlined" startIcon={<Add />}>
                        Add Pet Entry
                    </Button>
                </div>
                <Paper sx={{ position: 'fixed', bottom: 0, left: 0, right: 0 }} elevation={3}>
                    <BottomNav/>
                </Paper>
            </Box>
        );
    }
Create Interface.js:
    import React from 'react';

    // custom component
    import PetList from '../components/PetList';
    import CreatePetEntry from '../components/CreatePetEntry';
    import EditPetEntry from '../components/EditPetEntry';

    // contexts
    import { usePetContext } from '../contexts/PetContext';
    const Interface = () => {
        const { nav_value } = usePetContext();

        switch (nav_value) {
            case "PetList":
                return <PetList/>
            case "AddPet":
                return <CreatePetEntry/>
            case "EditPet":
                return <EditPetEntry/>
            default:
                return <PetList/>
        };
    };
    export default Interface;
Now, in your <App.js/> file import and render the <Interface.js/> component:
    import './App.css';
    import Interface from './main/Interface';

    function App() {
      return (
        <div className="App">
          <Interface/>
        </div>
      );
    }
    export default App;
Now Strapi will be running on port 1337, and the React app will be running on port 3000.
If you visit http://localhost:3000/, you should see the app running.
Conclusion
In this article, you saw how to use Strapi, a headless CMS, to serve as the backend for a typical CRUD application. Then, you used React and Context API to build a frontend with the managed state so that changes can be propagated throughout the application.
Headless CMSes are versatile tools that can be used as part of almost any application's architecture. You can store and administer information to be consumed from different devices, platforms, and services. You can use this pattern to store content for your blog, manage products in an e-commerce platform, or build a pet adoption platform like you've seen today.
To access the code for this article, check this GitHub repository.

Latest comments (1)
Strapi is amazing!