
Welcome! This blogpost will be going through using the Appwrite Dart SDK to interact with Appwrite APIs (Users, Database, Storage, Functions, Accounts)
Setting up Appwrite and Dart SDK
Firstly, you will need to install Appwrite and Dart before you can follow along with this tutorial. The main website for each of them have really good documentation on installing them.
Appwrite Installation and running your local instance:
https://appwrite.io/docs/installation
Flutter (the Dart SDK will be installed as part of it starting with Flutter version 1.19.0):
https://flutter.dev/docs/get-started/install
Once you have both of them set up, then start running your Appwrite Server and create your own Dart project.
Within the pubspec.yaml file of your Dart project, you need to ensure that you have Appwrite Dart SDK as a dependency there.
Run the command below if it is missing:
dart pub add dart_appwrite
Pubspec.yaml example:

Now that we have that out of the way, let's get the ball rolling!

Importing the Appwrite Dart SDK and creating the client
1) If you have the Appwrite Dart SDK dependency in your pubspec.yaml, then you should be able to import the package:
import 'package:dart_appwrite/dart_appwrite.dart';
2) Create the Appwrite client:
Client client = Client();
3) Then, we need to set the endpoint, project ID and secret key for the client.
  client
      .setEndpoint(endpoint)
      .setProject(projectid) // Project ID
      .setKey(secret) // Your Appwrite secret key
      .setSelfSigned(status: true); //Don't use this in production
4) Those information can be found in the Appwrite Console. Examples of where you can find the information below.
Project ID and Endpoint:

API Key:

Next, we will move on to interacting with the different Appwrite APIs.
Users
The Users service allows you to manage your project users. Use this service to search, block, and view your users' info, current sessions, and latest activity logs. You can also use the Users service to edit your users' preferences and personal info.
We will be going through some of examples of interacting with the Users API with Appwrite Dart SDK.
Firstly, we need to create a Users service by passing the client we defined earlier as an argument.
Users users = Users(client);
Once we have the Users service then we can go on to interact with our Appwrite backend through the Users API.
Creating a new user
This is how you would create a new user using the Dart SDK.
Future response = users.create(
 email: "example@gmail.com",
 password: "example123",
 name: "example"
);
The arguments that are accepted by the users.create(...) function are:
email - The first argument is the email of the user and this is Required. The type provided should be string.
password - The second argument takes the password of the user and this is required. The type of the password should be string.
name - The third argument is the name of the user (max length is 128 characters) and this is Optional. The type provided should be string
Now we can see our new user created in the Appwrite Console under "Develop > Users".

Note that we will have the response from the Create User request and we will also always have response whenever we make a request to Appwrite. You can check what the response with the code below:
response
    .then((response) {
    print(response);
  }).catchError((error) {
    print(error.response);
  });
The response will be in JSON format and here is how the response for the Create User Request looks like:
{
    "$id": "617eb25e03167",
    "name": "example",
    "registration": 1635693866,
    "status": 0,
    "passwordUpdate": 1635693866,
    "email": "example@gmail.com",
    "emailVerification": false,
    "prefs": {}
}
Listing users
We can also list all the users that are currently defined.
Future response = users.list();
Example JSON Response:
{
    "sum": 1,
    "users": [
        {
            "$id": "617eb25e03167",
            "name": "example",
            "registration": 1635693866,
            "status": 0,
            "passwordUpdate": 1635693866,
            "email": "example@gmail.com",
            "emailVerification": false,
            "prefs": {}
        }
    ]
}
Deleting a user
To delete a user, you have to provide the user's user ID as an argument to the delete function.
Future result = users.delete(userId:'617eb25e03167');
This response does not have a payload so you will have to list all the users again using the function mentioned in the earlier section to see your changes or view it in the Appwrite console.
Storage
The Storage service allows you to manage your project files. Using the Storage service, you can upload, view, download, and query all your project files.
Each file in the service is granted with read and write permissions to manage who has access to view or edit it.
We first define the Storage service:
Storage storage = Storage(client);
Create file
The example here assumes that you have a file called "test.jpg" in your project folder which will be uploaded to the Appwrite Storage service. We will be using the createFile function to upload our file.
final file = await MultipartFile.fromPath('file', './test.jpg', filename: 'test.jpg');

Future response = storage.createFile(
    file: file, //multipart file
    read: ['*'],
    write: ['*'],
  );
Here are the arguments that we can provide to the storage.createFile(...) function.
file - The binary data of the file that you want to create to upload into Appwrite service and this is a Required argument.
read - An array of strings to containing a specific user, team or everyone (denoted by the wildcard permission '*') to bestow with write permissions and this is Optional. Only the current user is granted with read permissions as default. The type that should be provided is Array.
write - An array of strings to containing a specific user, team or everyone (denoted by the wildcard permission '*') to bestow with write permissions and this is Optional. Only the current user is granted with write permissions as default. The type that should be provided is Array.
You can read more about permissions in Appwrite here:
https://appwrite.io/docs/permissions
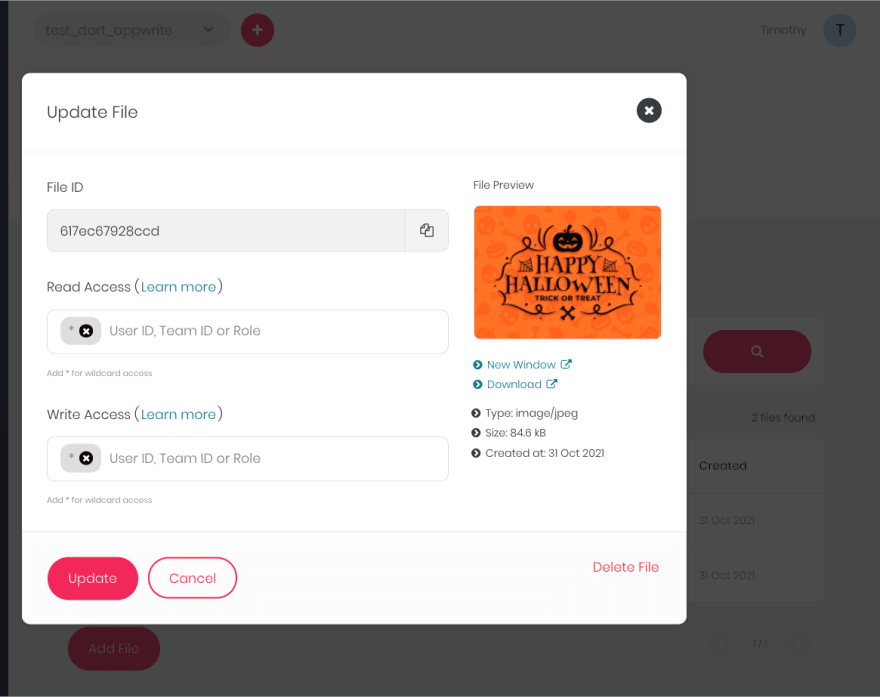
Now, we can see the changes reflected under the "Develop > Storage" section of Appwrite.
Example of JSON response for Create File request:
{
    "$id": "617ec67928ccd",
    "$permissions": {
        "read": ["*"],
        "write": ["*"]
    },
    "name": "test.jpg",
    "dateCreated": 1635698297,
    "signature": "288da602ad6002d9720f52aa97b49d8c",
    "mimeType": "image/jpeg",
    "sizeOriginal": 84647
}
List files
We can then list our files from the Storage service using listFiles function other than viewing it in the Appwrite Console.
Future response = storage.listFiles()
Example of JSON Response:
{
    "sum": 1,
    "files": [{
        "$id": "617ec67928ccd",
        "$permissions": {
            "read": ["*"],
            "write": ["*"]
        },
        "name": "test.jpg",
        "dateCreated": 1635698297,
        "signature": "288da602ad6002d9720f52aa97b49d8c",
        "mimeType": "image/jpeg",
        "sizeOriginal": 84647
    }]
}
Delete file
To delete the file from the Storage service, we will be using the deleteFile function by providing the file ID as an argument.
Future response = storage.deleteFile(fileId: '617ec67928ccd')
This response does not have a payload so you will have to list all the users again using the function mentioned in the earlier section to see your changes or view it in the Appwrite console.
Functions:
Appwrite Functions allow you to extend and customize your Appwrite server functionality by executing your custom code. Appwrite can execute your custom code in response to any Appwrite system event like account creation, user login, or document update. You can also schedule your functions to run according to a CRON schedule or start them manually by triggering your function from an HTTP endpoint using the Appwrite client or server APIs.
Appwrite Functions run in a secure, isolated Docker container. Appwrite supports multiple runtimes for different programming languages such as Kotlin, Python and others that you can use to run your code.
Firstly, we will create our Functions service using our client defined earlier.
Functions functions = Functions(client);
Create Function
Here, we will be creating a function called test_function that will be our custom written code that we want it to be executed with all read and write permissions. We also want this function to be execution in the Python 3.9 runtime.
Future response = functions.create(
  name: '[test_function]',
  execute: [*],
  runtime: 'python-3.9',
);
The arguments that we are passing to the functions.create(...) shown above:
name - The name of the function that that you want (maximum length is 128 characters) to upload into Appwrite service and this is a Required argument.
execute - An array of strings to containing a specific user, team or everyone (denoted by the wildcard permission '*') to bestow with execute permissions and this is Required. No user is granted with read permissions as default. The type that should be provided is Array.
runtime - This sets the execution runtime for the function. The list of supported runtimes are: https://appwrite.io/docs/functions#supportedRuntimes. The type that should be provided is string.
Additional arguments that can be provided: https://appwrite.io/docs/server/functions?sdk=dart-default#functionsCreate
We should be able to see our new function at the "Develop > Functions" section of Appwrite now.

Example of JSON response for create function request:
{
    "$id": "617ec96ceb93e",
    "$permissions": {
        "execute": ["*"]
    },
    "name": "[test_function]",
    "dateCreated": 1635699052,
    "dateUpdated": 1635699052,
    "status": "disabled",
    "runtime": "python-3.9",
    "tag": "",
    "vars": [],
    "events": [],
    "schedule": "",
    "scheduleNext": 0,
    "schedulePrevious": 0,
    "timeout": 15
}
List Functions
List our functions from the Functions service using the list function other than viewing it in the Appwrite Console.
Future response = functions.list();
Example of JSON response:
{
    "sum": 1,
    "functions": [{
        "$id": "617ec96ceb93e",
        "$permissions": {
            "execute": ["*"]
        },
        "name": "[test_function]",
        "dateCreated": 1635699052,
        "dateUpdated": 1635699052,
        "status": "disabled",
        "runtime": "python-3.9",
        "tag": "",
        "vars": [],
        "events": [],
        "schedule": "",
        "scheduleNext": 0,
        "schedulePrevious": 0,
        "timeout": 15
    }]
}
Delete Functions
We can delete the function that we have created using the Appwrite Dart SDK by doing:
Future result = functions.delete(functionId:'617ec96ceb93e');
Further Resources
Some of the features that are present in Appwrite Dart SDK was discussed in this post. If you wish to learn more then, please do take a look at the Appwrite documentation:
If you want to help out with bugs and new features for Appwrite, then check out the Appwrite Github:
https://github.com/appwrite/appwrite
My Github Profile: https://github.com/timothy22000

Latest comments (0)