Reprise
My project is to create an SVG-based backdrop in the style of a cutting mat for software engineers (well me, not really anyone else, apologies for being selfish).
As stated in the previous post, I going to start by plot a grid 4000px by 2500px with cells of 250px square and bounded with a slightly thicker rectangle. Also, as stated previously, I have chosen a background colour based on engineer's marking fluid (#191662) and a grey (#777) for the grid lines and the by-line.
I will release the cutting-mat SVG image at the end of each stage via my GitHub repo.
Plotting the grid
The top-most element of an SVG file is an <svg> element. SVG is based on XML and includes a reference to the default namespace (http://www.w3.org/2000/svg) and version number (1.1).
<svg xmlns="http://www.w3.org/2000/svg" version="1.1">
 <!-- Content here. -->
</svg>
The SVG element can be nested to contain content in a conveniently manner. As stated previously, SVG files can also reference CSS files and even JavaScript files as follows. It is also useful to stipulate the target width and height of the content as attributes of the SVG element.
<svg xmlns="http://www.w3.org/2000/svg" version="1.1"
  width="1400" height="1000">

  <link xmlns="http://www.w3.org/1999/xhtml"
    rel="stylesheet" type="text/css"
    href="cutting-mat.css"/>

  <!-- Content here. -->

  <script href="cutting-mat.js"></script>
</svg>
I have found viewing SVGs in a web browser such as Chrome or Edge to be particularly useful as the dev tools provide access to the SVG Document Object Model (DOM), along with the styles defined in the CSS file and code provided by the JS files.
Viewing the above example will not show a great deal as the SVG element is by default transparent and the CSS and JS files we currently have provide/do nothing, so let's add a rectangular background by changing the SVG and CSS files as follows. We can even use custom properties in CSS.
:root {
  --background-colour: #191662;
}

.backdrop {
  fill: var(--background-colour);
}
The backdrop will take the form of an SVG rectangle element <rect ... /> located at the origin of the image and sized to fill the image.
<svg xmlns="http://www.w3.org/2000/svg" version="1.1"
  width="1400" height="1000">

  <link xmlns="http://www.w3.org/1999/xhtml"
    rel="stylesheet" type="text/css"
    href="cutting-mat.css"/>

    <rect x="0" y="0" width="1400" height="1000"
      class="backdrop"></rect>
</svg>
Adding the by-line
Next, I want to add a by-line in the bottom-right corner using a <text .../> element. By default text elements are located using the bottom-left corner of the block containing the text. This can be changed using the text-anchor attribute (or CSS property) to justify the text from the centre of the block, or the right as follows.
.byline {
  fill: var(--byline-colour);
  font-size: 1.5rem;
  text-anchor: end;
}
We have also added another colour to the :root and applied it to the fill property/attribute of the text element. Also, notice we have stipulated as font-size of 1.5rem, which as the root element is using the default font-size of 16px, this will provide text of 24px in size. We can now add a text element to the SVG as follows.
<text x="1380" y="980"
  class="byline">Created by T-G Gilmore, 2022, using hand-written SVG, CSS and JavaScript</text>
Next, I want to add an HTML link to a creative-commons licence in the bottom-left corner, which can be achieved using the foreignObject element to embed the HTML in the SVG.
<foreignObject x="20" y="948" width="106" height="38">
  <a xmlns="http://www.w3.org/1999/xhtml" rel="license"
    href="http://creativecommons.org/licenses/by-nc-sa/4.0/">
    <img alt="Creative Commons Licence"
      src="https://i.creativecommons.org/l/by-nc-sa/4.0/88x31.png" />
  </a>
</foreignObject>
Time to create the grid
We will add the grid to the SVG element, contained within SVG element of the whole document, so we can size and position all related content at the same time.
<svg x="60" y="60" width="1280" height="800" id="grid">
  <g>
    <!-- Horizontal and vertical lines inserted here -->
  </g>
  <g>
    <rect x="0" y="0" width="1280" height="800" class="border">
    </rect>
  </g>
</svg>
The containing SVG element has an id attribute used by the JavaScript to locate the element in the DOM. The other four attributes x, y, width, height control the position and size of the container. Notice the width is 1280px, which is narrower than the overall SVG, and it is positioned 60px from the left side. It is also positioned 60px from the top and 800px tall. Also notice the ratio of the width to height, 1280:800 when divided by 80px gives the 16:10 I was aiming for from the previous post.
Notice the SVG element contains two group elements <g>. The first group contains a comment initially but we will soon be adding JavaScript to inject the horizontal and vertical grid lines.
The second group element contains the rectangle element that bounds the lines. The rectangle (rect element) has a class attribute we will use to style the border and lines as follows.
#grid rect {
  stroke: var(--grid-colour);
  stroke-width: 3;
  fill: transparent;
}

#grid line {
  stroke: var(--grid-colour);
}
Just link HTML, SVG has a stacking order the can be applied most easily through the order elements appear in the document. By placing the rectangle in the second group it will appear on top of the grid lines.
We will be adding the custom property --grid-colour to the :root with the value of #777, which is a medium grey. Now for the JavaScript, we include the following functions in the 'cutting-mat.js' file.
(function () {
  drawGrid();

  // :

})();

function drawGrid() {
  const gridSize = 40;
  const grid = document.querySelector('#grid g');

  function repeatFn(occurrence, fn) {
    [...'*'.repeat(occurrence)].forEach(fn);
  }

  function drawLine(x1, y1, x2, y2, dash) {
    return `<line x1="${x1}" y1="${y1}" x2="${x2
      }" y2="${y2}" stroke-dasharray="4,${dash * 4}"></line>`;
  }

  repeatFn(16 * 2, (_, index) => {
    const vert = gridSize * index;
    grid.innerHTML += drawLine(vert, 0, vert, 800, index % 2);
  });

  repeatFn(10 * 2, (_, index) => {
    const horiz = gridSize * index;
    grid.innerHTML += drawLine(0, horiz, 1280, horiz, index % 2);
  });
}
I want the grid to be formed from alternating dashed and solid lines at 40px (gridSize) intervals, all injected into the first group of the #grid element (grid). To help repeat the drawing of lines I have created a helper function repeatFn that takes two parameters 'occurrence' and 'fn'.
- occurrence: indicates how many times the function should be performed.
- fn: is the function to be called.
Another helper function drawLine constructs the SVG instruction to populate the SVG line. Using the repeatFn function we call drawLine 32 times for the verticals and 20 times for the horizontals all using the drawLine function.
Nearly finished with the grid
That is it for this post but there is a minor issue. The rectangle is supposed to have a line width of 3px according to the CSS. But if you have been following along you will notice the rectangle does not appear that thick. The reason is one third of the width is outside the boundary of the SVG container. We can resolve this issue by;
- expanding the SVG by a few pixels (4px in both directions) and
- offset the content of the SVG element by -2px in both directions.
To achieve this we first increase the width and height of the SVG element and position it -2px as follows.
<svg x="58" y="58" width="1284" height="804" id="grid">
Next we have to remap the coordinate system within the SVG element to offset everything using the viewBox attribute that consists of four numeric values. The first two numbers of the 'x' and 'y' location that we will offset left and up by 1px. The last two values are the width and height that will remain unchanged from the size of the svg element.
<svg x="58" y="58" width="1284" height="804"
   viewBox="-2 -2 1284 804" id="grid">
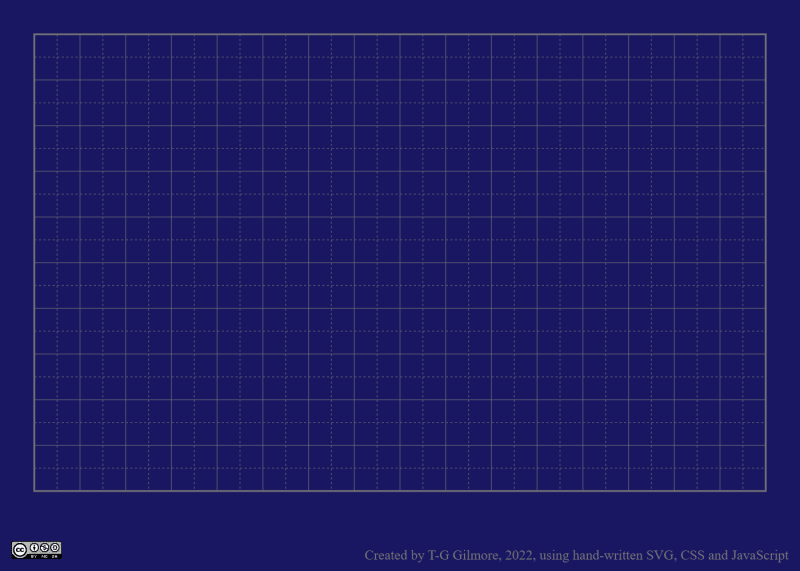
And this is how it looks so far:
In the next post we will be rendering the screen resolutions as described in my original post.


Oldest comments (2)
Love creating SVG's in Figma.
Hi Andrew, Thanks for your comment and hope you liked this post and the others in this series. I have not used Figma myself but understand it is a well loved tool. Keep reading the series as there are two more posts to come.
Regards, Tracy