Overview
In this post, I’m going to show how you can quickly set up drag and drop editor and hosting, for a static website with Paperbits content builder and Netlify for free.
What is it Paperbits
In most cases, if we want to run a blog website or a simple landing page we must have to be able to understand and code CSS, HTML, or even Javascript. Paperbits is an open-source project that gives developers the possibility to build a tool for users to simplify the process of web content creation without knowledge of templating languages like Handlebars or markup like Markdown.
How Paperbits works
Paperbits is following the JAMstack approach. JAMstack is a modern web development architecture based on client-side JavaScript, reusable APIs, and prebuilt Markup. These three core components used to create websites that are both fast and highly dynamic.
JAMstack based on decoupling a web content building and hosting steps. In most cases, web content builds with a static page generator. The page generator creates a website that you can deploy and host anywhere. The simplest solution is hosting static pages on cloud storage service and a content delivery network (CDN).
Currently, most JAMstack static site generators are heavily geared towards developers "for developers by developers". If we want to create a web page, we must follow a particular folder structure and setup code editor for CSS, HTML, JavaScript, or markup like Markdown. There are almost no options for non-developers (for example web designers, content creators) who are familiar with how HTML, CSS work but want to avoid edit them by hand. Now, this type of person has an option to use the Paperbits drag and drop content builder.
Paperbits has two parts the visual editor and publisher (static site generator). In Paperbits visual editor you are abstracted from coding HTML by the drag and drop content builder and enhancing appearance by managing the style guide. The editor is a web app where we can create/edit web pages, manage styles, layouts, and navigation without touching code. All created content, the editor store as metadata in a JSON file. After you are done with editing and like what you see in the editor (this is exactly what you get), you are ready for publishing your website. The publisher is a static site generator. It uses saved metadata JSON file to generate pages and copy media files in the result folder that you can deploy and serve as a website.
You can get more details on Paperbits website.
Why Netlify
Netlify is well known as a home for JAMstack frameworks. Netlify provides a simple and fast platform for static website hosting. It has everything that you need for our static websites like custom domain, free SSL with Let's Encrypt, and automatic deployment from linked GitHub repository. We can use all these for free on the Starter plan.
Prerequisites
To run and edit your website we need Netlify and GitHub accounts.
In GitHub, we need to fork the paperbits-demo repository https://github.com/paperbits/paperbits-demo
The fork gives us an option to get the latest updates from the paperbits-demo repository. How to fork a repository you can find on GitHub https://help.github.com/en/github/getting-started-with-github/fork-a-repo
Setup and deploy a site with Netlify
Login on the Netlify portal and create a site from the forked repository in GitHub. We can easily do it by open the Sites tab and click the button New site from Git.

We should follow 3 simple steps:
connect to our GitHub account
select the forked repository from the paperbits-demo
provide build settings for our site
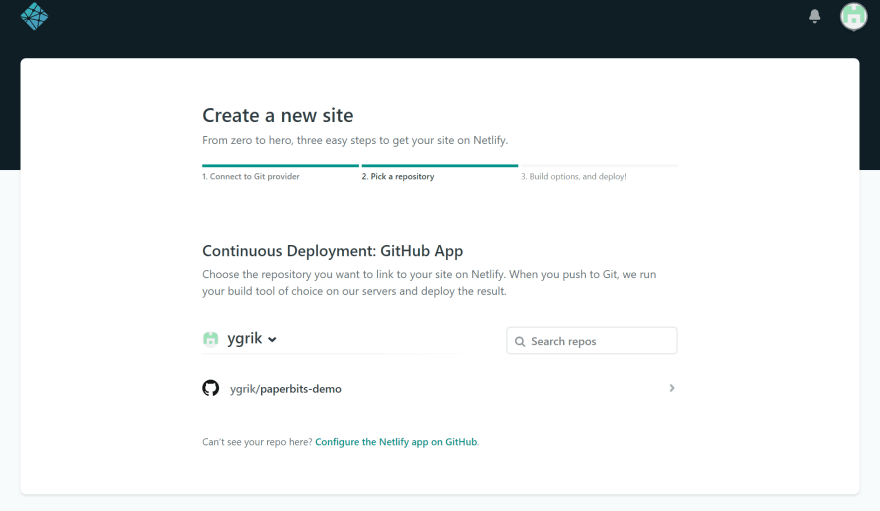
On the first step, we should select GitHub, authorize Netlify access to our GitHub account. On the second step select a repository from the list.
In my case, I see ygrik GitHub account and ygrik/paperbits-demo repository
On the last step, you should select the branch, build command, and publish directory.
To build Paperbits site we need to run NPM command: npm run publish
After build completion, all files for our static site will be in dist/website directory and ready to serve.
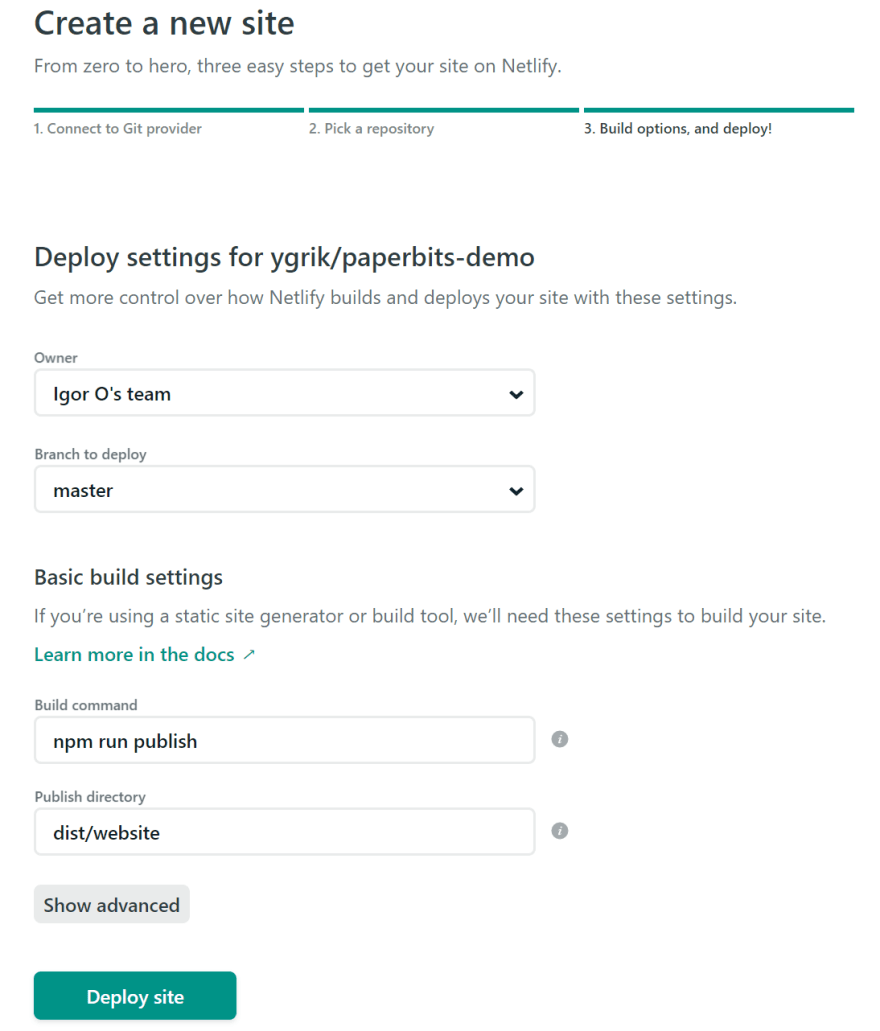
We are ready to deploy our website. Just click the button Deploy site and Netlify will run provided build command and in a couple of minutes serve our static site on netlify.com subdomain.
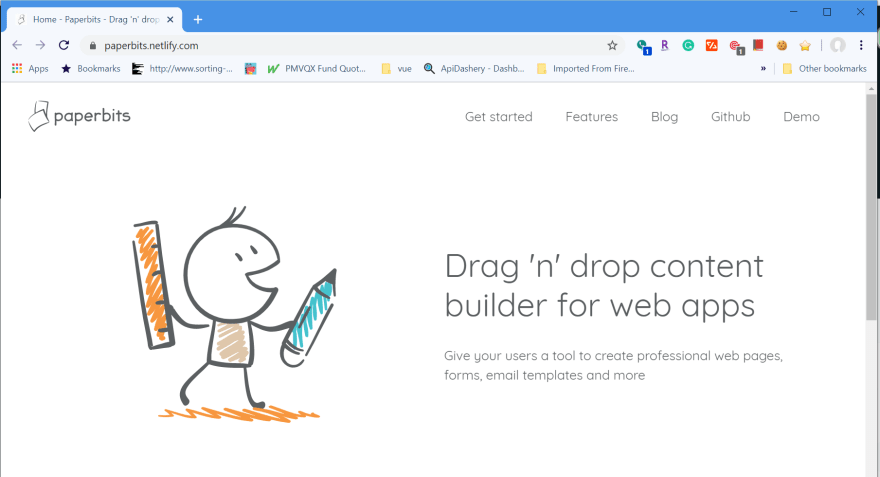
I changed the random site name to paperbits and my site now hosts on https://paperbits.netlify.app
We can open this link in a browser and see the Paperbits website.
Setup and deploy an editor for our site
To run editor for our website we need to create one more site in Netlify.
For this, we should repeat the first two steps for the same forked repository. The only difference will be in settings for the build command and publish directory.
To build Paperbits editor we need to run NPM command: npm run build-designer
After build completion, all editor files will be in dist/designer directory and ready to serve.
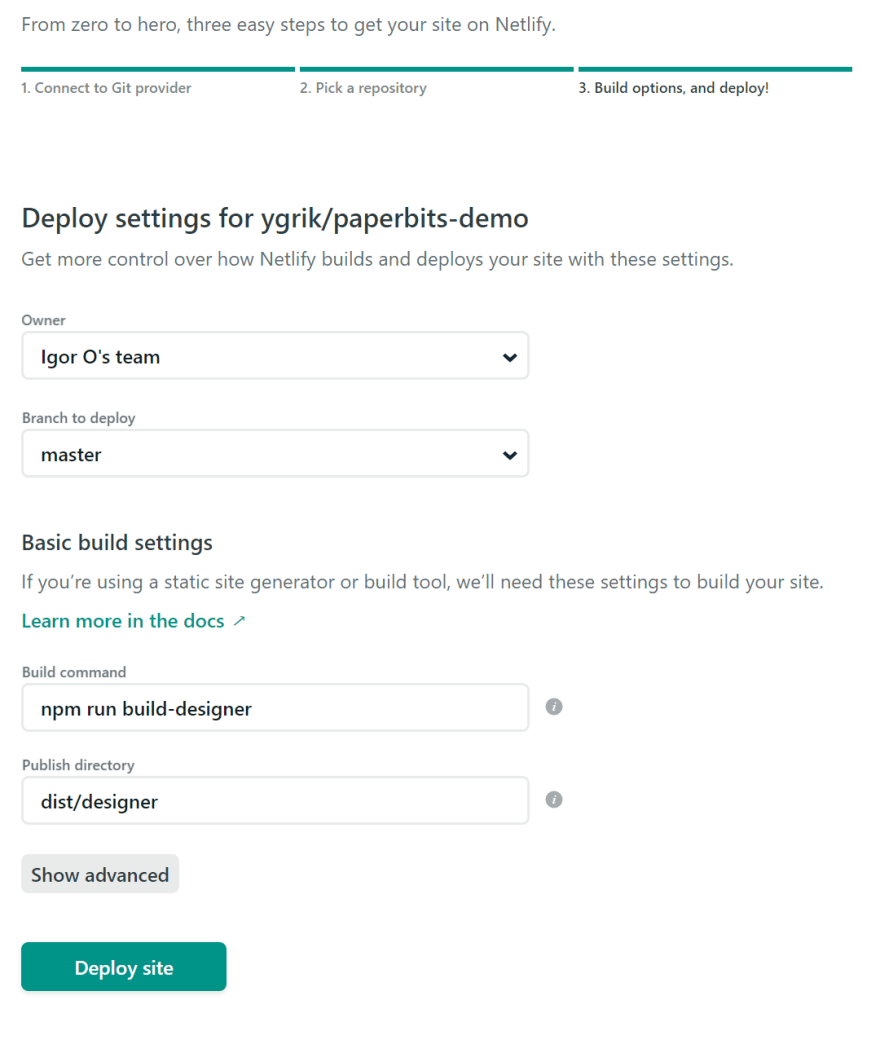
Click the button Deploy site and Netlify builds and serves our editor as a site on the netlify.com subdomain.
I changed the random site name to paperbits-editor and my editor now host on https://paperbits-editor.netlify.app
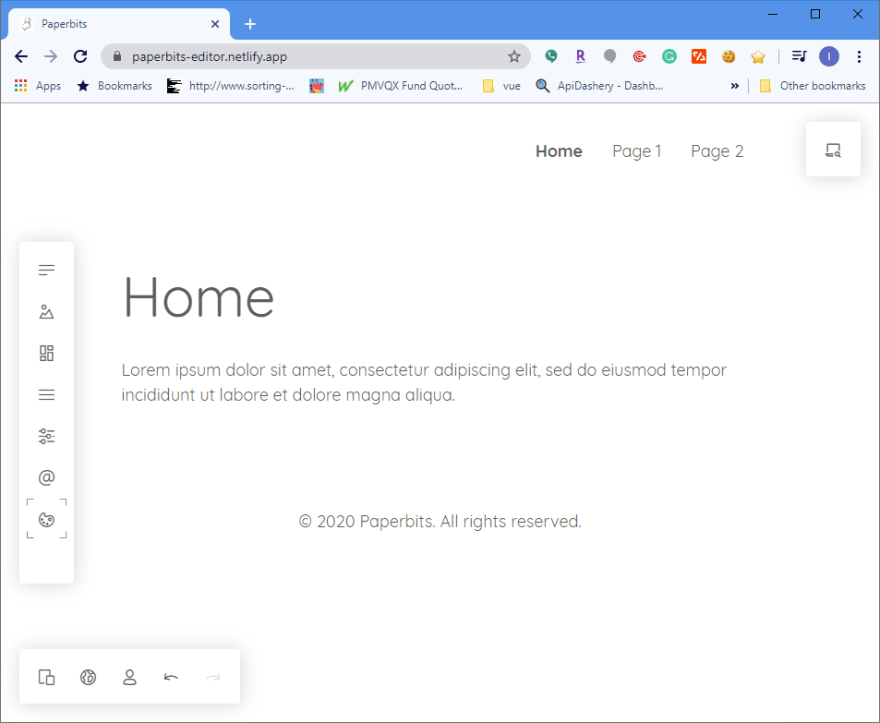
We can open this link in a browser and see the Paperbits website in the editor.
Build content with Paperbits editor.
Now we are ready to create our website content. By default, our editor loads the Paperbits website. The metadata file for it located in the repository src/data/demo.json
This JSON file is like a project file for a website. In the beginning, I offer to start from an empty website, you can download the metadata file from URL
https://cdn.paperbits.io/blog/templates/empty.json
and overwrite demo.json content with empty.json, commit, and push this change to our GitHub repository. After push Netlify triggers the build and publishes the latest changes for our website and editor.
Reload our editor and it loads the empty website. This site has three empty pages, one layout, default style guide, and a menu with navigation between pages.
If you do not want to commit each change to GitHub and reduce usages of build minutes (Netlify give you 300 build minutes/month on Started tier), you can save website changes locally with keyboard shortcut Ctrl + S and load saved changes in Paperbits editor from file with keyboard shortcut Ctrl + O.
Media files
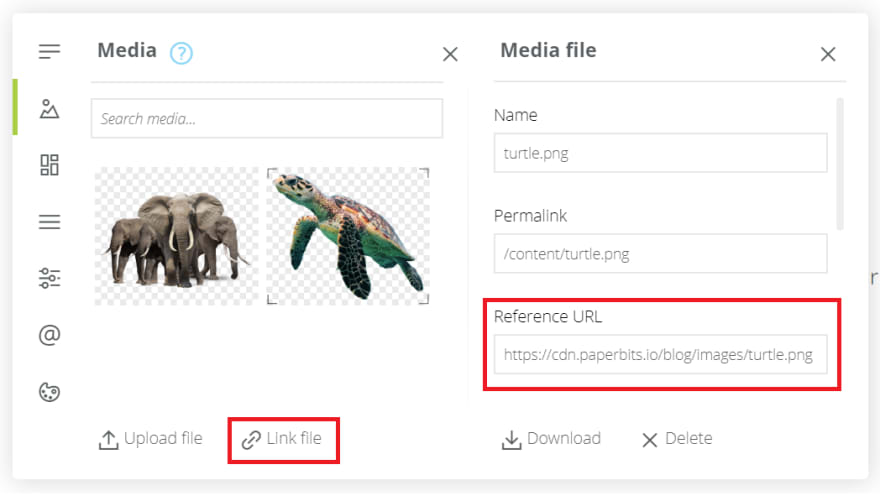
We can start building a website by adding images to the media library. Our images must be available for the Netlify build service to download them on the publishing step. I use CDN for my images and link files as a reference URL in the media library.
You can use any web-accessible media files as a reference on cloud storage, One Drive, Google Drive, Dropbox, etc.
We can not use the Upload file option because of Paperbits demo has settings to store a file in the browser memory and it is not accessible on the publishing step. You can change this in code by overriding behavior in StaticBlobStorage.ts
Simple content editing
On the Home page, I removed default text (select text widget and delete) and add a section with two articles, one for image and one for text. Just hover mouse on content and find a blue plus button. Click it and select a preset for two articles layout.
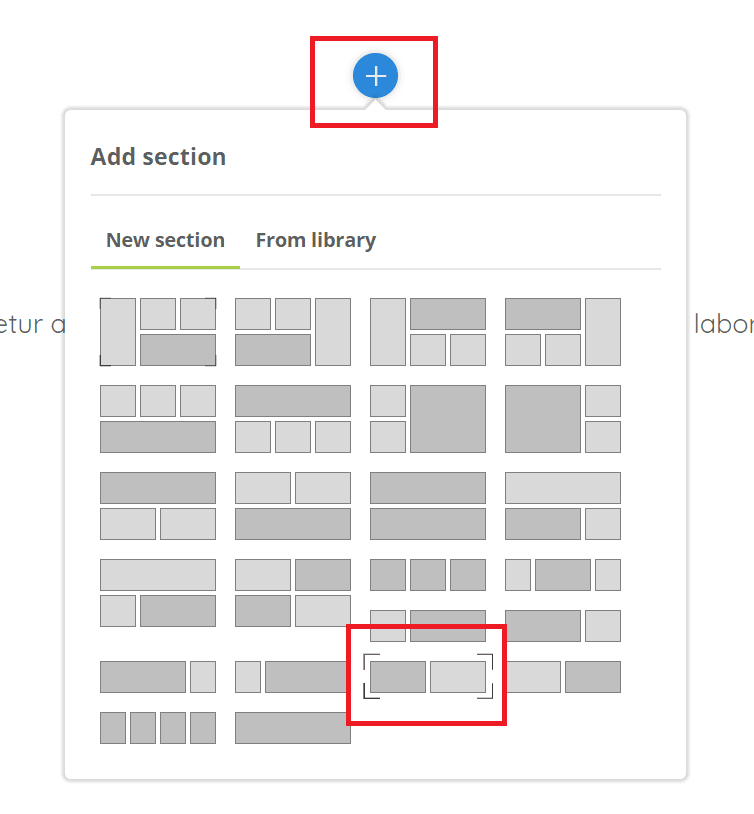
We have several presets for a section layout for most cases. If you do not like the last changes you can use Undo/Redo buttons in the left bottom corner.
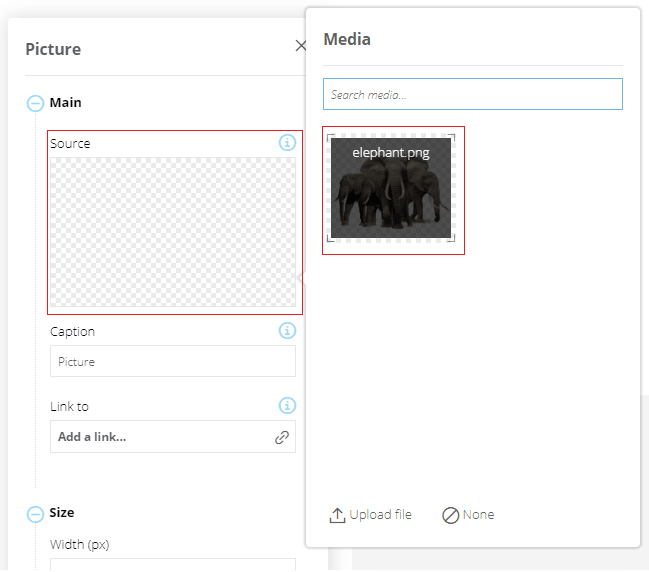
Hover the mouse pointer on the left article, click the gray plus button and select the picture widget.

Open picture widget editor by double click on the added picture placeholder. Click on the source placeholder and select an image from the media library.
Add a text widget in the right article and replace the default text. Click the preview button in the right top corner and review what you did.
Save our changes with Ctrl + S, update content for src/data/demo.json, and push changes to the GitHub repo. Netlify will do the publishing job and your website goes live for everybody.
The project metadata file for this example website available by this URL
https://cdn.paperbits.io/blog/templates/animals.json
You can load this website in your Paperbits editor and play with it.
If you want to run this solution locally you find more details here https://paperbits.io/wiki/getting-started
Conclusion
In this post, I described how to build and host a simple static website with no-code cloud solution based on Paperbits visual content builder, Github, and Netlify for free. I showed how to set up step by step the whole solution on GitHub and Netlify services.
Now you can share the JSON metadata file with your web designer, content writer, and build website content without coding CSS and Html. In the example website, I used a small set of the Paperbits editor functionality and did not touch the powerful widget extensibility option.
To be continued...

Latest comments (1)
wow that's amazing! thanks a million to share something special with us! I'm super Excited to found all in one Post! When developer's looking a great Web editor? Hope need to Use that! Here i found more one you can try! Ezytor is a simple website editor that gives you all the components to create and manage your web projects. You can easily create stunning websites with Ezytor’s drag-and-drop functionality, templates, widgets and much more.