Deploy .NET Core & React to Heroku using Github Actions
Heroku is a cloud Platform-as-a-Service (PaaS) used to build and deploy applications of different languages on the cloud.
.NET Core is not officially supported by Heroku which means we cannot deploy/run our C# code directly on it. Fortunately, Heroku does support Docker containers, so in this tutorial, we are going to explain how to deploy a containerized .NET Core application on Heroku.
We can do this process locally on our machine by using Docker CLI and Heroku CLI but we need to repeat the entire flow every time we do a change even a small one. To avoid this we have to use and implement CI/CD workflow and for doing that we are going to use Github Actions.
Adding Dockerfile
I assume you’ve already created the application, if not you can follow this tutorial on how to create a .NET Core application with React.
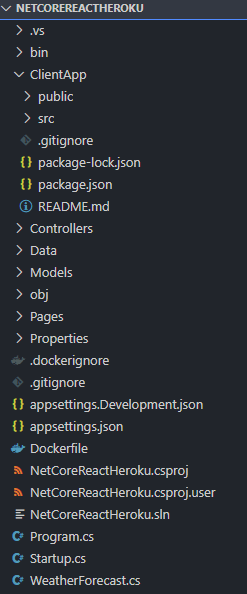
After we’ve created our application we can add Dockerfile to it. Our application structure will be like this.
As you can see we’ve added Dockerfile to our solution and this is how it initially looks like
As you can see in our solution we have ClientApp folder which contains all files of React application and the current Dockerfile builds only .NET Core solution so we need to modify it in order to build the React app.
In line 1 we’ve declared .NET Core base image but besides that, we also need to add a Node.js base image (line 16— for building React app) and copy the build folder (line 30)
By default .NET Core application runs on port 5000 and 5001, on the other side Heroku provides a single port for you to use and expects your app to run on the port Heroku gives, so basically that means our app should listen to only HTTP connections on that port and Heroku will take care of HTTPS part, so we have to replace the line:
ENTRYPOINT ["dotnet", "NetCoreReactHeroku.dll"]
with this:
CMD ASPNETCORE_URLS=http://*:$PORT dotnet NetCoreReactHeroku.dll
By using the initial template of Dockerfile we usually face the error npm: not found while building the Docker image because NodeJs don’t exist on the Docker image of the SDK, and to get rid of this error we need to prevent the PublishRunWebpack task of csproj to be executed. To do that we replace this line:
<Target Name="PublishRunWebpack" AfterTargets="ComputeFilesToPublish">
with this one:
<Target Name="PublishRunWebpack" AfterTargets="ComputeFilesToPublish" Condition=" '$(BuildingDocker)' == '' ">
As you can see we’ve added a Condition to csproj which accepts the parameter BuildingDocker and this parameter should be on Dockerfile as well as an environment variable (line 8).
Now we are all set with Dockerizing our solution, and if you want to test/build the solution and see if Dockerfile works simply run this command.
docker build . -t $YOUR_APP_NAME -f Dockerfile
Create a Heroku App
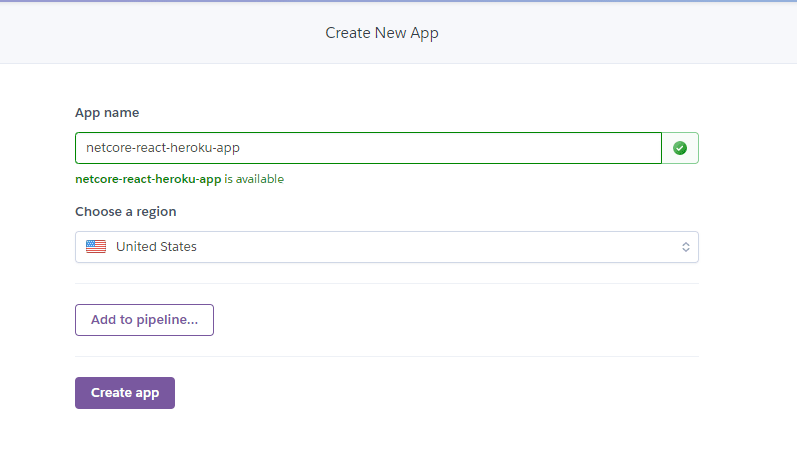
First of all, you need to have an account on Heroku, and then you go to your dashboard (dashboard.heroku.com/new-app) to create your application.
After we create our Heroku app we need to get an API key which we’ll use later on our Github Actions. We can get this key by going to Account Settings.
Setting up Github Actions
After we added Dockerfile and created the Heroku application now we are ready to deploy our image to the Heroku container and release our web application. To make this happens we are going to use Github Actions. Github Actions provides an automated way to trigger custom workflows in response to events on Github (push, pull_request, etc).
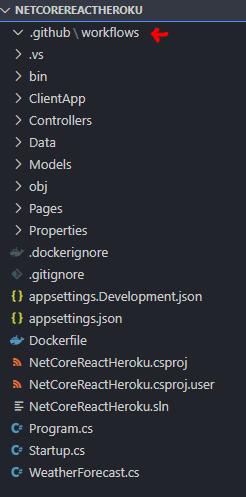
Go to the main directory of your application and add .github folder and inside it also create another folder called workflows as shown in the screenshot below.
Now inside workflows folder create workflow file which is ayml file.
This workflow should have one name (line 1) and should define the events that are going to be triggered. In our case, we’ve told the workflow to be triggered only when we push to master branch. In line 9 you can see the Heroku API key env variable which is used to login into our Heroku registry, and you can notice the keyword secrets which means we should go to our repository secrets and add this variable (see screenshot below).
Every workflow is made up of jobs (line 12) and every job is composed of individual steps. In our case, we’ve declared only build job which has 3 steps
Cloning the repository using checkout action (line 20) that checks-out our repository under
$GITHUB_WORKSPACE, so our workflow can access it.Building our Docker image by running the command on runner (line 25).
Pushing the Docker image to Heroku Container by running a set of Heroku commands (lines 30 and 31).
Finally, you just have to commit and push those changes and go to the Actions tab under your Github repository where you can see the build process going on. When the build complete successfully you can visit your deployed app on Heroku (https://{YOUR_APP_NAME}.herokuapp.com).
Note: The complete solution of this tutorial can be found in this Github repository.
Thank you for reading. I hope you enjoyed this tutorial and learned something new 😊.
If you liked this article and want to see more you can find me at


Top comments (0)