Protecting an application starts with authentication and authorization, ensuring users have access to the right information. This tutorial will show you how to add authentication and authorization with ease to your next.js application using AWS Amplify.
Prerequisites
To follow along you need to have;
- AWS account
- AWS CLI installed in your Next.js app ## Create an Amplify Project
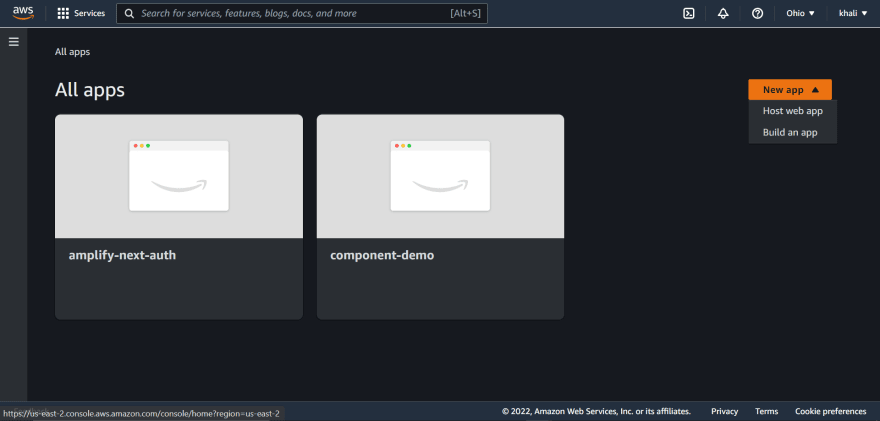
To create an Amplify project, Navigate to your AWS console, search for AWS Amplify,
then click on New App, and select Build an app from the dropdown.
Give the App a name and click on Confirm deployment button to deploy.
Once the deployment is completed, click the Launch Studio button to launch the Amplify studio.
Enable Auth
The Amplify studio gives access to many cool features like Database modeling, UI library storage, authentication, and more. For this tutorial, you will be using the authentication feature of AWS Amplify.
Click on authentication at the sidebar to configure the authentication. Make the password less strict by disabling uppercase, symbol, and character when creating a password.
Click on Deploy and Confirm Deployment.
Create Next.js App
Now that the backend is all set, head back to your local machine and create a Next.js app. To do that, Run the command below in your project directory.
npx create-next-app amplify-next-auth
Install Amplify Dependencies
Next is to install all the Amplify dependencies needed for this project. Run the command below to install them.
npm install aws-amplify @aws-amplify/ui-react
The aws-amplify SDK allows you to connect your application to Amplify while
@aws-amplify/ui-react is the Amplify component SDK.
Pull Amplify Project into React Project
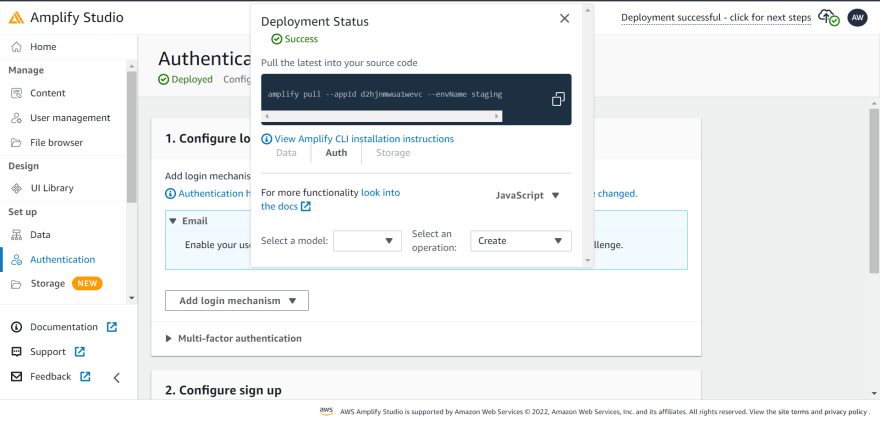
Now that we have the back-end and client-side ready, you need to link the two together. Head back to your AWS Amplify studio and click the deployment link at the top right hand corner.
Copy the pull command and run it in your project directory.
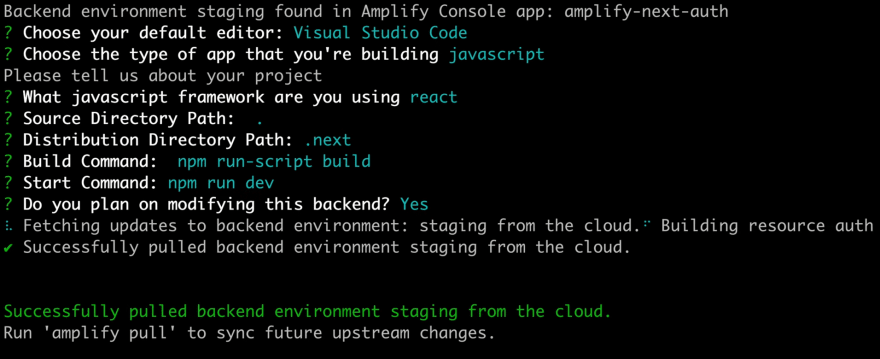
AWS Amplify will prompt you to confirm access. Click yes and head back to the terminal. Amplify will ask you a series of questions, choose default for most except for the last three,
Configure Amplify for React Project
After pulling the Amplify project, you should have some files and folders added to your project.
amplify folder*:* This is where all the back-end code resides.
aws-export file: This is the configuration file.
Note: This should not be committed to git.
To use the Amplify SDK, you need to configure it at the root level of your project. Next.js uses the _app.js as the root file.
Head to _app.js and import the SDK. paste the code below in your _app.js file.
import '../styles/globals.css'
import {Amplify} from "aws-amplify"
import awsconfig from "../aws-exports"
import '@aws-amplify/ui-react/styles.css'

Amplify.configure({...awsconfig,ssr:true})

function MyApp({ Component, pageProps }) {
      return <Component {...pageProps} />
}

export default MyApp
The above code snippet imports and set configurations for the AWS Amplify, for easy integration and display of an interactive user interface.
Protecting the Client
After configuring the Amplify project, the next is to protect the components, head to the pages/index.js file, and replace the code with the below.
import { withAuthenticator } from "@aws-amplify/ui-react";

function Home({signOut,user}){
    return (
        <>
          <h1>hello {user.username}</h1>
          <button onClick={signOut}>Sign Out</button>
        </>
      )
}
export default withAuthenticator(Home)
The withAuthenticator higher order component handles the protection by allowing only authenticated users to access the Home component, also providing a pre-built login and registration feature.
Testing
To test the application run the command below,
npm run dev
Amplify protects the Home component by providing a login and registration feature.
You can log in by providing your email and password; afterward, you will be sent a confirmation token.
Enter the token sent and click confirm to access the Home component.
Protect SSR Pages
After signing in, AWS Amplify saves your authentication token in the local storage. You will use that in protecting your server side rendered (SSR) pages.
Navigate to the /pages folder and create a protected.js file. Paste the command below.
import {withSSRContext} from "aws-amplify"

function Protected({authenticated,username}){
    if(!authenticated){
        return <h1>Not Authenticated</h1>
    }
    return <h1>Hello {username} from SSR route!</h1>
}

export async function getServerSideProps(context){

const {Auth} = withSSRContext(context)

try{
    const user = await Auth.currentAuthenticatedUser()

return {
    props:{
        authenticated:true, username:user.username
    }
}

}catch(err){
    console.log(err)
    return {
        props:{
            authenticated:false
        }
    }
}
}
export default Protected
This component will receive authenticated, and username props which will be used to render the component conditionally whether authenticated props is true or false.
The protected component receives the props through the getServerSideprops function. The function grabs the Auth function from the withSSRContext imported from the AWS Amplify SDK.
Conclusion
This tutorial discussed on how to easily implement authentication and authorization to a Next.js app. Don't forget to check the official documentation of AWS Amplify to explore further and add more features to your app.


Top comments (1)
this is GOLD