In this article we are going to learn how to deploy a .NET API to Heroku through GitHub Actions. Also, we are going to create a PostgreSQL database in Heroku.
Prerequisites:
- Visual Studio 2022 with .NET 6 SDK
- pgAdmin and PostgreSQL Database
- GitHub account
- Heroku account
1. Create .NET project
Create a .NET Web API project, named NETToDoDemo. Select .NET 6 framework, authentication None, disable Configure for HTTPS, enable Docker, and select Windows as Docker OS.
Remove WeatherForecast class and WeatherForecastController controller.
Right click to the project / Edit Project file. Then, disable nullable property.
Create Entities folder and inside this create ToDo class.
using System.ComponentModel.DataAnnotations;
using System.ComponentModel.DataAnnotations.Schema;

namespace NETToDoDemo.Entities
{
    public class ToDo
    {
        [DatabaseGenerated(DatabaseGeneratedOption.Identity)]
        public int Id { get; set; }

        [MaxLength(30)]
        public string Name { get; set; }
        public string? Description { get; set; }

        [Range(1, 3)]
        public int Priority { get; set; }
        public bool IsCompleted { get; set; }
    }
}
Install the following packages:
- Microsoft.EntityFrameworkCore.Design
- Microsoft.EntityFrameworkCore.Tools
- Npgsql.EntityFrameworkCore.PostgreSQL
Create Contexts folder, and inside this create ToDoContext class.
using Microsoft.EntityFrameworkCore;
using NETToDoDemo.Entities;

namespace NETToDoDemo.Contexts
{
    public class ToDoContext : DbContext
    {
        public ToDoContext(DbContextOptions<ToDoContext> options) : base(options)
        {
        }

        public DbSet<ToDo> ToDos { get; set; }
    }
}
Open pgAdmin and create ToDoDemo database.
Open appsettings.Development.json file and add the connection string.
{
  "Logging": {
    "LogLevel": {
      "Default": "Information",
      "Microsoft.AspNetCore": "Warning"
    }
  },
  "ConnectionStrings": {
    "DefaultConnection": "Host=localhost;Database=ToDoDemo;Username=postgres;Password=12345678"
  }
}
In Program.cs file we are going to get the connection string and configure the Db Context.
using Microsoft.EntityFrameworkCore;
using NETToDoDemo.Contexts;

var builder = WebApplication.CreateBuilder(args);
var configurationBuilder = new ConfigurationBuilder()
                            .SetBasePath(builder.Environment.ContentRootPath)
                            .AddJsonFile("appsettings.json", optional: false, reloadOnChange: true)
                            .AddJsonFile($"appsettings.{builder.Environment.EnvironmentName}.json", optional: true)
                            .AddEnvironmentVariables();

builder.Configuration.AddConfiguration(configurationBuilder.Build());

// Add services to the container.

var defaultConnectionString = builder.Configuration.GetConnectionString("DefaultConnection");
builder.Services.AddDbContext<ToDoContext>(options =>
   options.UseNpgsql(defaultConnectionString));

...
Open Package Manager Console. And execute the following commands:
- Add-Migration InitialCreate -Context StoreContext
- Update-Database
Go to pgAdmin, ToDoDemo database and expand Schemas / public / Tables. As you can see there are 2 tables
In .NET project, right click to Controllers / Add / Controller ..., then select API, API Controller with actions, using Entity Framework.
Use the below configuration and click on Add.
Make sure it's selected IIS Express as profile. Then, go to Debug tab / Start Without Debugging.
All the methods from ToDosController are available to test.
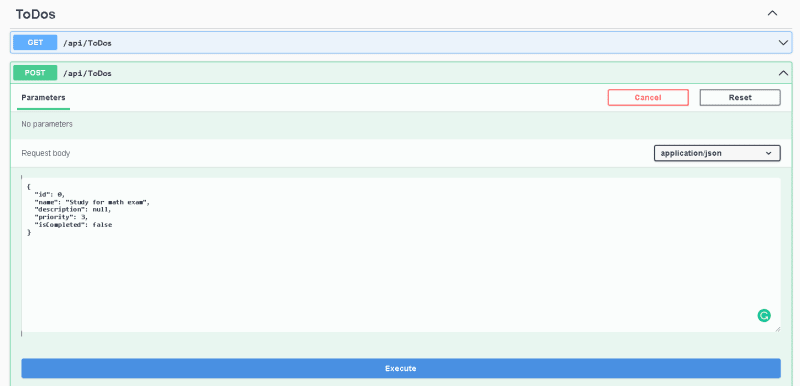
Let's test all the methods. First, create a ToDo.
As you can see, the ToDo was created in the database.
Then, we are going to update it. Go to the PUT method. Don't forget to specify the id in the parameters.
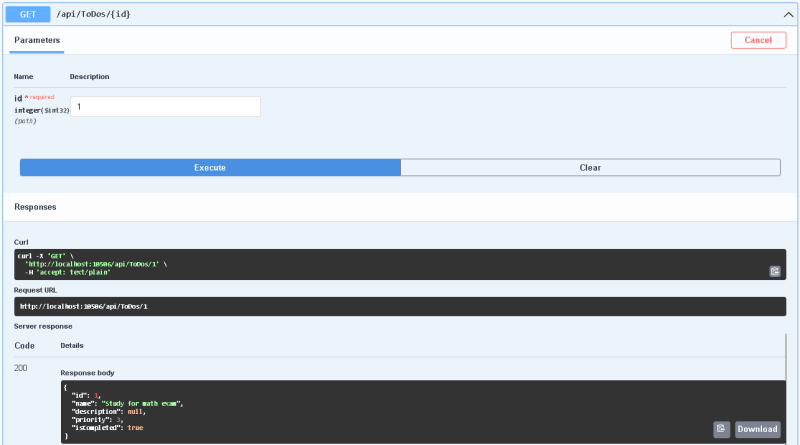
Test GET ToDos and GET ToDos by id.
Finally, test the DELETE method.
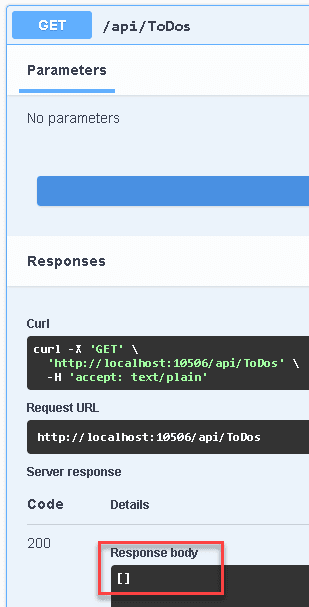
And if you test GET /api/ToDos again, the list should be empty.
2. Create Heroku project and PostgreSQL database
Go to Heroku and create an account if you haven't one. Click in New / Create new app.
Type a name for the app and then Create app.
Go to Resources tab and click in Find more add-ons.
In the search box, type postgres and hit Enter.
Select Heroku Postgres and click on Install Heroku Postgres.
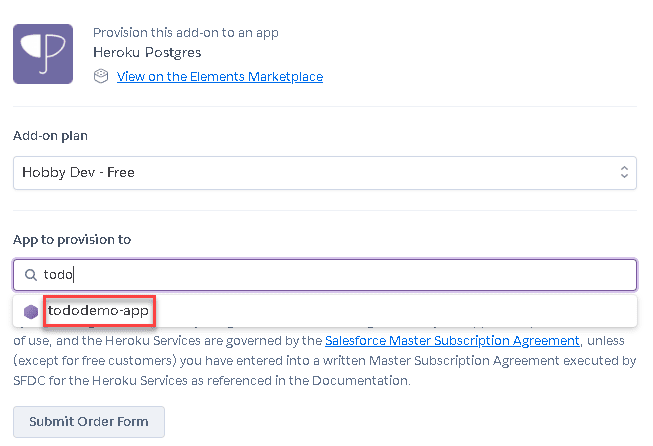
Select the app you created and click on Submit Order Form.
Click in Heroku Postgres.
Go to the Settings tab and click in view credentials.
The same credentials you can see in the Settings tab from the app panel.
Add ASPNETCORE_ENVIRONMENT config var.
In .NET project, in Program.cs, add the following below builder.Services.AddDbContext.
var serviceProvider = builder.Services.BuildServiceProvider();
try
{
    var dbContext = serviceProvider.GetRequiredService<ToDoContext>();
    dbContext.Database.Migrate();
}
catch
{
}
Also, add the following above builder.Services.AddDbContext.
var defaultConnectionString = string.Empty;

if (builder.Environment.EnvironmentName == "Development") {
    defaultConnectionString = builder.Configuration.GetConnectionString("DefaultConnection");
}
else
{
    // Use connection string provided at runtime by Heroku.
    var connectionUrl = Environment.GetEnvironmentVariable("DATABASE_URL");

    connectionUrl = connectionUrl.Replace("postgres://", string.Empty);
    var userPassSide = connectionUrl.Split("@")[0];
    var hostSide = connectionUrl.Split("@")[1];

    var user = userPassSide.Split(":")[0];
    var password = userPassSide.Split(":")[1];
    var host = hostSide.Split("/")[0];
    var database = hostSide.Split("/")[1].Split("?")[0];

    defaultConnectionString = $"Host={host};Database={database};Username={user};Password={password};SSL Mode=Require;Trust Server Certificate=true";
}
Move Dockerfile to the solution directory and update it. Make sure it's as the following structure.
FROM mcr.microsoft.com/dotnet/aspnet:6.0 AS base
WORKDIR /app
EXPOSE 80
EXPOSE 443

FROM mcr.microsoft.com/dotnet/sdk:6.0 AS build
WORKDIR /src
COPY ["NETToDoDemo/NETToDoDemo.csproj", "NETToDoDemo/"]
RUN dotnet restore "NETToDoDemo/NETToDoDemo.csproj"
COPY . .
WORKDIR "/src/NETToDoDemo"
RUN dotnet build "NETToDoDemo.csproj" -c Release -o /app/build

FROM build AS publish
RUN dotnet publish "NETToDoDemo.csproj" -c Release -o /app/publish

FROM base AS final
WORKDIR /app
COPY --from=publish /app/publish .
CMD ASPNETCORE_URLS=http://*:$PORT dotnet NETToDoDemo.dll
From Heroku, click in your avatar image / Account settings.
Go to API Key, click in reveal. Copy the API Key, we are going to use it in the next section.
3. Create repository in GitHub and implement CI/CD workflow
Go to your GitHub account, create a repository and push the project. Then, click on the Settings tab.
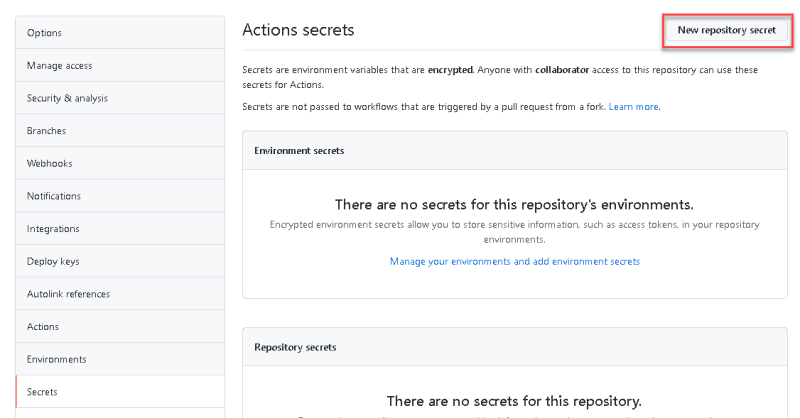
Go to Secrets tab and click in New repository secret.
Add the following secrets:
- Your Heroku API KEY
- Your Heroku email
- Your Heroku App Name
Click on Actions tab.
Click in set up a workflow yourself.
Replace the main.yml file with the following
name: Deploy to Heroku

on:
  push:
    branches:
      - main

jobs:
  build:
    runs-on: ubuntu-latest
    steps:
      - uses: actions/checkout@v2
      - uses: akhileshns/heroku-deploy@v3.12.12
        with:
          heroku_api_key: ${{secrets.HEROKU_API_KEY}}
          heroku_app_name: ${{secrets.HEROKU_APP_NAME}}
          heroku_email: ${{secrets.HEROKU_EMAIL}}
          usedocker: true
This file is responsible to deploy automatically to Heroku using the secrets we created and the Dockerfile in the .NET project.
Click in Start commit and then Commit new file.
We have to wait until the GitHub action finishes. As you can see it was successful.
If you go to the Overview tab in your Heroku app. You can notice it was added something in Dyno information.
You can test your API with the following base URL https://<APP_NAME>.herokuapp.com.
You can find the source code here.
Thanks for reading
Thank you very much for reading, I hope you found this article interesting and may be useful in the future. If you have any questions or ideas that you need to discuss, it will be a pleasure to be able to collaborate and exchange knowledge together.











Latest comments (1)
Great tutorial, thank you Cristopher! I'll bookmark it poste restante.