What you’ll be building. Demo, Git Repo Here.
Introduction
It's time you take your web development to the next level. You need to start developing mobile apps and if you ain’t there yet, start building. React Native has made life a lot easier for all the JavaScript developers out there, especially from the ReactJs community. And to cap it all, Google decided to contribute to the community by providing free starter backend services called Firebase. Firebase will get you producing mind-blowing applications, web or mobile in no time. You don’t need a top-notch machine to start developing a React Native app (initially speaking). All you must do is to get started.
Prerequisites
To follow up this tutorial, you will need to understand how to use the following stacks.
Installing the Application Platforms
Firstly, you need to have NodeJs installed on your machine; you can go to their website to do that. Secondly, you need to have the Expo-CLI installed on your computer using the command below.
# Install Expo-CLI
npm install --global expo-cli
Initializing the Project
Next, on the terminal create a new expo project with the name “instagram-clone” and the blank template when prompted. You should know that expo-CLI uses yarn by default.
# Create a project named my-app
# Select the "blank" template when prompted.
expo init instagram-clone

# Navigate to the directory.
cd instagram-clone

# Start the newly created expo project.
yarn start // or yarn web to spin up the web interface.
Executing the above commands will create a new react-native project and spin it up on the browser. Now you will have the option of launching the IOS, Android, or the Web interface by simply clicking on the one that you want. For the sake of the newbies coding along with me, we will use the web interface. To spin up a development server on a mobile device you will need a simulator. Check out the instructions found here to use an IOS or Android simulator, otherwise, use the web interface and follow up the tutorial. Lastly, open the project in VScode, and let's get coding.
Superb, you have successfully created the project, let’s install the project dependencies next.
Installing Project Dependencies
Just the core packages of React Native won’t get us an instagram clone, we will add up some more packages to finish up this project.
# Required Packages
expo install firebase
yarn add @react-navigation/native
yarn add @react-navigation/stack
yarn add email-validator
yarn add formik
yarn add valid-url
yarn add yup
Epic, you have just completed the installations of our app dependencies, now let’s proceed with setting up Firebase configurations for this project.
Setting Up Firebase
This app uses Firebase for all its backend activities. To configure Firebase into This app uses Firebase for all its backend activities. To configure Firebase into your project, follow the steps below.
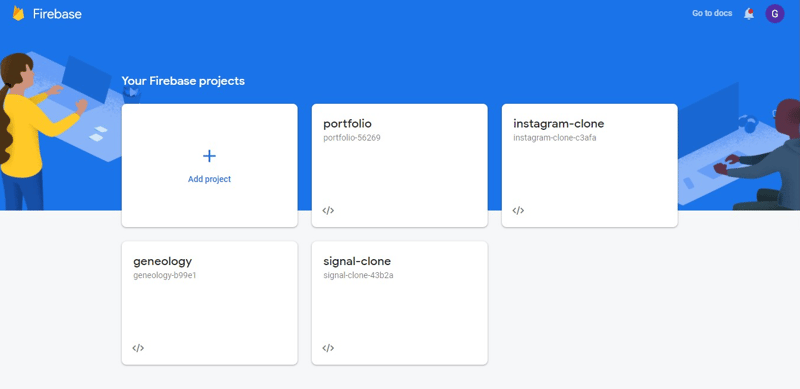
In the first step, we will head on to the Firebase console and create an account, you will need a Gmail account for this. You can sign in if you already have an account, you should see this project interface once you are in.
Once you are on this page, click on the ”add project” button and you will be directed to a project creation process. You will start by entering the name of your project.
Once you have entered a project name, click on continue until the project creation is completed and you will be presented with the project overview page as seen in the image below.
Next, we want to activate two services on Firebase that will help us build this application. One is the authentication service and the other, the Firestore service.
Next, click the edit icon on the email/password provider and enable it as seen in the image below.
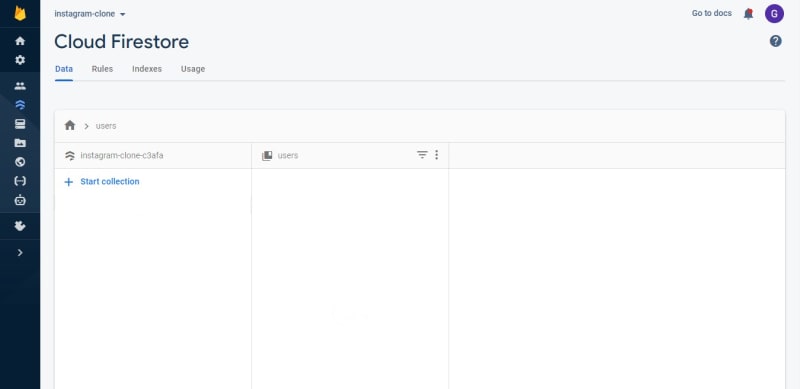
Next, head to the Firestore database and activate it by clicking on the get started button, the page should look like this after enabling the Firestore service.
Now it's time we create a config set up for our application. Head to the project overview page and click on the “add app” button, and choose the web option.
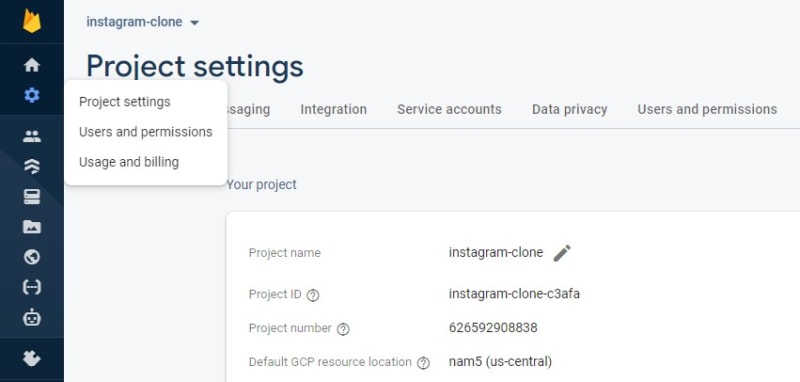
You can get all this information from the Project Settings page as seen in the image below.
Scroll down and you will see the configuration settings. Create a new file called firebase.js at the root of your project and copy these configurations to it. This file will later be used for developing our application and it should look like this.
Fantastic, we are done with the basic Firebase settings, let’s proceed to the structuring of this application.
Project Structure
Your project structure should be looking like this.
You should keep this as a reference guide as you code along. Jump in with me and let's start creating our project directories and files one after the other.
The Components Directory
We have several directories in this project, let's start with the components folder. Create a folder called components within the root of this project and create the files discussed below.
FormikPostUploader.js Component
This component is responsible for defining what each post will contain. This component uses Formik and Yup for structuring the interface that helps create new posts. It also ensures that each post you upload to the database is well captured and validated with correct data. See the code snippet below.
Super, now let’s use it in the AddNewPost component.
AddNewPost Component
This component combines the FormikPostUploader component to improve the user interface. It also adds a Header component that will navigate the "NewPostScreen" back to the "HomeScreen". The code snippet below describes it better.
Great, we will later hook up this components with the NewPostScreen.
Header Component
This component carries three icons and the brand name which also serves as the logout button. Among the three icons are a plus, heart, and chats icons. The plus icon navigates you to the NewPostScreen. The snippet below shows this in detail.
Epic, we will use this component later on the HomeScreen. Let’s proceed to code up the Stories component.
Stories Component
The stories component renders a list of stories and their respective username and is displayed in a vertical scroll view. The code snippet tells it all.
This component along with the Header component will be used on the HomeScreen later. It’s time to proceed with the BottomTabs component.
BottomTabs Component
This component is responsible for displaying the sticky bottom icons at the bottom part of our app. It can also be used for navigation. See the codes below to understand how it works.
You have done well, let’s build the post component next.
Post Component
This component is comprised of many smaller components stacked in one file, it's best we describe it visually and codewise.
This is a huge component, it is better to spit out the codes for you to look at.
Nice, you have done well, keep following and you will complete this app successfully. Now let’s add the authentication components.
LoginForm and SignupForm Components
These are the authentication components built to provide a clean authentication user interface. This component also uses Formik and Yup to perform form validation. Since they are similar code-wise, we might just as well discuss them at once. Create and copy the codes below into the following components in your components folder.
Hurray, you have just completed the creation of all the components we will be using for this tutorial. Now let’s jump in and start creating some screens.
The Screen Directory
This entire project contains four screens which include the Login, Signup, Home, and NewPost screens. Let’s proceed by coding the LoginScreen.
Login Screen
This screen will authenticate a user if he has previously signed up on our application. With correct details the user will be let in, else, the firebase will alert the user of invalid credentials. Here is the code responsible for this behavior.
Now let’s moving on to the SignUpScreen.
Signup Screen
While the Login Screen authenticates already existing users, the SignUpScreen registers new users into our application.
Great, let’s add the last two screens starting with the NewPost screen.
New Post Screen
This component allows us to send a new post to firebase after validating it with the FormikPostUploader component. The codes are attached below.
Smart, let’s finish up with the HomeScreen.
Home Screen
This is the heart of this project. The Home screen uses the Post, Header, and BottomTabs components to populate the view. This is achieved by retrieving the posts from Firestore and recursively rendering all the posts with the Post component. The code snippets show this in detail.
There you have it, you are almost done with this process, let’s support this app with some static data.
The Data Directory
This folder contains all the static files needed to support this project, it is essential for supporting the components data. Create a folder named “data” at the root of this project and create the following files inside of it.
Amazing, let’s secure our application routes so unauthorized users won’t access it.
Route-Guards and Protection
Using the Firebase authentication service and authState function, we will regulate access to our application. Create two files named “AuthNavigation.js” and “navigation.js” at the root of this project. Next, paste the following codes into them.
Good, let’s seal the deal by replacing the App.js with the code block below.
import React from 'react'
import AuthNavigation from './AuthNavigation'
export default function App() {
  return <AuthNavigation />
}
Cool, you have been so patient coding along, you deserve a cup of coffee.
Before you go, download the images from the links below and add them to the assets folder of this project.
https://github.com/Daltonic/instagram-clone/blob/main/assets/header-logo.png?raw=true
https://raw.githubusercontent.com/Daltonic/instagram-clone/main/assets/instagram_logo.png
Congratulations, you just crushed this project.
Conclusion
You don't need rocket science to learn how to develop applications with react and react-native. You can start small but never remain small. With the support of Google's Firebase, learning how to create stunning applications with react and react native will continuously advance your skills in software development and you can land that dream job or upscale your dev skills. You have to learn how to build a react native Instagram clone, it's time you start building.
About Author
Gospel Darlington is a remote Fullstack developer, prolific with technologies such as VueJs, Angular, ReactJs, React Native, and API development.
He takes a huge interest in the development of high-grade and responsive web applications.
Gospel Darlington currently works as a freelancer developing apps and writing tutorials that teach other developers how to integrate software products into their projects.
He spends his free time coaching young people on how to be successful in life. His hobbies include inventing new recipes, book writing, songwriting, and singing. You can reach me on Website, LinkedIn, Twitter, Facebook, or GitHub for any discussion.


Top comments (1)
Are you looking for an Instagram Clone for Android and iOS? We provide an Instagram clone development service. Make an app like Instagram in your budget. Our app developers will create apps like Instagram, other social apps with more enhanced features.