Hello folks,
So as you already know from the title we are going to create a live chat with Socket, Angular, and Node.. and we are not going to connect it with the database as it can be your first project with the socket.
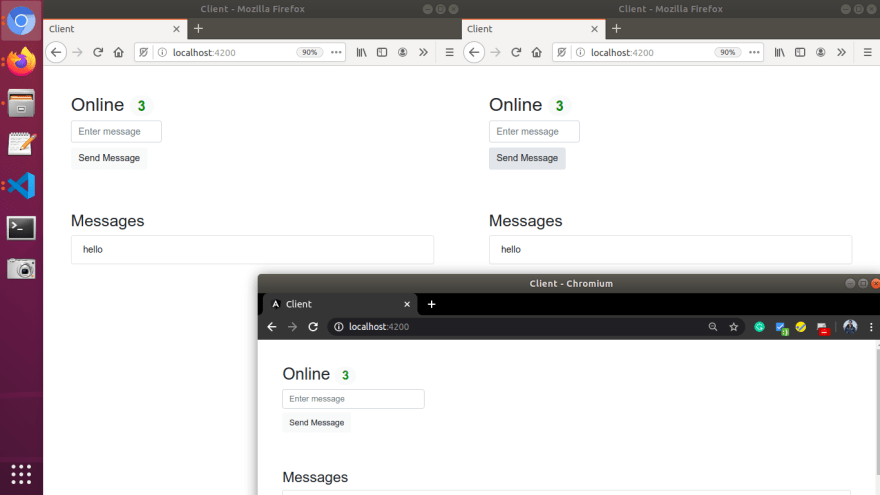
Before starting let's have a look on what's we gonna create,
Sample Output:-
Find this project here : Github
So, Let's start:
1.
First let's setup the project :
mkdir chat
cd chat
ng new client
express server
execute the commands given to set up our application first :
after this your folder should look like this :
chat
|-client
|-server
2.
So, now let's start with creating the basic UI first.
Replace your index.html with this code:
<!doctype html>
<html lang="en">
<head>
  <meta charset="utf-8">
  <title>Client</title>
  <base href="/">
  <meta name="viewport" content="width=device-width, initial-scale=1">
  <link rel="icon" type="image/x-icon" href="favicon.ico">
  <link rel="stylesheet" href="https://stackpath.bootstrapcdn.com/bootstrap/4.5.0/css/bootstrap.min.css" integrity="sha384-9aIt2nRpC12Uk9gS9baDl411NQApFmC26EwAOH8WgZl5MYYxFfc+NcPb1dKGj7Sk" crossorigin="anonymous">

</head>
<body>
  <app-root></app-root>

  <script src="https://code.jquery.com/jquery-3.5.1.slim.min.js" integrity="sha384-DfXdz2htPH0lsSSs5nCTpuj/zy4C+OGpamoFVy38MVBnE+IbbVYUew+OrCXaRkfj" crossorigin="anonymous"></script>
<script src="https://cdn.jsdelivr.net/npm/popper.js@1.16.0/dist/umd/popper.min.js" integrity="sha384-Q6E9RHvbIyZFJoft+2mJbHaEWldlvI9IOYy5n3zV9zzTtmI3UksdQRVvoxMfooAo" crossorigin="anonymous"></script>
<script src="https://stackpath.bootstrapcdn.com/bootstrap/4.5.0/js/bootstrap.min.js" integrity="sha384-OgVRvuATP1z7JjHLkuOU7Xw704+h835Lr+6QL9UvYjZE3Ipu6Tp75j7Bh/kR0JKI" crossorigin="anonymous"></script>
</body>
</html>
here we added bootstrap to our project..
And after this :
Go to
/client/src/app/app.component.html and replace the code with the following:
<div class="m-5">
  <h2>Online
  <span class="badge badge-pill badge-light" style="color: greenyellow;">
    2
  </span>
</h2>
<input type="text" class="form-control w-25" placeholder="Enter a message">
<button class="btn btn-light mt-2">
  Send message
</button>

<br><br><br><br>
<h3>Messages</h3>
<ul class="list-group">
  <li class="list-group-item" >item </li>
</ul>
</div>
Run this code in the client folder,
ng serve -o
to see our code in action..
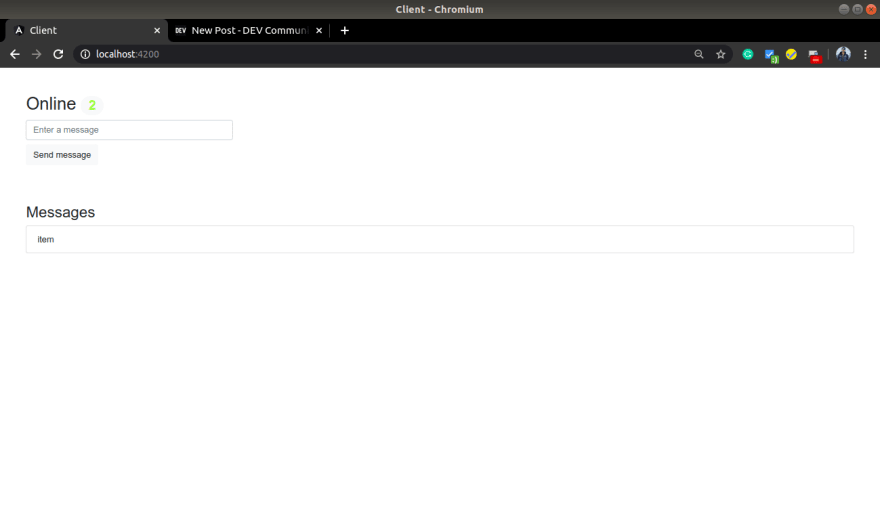
you will see we are done with our basic UI.
3.
Let's create a service first..
in client/src/app run:
ng g s socket
and also run to install socket client
npm i socket.io-client --save
And put the following code in socket.service.ts:
import { Injectable } from '@angular/core';
import * as io from 'socket.io-client';
import { Observable } from 'rxjs';

@Injectable({
  providedIn: 'root'
})
export class SocketService {

  socket;
  socket_endpoint = 'http://localhost:3000';


  constructor() {
    this.socket = io(this.socket_endpoint);
  }

  sendMessage(msg){
    this.socket.emit('new-message',msg);
  }

  getMessage(){
    return Observable.create((observer)=>{
      this.socket.on('new-message' , (message)=>{
        observer.next(message);
      })
    })
  }

  getOnUser(){
    return Observable.create((observer)=>{
      this.socket.on('on-user',(count)=>{
        observer.next(count);
      })
    })
  }

}
After this Goto ,
/client/src/app/app.component.ts
And place the following code..
import { Component ,OnInit} from '@angular/core';
import {SocketService} from './socket.service';
@Component({
  selector: 'app-root',
  templateUrl: './app.component.html',
  styleUrls: ['./app.component.css']
})
export class AppComponent {
  title = 'client';


  message = '';  //message typed by user
  msgList = []; //list of messages
  userOnLine :Number = 0; //number of online users
  constructor( public socketService:SocketService ){}

  ngOnInit() {
    this.getMessage();
    this.getOnUser();
  }

  getMessage(){
    this.socketService.getMessage().subscribe((message) => {
      console.log(message);
      this.msgList.push(message);
    })
  }

  getOnUser(){
    this.userOnLine = this.socketService.getOnUser().subscribe((res)=>{
      console.log(res + ' user online');
      this.userOnLine = res as Number;
    });
  }

  sendMessage() {
    if(this.message.length == 0)
      return;

    this.socketService.sendMessage(this.message);
    this.message = '';
  }
}
Message variables will hold the message typed by the user for this we will use two-way binding.
To use two-way binding let's first import FormModule.
Add the followings in app.module.ts file:
import { FormsModule } from '@angular/forms';

imports:[
FormsModule
]
Now to enable two-way binding let's format the code of app.component.html:
<div class="m-5">

  <h2> Online
    <span class="badge badge-pill badge-light" style="color: green;">
      {{ userOnLine }}
    </span>
  </h2>


  <input type="text" class="form-control w-25" [(ngModel)]="message" placeholder="Enter message">
  <button class="btn btn-light mt-2" (click)="sendMessage()">
    Send Message
  </button>


  <br><br><br><br>
  <h3>Messages</h3>
  <ul class="list-group">
    <li class="list-group-item" *ngFor="let item of msgList">{{ item }}</li>
  </ul>
</div>
With this, we are all done with our client-side...
So, let's Do our backend now...
4.
First, let's install some dependencies:
Run this command inside server/
npm install socket.io --save
then,
In, server/bin/www add:
const io = require('socket.io')(server);
require('../socket/base')(io);
5.
Now let's create that base file we imported in the above step :
create a folder named socket inside the server folder...
And, create a base.js file in that folder.
Server
|- socket
..|- base.js
IN base.js file :
var userCount = 0;
module.exports = (io)=>{
    io.on('connect', (socket)=>{
        userCount++;

        socket.on('disconnect',()=>{
            userCount--;
            io.emit('on-user',userCount);
        });

        socket.on('new-message',(msg)=>{
            io.emit('new-message',msg);
        });

        io.emit('on-user',userCount);
    });
}
paste this code and restart both of your server's
Now let's have a look at our final output....
Find this project here : Github
Please give a follow in Github if you liked this article...


Top comments (0)