
This article was originally published on the Sentry blog here.
In this article we are going to talk about Unity basics. By the end you will understand the Unity editor interface, Game Objects and Sprites, the frequently used UI elements, and a high-level overview of how to monitor your Unity games for errors and performance issues. This is written for beginners who have never used Unity before but have previous experience using a programming language.
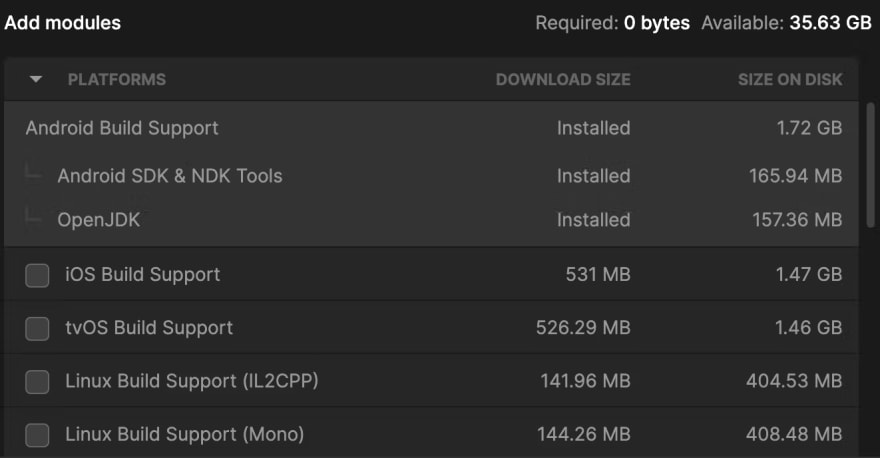
The following should be installed on your computer to follow along this tutorial:
- Unity
- Unity Hub
- Visual Studio
In this tutorial, Unity Version “2020.3.23f1” is used.
Unity is a cross-platform game engine where you can develop 2d and 3d games. When we say cross-platform, we mean it is used to build multi-platform applications (for example, Android, iOS, desktop, virtual reality, consoles). It supports more than 19 platforms and the Unity editor is supported by macOS, Windows, and Linux.
Let’s open Unity.
Introduction to the Unity editor interface
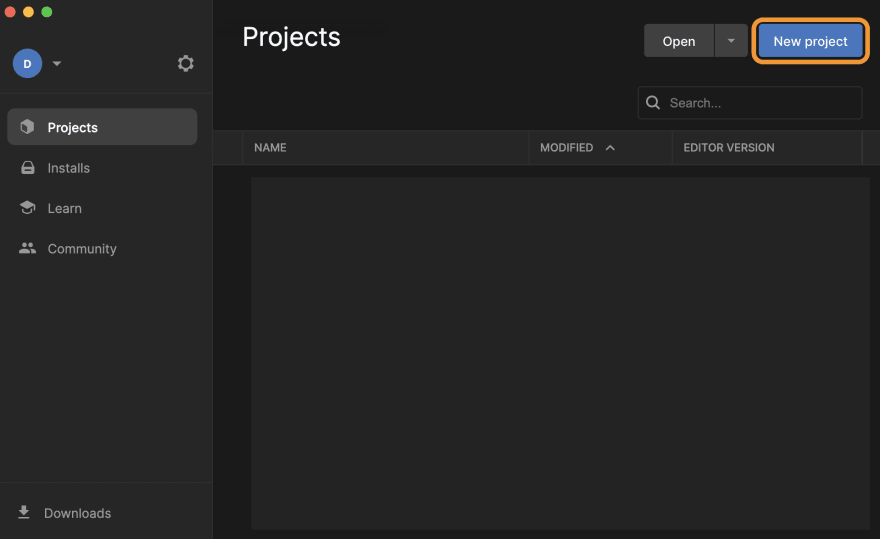
Start by opening Unity Hub > Click on New Project > Select 2D > Click on Create Project.

After opening Unity and creating your new project, you’ll land in the editor interface (see below). The Unity Editor has several windows. You can edit the layout to whatever suits you. But before changing the layout, let’s understand a little more about each window’s capabilities.
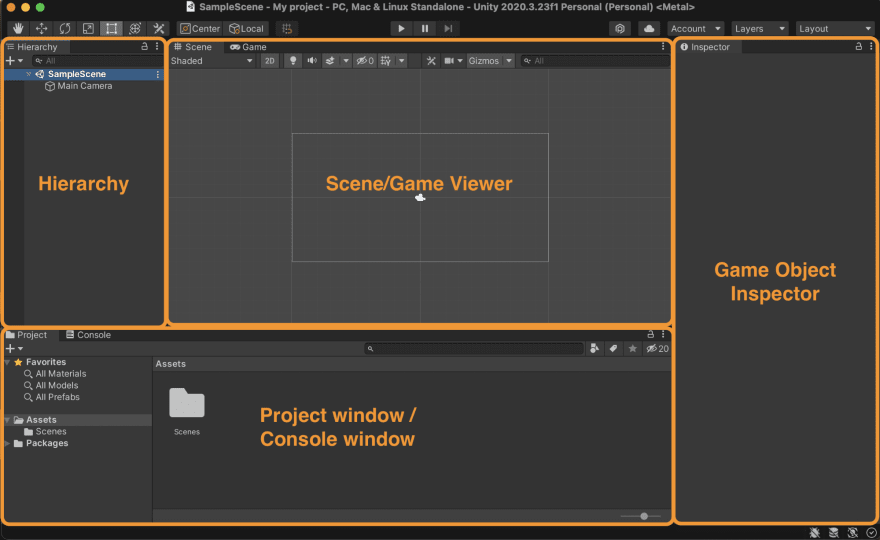
Hierarchy window
This window is for all the objects in the scene in hierarchical order. By objects, I mean game objects which are literally anything in the scene. In the image above, the “Main Camera” is a GameObject. The GameObjects will be arranged in the same order you created them (you can re-arrange if you’d like). The order (top to bottom) does not matter all that much in most cases. But the Hierarchy allows creation of Parent-Child relationships by dragging GameObjects into each other.
Scene Window
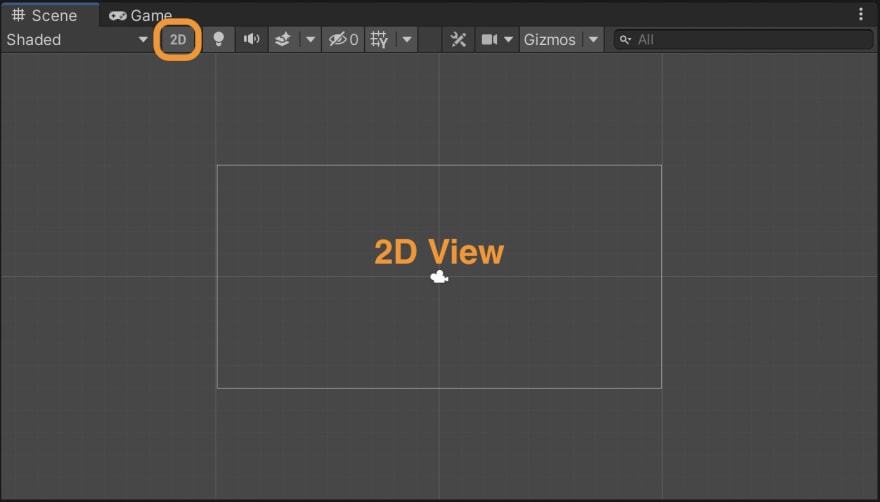
A Scene is where the actual content of your game lives. The scene can be a menu scene, a level scene, a game scene, etc. You can view the scene in 2d and 3d view, even if it is a 2d project. To do so, just toggle the 2d button as shown in the image below. In this window you can select, position, and/or modify the GameObjects.

Game window
Located just to the right of the “Scene” tab, the “Game” tab opens a window of what the player will see when they play your game.
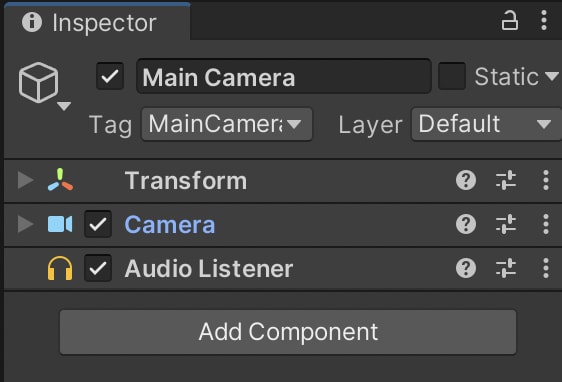
Game Object Inspector Window
From this window, you can change any component of the selected GameObject. In the image shown below, the Main Camera GameObject is selected, and below is all the detailed information for the Main Camera. “Transform”, “Camera”, and “Audio Listener” are all components added to the Main Camera by default. You can add more components to a GameObject by using the “AddComponent” button. We will talk more about components later.
Project Window
This is where the project folders live. There is an Assets folder and a Packages folder. The Assets folder contains everything about your game — scenes, images, fonts, C# scripts, sound files, and more. The Packages folder contains the packages which are “extensions” to the Unity Editor that can add functionality or assets that you install from the Package Manager (for example Unity UI Package, which is installed by default). You can remove the packages from the Package Manager. To open the Package Manager click on Window in the menu bar, then Package Manager.
Console Window
Just right of the Project Window is the Console Window. Here you will find log messages, error messages, and warnings.
Changing the Layout
I’m going to change the layout to a (personally) more preferable view.
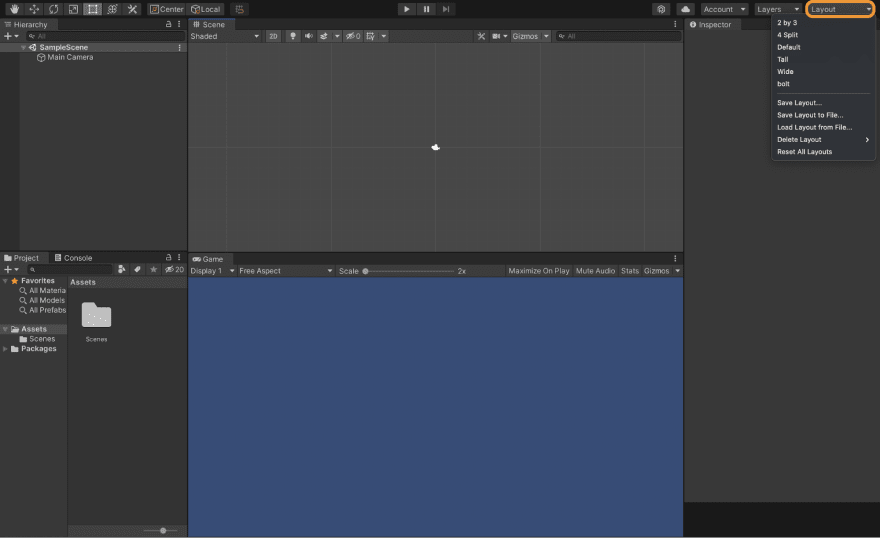
There are pre-saved layouts from the Layout dropdown menu as shown in the image below.
You can change the layout by dragging and dropping the windows wherever you desire. Here, I dragged the Game window to be below the Scene window at the center, and the Project & Console windows to be below the Hierarchy window on the left. Choose whichever layout you prefer.
Game Objects
A GameObject is any object in your scene. It is like a container that has properties. You change properties by adding and editing its components. Unity has a lot of components ready to be used, but you can create your own as well using C# scripts.
There are a few ways to create a GameObject and add it to a scene:
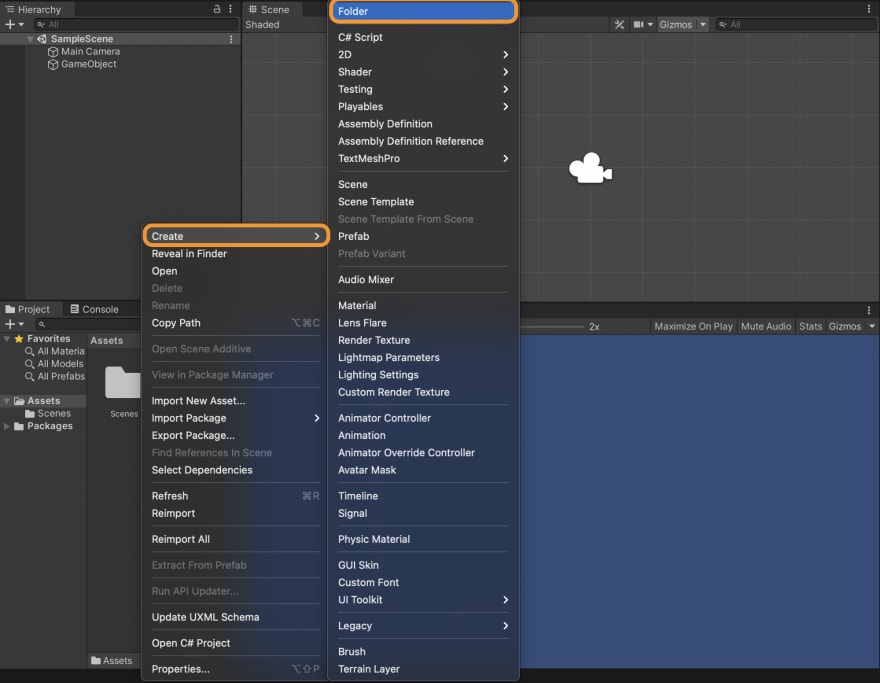
- Right-click in the Hierarchy window, then choose any of the objects from the popup menu as shown in the image below. You can create an empty object, select a 2D object, a 3D object, effects, and so on.

- Alternatively, you can drag an object from the Assets folder and drop it in the Hierarchy window (Unity will try to create a GameObject with the appropriate components for you).
When you create an empty GameObject, it is an empty container until you add components. This empty GameObject can be used as a container for the scene management script, for example (we will talk about scripts later). This GameObject will not be visible to the player since it has no component that can be rendered/displayed to the player, but the script will run in the background.
Let’s create one and check the inspector.
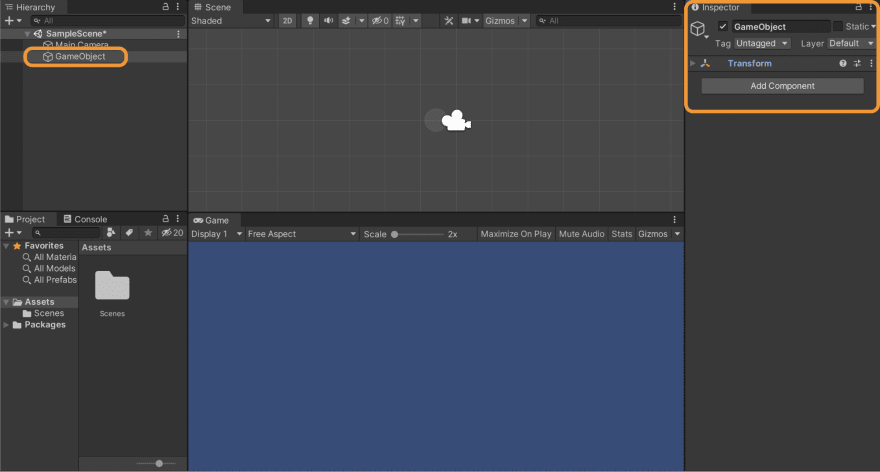
According to the image above, the empty GameObject only has a Transform component. We will talk about the Transform component a little later. As you can see in the Scene window, only the Main Camera is shown. The Main Camera has some special components like Gizmos which can easily be found in the scene view.
Let’s check out some other frequently used game objects.
Sprites
A Sprite is a 2D graphical GameObject (basically an image). They are images that cover the GameObjects to give them a visual appearance.
Let’s add a Sprite into our scene.
There are two ways we can add a Sprite:
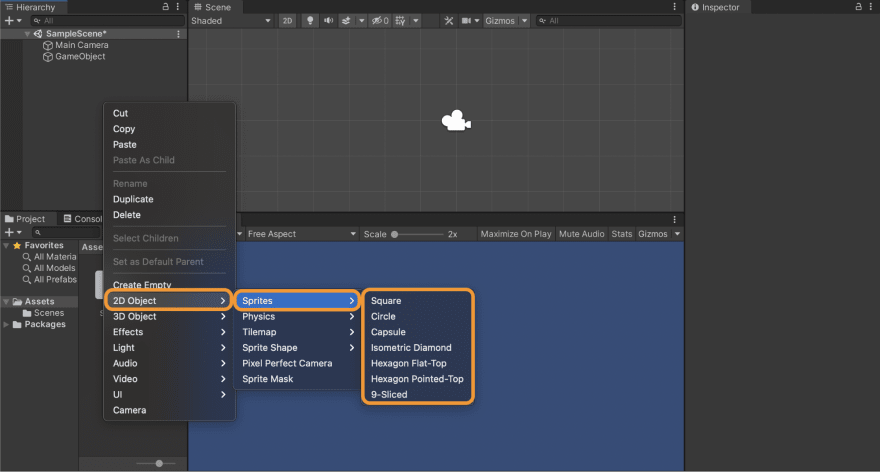
- If you want specific shapes, like a square or a circle, right click in the hierarchy window > 2D Object > Sprites > Select whatever shape you want as shown in the image below.
- Drag an image from the assets folder into the hierarchy window. To do this, we’ll need to add images into the asset folder. For organizational purposes: Create a new folder within the assets folder for Sprites / images.
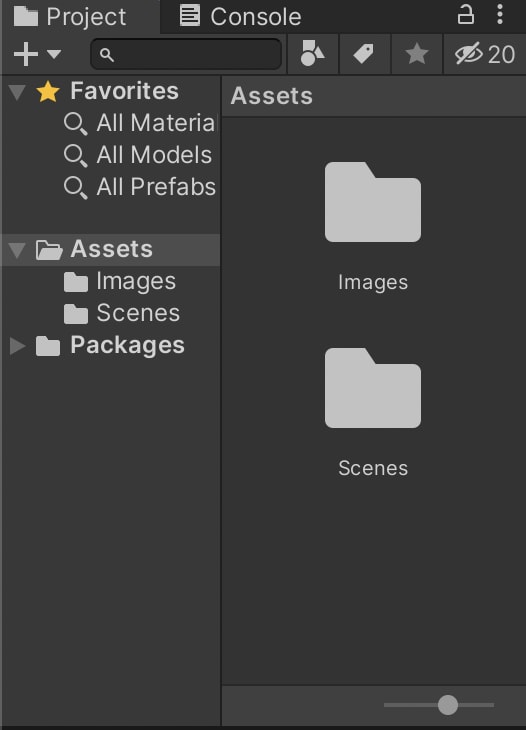
Now you can drag items into the images folder, or right-click on the images folder > Import New Asset > Choose the image you want from your computer.

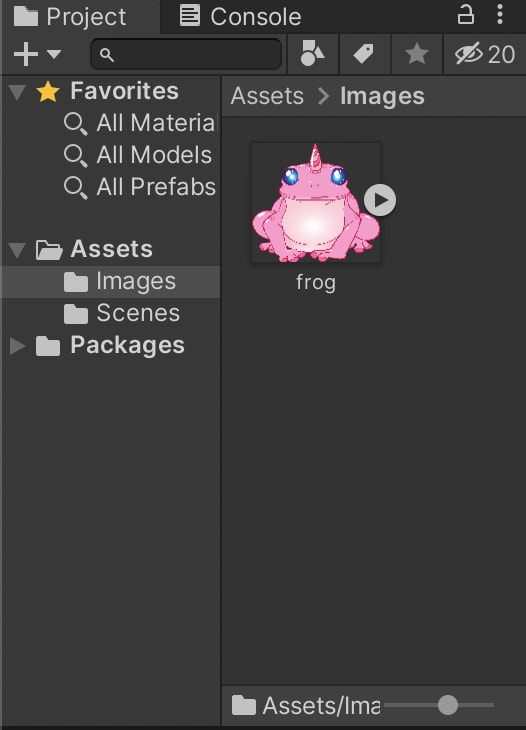
I’m going to add an image of a frog into my Assets > Images folder.
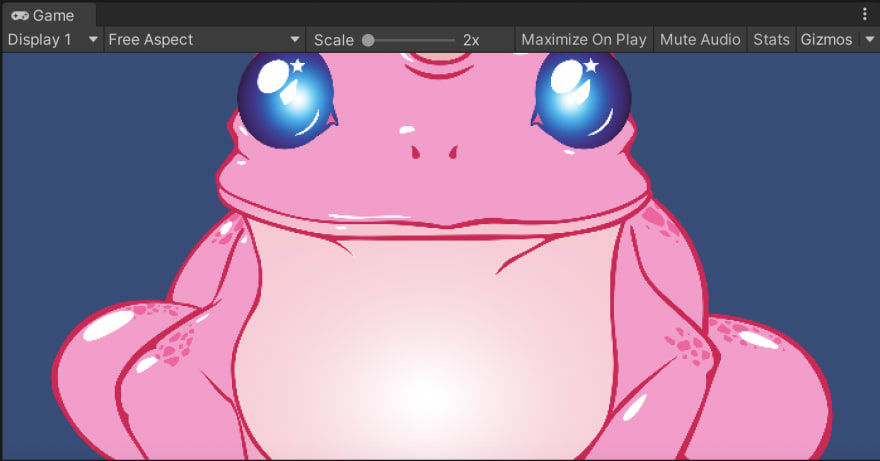
Let’s add this Sprite into the scene by dragging it into the Hierarchy window.
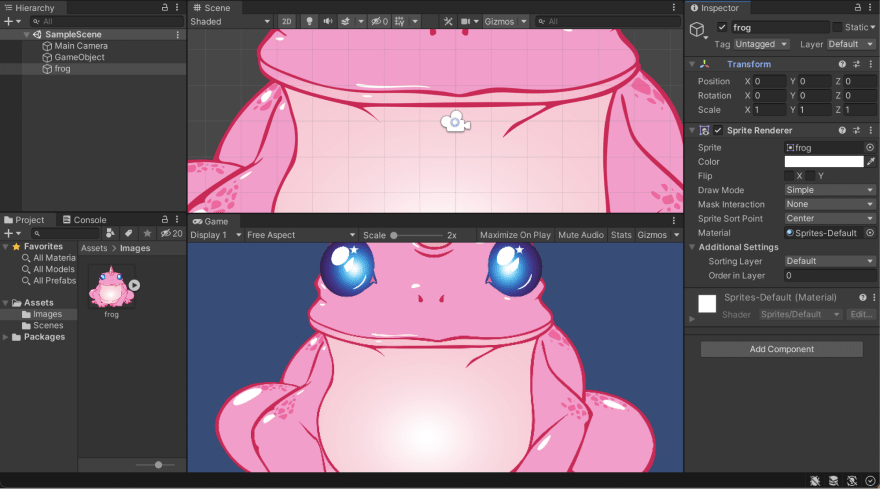
As you can see in the image below, the frog image appears low quality as the outline is pixelated.
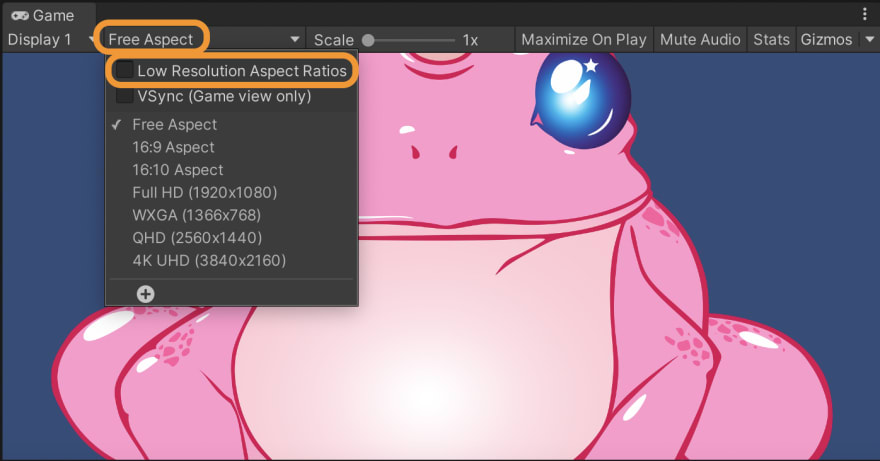
To improve the quality, uncheck Low Resolution Aspect Ratios as shown below.
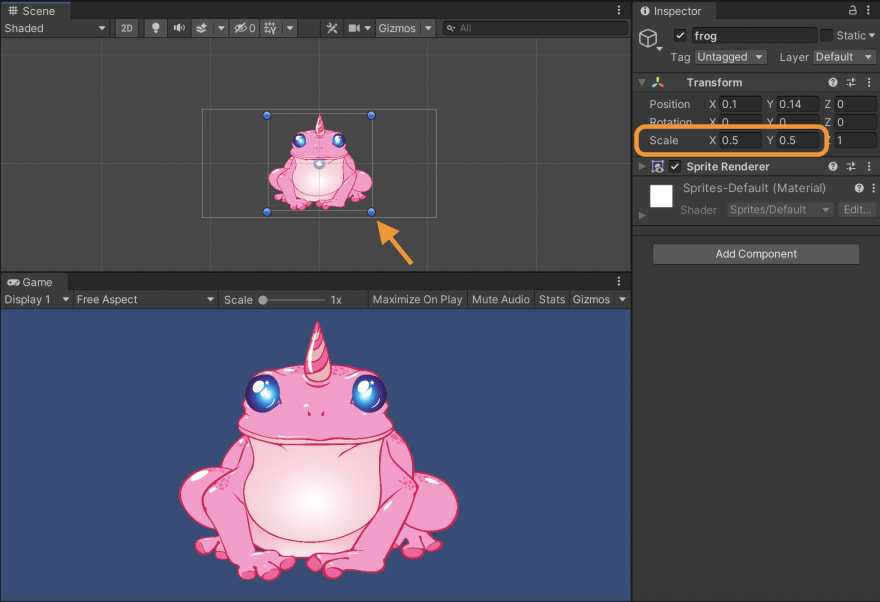
We need to scale the frog down as it is too big. To do so, select the frog, then go to the Inspector and change the Scale in the Transform Component to a smaller size (0.5, for example). Another way to do this is to select (and grab) the image by one of the blue dots around it’s edges and, while holding the shift key to maintain aspect ratio, drag it to the size you want.
Sprite Inspector
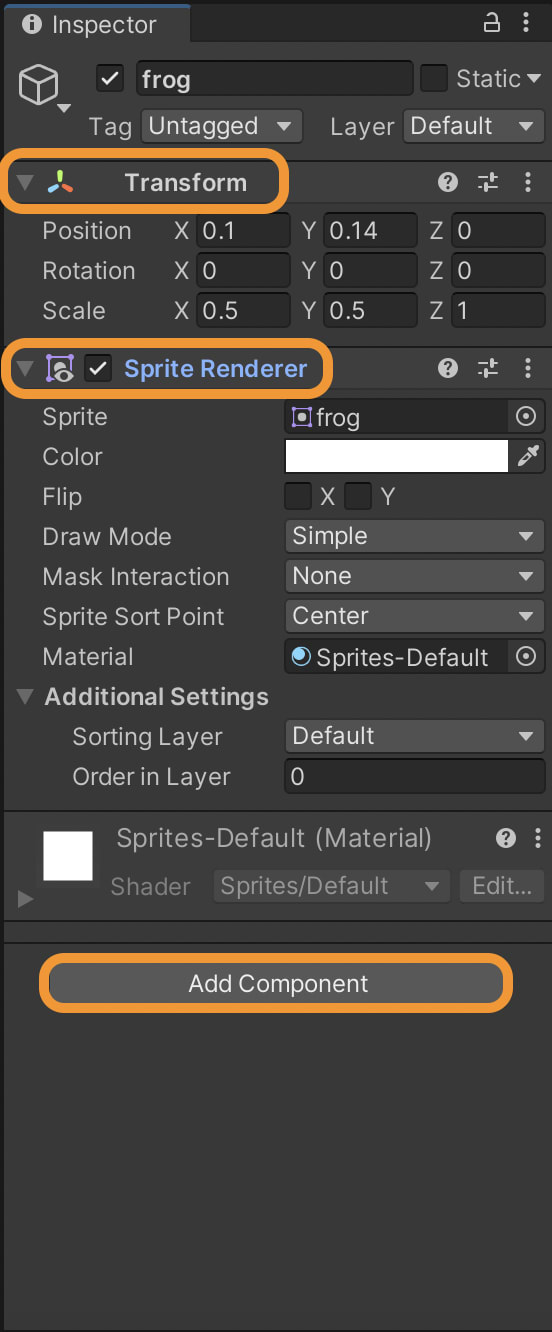
Now let’s take a look at the Sprite’s inspector.
As shown in the image, a Sprite has two main components by default:
- Transform
- Sprite Renderer
You can always add more components using the “Add Component” button at the bottom.
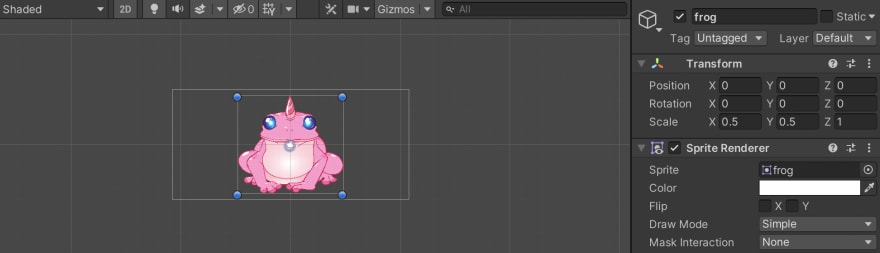
The Transform component has the object’s position, rotation, & scale in X, Y, & Z coordinates. Since this is a 2D game object, Z will be 0. These are pretty self explanatory.
Let’s see how these X, Y, and Z coordinates are measured.
For the “Position”, X & Y are measured from the center of the screen. The center of the screen grid is point (0,0).

The frog’s center is located at point (0,0) thus position X = 0 & Y = 0. This point is measured from the blue circle at the center which is called the object’s pivot.
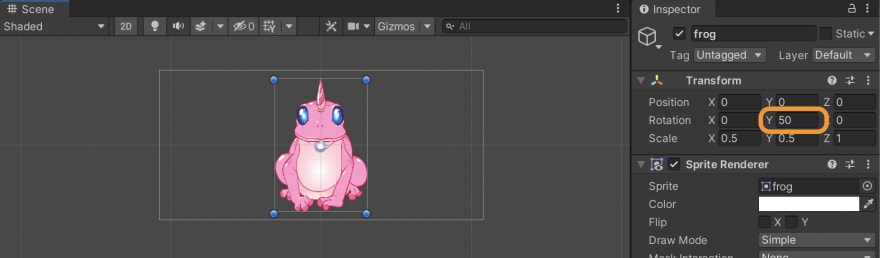
The Sprite’s rotation will rotate around the pivot. Let’s change rotation values and check the frog. If we change the X value, it will rotate around the X axis.

If we change the Y value, it will rotate around the Y axis.
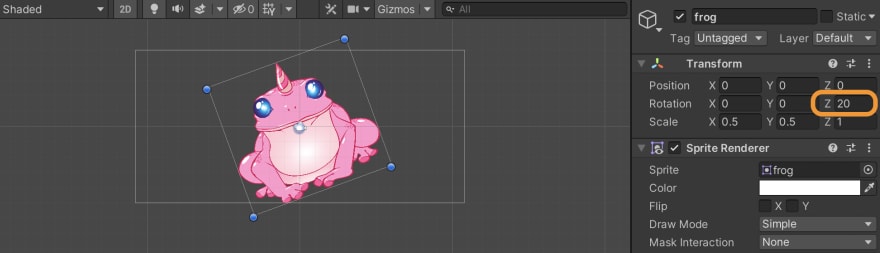
If we change the Z value, it will rotate around the Z axis.
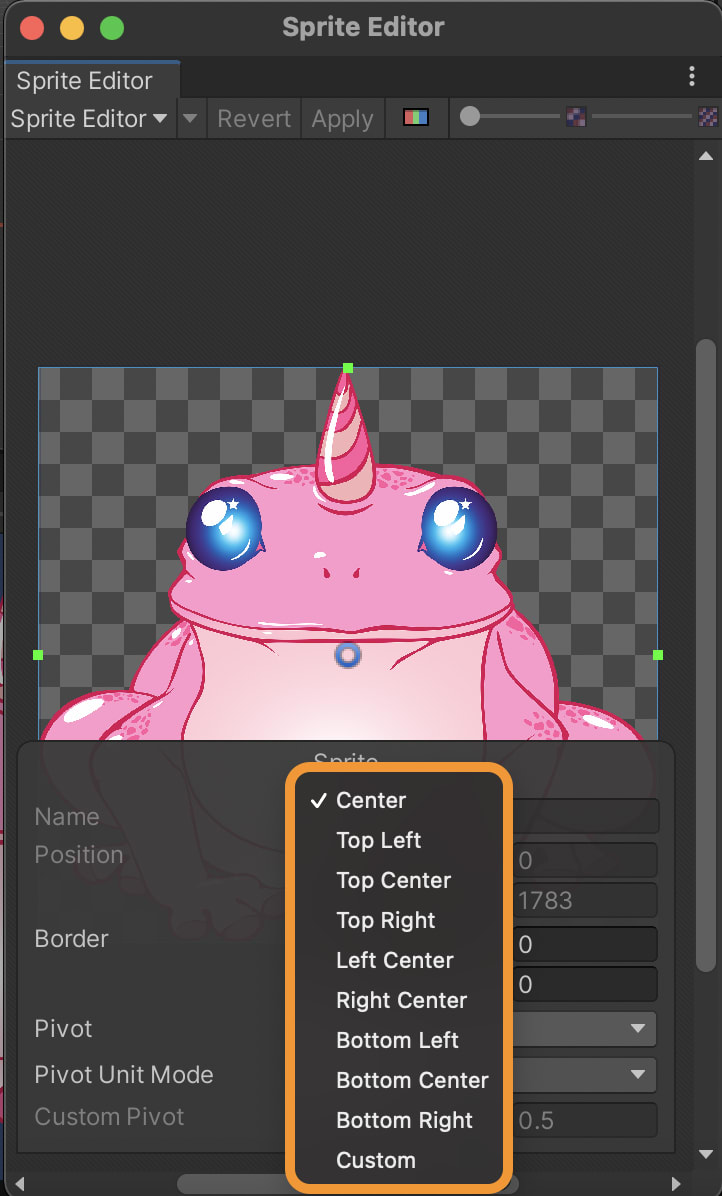
To open the Sprite Editor window: From the menu bar, select Window > Select 2D > Sprite Editor, then select the value from the Pivot dropdown window (center is the default).
Let’s define the main properties of the sprite renderer component:
- Sprite: You can change the image here
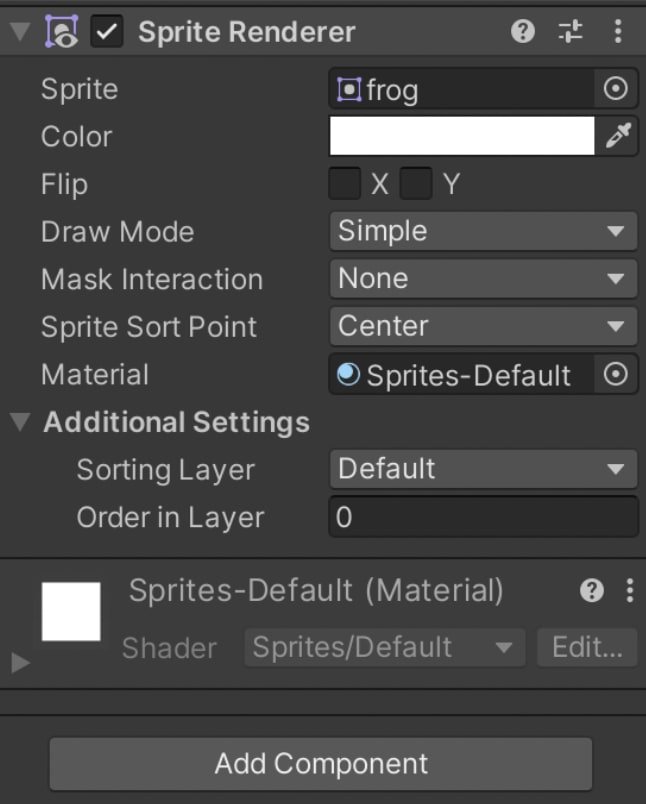
- Color: Change its color.The chosen color will cover the image but keeps the outline of the frog. Let’s change the color to black as shown in the image below.

Flip: Allows you to flip the game object vertically and horizontally by checking the X & Y.
Additional Settings: If you use layers, you can sort the GameObject into a specific layer, as well as its order in that layer. For example, you can make a background layer that will be the background image of your game. Then the UI layer will be for the buttons and menus.
UI Game Objects
To add these GameObjects to the scene, we right-click in the hierarchy window > UI menu.
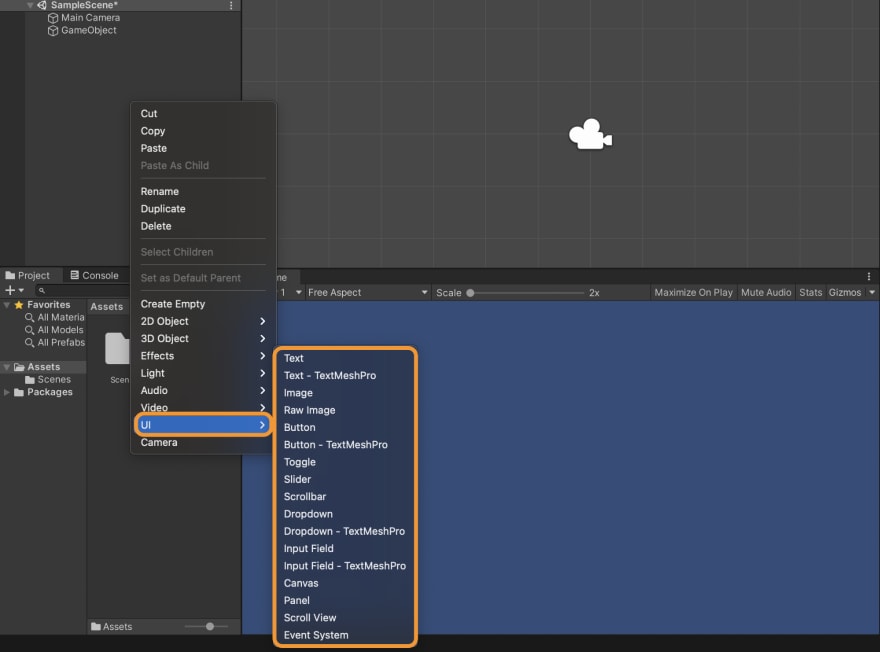
Now, let’s add the following UI GameObjects and check their inspector components.
When you add a text, image or button GameObject, a Canvas and an EventSystem are automatically added to the Hierarchy. Let’s define and understand these, and then we’ll continue on with the GameObjects.
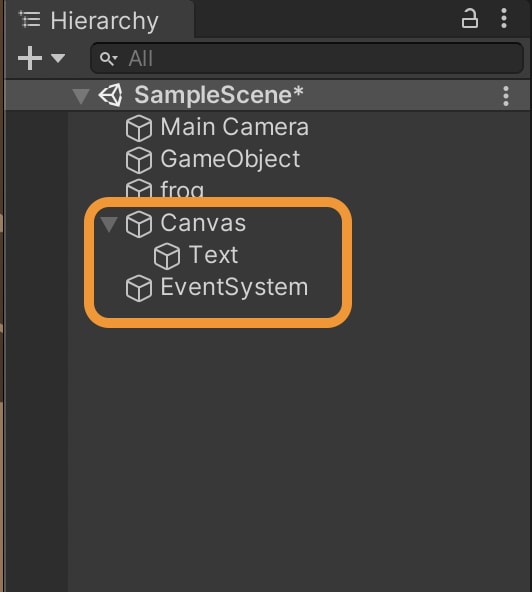
Canvas
The Canvas is a container for all UI elements in the scene. All UI elements such as texts, images, & buttons should be inside a Canvas. If Unity did not find one, it will add one automatically as you saw when you added a text GameObject.
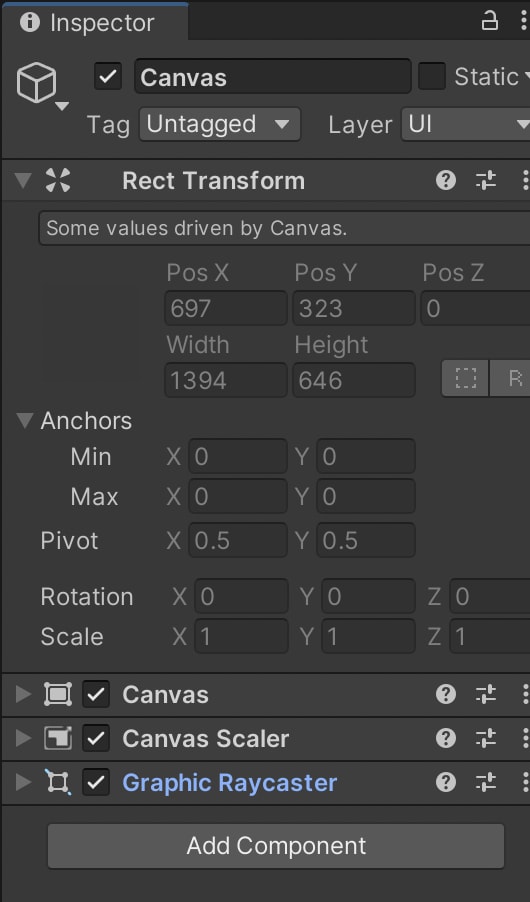
As shown in the image, Canvas inspector has four components in its inspector by default:
- Rect Transform
- Canvas
- Canvas Scaler
- Graphic Raycaster
Rect Transform
Similar to Transform but has more properties and is mainly for UI elements. Here it is grayed out, as these values are controlled by the Canvas component.
Canvas
Canvas is a component that controls how a group of UI elements will be rendered. All UI elements must be children of a Canvas. It is possible to have more than one canvas in a scene.
When we look at our frog in the game view and scene view, you’ll notice the text is very small in the game view and the Canvas is shifted in the scene view.
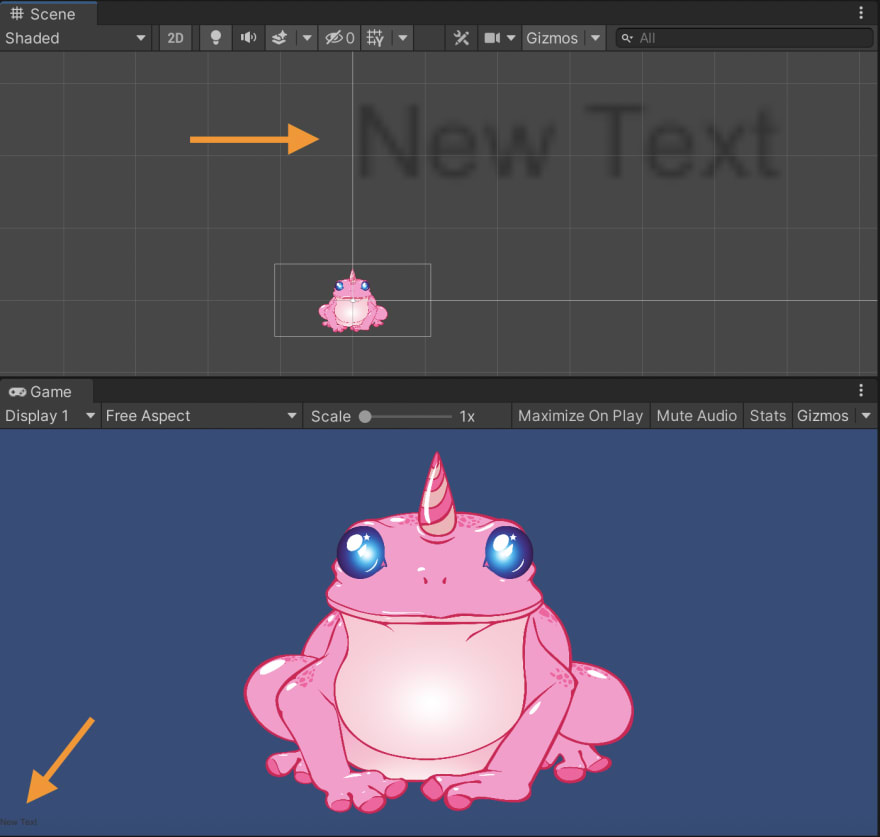
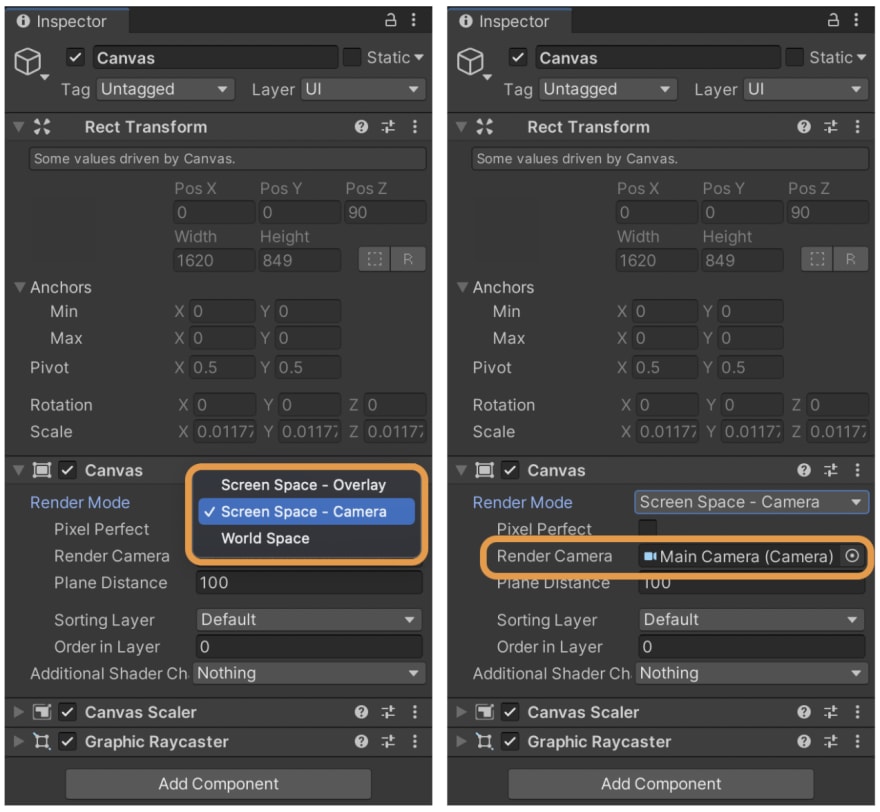
To adjust, we can change the Render mode to “Screen Space - Camera” and drag and drop the “Main Camera” from the Hierarchy into the Render Camera component as shown in the two images below.
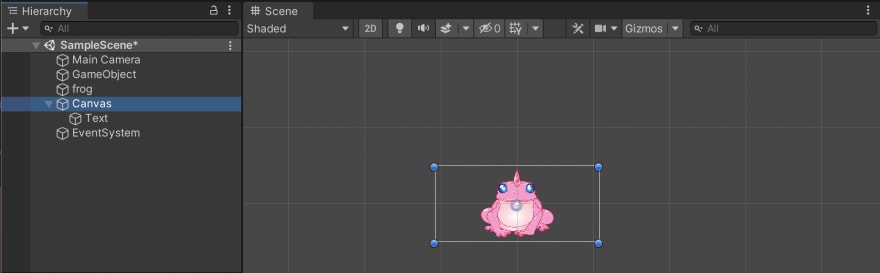
Now the Canvas will be centered in the main camera view as shown below:
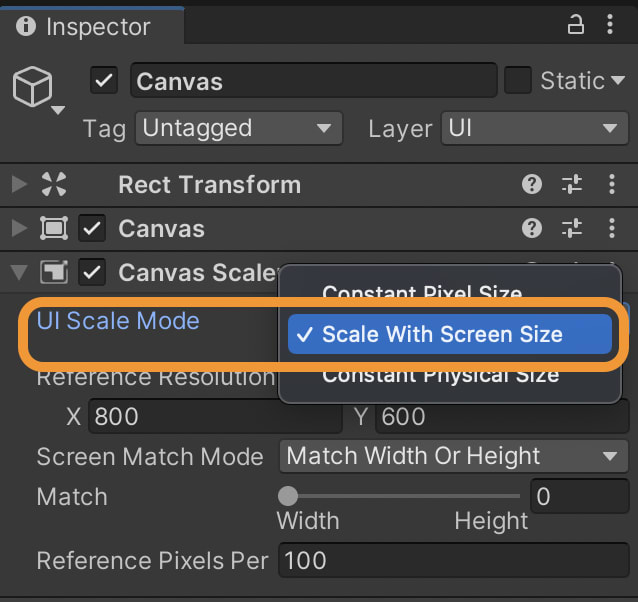
Canvas Scaler
This component lets you choose how the UI elements scale when the screen size changes from device to device. You will normally want it to scale with screen size and that is what we will do. Change the UI Scale mode to “scale with screen size” as shown:
We also need to choose a reference resolution. This is self explanatory. I normally choose the size of the background image so the image won’t be crushed. We will change this later after we add a background image.
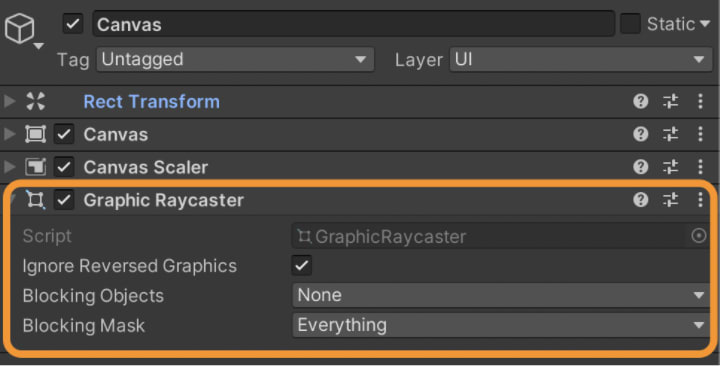
Graphic Rayaster
Do you ever wonder how the graphics are being detected?
It is the raycaster that sends rays and looks to see if any graphics have been hit or not. (“hit by that ray”)
From this component you can determine whether to ignore reversed graphics (backfacing graphics) or not, and decide on the blocking objects and masks to that ray.
Event System
The Event System is for events. It captures input events from input devices (for example a mouse, keyboard, or touch on mobile devices). If there is no Event System, you will not be able to have any input events.
Text, Image, Button objects
Text
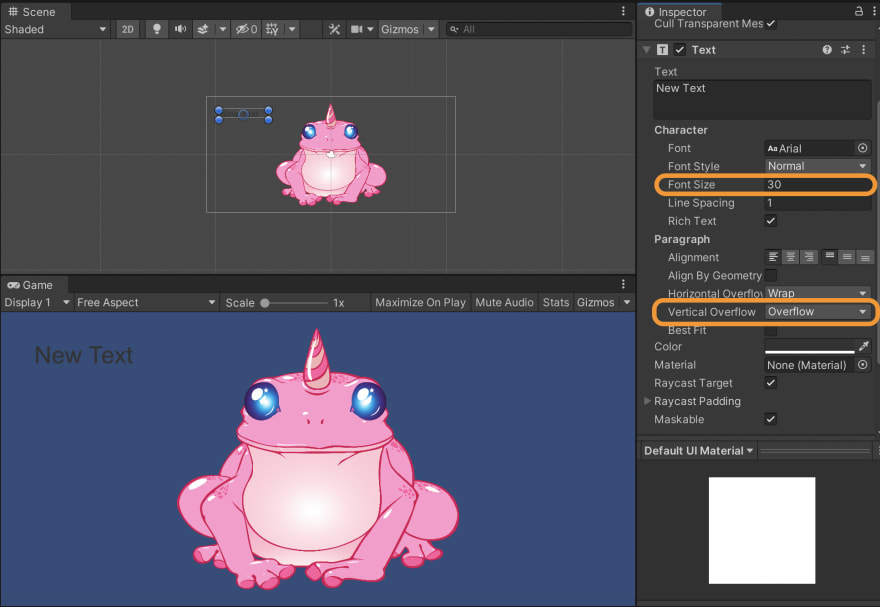
Now let’s go to the text GameObject. Locate and select the text, then drag it to where you want it on the screen (let’s move it to the top left corner). We can increase the text font size (to 30 for example) to make it more visible. It will appear the text has disappeared, but we can correc this by changing the vertical overflow in the inspector from “Truncate” to “Overflow”, as shown below. We will probably change the text color later, after we add a background image. You can change the size of the text GameObject as well by dragging the text by one of it’s corners so it will hold more text without the need to overflow. This will be needed after we make a final UI design as this text may have a background frame.
Image
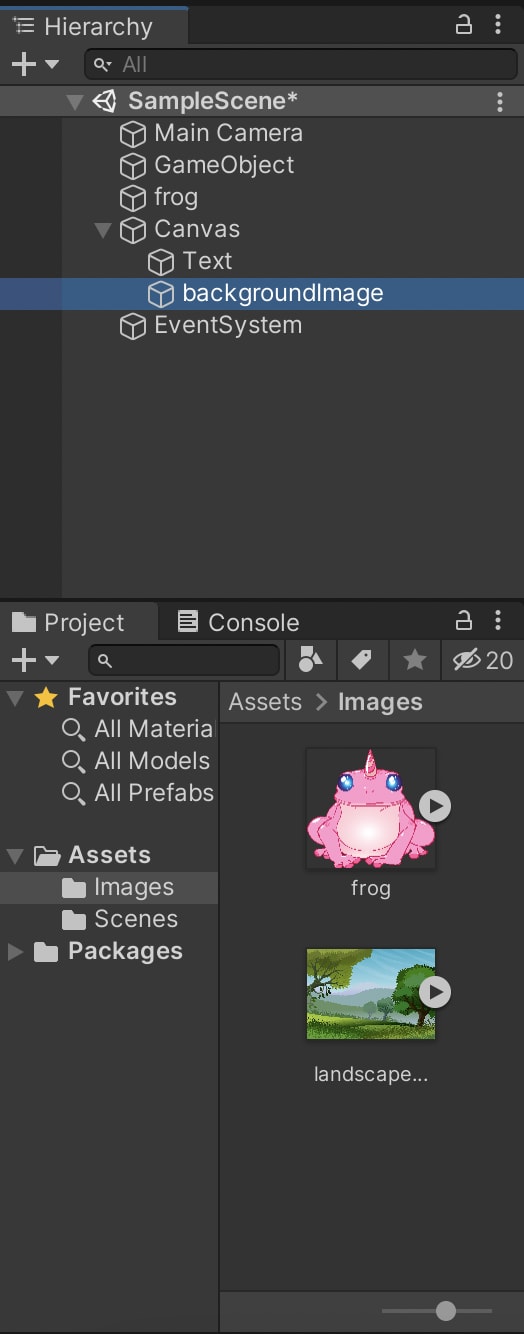
Let’s give our game (and frog) a background image. We can import a background image into the assets/images folder. I added the image GameObject into the scene and named it “BackgroundImage”.
In the Image inspector, drag and drop the imported image into the “Source Image” property in the “Image” component.
If the image looks too small, navigate to the image component and click “Set Native” to make the image its original size. But now it’s too big. Make sure position X & Y are both set to zero so that the image is centered.
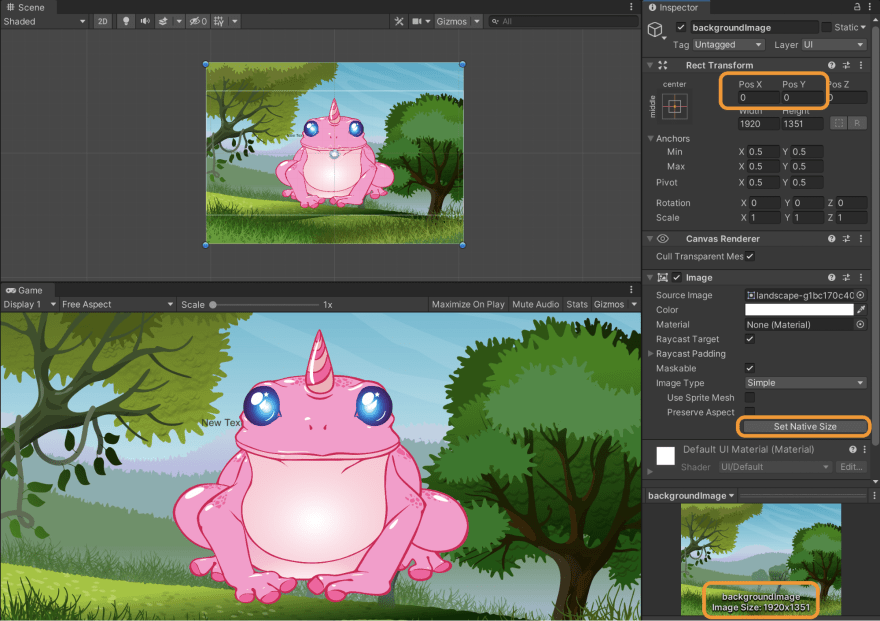
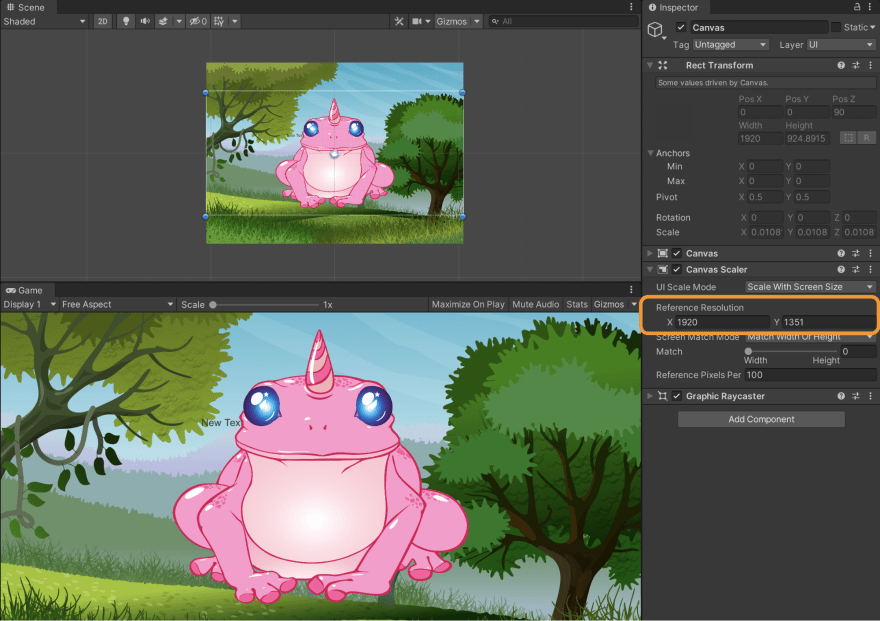
It is ok that the image is too big, the reason for this is that the canvas is set to a lower resolution. Remember earlier when I mentioned that we’d change the reference resolution to the size of the background image? Let’s go to the canvas GameObject and set the reference resolution to the size of the image.
My image is 1920 x 1351 px. Now the image’s size looks good, but because it is not the same ratio as the screen, we will have to change the anchors and the image position.
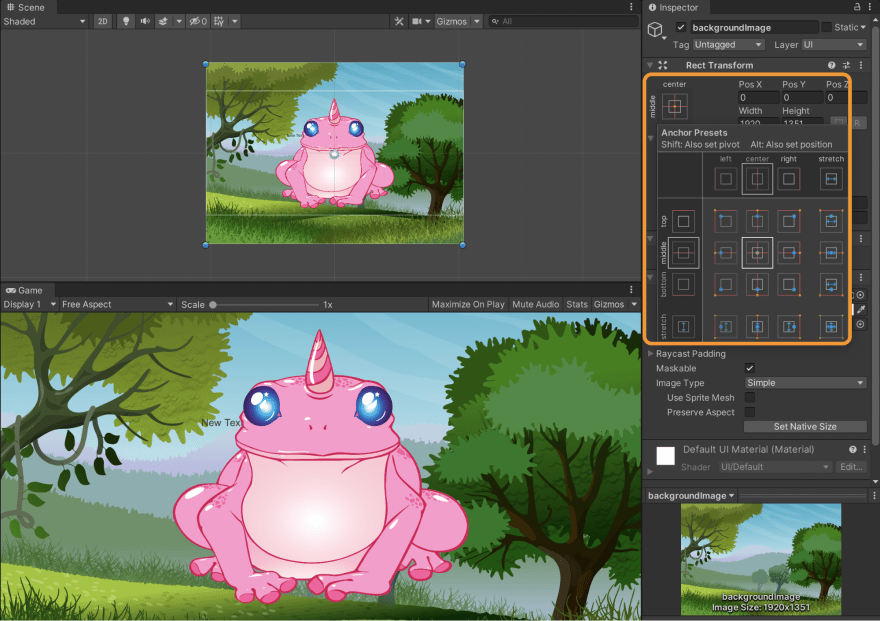
If we want to change the image position and anchors, we can navigate to the “Rect Transform” component for our background image in the image inspector. Select “center-middle” from the anchor presets.
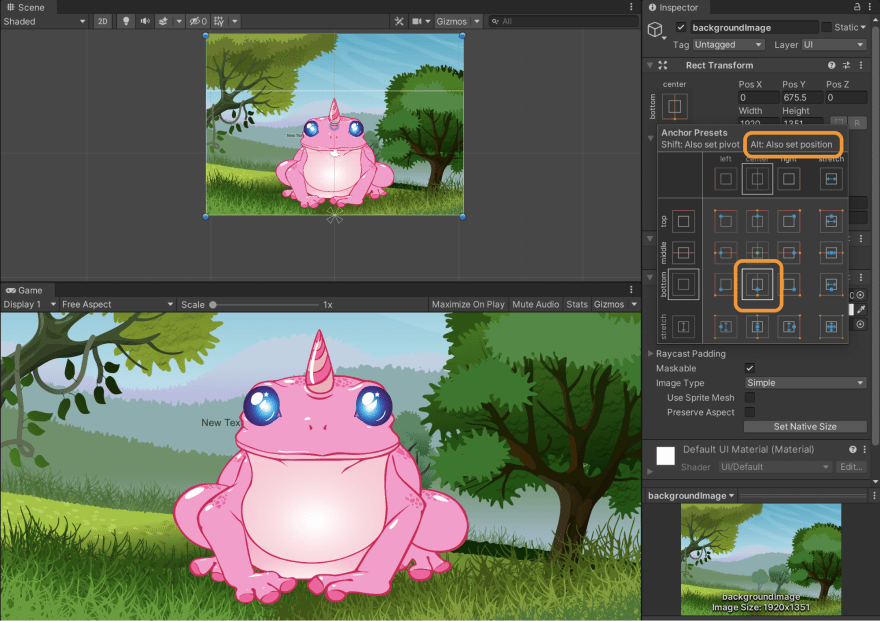
Hold “Alt/Option” and select the bottom-center position for the image and anchors position to adjust. As you can see, the anchors changed their location to “bottom-center” and the image did as well.
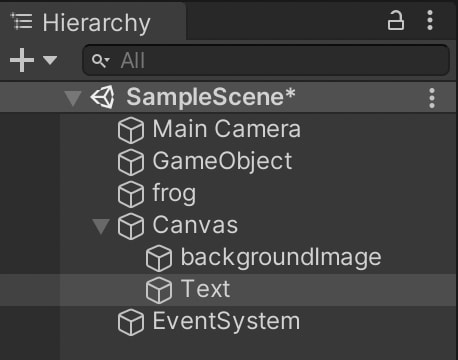
Since we added text GameObject before the background image, we’ll need to change the order to bring the text to the front. You can move objects forward or backward by moving them up (or down) in the Hierarchy window. Lower items will be more forward, and higher items more towards the back.
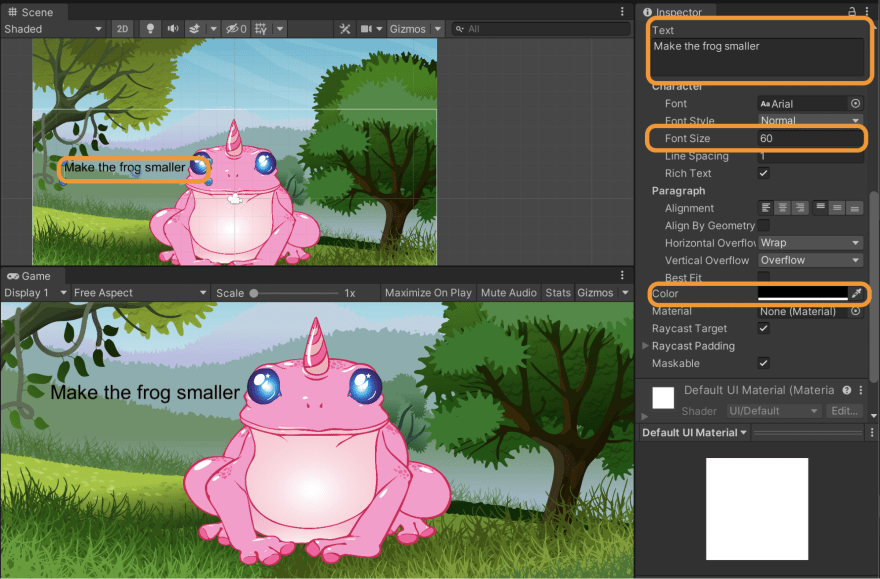
We need to revisit our text object and change its size as it depends on the reference resolution of the canvas. As you can see a few images above, the text is relatively small.
I changed the font size to 60 and edited it to say “Make the frog smaller”, changed the text color to black, and made the text object wider by dragging in the scene viewer. You may have noticed the text object disappears (if you happened to move it over top of the frog) as the frog is a Sprite, not an image.
Button
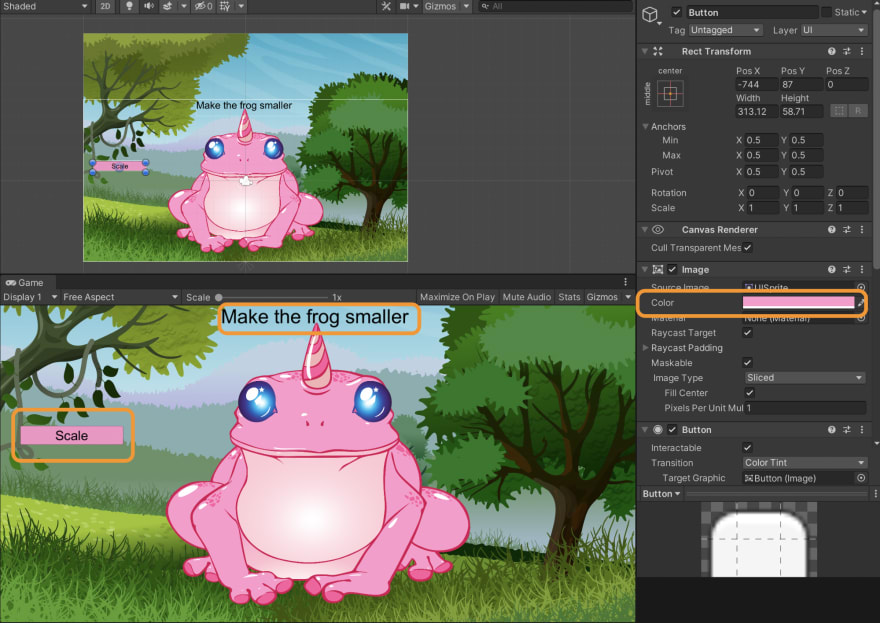
To insert a button, right click in the Scene Hierarchy and go to Create → UI → Button. The button is accompanied with a text GameObject.
We can change the position, color, and size of the text & the button,
I edited the text game object of the button, changed the text to “Scale”, changed the color to black, and changed the font size to 40. Now we have a button that does not do anything until we add a C# script.
Introduction to C# Scripts
If you’re not familiar with C#, you can get familiar with it over at W3Schools or Microsoft. It is the programming language used in Unity scripts.
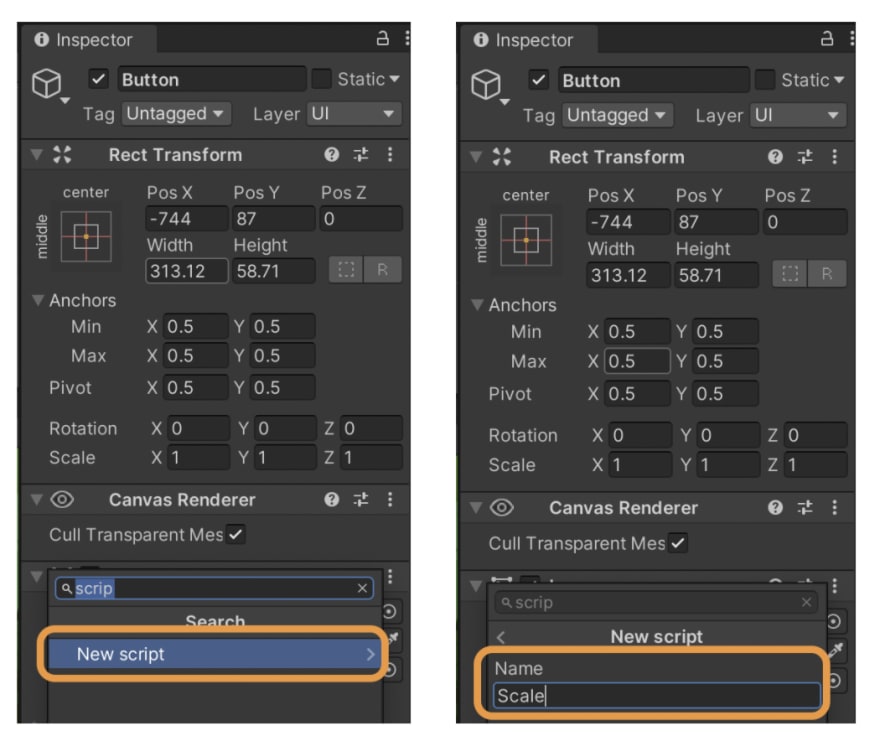
Let’s add a small C# script to our button GameObject so that when we click the button, the frog scales down. We’ll add a script component to the button by clicking on “Add Component” in the button’s inspector and name the script “Scale”.
Unity defaults to Visual Studio for editing, but you can select any editor you prefer from the “External Tools” panel in preferences. After double clicking on the “Scale” script we’re taken to our editor with some initial content like this:

Every script made in Unity contains two functions, “Start()” and “Update()”, inside a public class with the name of the C# file you just created.
When you run the game, the “Start()” function runs one time at the beginning of the game, while the “Update()” function is called once per frame. We don’t have to use these functions in every script, so we can either delete them or leave them empty.
To scale down the frog when we click on the Scale button, we will make a new function, public void ScaleDown(){}, so we can call this function when we click on the Scale button.

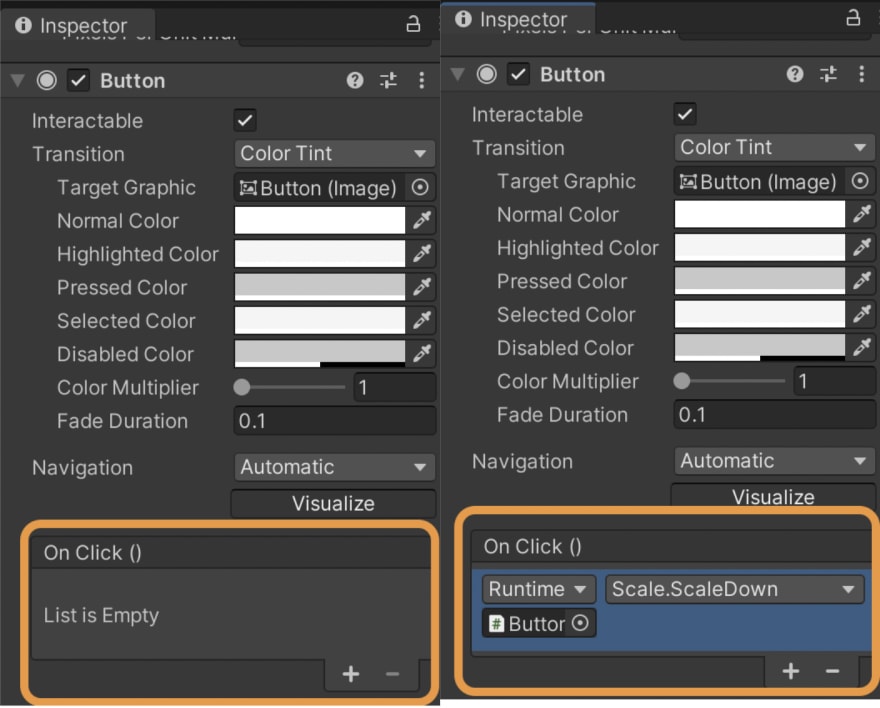
Save the script file and return to Unity to call the function and run the game. Select the button GameObject from the Hierarchy. You will find the OnClick() list in the button component in the inspector as shown in the image below. Click “+” and add the function we just created in the script. Since the script is attached to the button itself, drag and drop the button GameObject from Hierarchy to the empty GameObject area and select the “ScaleDown()” function from the drop down menu.
Time to run our game. Click the play button.
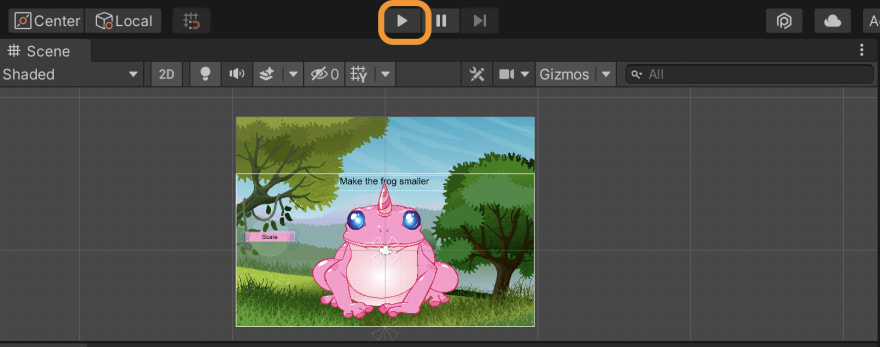
When we run the game, any changes made while in game mode cannot be saved, and when you exit game mode, everything returns to the state it was in prior to running (keep this in mind).
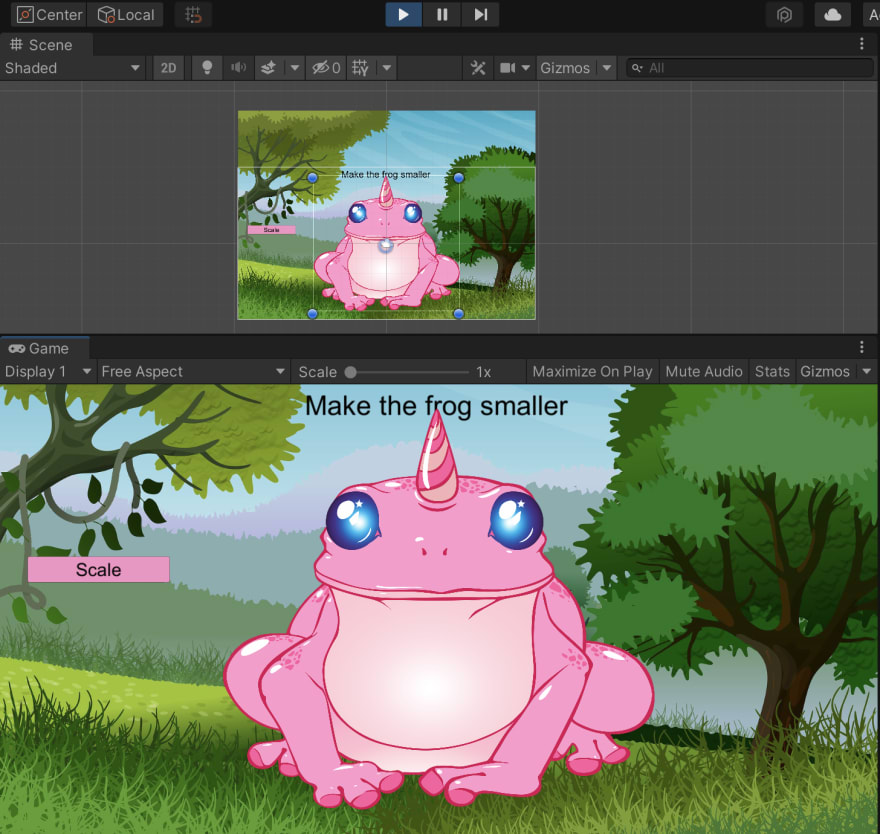
Now let’s click on the “Scale” button and see what happens to the frog.
(Before clicking on the scale button)
(After clicking on the scale button)
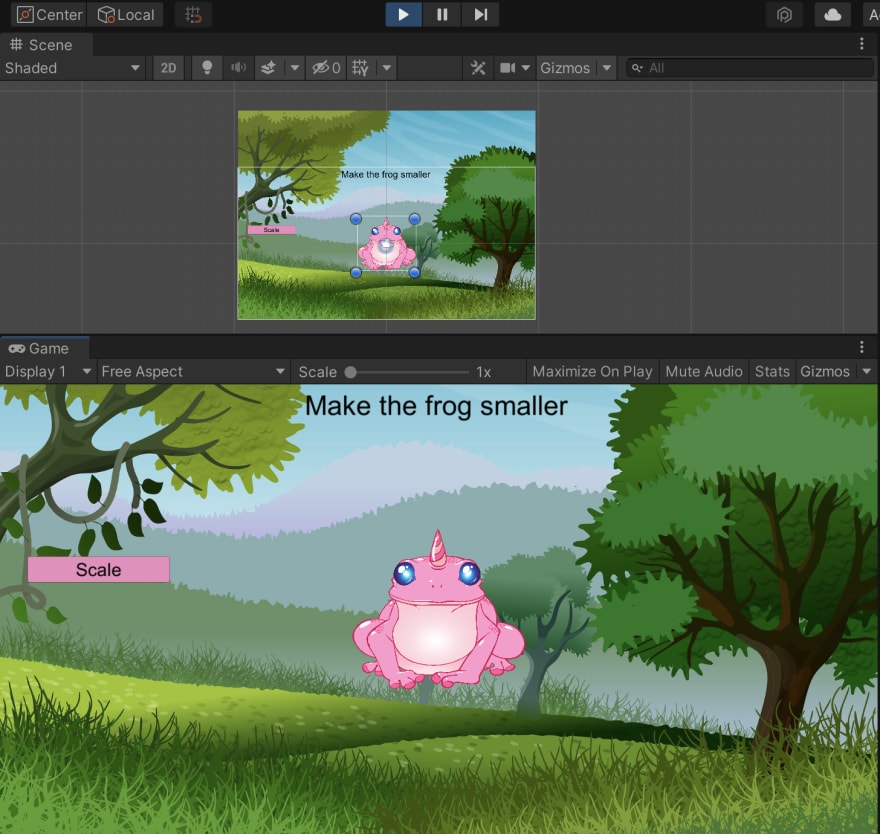
As you can see, the frog is smaller — and if you check the inspector, the scale values are now 0.2. Once you stop the game, the values will return to their originals.
If you made it this far — congratulations. You have made a functioning micro game!
Monitoring our games for errors & performance issues
Whenever we develop a game so popular that it’s played by thousands of gamers, we’ll want to make sure we’re monitoring for errors and performance issues our users may experience so we can quickly resolve them. A tool like Sentry can help us with this.
Implementing Sentry
Getting started is easy. Signup, and select “Unity” as the platform you’d like to setup.
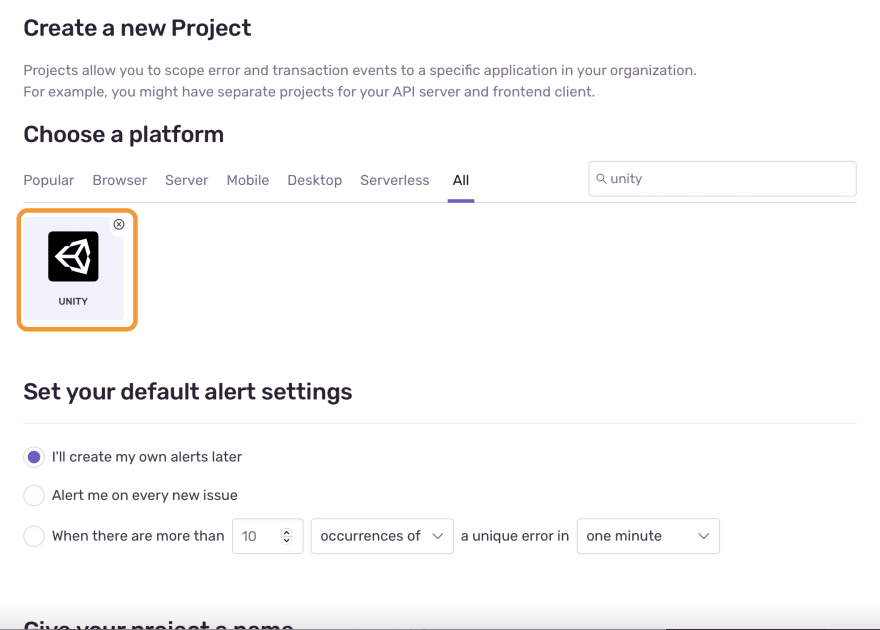
Create a new project in Sentry and give it a name. You can associate projects with certain teams, which is useful for large organizations.
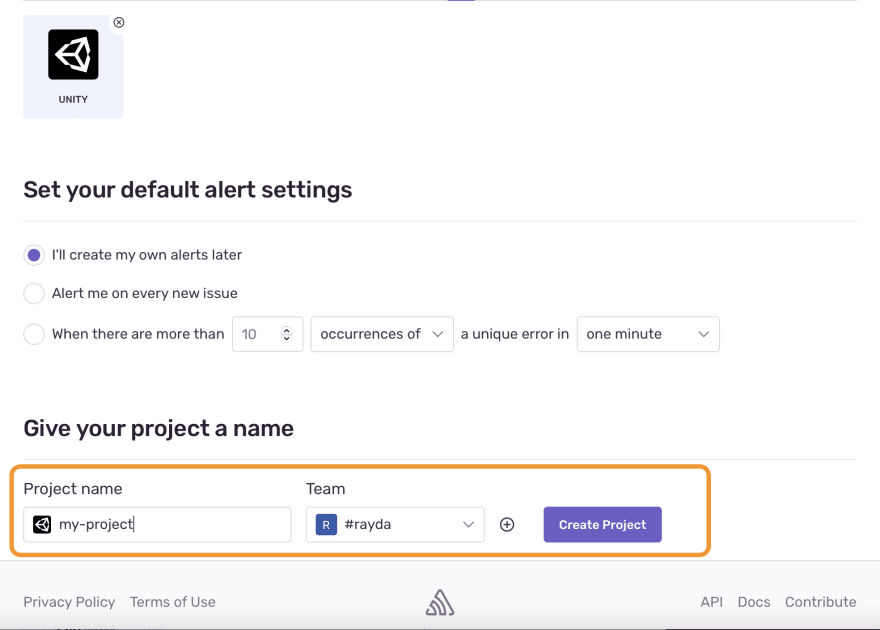
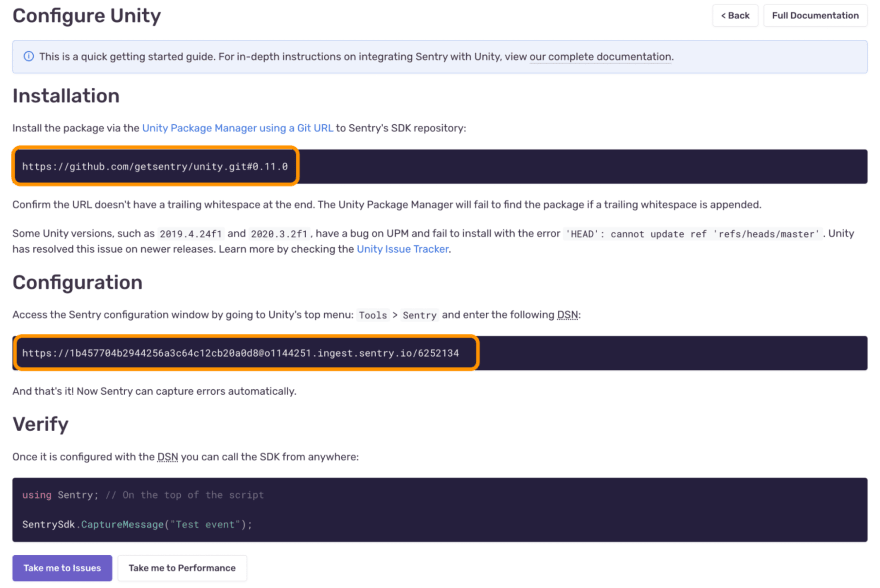
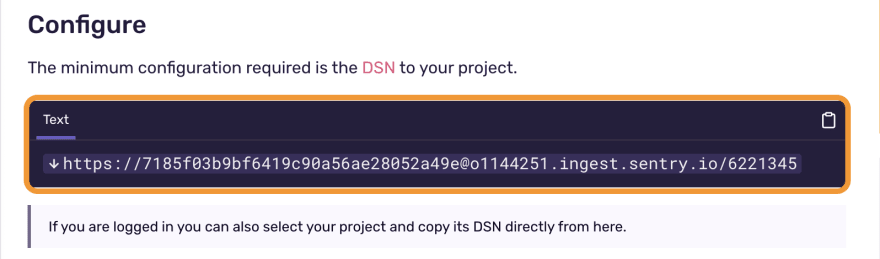
Once your project is created, you will find the steps to install the package, configure your DSN, and call the Unity SDK.
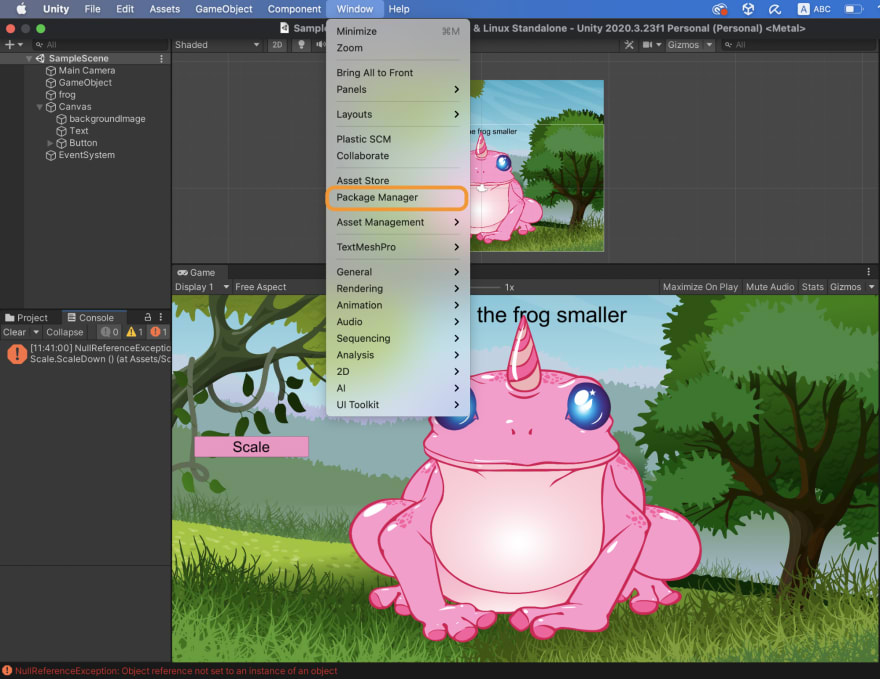
We can open the package manager in Unity by clicking Window > Package Manager.
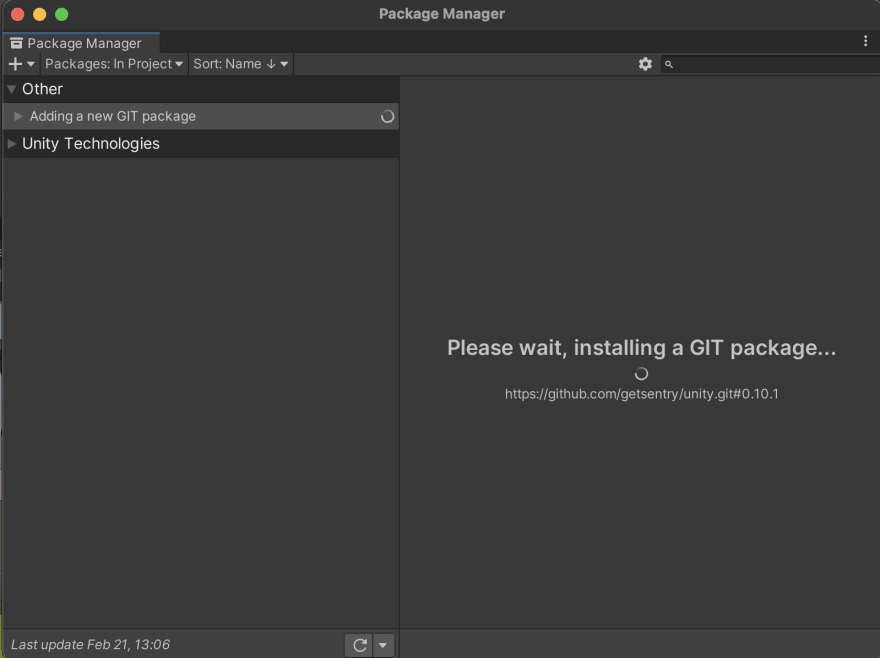
Click the ”+” sign and then “Add package from git URL…“.

Paste this URL into the input field:
https://github.com/getsentry/unity.git#0.10.1
You can get the latest URL from the “Install” section in Sentry’s docs (https://docs.sentry.io/platforms/unity/). This will install the package.
We’ll need to add our DSN by clicking on Tools > Sentry.
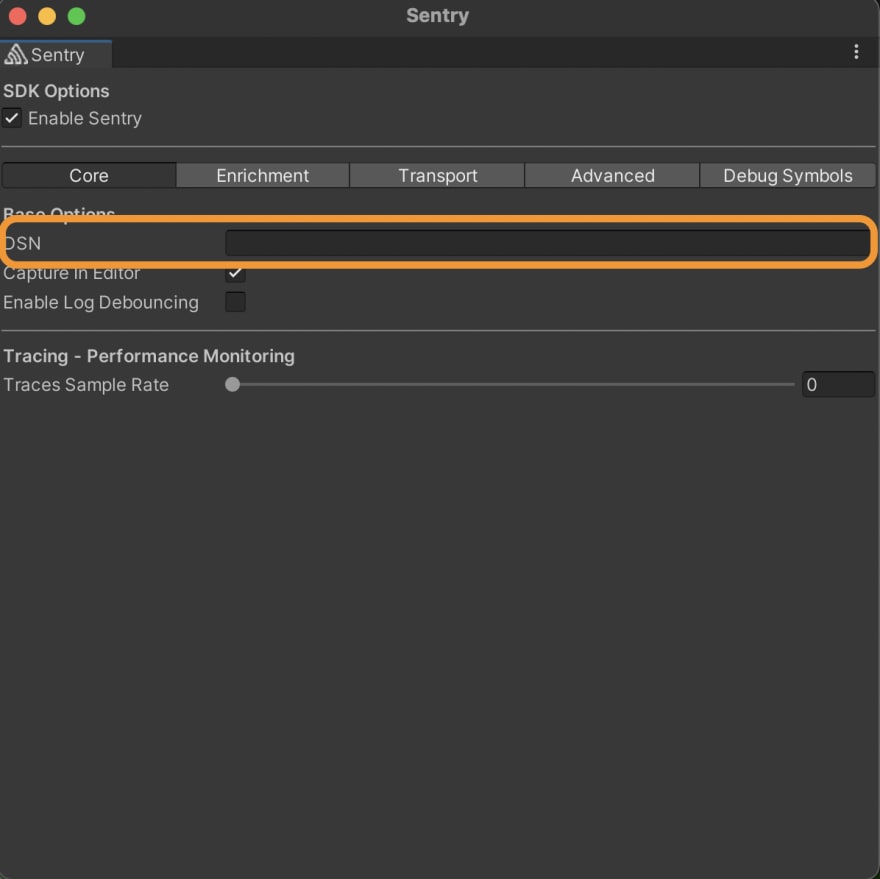
To find the DSN to your project.
- If you are signed in, the Unity Sentry documentation will have the DSN to your project here https://docs.sentry.io/platforms/unity.
- You can get the DSN for your project within Sentry’s platform.
Go to your Projects page > Click on your current project > Settings > Client Keys (DSN).

Tracking errors
To track an error in Sentry, we need to trigger an intentional one. Let’s make a spelling mistake in our frog name and check if Unity will find the frog GameObject.
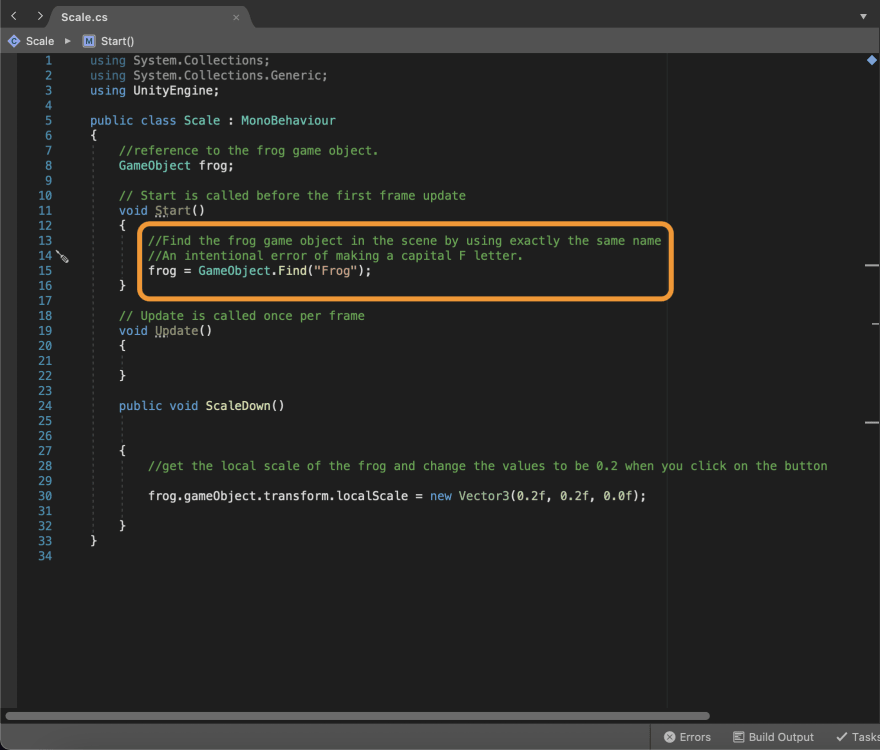
As seen below, we triggered a Null exception error as there is no GameObject called “Frog”.
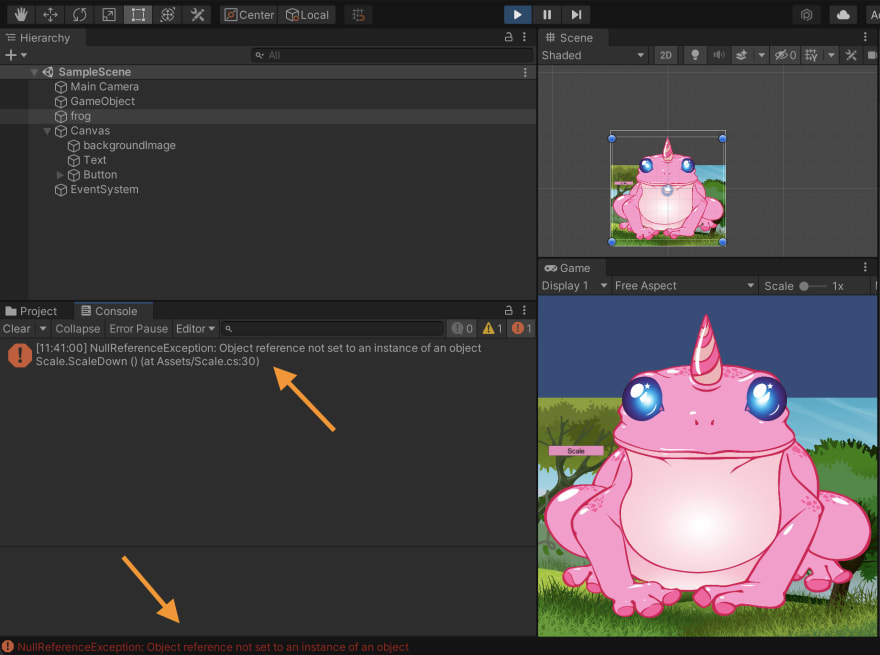
Now let’s run the game one more time and see how Sentry tracked the error.
We have a new, unhandled issue to resolve. Once we handle this exception, we can click “Resolve”. (I’ll write more about what else we can do to monitor Unity errors in Sentry in a future post).


Monitoring performance
A laggy game is a sure way to make someone stop playing. In addition to catching errors, it’s also important to monitor slowdowns or crashes in our game. We can get started by clicking “Performance” within Sentry.
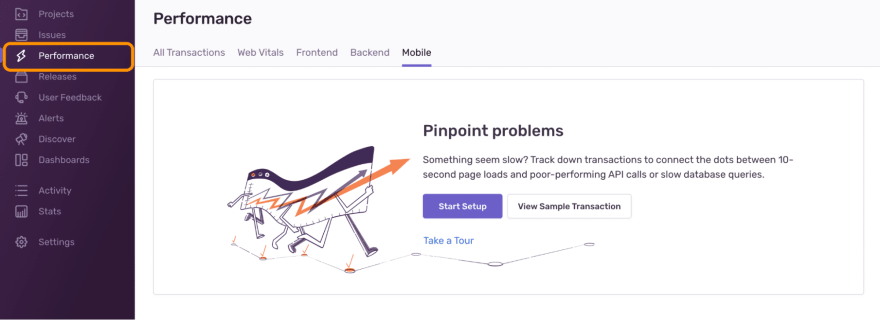
“Start setup” and then select the Unity SDK from the list of supported SDKs.
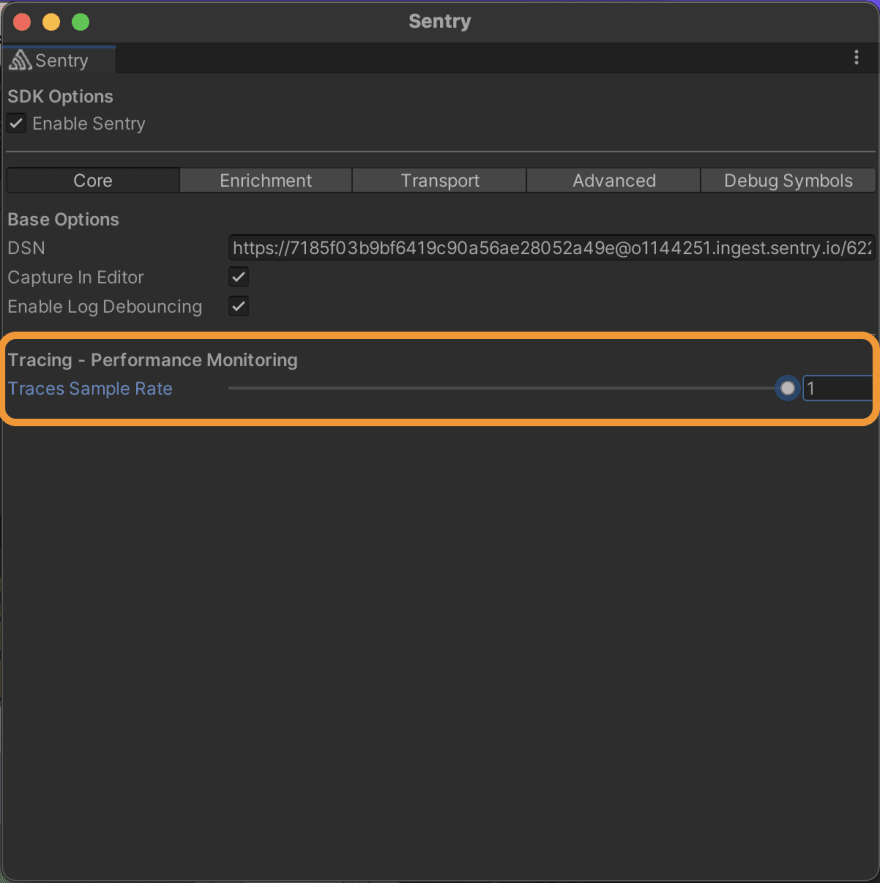
Back in the Unity editor, navigate to Tools > Sentry > then change the “Traces Sample Rate” to a value between 0 and 1, as shown in the image below. Inputting “1” will send 100% of transactions to Sentry.
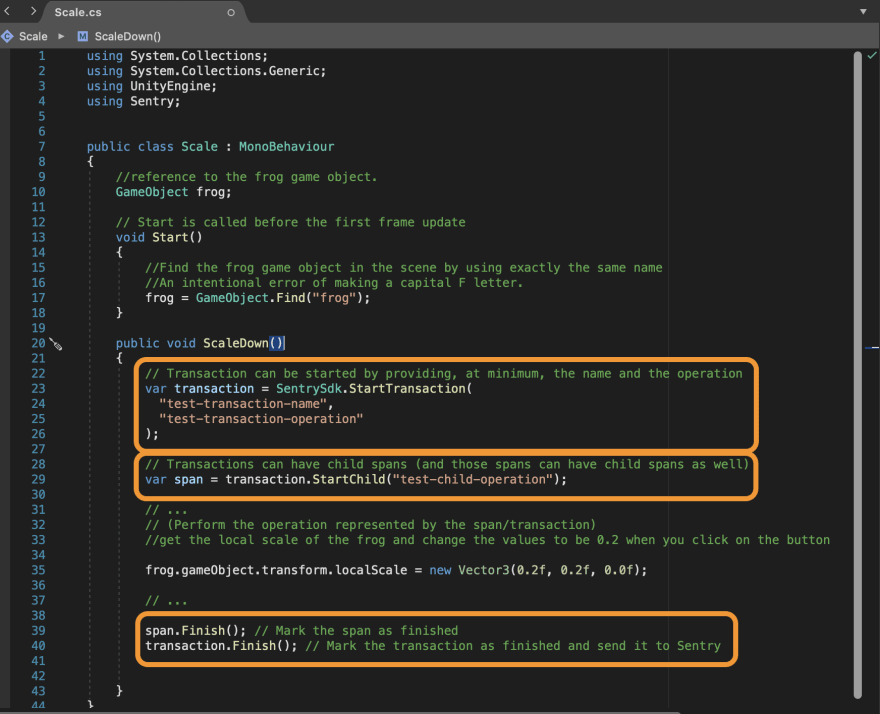
We can open our “Scale” C# script to capture transactions for Sentry to monitor our project’s performance. We set this up by adding the code below:
Now we can run the game and check the performance page in Sentry. You can toggle between projects, environments, and the time duration for the transactions you’re monitoring.
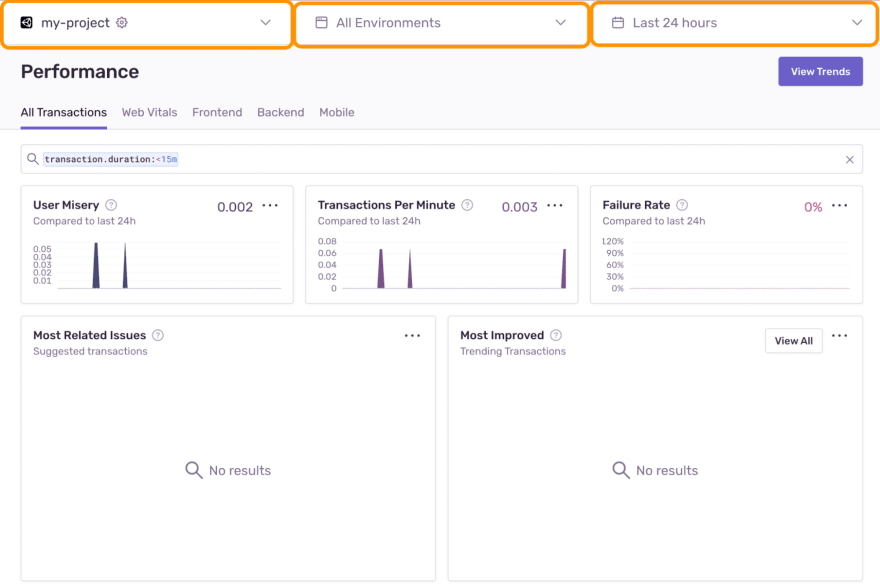
We can look at all transactions, or filter to only look at web vitals, frontend, backend, and/or mobile transactions.

For example, here, the All Transactions tab is open where we can see a handful of performance metrics (more details
here including User Misery, which is the number of users who experience a load time 4x the company response time threshold of 300ms).
Conclusion
Thank you for reading and I hope you have a basic understanding of the Unity Platform as well as Sentry’s application monitoring platform. Stay tuned for more Unity articles as we build on our foundational knowledge.

Oldest comments (0)