Forms are everywhere. Whether you're scheduling an appointment, registering for an event, collecting user feedback, conducting a survey, or submitting your vacation request: forms are essential to collect information, run a business, or interact with customers. In this blog post, we will learn how to connect a form to a database using Five.
There are a lot of online form builders, such as Google Forms, Jotform, or Typeform. And many of these form builders operate on top of a spreadsheet as data storage. A lot of that data then gets moved from the spreadsheet into a database, such as MySQL, using some ELT process or "glue code" written in PHP, JavaScript, or SQL.
In this blog post, we will explore how to use Five to create a database table and connect a form to it. We will accomplish all of this without writing any code and without requiring any external tools.
Create a Form and a Database
Download Five for Free to Get Started
Connecting a Form to a Database
Step 1: Using Five To Create Database Tables
Five's Table Wizard is a visual table builder for MySQL. To create a new table in your database, you simply add fields to it, give each field a name, data type, and display type, and you're done!
Watch the video below and learn how to create a database table with Five:
Step 2: Using Five to Create Forms
Creating a table in Five barely took us 5 minutes. Now let's see how quickly we can create a form on top of our table. Again, Five comes with a handy wizard, the Form Wizard, which makes very easy and quick to create a form.
Watch our video on creating forms here to learn how.
In just two steps we have created a database and a form that can be used to enter, edit, or display data stored in your database.
Step 3: Advanced Features - Using Five to Create Sophisticated Forms
We have already learned how to connect a form to a database. Now let's think about how to make our form smarter.
Forms are windows through which people can see and reach your database. But often, not everyone should get the same view onto your database. For example, some users should only see certain fields inside your form. Or other fields should be read-only or hidden.
Five gives you all of these options. Let's explore what else we can do to our form using Five.
Read Only, Show If, Required If, and Default Value
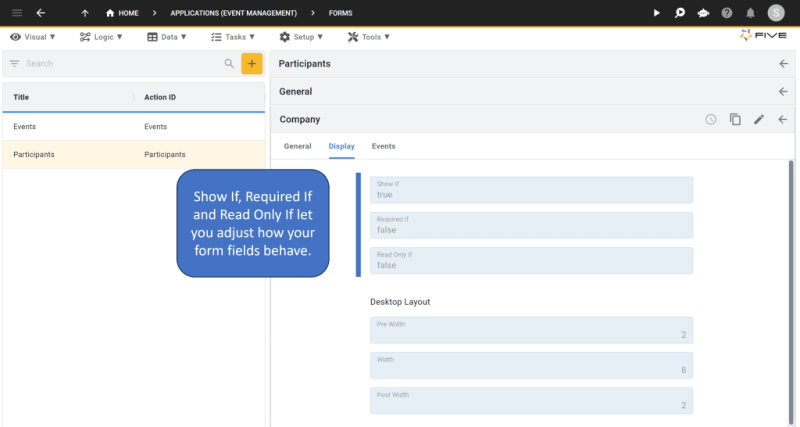
To adjust how your form behaves, open up Five, click on Visual > Forms > Select a Form and then click on Pages > General > Fields > Display. This is where you can add Show If, Required If, or Read Only If conditions to each form field. These fields accept simply JavaScript, such as true, false or == statements to define the if condition.

For example, say you are creating a registration form for a hospital, and one of the questions on the form asks about patients' gender. If a patient selects "Female", you'd like to ask whether they are currently pregnant or not. But you don't want the same question to appear when someone selects "Male". By using Five's "Show If" field to make sure your form behaves as described.
Of course, you can also give a form field a Default Value. This value will be shown and stored in your database unless your users decide to override it. Click on General to set a default value.
Adjusting the Look of Your Form
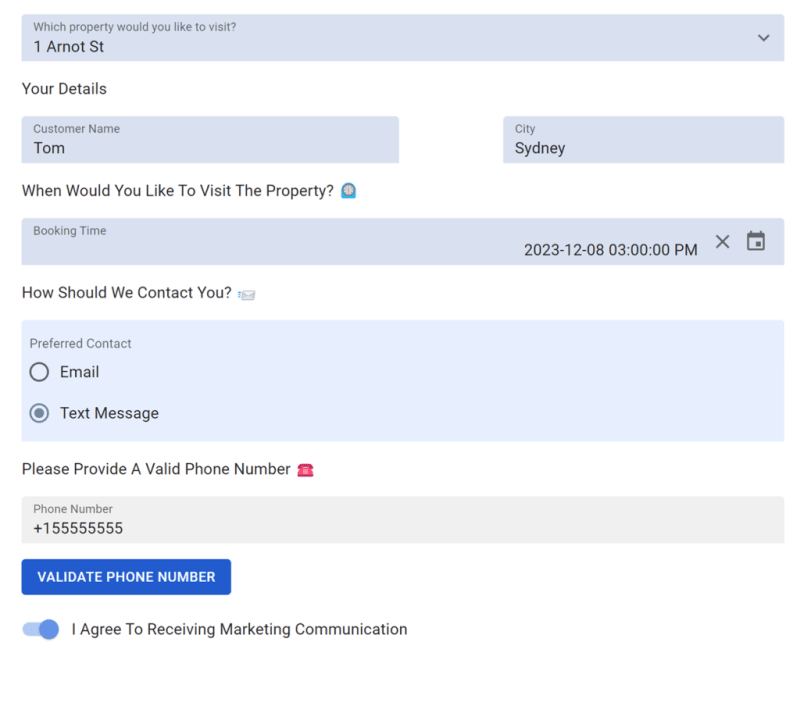
When a new form is created in Five, Five will automatically stack all of its fields on top of each other, like a waterfall. But what if you want something a little bit more unique, like this form that collects booking requests?

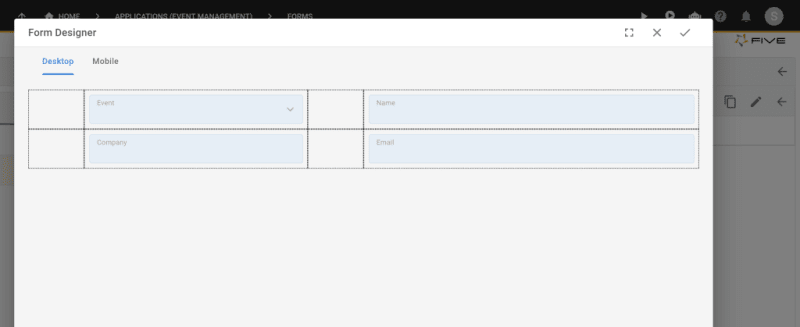
To customise how your form looks, use Five's Form Designer, a drag-and-drop form editor.

The form designer lets you customise how fields are shown on desktop or mobile. You can simply drag and drop your fields into the grid to make them appear side by side, on top of each other or to adjust their size.
On a smaller screen size, such as mobile, Five will automatically adjust how your form is shown. Five uses something called responsive design, which makes sure applications look great regardless how users access them: from desktop, tablet or mobile.
Of course, you can also change the appearance of your form by adjusting font types, colours and fields. Watch this video to learn how:
Publishing Your Form to the Web
Last but not least, it's time to publish your form on the web so that your users can access it.
Five gives you several pricing plans to publish apps to the web. Once published, each app comes with a custom URL that you can share with users. You can also embed forms in an iframe on your website, or decide to publish forms without the surrounding user interface that Five gives you by default.
Once your users have access to your form, all data flows directly into your database. No more spreadsheets needed!


Top comments (0)