
This is the eighteenth of a new series of posts on ASP .NET Core 3.1 for 2020. In this series, we’ll cover 26 topics over a span of 26 weeks from January through June 2020, titled ASP .NET Core A-Z! To differentiate from the 2019 series, the 2020 series will mostly focus on a growing single codebase (NetLearner!) instead of new unrelated code snippets week.
Previous post:
NetLearner on GitHub :
- Repository: https://github.com/shahedc/NetLearnerApp
- v0.18-alpha release: https://github.com/shahedc/NetLearnerApp/releases/tag/v0.18-alpha
In this Article:
- R is for Razor Pages
- Core 3.x Packages
- Page Syntax
- Model Binding
- Page Parameters
- Page Routing
- Handler Methods
- References
R is for Razor Pages
Razor Pages were introduced in ASP .NET Core v2.0, and briefly covered in my 2018 series, and with more detail in my 2019 A-Z series. To complement this updated post in 2020, you may also refer to a previous posts in this series to learn more about Forms and Fields (specifically the Razor Pages section).
Built on top of MVC in ASP .NET Core, Razor Pages allows you to simplify the way you organize and code your web apps. Your Razor Pages may coexist along with a backend Web API and/or traditional MVC views backed by controllers. Razor Pages are typically backed by a corresponding .cs class file, which represents a Model for the Page with Model Properties and Action Methods that represent HTTP Verbs. You can even use your Razor knowledge to work on Blazor fullstack web development.

Core 3.x Packages
To follow along, take a look at the NetLearner Razor Pages project on Github:
- NetLearner Razor Pages Project: https://github.com/shahedc/NetLearnerApp/tree/master/src/NetLearner.Pages
Let’s start by taking a look at this 3.1 (LTS) project. The snippet below shows a .csproj for the sample app. This was created by starting with the Core 3.1 Razor Pages Template in VS2019 and then updating it to view/edit data from the shared NetLearner database.
<Project Sdk="Microsoft.NET.Sdk.Web"> <PropertyGroup> <TargetFramework>netcoreapp3.1</TargetFramework> <UserSecretsId>aspnet-NetLearner.Pages-38D1655D-B03D-469A-9E4E-5DDDED554242</UserSecretsId> </PropertyGroup> <ItemGroup> <Compile Remove="Data\*\*" /> <Content Remove="Data\*\*" /> <EmbeddedResource Remove="Data\*\*" /> <None Remove="Data\*\*" /> </ItemGroup> <ItemGroup> <PackageReference Include="Microsoft.AspNetCore.Diagnostics.EntityFrameworkCore" Version="3.1.0" /> <PackageReference Include="Microsoft.AspNetCore.Identity.EntityFrameworkCore" Version="3.1.0" /> <PackageReference Include="Microsoft.AspNetCore.Identity.UI" Version="3.1.0" /> <PackageReference Include="Microsoft.EntityFrameworkCore.Sqlite" Version="3.1.0" /> <PackageReference Include="Microsoft.EntityFrameworkCore.SqlServer" Version="3.1.0" /> <PackageReference Include="Microsoft.EntityFrameworkCore.Tools" Version="3.1.0" /> <PackageReference Include="Microsoft.Extensions.Logging.Debug" Version="3.1.0" /> <PackageReference Include="Microsoft.VisualStudio.Web.CodeGeneration.Design" Version="3.1.0" /> </ItemGroup> <ItemGroup> <ProjectReference Include="..\NetLearner.SharedLib\NetLearner.SharedLib.csproj" /> </ItemGroup></Project>
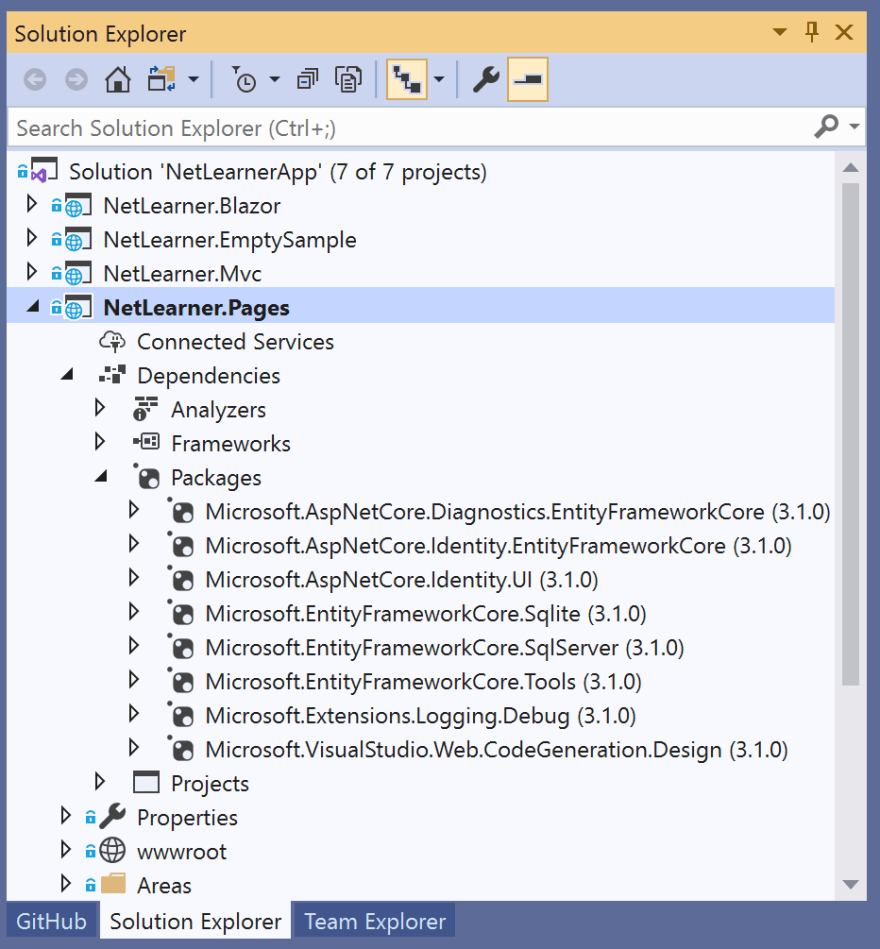
For ASP .NET Core 3.x projects, both NewtonsoftJson and EF Core have been removed from the ASP .NET Core shared framework. Instead, they are available as NuGet packages that can be included via < PackageReference > tags in the .csproj project file.
This is reflected in the Solution Explorer, where the Dependencies tree may show NewtonsoftJson and/or EF Core packages nested under the NuGet node, if you use them in your project.
If you need a refresher on the new changes for ASP .NET Core 3.x, refer to the following:
- A first look at changes coming in ASP.NET Core 3.0: https://devblogs.microsoft.com/aspnet/a-first-look-at-changes-coming-in-asp-net-core-3-0
- [From 2018 A-Z series] .NET Core 3.0, VS2019 and C# 8.0 for ASP .NET Core developers: https://wakeupandcode.com/net-core-3-vs2019-and-csharp-8/#aspnetcore30
Page Syntax
To develop Razor Pages, you can reuse syntax from MVC Razor Views, including Tag Helpers, etc. For more information on Tag Helpers, stay tuned for an upcoming post in this series. The code snippet below shows a typical Razor page, e.g. Index.cshtml:
@ **page** @ **model** IndexModel@{ ViewData["Title"] = "Home page";}<!-- HTML content, with Tag Helpers, model attributes -->
Here is a quick recap of what a Razor Page is made of:
- Each Razor Page starts with an @ page directive to indicate that it’s a Razor Page. This is different from Razor Views in MVC, which should not start with @page.
- The @ page directive may be followed by an @ model directive. This identifies the corresponding C# model class, typically located in the same folder as the .cshtml page itself.
- (Optional) You can include server-side code within an @ {} block.
- The rest of the page should include any HTML content you would like to display. This includes any server-side Tag Helpers and Model attributes.
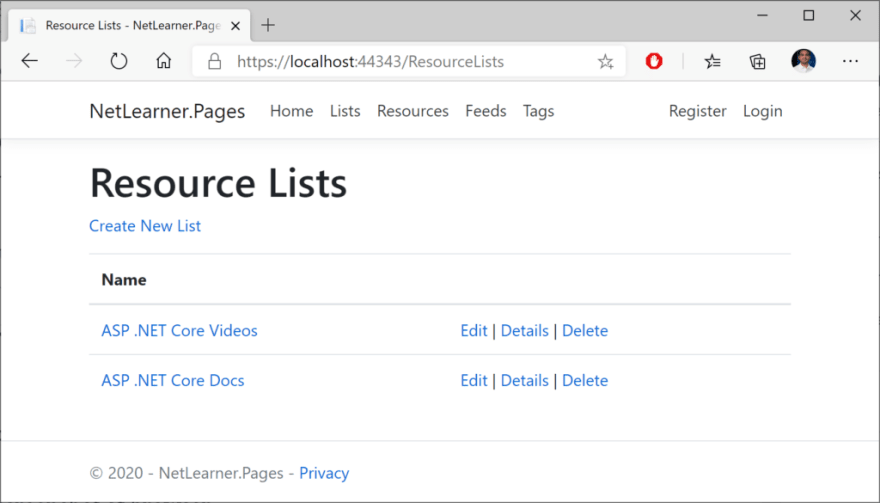
Running the Razor Pages web project from NetLearner shows a list of Learning Resources at the following URL:
e.g. https://localhost:44343/ResourceLists
Model Binding
The .cs model class associated with the page includes both the model’s attributes, as well as action methods for HTTP Verbs. In a way, it consolidates the functionality of an MVC Controller and C# viewmodel class, within a single class file.
The simplest way to use model binding in a Razor Page use to use the [BindProperty] attribute on properties defined in the model class. This may include both simple and complex objects. In the sample, the Movie property in the CreateModel class is decorated with this attribute as shown below:
[**BindProperty**]public **ResourceList** **ResourceList** { get; set; }
Note that [BindProperty] allows you to bind properties for HTTP POST requests by default. However, you will have to explicitly opt-in for HTTP GET requests. This can be accomplished by including an optional boolean parameter ( SupportsGet ) and setting it to True, e.g.
[**BindProperty** ( **SupportsGet** = true)]public **string SearchString** { get; set; }
This may come in handy when passing in QueryString parameters to be consumed by your Razor Page. Parameters are optional and are part of the route used to access your Razor Pages.
To use the Model’s properties, you can use the syntax Model.Property to refer to each property by name. Instead of using the name of the model, you have to use the actual word “Model” in your Razor Page code.
e.g. a page’s model could have a complex object…
public **ResourceList** **ResourceList** { get; set; }
Within the complex object, e.g. the shared ResourceList class has a public Id property:
public int **Id** { get; set; }
In the Razor Page that refers to the above model, you can refer to Model. *Movie.ID * by name:
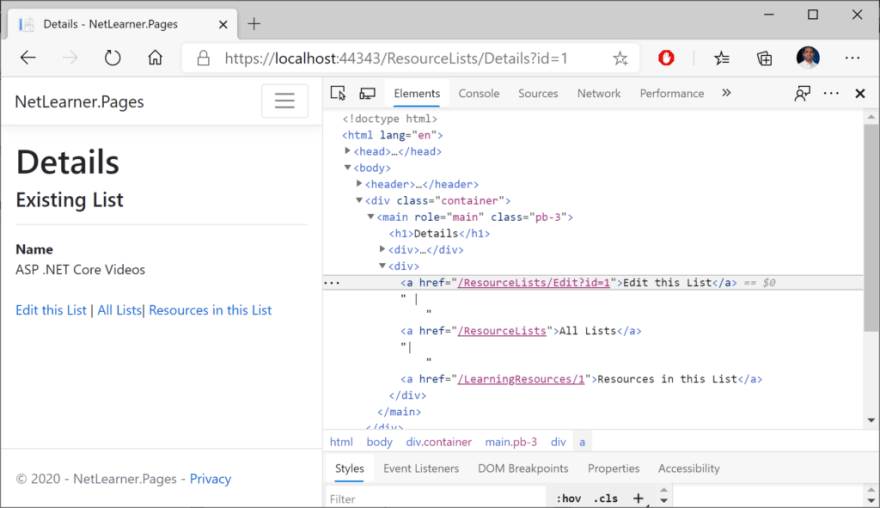
@ **page** @ **model** NetLearner.Pages.DetailsModel...<a asp-page="./ **Edit**" asp-route-id="@ **Model.ResourceList.Id**">Edit this List</a>
In this particular example, the anchor tag is generated with a link to the Edit page with a route that uses a specific Movie ID value. The link points to the Edit page in the current subfolder (i.e. “ResourceLists”), indicated by the period and slash in the path. The generated HTML looks like the following:
<a href="/ **ResourceLists** / **Edit**? **id** =1">Edit this List</a>
Page Parameters
Page parameters can be included with the @ page directive at the top of the page. To indicate that a parameter is optional, you may include a trailing ? question mark character after the parameter name. You may also couple the parameter names with a data type, e.g. int for integers.
@ **page**"{id}"@ **page**"{id?}"@ **page**"{id:int?}"
The above snippet shows 3 different options for an id parameter, an optional id parameter and an integer-enforced id parameter. In the C# model code, a property named id can be automatically bound to the page parameter by using the aforementioned [BindProperty] attribute.
In the sample, the SearchString property in the IndexModel class for ResourceLists shows this in action.
[**BindProperty** ( **SupportsGet** = true)]public **string SearchString** { get; set; }
The corresponding page can then define an optional searchString parameter with the @page directive. In the HTML content that follows, Input Tag Helpers can be used to bind an HTML field (e.g. an input text field) to the field.
@ **page**"{ **searchString**?}"...Title: < **input** type="text" **asp-for** =" **SearchString**" />
Page Routing
As you may have guessed, a page parameter is setting up route data, allowing you to access the page using a route that includes the page name and parameter:
e.g. https://servername/PageName/?ParameterName=ParameterValue
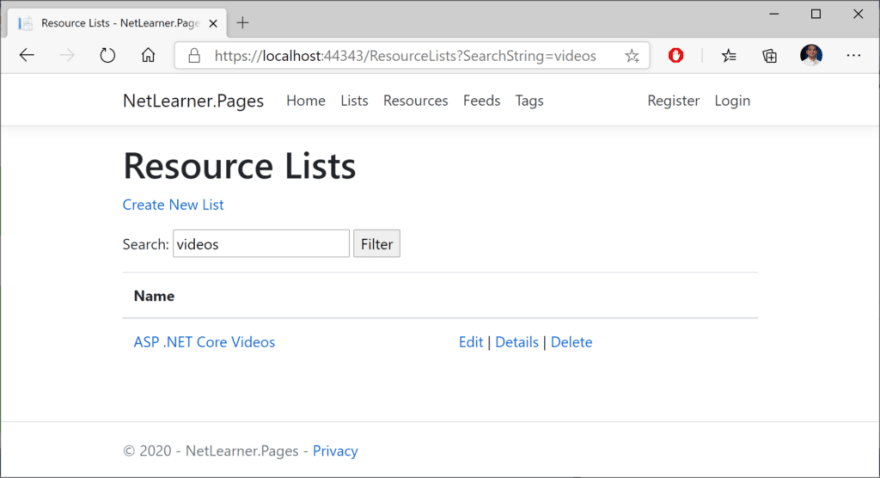
In the sample project, browsing to the ResourceLists page with the search string “videos” includes any search results that include the term “videos”, as shown in the following screenshot.
e.g. https://localhost:44343/ResourceLists?SearchString=videos
Here, the value for SearchString is used by the OnGetAsync () method in the Index.cshtml.cs class for ResourceLists. In the code snippet below, you can see that a LINQ Query filters the movies by a subset of movies where the Title contains the SearchString value. Finally, the list of movies is assigned to the Movie list object.
...public IList<ResourceList> **ResourceList** { get;set; }...public async Task **OnGetAsync** (){ ... if (!string.IsNullOrEmpty( **SearchString** )) { **resourceLists** = resourceLists.Where(s => s.Name.Contains( **SearchString** )); } ... **ResourceList** = await **resourceLists.ToListAsync();**}
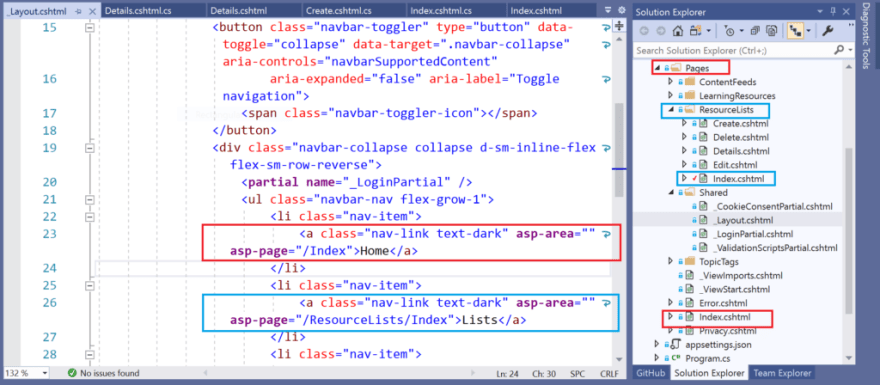
By convention, all Razor Pages should be in a root-level “Pages” folder. Think of this “Pages” folder as a virtual root of your web application. To create a link to a Razor Page, you may link to the name of a Razor Page at the root level (e.g. “/Index”) or a Razor Page within a subfolder (e.g. “/ResourceLists/Index” as seen in the shared _Layout.cshtml file).
<a class="nav-link text-dark" asp-area="" asp-page="/ **Index**"> **Home** </a><a class="nav-link text-dark" asp-area="" asp-page="/ **ResourceLists/Index**"> **Lists** </a>
Handler Methods
The OnGetAsync () method seen in the previous method is triggered when the Razor Page is triggered by an HTTP GET request that matches its route data. In addition to OnGetAsync (), you can find a complete list of Handler Methods that correspond to all HTTP verbs. The most common ones are for GET and POST:
- OnGet() or OnGetAsync for HTTP GET
- OnPost() or OnPostAsync for HTTP POST
When using the Async alternatives for each handler methods, you should return a Task object (or void for the non-async version). To include a return value, you should return a Task (or IActionResult for the non-async version).
public void **OnGet** () {}public IActionResult **OnGet** () {}public async Task **OnGetAsync** () {}public void **OnPost** () {}public IActionResult **OnPost** () {}public async Task<IActionResult> **OnPostAsync** () {}
To implement custom handler methods, you can handle more than one action in the same HTML form. To accomplish this, use the asp-page-handler attribute on an HTML
< **form** method="post"> < **button** asp-page-handler=" **Handler1**">Button 1</button> < **button** asp-page-handler=" **Handler2**">Button 2</button></ **form** >
To respond to this custom handlers, the exact handler names (e.g. Handler1 and Handler2) need to be included after OnPost in the handler methods. The snippet below shows the corresponding examples for handling the two buttons.
public async Task<IActionResult> **OnPostHandler1Async** (){ //...}public async Task<IActionResult> **OnPostHandler2Info** (){ // ...}
NOTE : if you need to create a public method that you don’t have to be recognized as a handler method, you should decorate such a method with the [NonHandler] attribute.
References
- Introduction to Razor Pages in ASP.NET Core: https://docs.microsoft.com/en-us/aspnet/core/razor-pages
- Tutorial Overview: https://docs.microsoft.com/en-us/aspnet/core/tutorials/razor-pages
- Tutorial: Get started with Razor Pages in ASP.NET Core: https://docs.microsoft.com/en-us/aspnet/core/tutorials/razor-pages/razor-pages-start
- Learn Razor Pages: https://www.learnrazorpages.com/
- Razor Pages Syntax: https://www.learnrazorpages.com/razor-syntax
- Getting Started with Razor Pages: https://visualstudiomagazine.com/articles/2019/02/01/getting-started-with-razor.aspx

Oldest comments (0)