React is one of my favorite JavaScript libraries to work with because of the component based nature of the language where "write once run everywhere" is the mantra that the language promotes. Same goes with React Native which is used for building in native environment such as mobile. I have worked on a project in the called rightIn. It is a mobile application that lets the user create activities in a more spontaneous manner. In this particular post, I want to talk about one of the difference that you will find when working with react and react native, "navigation" specifically the use of navigators in react native applications.
In react, react router is the standard library for determining where each click or link will take you to on the website. In react native however, it is react navigation that you will use to structure your navigation scheme for your application.
Mobile applications are usually made up of multiple screens and the transition between these screens are usually organized and managed through navigators. There are different navigators that are available for managing navigation scheme such as DrawerNavigator, StackNavigator, and BottomTabNavigator to name a few. I used two of the navigators in my own application, the SwitchNavigator and BottomTabNavigator.
To start, once you have your react native app initialized and ready to go. Install react navigation through npm install.
npm install --save react-navigation
I created a main navigator which is called "MainNavigator.js" like component that serve as a container for holding other navigators. In terms of hierarchy, the main container will be the outer wrapper that holds other navigators inside. In my App.js file, it's going to render and turn that main navigator component.
    render() {
      return (
          <View style={styles.container}>
              {Platform.OS === 'ios' && <StatusBar barStyle="default" />}
              <Root>
                <MainNavigator screenProps={screenProps} />
              </Root>

          </View>
      )
    }
Once I have this outer wrapper created, I can go into the main navigator to build out the navigation scheme that suits my application. There are different components available to be imported from react-navigation.
import { createAppContainer, createSwitchNavigator, createBottomTabNavigator } from 'react-navigation';
const AppContainer = createAppContainer(AppSwitchNavigator);
One thing to note is that the createAppContainer is important because it is the actual container that holds all the navigators inside. I named the file MainNavigator.js but the actual export default is the AppContainer.
    //MainNavigator.js

    export default AppContainer;
Let's take a took at the SwitchNavigator that I placed inside the AppContainer.
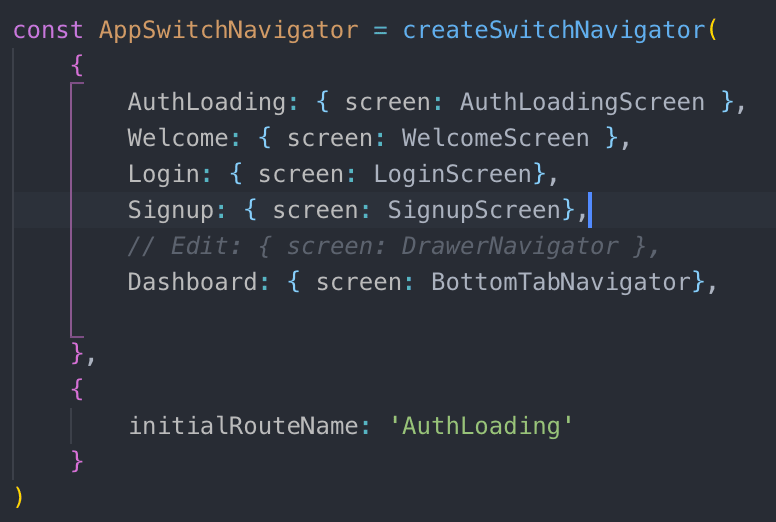
A switch navigator is used for only showing one screen at a time. In this case, the welcome screen, signup screen, or login screen usually just take up the whole screen when displaying in the mobile so switch navigator is pretty useful here. Notice the object like structure within the createSwitchNavigator method, the WelcomeScreen, LoginScreen, and SignupScreen are individual component that will be displayed in the app. The folders and file structures I used can be seen in the below image.

The keys such as Welcome, Login, and Dashboard can be used for navigation purpose via the built in method as shown below.
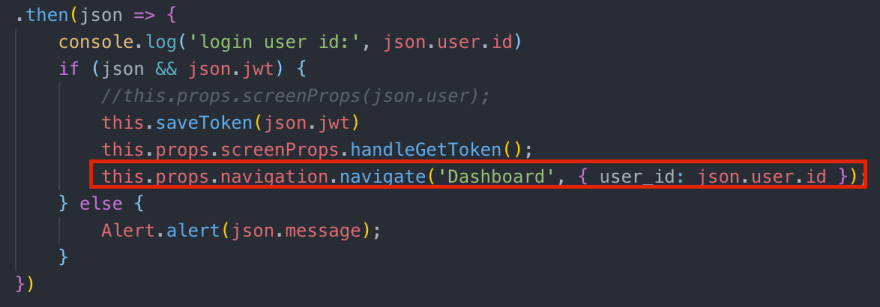
The line highlighted in the image is a way to navigate or redirect to the specified screen which in this case is the dashboard. Dashboard is actually a navigator within the SwitchNavigator. It is possible to nest one navigator within another to create nested navigators. The one that is nested within the SwitchNavigator for me is the BottomTabNavigator.
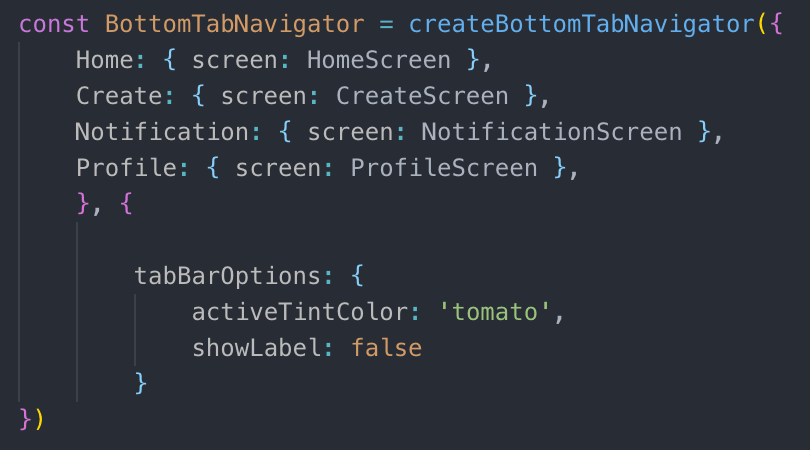
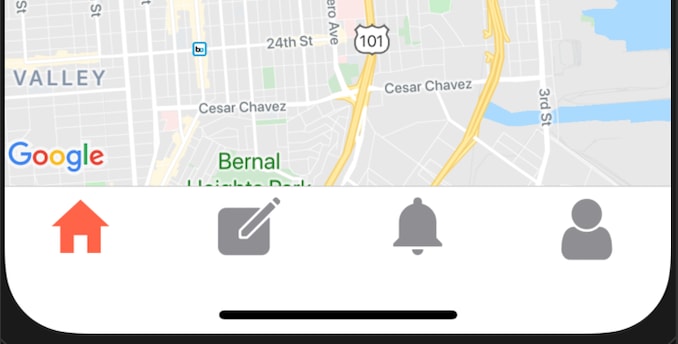
As the name suggests, the BottomTabNavigator can be used to create tabs in the bottom of the mobile screen as shown below. Each of the tab represents home, create, notification, and profile screen. Bottom tabs are some of the common navigation that you can incorporate in your application as well.
Conclusion
React navigation is the way to create, organize, and manage navigation scheme within the react native app. In this project, I used SwitchNavigator in conjunction with BottomTabNavigator to create navigation structure within my app. There is also other navigators that are available to use for other navigation options such as StackNavigator and DrawerNavigator. I like react navigation a lot because I think it is a quite a simple way for organizing screens and navigation schemes.
References
https://facebook.github.io/react-native/docs/navigation#__docusaurus
https://reactnavigation.org/docs/en/switch-navigator.html
https://reactnavigation.org/docs/en/bottom-tab-navigator.html

Latest comments (0)