
In this step of our multi-part tutorial, we are going to configure Hasura as our application’s back-end. Hasura is an open-source, GraphQL flavored “back-end-as-a-service” which plays very well with GraphCMS given they both share the GraphQL underpinnings. The back-end-as-a-service simply means that we’ll get a thin UI sitting on top of our database and be offered some user-friendly features, such as taking advantage of Postgres’ hook system but with the convenience of a UI and some additional USPs from the BaaS provider.
Why Hasura?
Apart from the above-mentioned reason that Hasura has native support for GraphQL, Hasura also released a new feature called ‘remote joins’ which allows us to essentially federate our schemas without having to annotate the schemas. If you’re unfamiliar with the federation concept, it basically means that each “section” or “group of concerns” of our application would be split into multiple schemas. These schemas could be developed in isolation of each other since they are often maintained by different teams with a different set of concerns and stakeholders.
Typically, you’d need to provide some kind “decoration”, in GraphQL this is done with directives, to tell one schema when to look at another schema for the answers. In traditional database design, this would be identifying a foreign key when one table needs to look at another table.
In Hasura, we have the convenience of simply providing our API URL, and through the power of GraphQL’s introspection (the ability to understand everything an API makes available to us), the Hasura tooling lets us use a very convenient drop-down to identify which field needs to be connected to our schema. This will be covered a little more later.
Lastly, the reason we chose Hasura is that it has built-in support for authentication and user permissions, which will be important to this application since we have multiple users creating their own, private content.
Environment Variables in Heroku
To begin, we are going to use the newly released Hasura cloud to quickly set-up a new instance of Hasura. You could just as easily use their deployable solution on Heroku (our database will be hosted there, anyways) or any other server stack supported by them, but we’ll focus on the cloud version to keep things simple.
Create an account with Hasura Cloud.

Create the database on Heroku
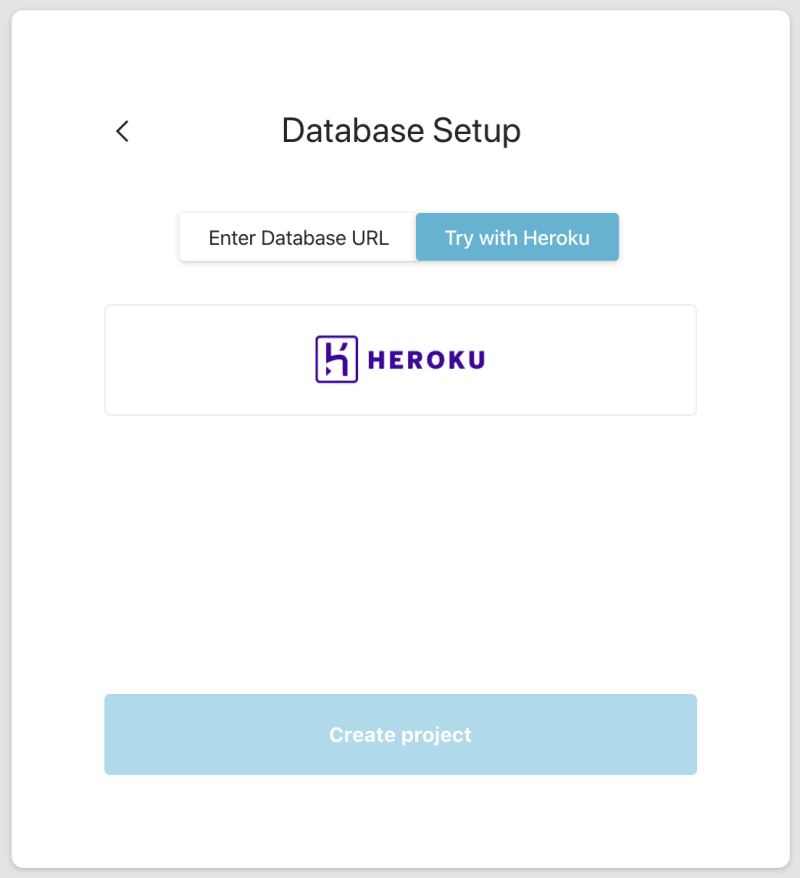
You’ll need to authenticate (or create an account with Heroku first) after which the Hasura Cloud interface will do automated provisioning for you.
Once you create the project, the app will go through a number of installation steps (all automated) and then prompt you to launch the console (main application) of Hasura. When you launch the console, it will open in a new tab, return to the Hasura Cloud UI to add our environment variables.
Note various values available to you here.
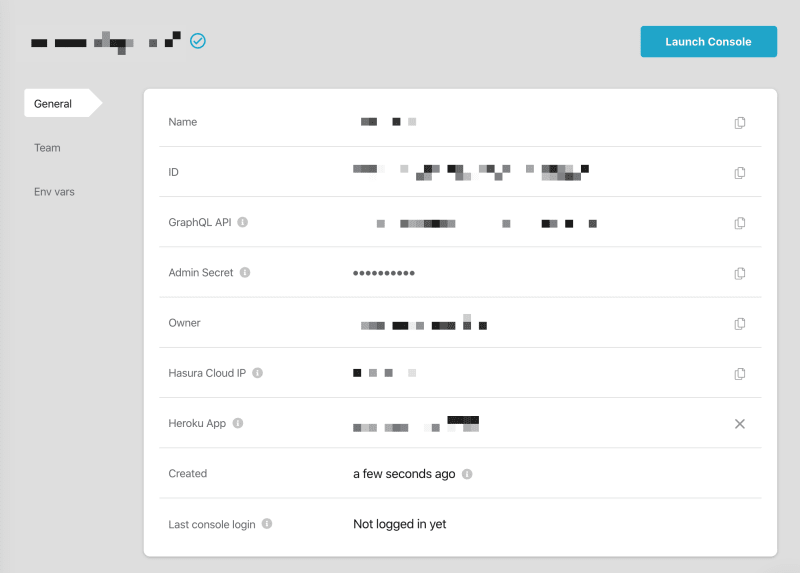
We will need to create a few variables for this project:
GRAPHCMS_FULL_ACCESS_TOKEN
This is our access token from GraphCMS which we defined in our GraphCMS API. Note, you’ll need to use the format Bearer <TOKEN_VALUE> since we use the full string as Hasura’s env values don’t allow us to use string interpolation.
HASURA_GRAPHQL_ADMIN_SECRET
For protecting our console (if we aren’t using Hasura Cloud) and also for protecting synchronizing function from Auth0.
HASURA_GRAPHQL_JWT_SECRET
Our application will use tokens from Auth0 to authorize our requests to Hasura. We need to configure Hasura to recognize Auth0’s JWT format. To do this, provide the following value as the environment variable:
{
  "type": "RS256",
  "jwk_url": "https://<YOUR_AUTH0_DOMAIN>/.well-known/jwks.json",
  "claims_format": "json"
}
Replacing <YOUR_AUTH0_DOMAIN> with your actual Auth0 application domain.
HASURA_GRAPHQL_UNAUTHORIZED_ROLE
Define this as “public” - which means that users who attempt to access our API without authentication will be assigned the “public” role, which we can assign specific privileges for in our database.
Creating the Content Model
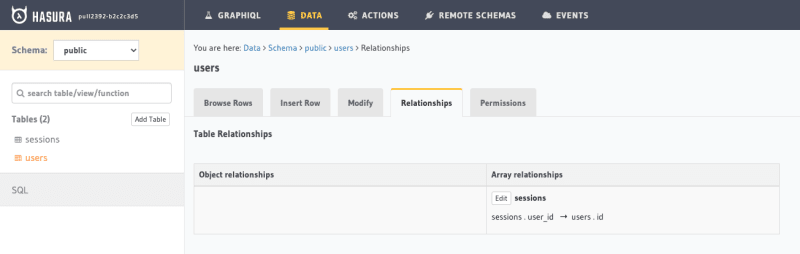
The majority of our product or editorial content was modeled in GraphCMS. We’ll simply use two models (or tables) in Hasura. Our user table, which is populated from Auth0 plus an additional array relationship called sessions to a table also called sessions.
An array relation simply means that we are defining a one-to-many or many-to-many relation. If we were creating a many-to-one or a one-to-one this would be an object relation.
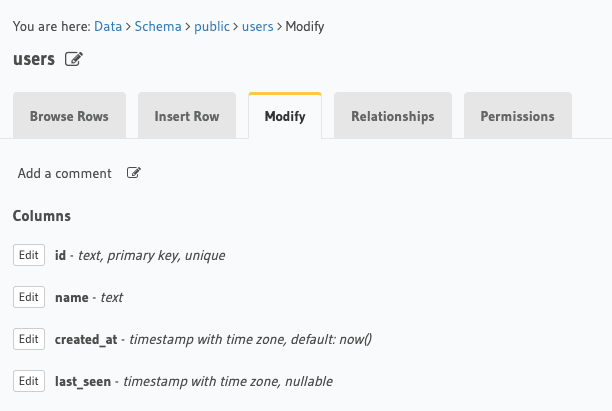
Users Table
Sessions Table
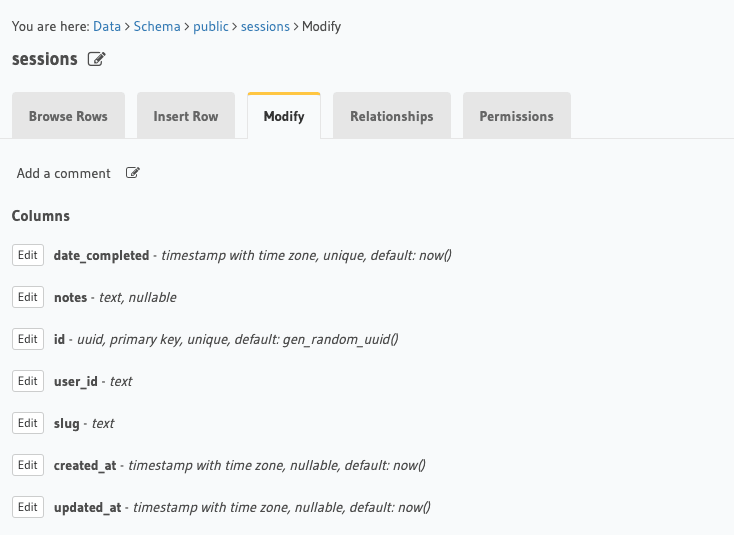
Adding Remote Schema
You’ll note in the session table above, we defined a workout “slug” - this will serve as our foreign key for GraphCMS when we define a remote schema relationship. Defining and federating a remote schema couldn’t be easier in Hasura. To enable our Remote schema, go to the “remote schema” tab at the top of the window, and add in the values, your settings should be similar to the attached graphic.
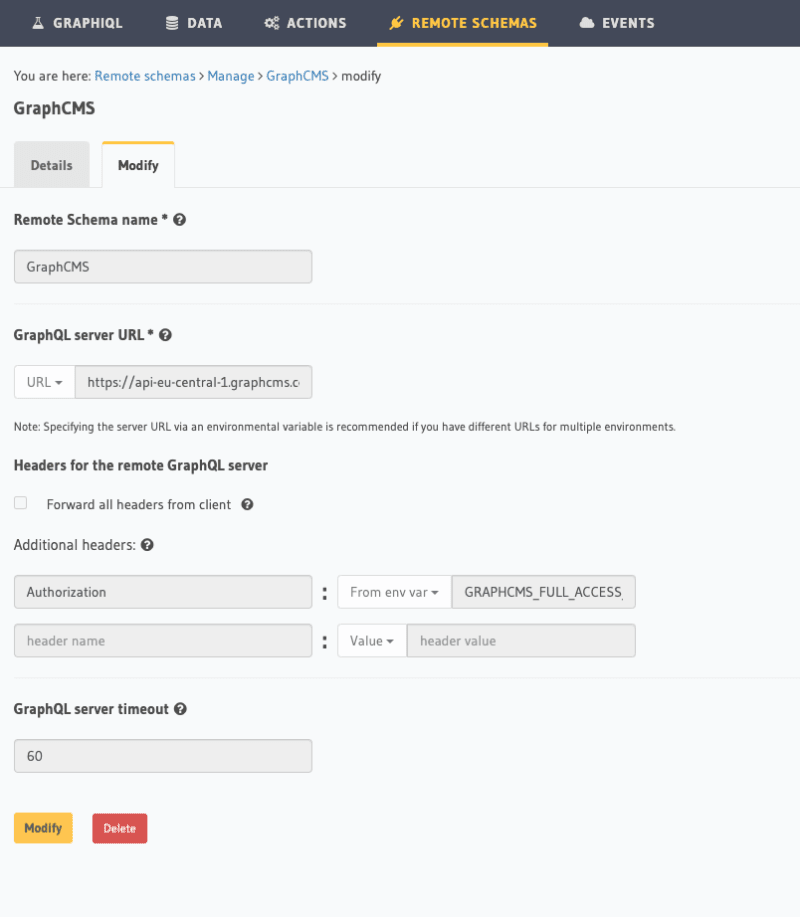
Note that for the Authorization header, we are using a value from our environment, our GRAPHCMS_FULL_ACCESS_TOKEN.
Define the Relationship
Return to the relationship tab of the sessions table. At the bottom of the tab window, there’s a section called “Remote Relationships.”
Name the field “workout” and choose the Remote Schema of GraphCMS (or whatever you labeled the remote schema in the previous step).
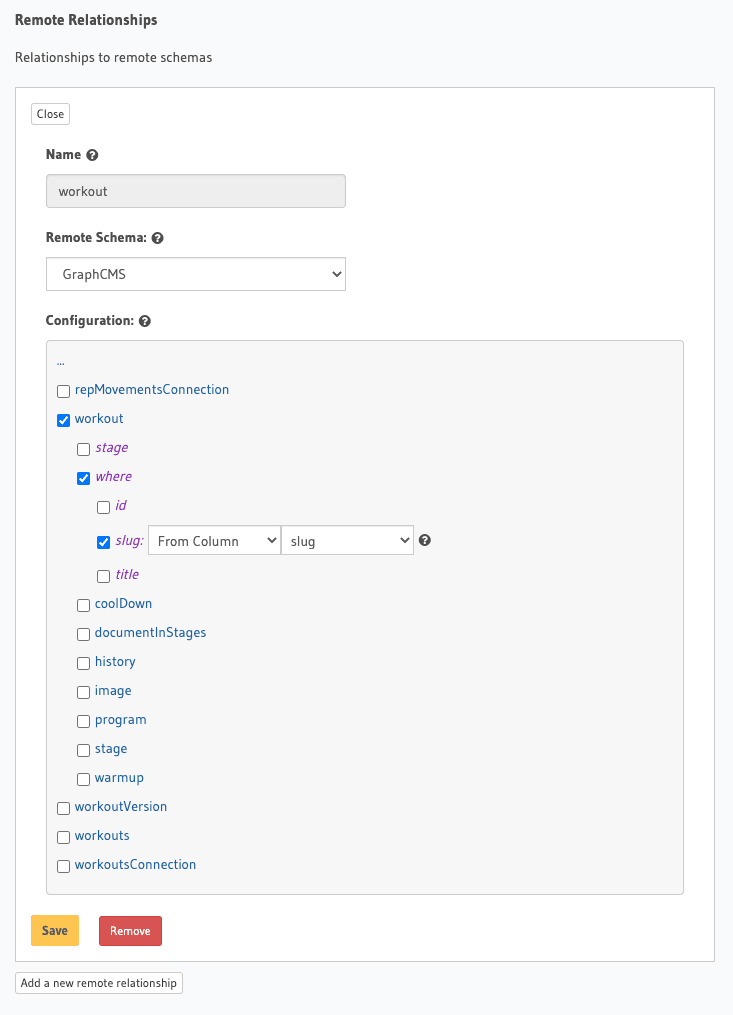
The trick here is that we are passing the value to the slug input argument of our where input type. The slug value is coming from the slug column of our session.
That’s it.

Creating a Web-hook
We use a webhook in the project to perform a sort of “pre-calculated aggregation” of the popularity of our workouts. This allows us to sort by popularity without needing to touch our user database if we were to distribute our GraphCMS API to another location that was un-aware of our Hasura project. In Hasura, these are called “Events”.
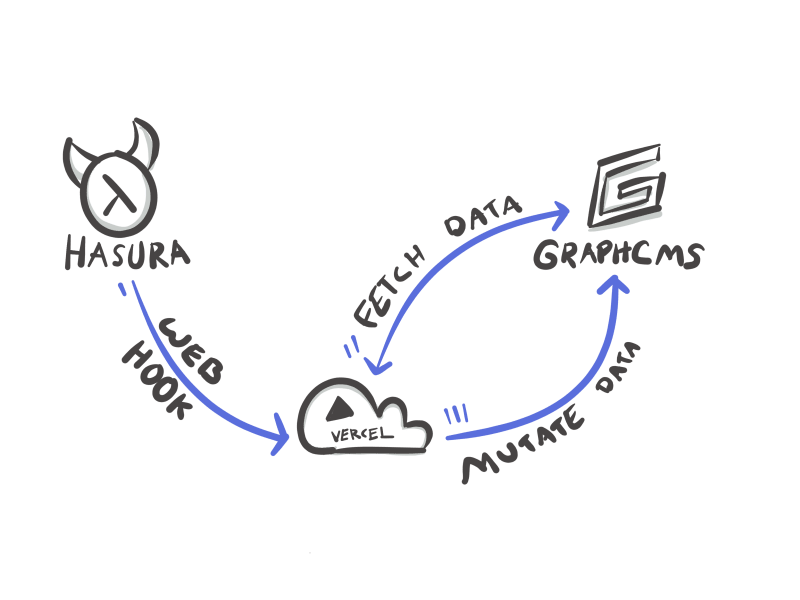
We define the trigger to occur when the table sessions receive a new insert and then we send a payload to the Web-hook URL defined.
The gotchas
There are some limitations to the remote schema joins for now. One of which is that you cannot use secure roles in the fields of a remote join. That is, you can’t extend the access controls from Hasura to the fields of GraphCMS. Hasura is working to enable this as is GraphCMS.
There are also some notable gotchas:
No exposed ID Type
Their ID scalar is not exposed by Hasura so we wouldn’t be able to use the direct ID of the workout entry from GraphCMS since meshing them would cause a type incompatibility error (even though both read as a text string.) That means we needed to create a slug entry in our GraphCMS model to support matching a foreign key from Hasura.
Required Fields
Because the input argument type where is required by GraphCMS for filtering by workout, we have to pass this value in as an empty argument when querying content, even though it is dynamically inserted at run-time. It’s less elegant than it could be, but a small price to pay for the amazing flexibility of adding a meshed-in third-party API.
Next Steps
That's it! You've made it to the end. Now you have all the pieces you need to create elegant, composed, distributed, and iterative APIs and services. Tweet out your success or check out GraphCMS for even more great resources.

Top comments (0)