
We all have our preferred music streaming platform that provides the soundtrack to our day. No matter the platform you choose, they all have content for each artist such as a photo, bio, and suggestions for similar artists.
Let’s learn how to build an artist content model using the LastFM Rest API as a remote source to retrieve metadata and a modular component to structure our artist content.
Using modular components and remote sources, we can create dynamic and engaging artist content that's easy to maintain and update. With Hygraph's content federation features, we can pull in data from LastFM and add it to our content model in a way that makes sense and considers the overall content workflow of our business.
Requirements:
- Hygraph account and a new project
- Web browser of your choice
- LastFM account (FREE)
- Basic understanding of content modeling
Adding a remote source to your Hygraph project
To obtain a LastFM API key, login into your LastFM Account and navigate to the create API account form.
Obtaining a LastFM API key
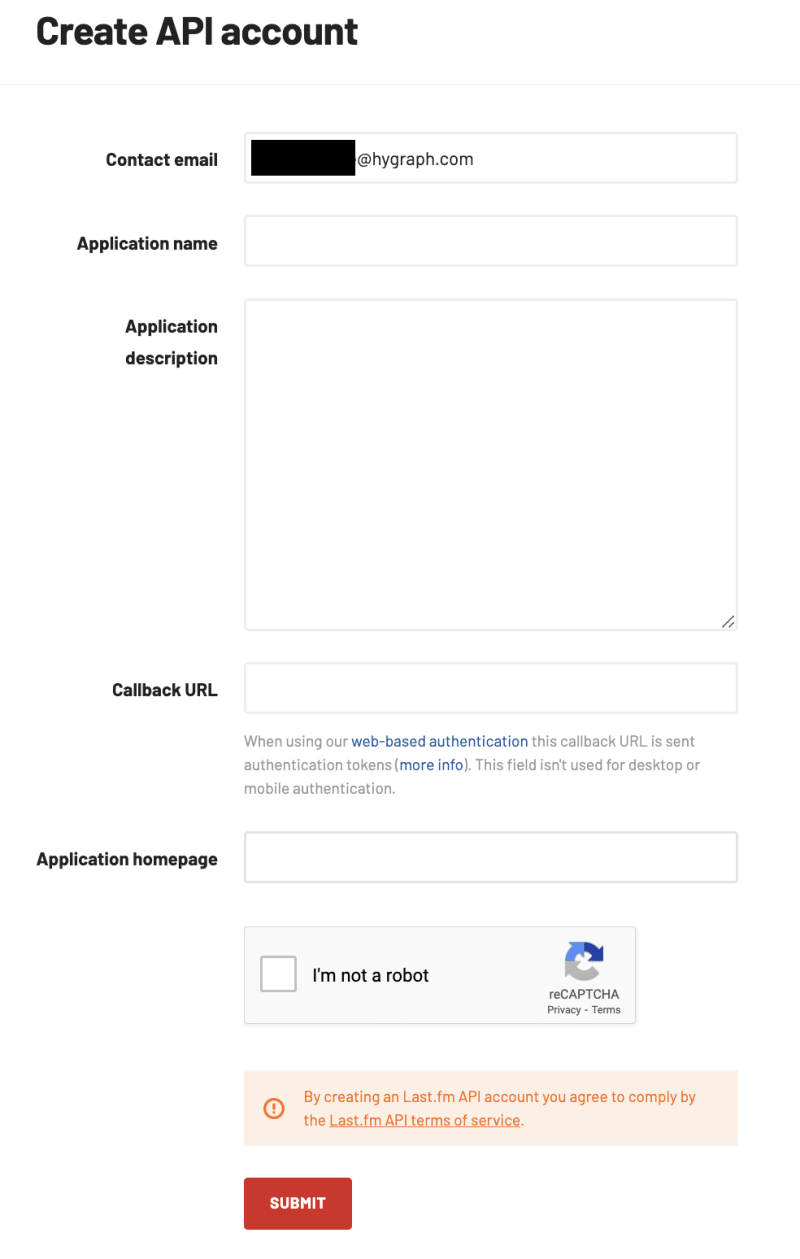
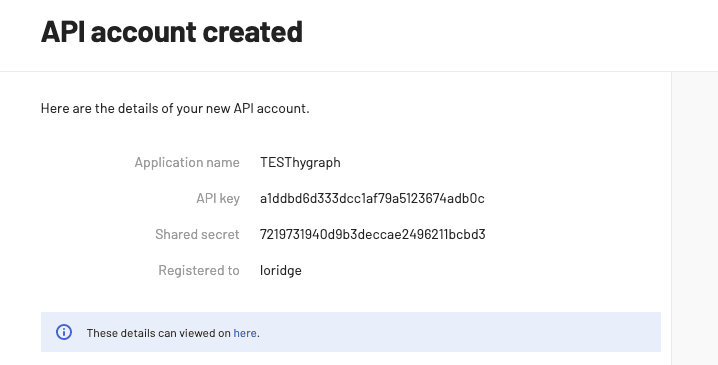
Because we are logged into our account, the contact email will be pre-filled. Next, we will add an application name, feel free to choose any name you want and click to Submit the form. Once the form is submitted, you will get an API Key and Secret, save this information as we will use it to connect LastFM to Hygraph later on.
For now, let’s test our API to make sure that we are able to successfully retrieve artist data.
Getting a JSON response from LastFM REST API
The LastFM API documentation gives us the Root URL and methods available to make a request. The root or base URL is https://ws.audioscrobbler.com/2.0/ (Keep the base URL close by, we will need it later!) and we will use the artist.getinfo method to retrieve artist metadata in JSON format. If we build out our request URL, we get something like:https://ws.audioscrobbler.com/2.0/?method=artist.getinfo&artist=ADD_ARTIST_NAME&api_key=YOUR_API_KEY&format=json.
Replace ADD_ARTIST_NAME with an artist and YOUR_API_KEY with the API key you generated earlier.
Example URL: https://ws.audioscrobbler.com/2.0/?method=artist.getinfo&artist=prince&api_key=a1ddbd6d333dcc1af79a5123674adb0c&format=json
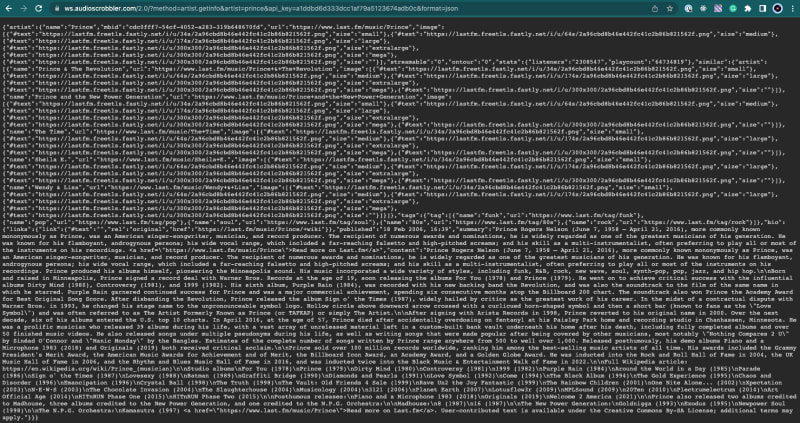
For example, if we search for the artist, Prince, with a valid API key in our web browser, we should get all information available about Prince.
Install a JSON validator extension for your web browser. This tutorial uses Google Chrome as a browser and the JSONVue extension. With our extension installed, we get lovely JSON that is organized and easier to read.
Back to our regularly scheduled programming…
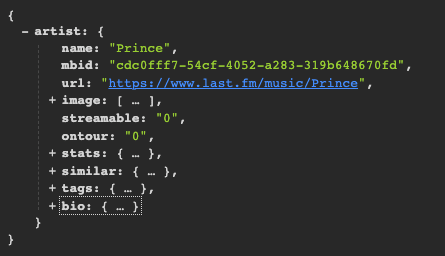
Great work—We have a working API Key and are able to retrieve artist data in JSON format! From our JSON response, we are able to get a bio, stats, tags, and similar artists for Prince. Our next step is to get this data into the right shape to work with Hygraph’s GraphQL API.
Shaping LastFM JSON to work as a native GraphQL API SDL
A Schema Definition Language or SDL is a way to define the shape of data that can be queried in a GraphQL API. It describes the schema or types of data available, their relationships, and how the data can be queried. We need to tell Hygraph the shape of the data to expect and make available. To do that, we'll create custom types using an SDL to define the schema that will be available to us via the Hygraph API. To jumpstart the process, we can use a JSON to GraphQL tool that will take our LastFM JSON response and generate GraphQL type definitions for us.
# SDL for LastFM REST API

type Link {
  text: String
  rel: String
  href: String
}

type Links {
  link: Link
}

type Bio {
  published: String
  summary: String
  content: String
  links: Links
}

type Tag {
  name: String
  url: String
}

type Tags {
  tag: [Tag]
}

type Image {
  size: String
}

type Similar {
  artist: [Artist]
}

type Stats {
  listeners: String
  playcount: String
}

type Artist {
  name: String
  mbid: String
  url: String
  streamable: String
  ontour: String
  bio: Bio
  tags: Tags
  similar: Similar
  stats: Stats
  image: [Image]
}

type AutogeneratedMainType {
  artist: Artist
}
Using the SDL generator should output the custom type definitions above. Copy and paste your SDL into a code editor or IDE of your choice and let’s make a few small changes to these types. Sometimes when connecting to older REST APIs where naming conventions are not as strict, you can get special characters in type names. In the case of the Image type from LastFM, there is a #text value that is used for the URLs for images. This cannot be queried using GraphQL because #text will be stripped out as a comment. Remove text: String from Type Image. Last, instead of using AutogeneratedMainType we will use ArtistMeta as our Main Type name.
type ArtistMeta {
  artist: Artist
}
Connecting LastFM to Hygraph as a remote source
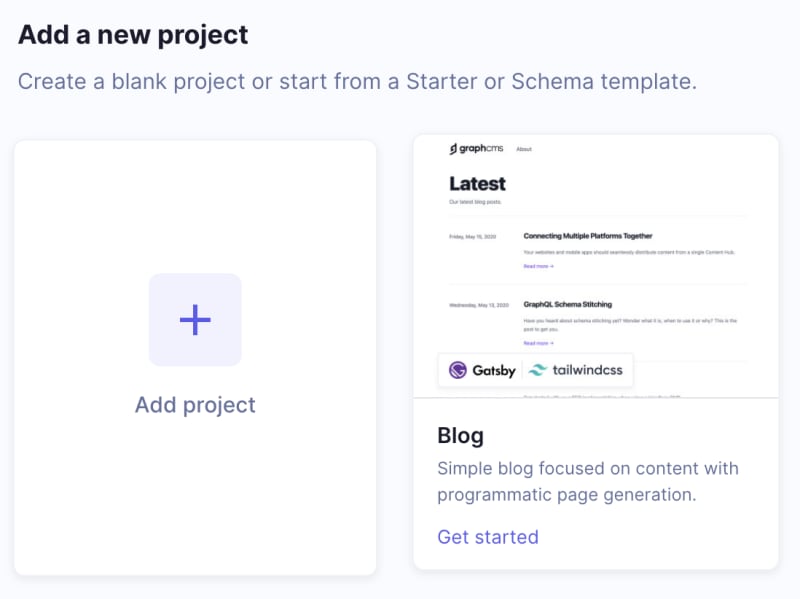
We have our SDL, now it's time to connect LastFM to Hygraph as a remote source. Login to Hygraph or create an account if you do not already have one. Once you are logged in, scroll down to “Add a new project”. We have the option to create a blank project or to use a starter template. For this project, we will start with a blank project, so click on the “Add project” square to get started.
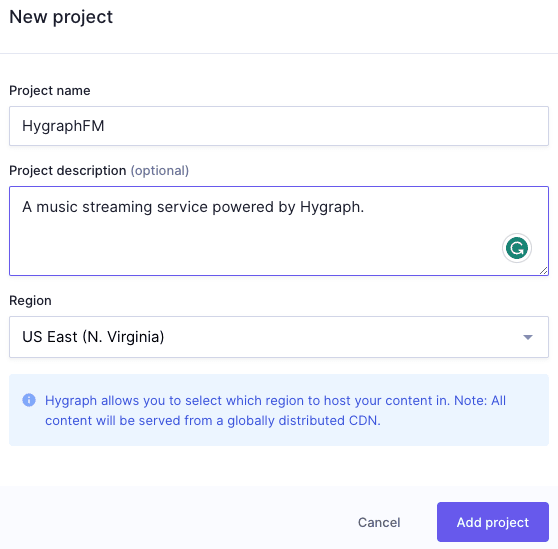
Add HygraphFM or a name of your choice as the “Project name” and select the “Region” from the dropdown menu that is geographically close to you to host your content. Once complete, click the Add Project button and Hygraph will create a blank project for you.
When Hygraph finishes the setup process, we are taken to our project dashboard. On the left sidebar menu, select “Schema”, then click “Add” next to Remote Sources.

- Display Name: LastFM API
- Prefix: LastFmApi
- Description: LastFM Rest API for artist metadata
- Type: REST
- Base URL:
https://ws.audioscrobbler.com/2.0/

When you choose a remote source Type, new fields for the Base URL and Custom type definitions are revealed. Add the base URL from LastFM that we saved earlier.
Adding our Custom Type Definitions
Next, copy and paste the custom type definitions from our SDL into the Custom Type definition field. The top bar of the field conveniently gives us a summary of the types we pasted in.

When working with a large number of type definitions, it is helpful to check this summary against our original SDL file to make sure we got all of our definitions.
Click the “Add” button at the top right corner and Hygraph will add LastFM as a remote source to our project. Now that we have connected LastFM as a remote source to our project, we can start building our artist content model and a modular component to create a structure for artist content.
Building the artist content model
Instead of thinking about a specific presentation such as an app or website, it is important to think about your organization and business goals as a whole when building a content model.
A content model is a definition of your data stored in Hygraph, but never forget that it also represents the process your editors will use to create and enter content. Think of a content model as a way to provide universal clarity on a process, task, or data point for the entire business while also ensuring you get the right data types in the API. In our case, we want to create a profile that provides information and statistics for every artist on our music platform. However, what other business needs should be included in this model? Getting input from stakeholders such as content creators, marketers, designers, product managers or account executives from the start of the build process ensures that you are developing a tool that works for everyone. When we as developers work collaboratively to create content models, it decreases the time we spend putting out fires, frees up our capacity and creativity to develop new tools and features, and empowers our organization to make content changes as needed.
After talking with marketing, product, and sales we learn that we need to incorporate content sections for marketing campaigns, a banner that promotes new album releases, and a CTA to invite friends (aka new users) to the platform. With this new information in mind, we are now ready to build the artist content model in Hygraph. From the “Schema” menu item in our Hygraph project, select “Add” from the Models section.
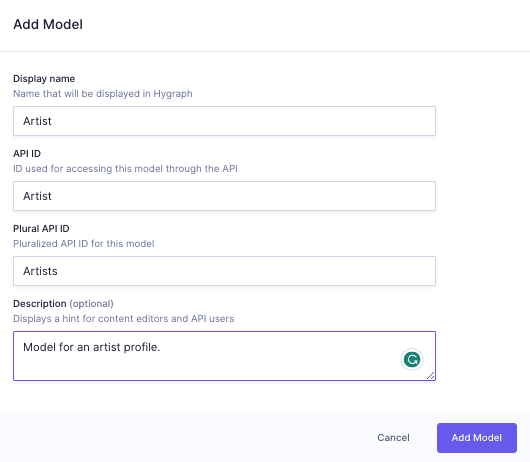
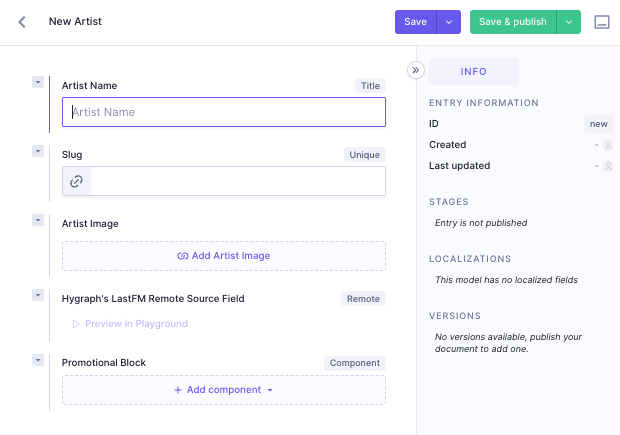
From here, we give our model a Display name, Artist, and the API ID and Plural API ID autocomplete for us, and click the “Add Model” button. Once setup is finished, the Artist model will display and we get a list of fields that we can use to populate our model.
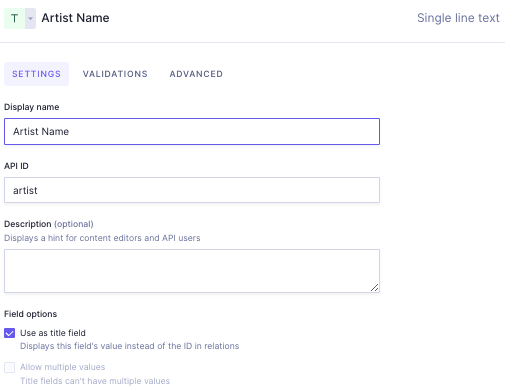
Single line text: Title field
The first field we need is a string field for the Artist Name, so we will use the Single line text field. For API ID, let’s use artist and check “Use as title field” option.
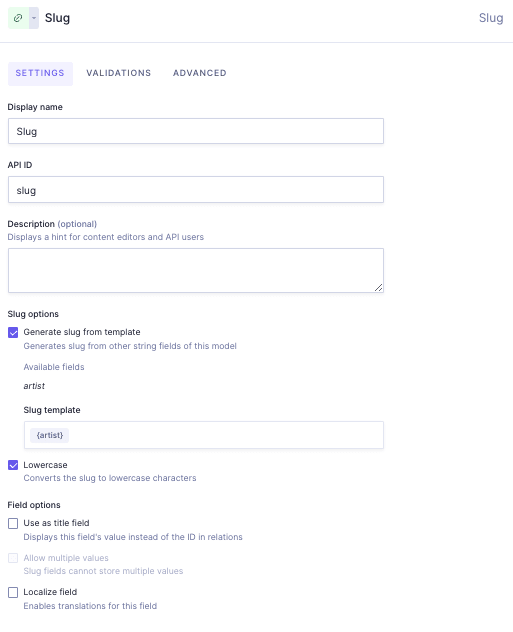
Slug field
Next, we will add a slug field to our artist model and we want it to generate the slug from our title in the options. In the Slug template field, add {artist} . This lets Hygraph know which field to use to generate our slug.

Asset: Image field
To go along with the data we are pulling in from LastFM, we want to include an image of the artist. Add the Asset Picker field and name it, Artist Image.
You may be wondering why we’re not pulling in images directly from our remote source. It can be really difficult to know when to automate or have manual control over fields, so it is important that we develop cross-functionally to understand the full context and purpose for content. In this case, our marketing team and artist management want the ability to curate images for artists. Sometimes, it makes more sense for your overall business goals or brands to have more control vs the ability to automate everything.
Rest: LastFM remote source field
Earlier, we connected LastFM as a remote source. Now we can add a Rest field to our artist model. Scroll down to the list of field types, and select “REST” and we will give this field a name, Hygraph's LastFM Remote Source Field and the API ID will auto-populate to hygraphLastFmRemoteSourceField.
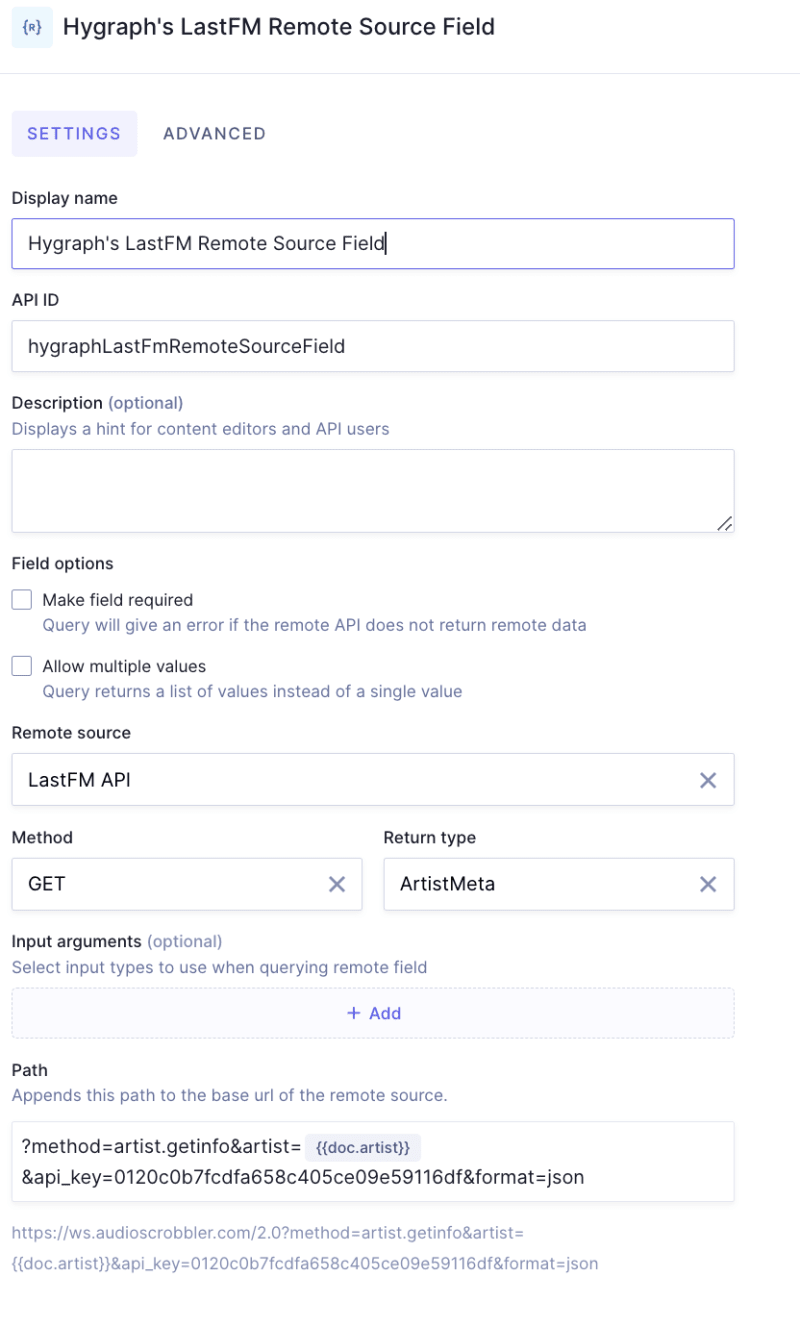
Next, we choose LastFM API or the name you chose in the “Remote source” dropdown menu and GET for our “Method” and ArtistMeta for our “Return type”. This lets Hygraph know that we want to retrieve or GET information from our LastFM and we have selected the ArtistMeta type because we want to be able to access all the metadata that is available for every artist. Last, we need to append the rest of the request URL to the path. Starting with the method, copy the example URL we made earlier that contains your API key into the “Path” field. Your field should contain: ?method=artist.getinfo&artist={{doc.artist}}&api_key=a1ddbd6d333dcc1af79a5123674adb0c&format=json. Adding artist={{doc.artist}} instead of using Prince as the artist search parameter tells Hygraph that we want to make a request based on the Artist Name used in the title field of a content document.
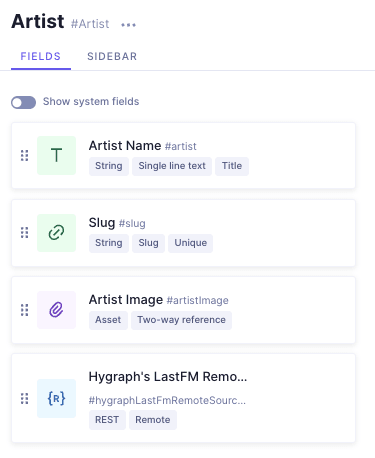
We now have an artist model that contains title, slug, image, and LastFM remote source field. While our artist model looks great, we need to incorporate the content that marketing and sales requested.
Creating a modular component for the artist model
The marketing and sales teams have asked for an invite your friends/new users call to action and promotional space content sections within the artist model. The best way to do this is by creating components that we will be able to add to our model as a collection of components using the modular component field. We need to create Button, Call to Action or CTA, and Callout components to help our organization accomplish its business goals. Using components vs hardcoding promotional spaces allows marketing and sales to test various types of language without needing the development team to make changes. Also, modular components help us scale our model and code, giving us the ability to add additional components later when inevitable feature requests come in and put them into a system the content editors will already know and use.
Button
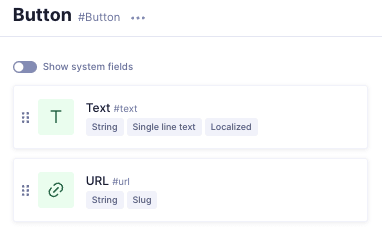
From the schema menu add a new component called Button and add a string field called Text and a slug field called URL. In the "Validations" tab of the slug field, check "Make a specific pattern" and choose URL from the dropdown menu.
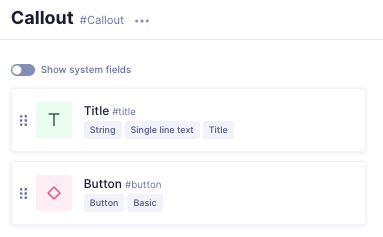
Callout
Next, add a new component, Callout, with these fields:
| Field | Name | Options |
|---|---|---|
| String | Title | Title |
| Basic | Button | Select Button component |
Call to Action (CTA)
Last, add a new component, Call To Action with these fields:
| Field | Name | Options |
|---|---|---|
| String | Heading | Localized |
| Rich text | Body | Localized |
| Asset | Image | Default |
| Basic | Button | Select Button component |
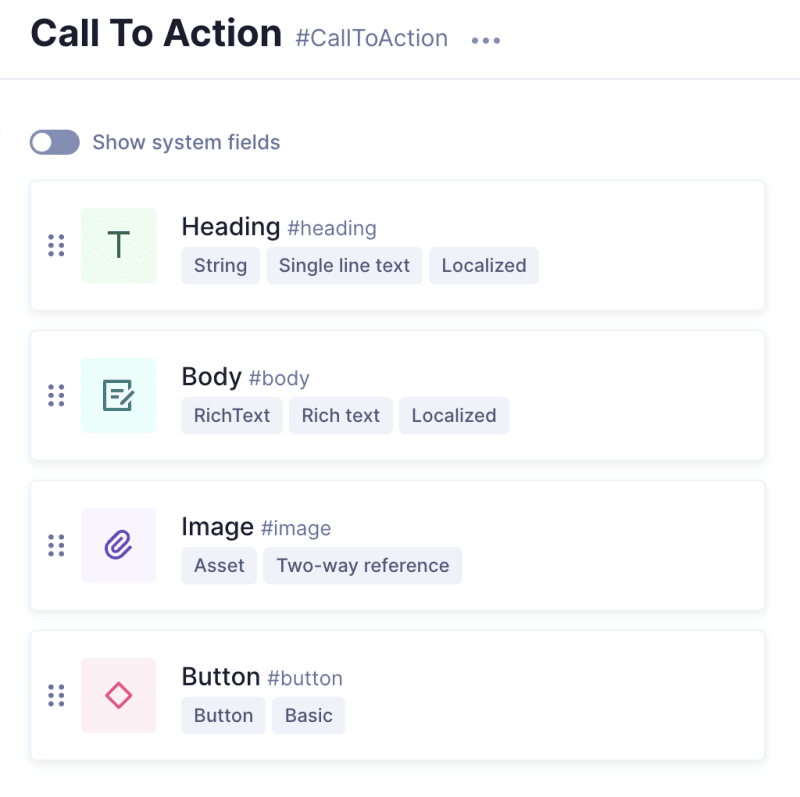
The "Basic" component field type does not allow multiple component instances and we only want one button for each Callout or Call to Action. Thinking about the overall content strategy and model allows us to make field type choices that are helpful to editors. So, our finished component will contain a Heading, Body, Image, and a single Button.
Our components are all done, now let's add them to the model as a modular component. Return to your artist model, and select the “Modular” field.
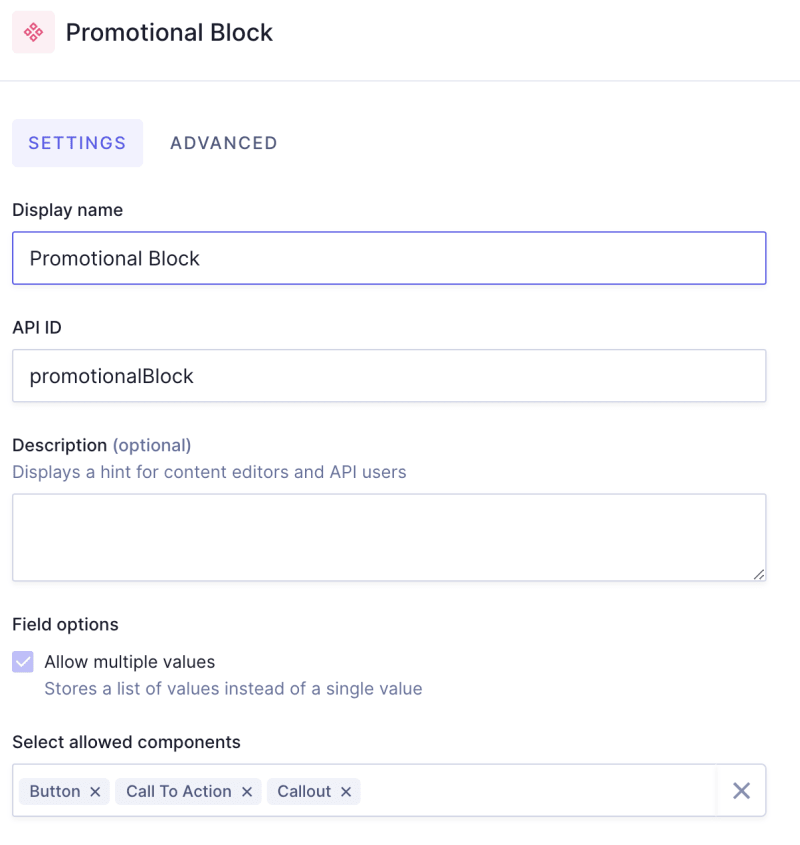
Give your collection of components a name, let’s use Promotional Block , select “Allow multiple values” from the “Field Options”, and choose the components we created, Button, CTA, and Callout from the dropdown menu.

Our artist model is now complete with Artist Name, Slug, Image, Hygraph’s LastFM Remote Source, and Promotional Block fields and we are ready to enter content!
Create Artist Content
It’s time to add content, navigate back to the main menu on the left side of your project. Select “content” and click on the button, “Add entry”, located on the top right.
A document entry form will appear. All the fields that we added to our Artist model are located on the form and are ready for content. Take some time to make 4 or more content entries of music artists. (Note: Choose music artists that actually exist, so we can use LastFM to get metadata). The artist used in this tutorial are:
- Radiohead
- Wu-Tang Clan
- A Tribe Called Quest
- De La Soul
Feel free to play around and add your own or use the artists above.
Querying artist content in the API playground
The API playground built into your Hygraph project is a great place to test queries, mutations, and API calls. Before we wrap things up, let’s experiment in the playground to see the information we get from LastFM API calls based on the content we added.
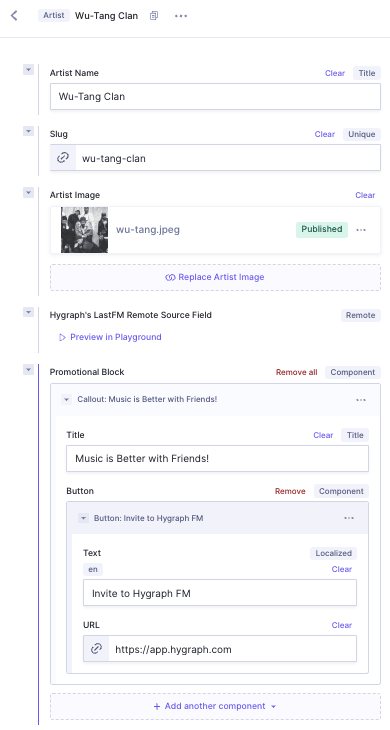
As a quick overview of the content, we have the artist Wu-Tang Clan with a name, slug, an image of the group, and a Callout that prompts our users to invite friends to Hygraph FM. With this in mind, let’s head over to the playground and test a query. From the entry form, click on “Preview in Playground” in the Hygraph LastFM Remote Source Field. This will take us directly to the API playground and autocomplete our query variable id with the entry form ID of the Wu-Tang Clan content. Example: {"id":"cli23id9o08rq0blh643i40v7"} . Now let’s test a query to get metadata along with the content we entered manually. Enter the following query:
# Test query in Hygraph API playground

query WuContent($id: ID!) {
  values: artist(where: {id: $id}, stage: PUBLISHED) {
    hygraphLastFmRemoteSourceField {
      __typename
    }
    artist
    artistImage {
      artistImageArtist {
        slug
        id
        promotionalBlock {
          ... on Callout {
            id
            title
            button {
              text
              url
              id
            }
          }
        }
        hygraphLastFmRemoteSourceField {
          artist {
            bio {
              summary
            }
            tags {
              tag {
                name
              }
            }
            similar {
              artist {
                name
              }
            }
          }
        }
      }
    }
  }
}
In the above query, we are asking Hygraph to give us the artist name, slug, id, callout title with the button, and from LastFM, we want the bio summary, tags, and similar artist names.
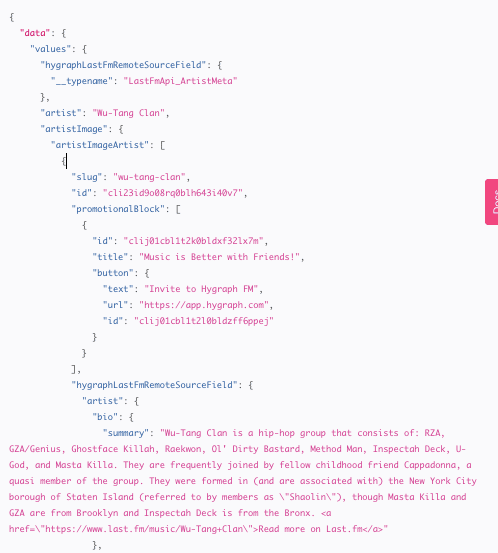
All went well and our WuContent query returned data from LastFM! We now have a short bio, genre tags, and similar artists that we can use along with our own content to populate a front end of our choice.
Next Steps
To recap, we built a content model for artists on our music platform with a modular component and added Last FM as a remote source to retrieve metadata. In the next article in the series, we will connect a frontend to our Hygraph FM project using Next.js 13 to present our artist content and deploy it to Vercel.

Top comments (0)