
The publication at GretaThemes.
--- --- ---
Customizing a WordPress theme is a necessary step to utilize any theme after activating it. And with the help of the theme's Customizer, you can do it more easily than ever. However, it may be a little bit difficult when you get used to this tool. So if you are confused, this article will be really helpful for you.
After choosing a WordPress theme and installing it, you should use the Customizer tool to customize the website's appearance following the theme demo or your own style. The advantage of this tool is the live preview mode that allows you to directly see the results while customizing. This saves you time and is much easier to manipulate than editing in the backend (Admin Dashboard).
Here are the basic steps to customize a WordPress theme with Customizer to create a website that is most closely similar to the demo theme or to your desire.
Open the Customizer Tool
First, go to Customizer on the Admin bar at the top of the page, or Dashboard > Appearance > Customize to open this tool.

Customizer's interface consists of two main parts: the left column contains customization options and the right screen displays the live preview. Here is the most common interface of Customizer.
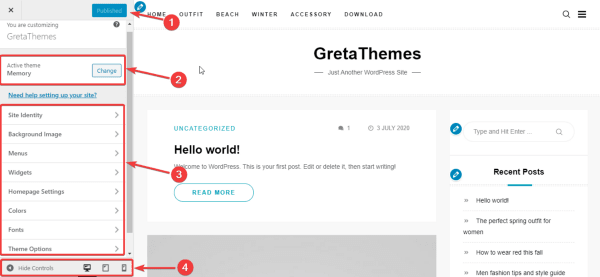
The left column includes:
1: The Publish button to save the results after customizing. If you close the site without clicking it, your customization won't be saved. So after every change, don't forget to press this button.\
2: This area shows the theme you're using. As you can see in my example, I'm using Memory theme. (You can download this theme here).\
3: Theme customization options. Note that the theme options vary depending on different themes.\
4: Click Hide Controls to hide this column. Also, if you want to see how the live preview looks like on other devices, just click the corresponding device icons here.
After getting familiar with the Customizer interface, let's dig into each basic customization option to customize an appearance that is most similar to the demo or to your idea. Remember to read the theme's documentation carefully, since it may have different customization requirements.
Customize Theme by Customizer
After activating a theme, your website hasn't looked like the demo yet. Unless your theme supports importing demo, you have to manually customize the theme. Common custom sections include:
Homepage Settings
This is the most important section to determine your homepage display.

In Homepage Settings, there are two options for showing homepage: the latest posts and static page. Depending on the requirements of each theme, you can choose a suitable option.
For a reading site like blogs, you should choose Your latest posts.

For business pages, you should choose A static page, then select a page for the homepage in the Homepage section and an archive page in the Posts page section. Just click on the drop-down menu icon in each section to select one from available posts and pages, or click Add New Page to create a new one for these two items.
However, if the chosen homepage has not been customized and set up, it may lack special features such as slider, call to action, hero image, etc. and you'll need more customization. You'd better read the theme's guidelines for these settings.

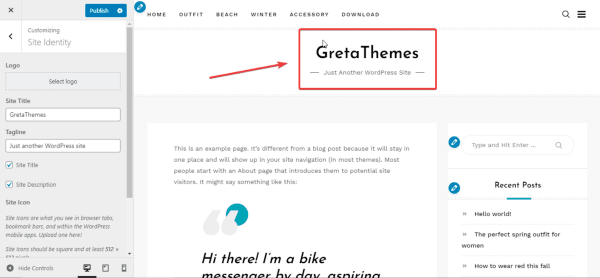
Site Identity
This section helps you change information about the website like changing logo, title, tagline.
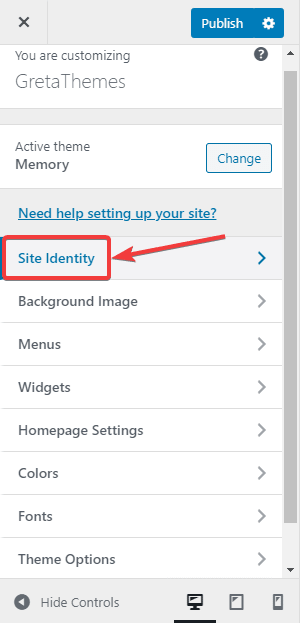
Choose the logo, write the title and tagline for your website. Besides, it may have options to customize logo, title, or hide/show these items.
Color, Background Image, and Fonts
Most of the themes, once activated, will automatically set up colors, backgrounds, and fonts similar to the demo. However, in case the above elements haven't been ready yet, you need to set them up.

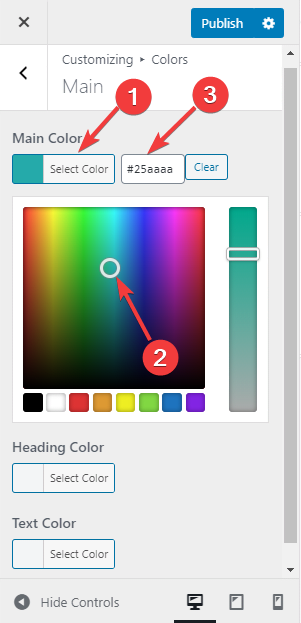
Color
Most themes support the Color section. However, while some themes allow you to change the color of many elements, some themes limit to few ones.
First, click the element that you want to recolor (1) (like main color, heading color, or text color). You can choose a color directly on the palette (2), or enter the color code here (3).
Font
Font or Typography section allows you to change font styles, family fonts, text size, etc. depending on each theme.
Choosing a family font also depends on the requirements of the theme. The easiest way is selecting an available font from the drop-down menu like the image below. Themes like this usually support only some basic fonts.

If your themes support Google Fonts, you may need to get the font's code, name, or link from fonts.google.com and then paste to the boxes like this.
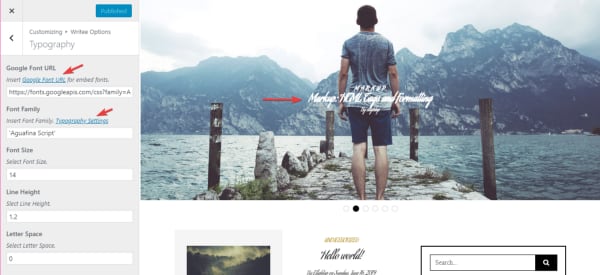
The advantage of the second way is that you have many choices of fonts from Google Fonts.
Background Image
Most themes allow you to choose a photo to set the background image. In Background Image section, click Select image and select a photo from your library or upload one.

Then, you can edit style, location, and size of the image to make a perfect fit with your website.

To change the background image, click the Change Image button. If you want to delete a background photo, hit the Remove button.
When you choose Repeat Background Image, the background image will be repeated from the beginning to the end of the page. If you choose Scroll with page, it will be moved along with the page when you scroll as below.
Menu
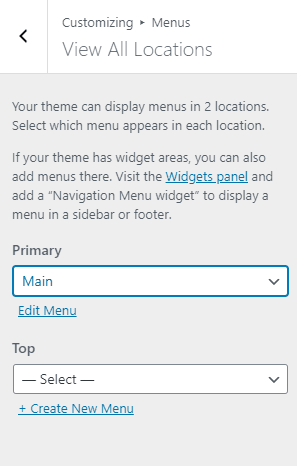
The Menu section lists all the menus and their current locations. Traditionally, the primary menu is on the header. Especially, some themes will allow you to display more than just one location, such as on the footer, topbar, slide menu, etc. To find out how many menu locations you have, look at the text below the Menu Location.

Memory theme, for example, has only one location for the menu. You can see it by clicking the View Location tab. Then, hit a menu location and select an available menu you want to display there. To edit a menu, click Edit Menu, and click Create New Menu to create another one.
What about the detail of creating and editing a menu? You can refer to our previous article here.
Widget
Widgets are blocks of content or function added to some areas supporting widgets such as sidebar or footer. There are 15 default WordPress widgets that allow you to insert videos, photos, galleries, latest posts, pages, and more. Especially, some themes even offer their own special widgets, so you should find out exactly the widgets you need, then select them properly.
In Widget section, you will see the areas that support widgets on the current page. The number and the location of these areas also vary by theme.
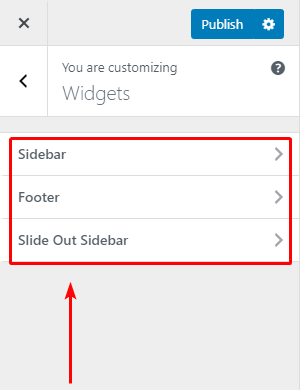
To add a widget, click the location to place the widget such as footer, and click the button Add a widget. You can choose one in the list or use the search bar to find the widget you want.

After choosing a widget, some like image, gallery, video, audio, and page ones may need additional setup to display them as you want. When doing this, you should carefully read the widget's request and follow it. Don't worry, these steps are quite simple.
To delete a widget, go to the desired one and click Remove.

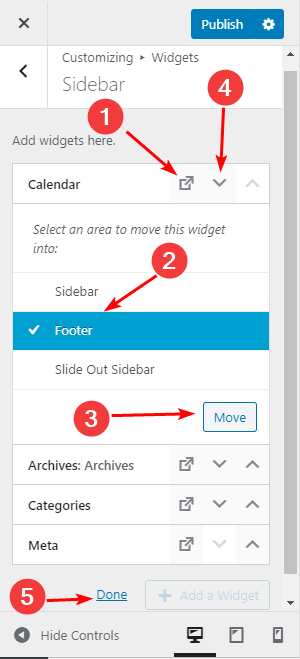
The Reorder button will help you move widgets to another area of the theme. Specifically, click (1), select the new widget area (2), and click the Move button (3). In addition, the up and down arrow button (4) will help move widgets in an area. When completed, press Done (5).
That's it, we've done with the widgets.
Last Words
Customizing these above sections with the Customizer are general and basic steps to customize your website so that it looks like a demo or your imagination. Besides, there are many other different sections for each theme. If you have any difficulty in customization, you should read the documentation or contact the theme author immediately.
Hope this article has helped you to create your own fascinating appearance for your site.

Top comments (0)