Today I’m releasing a small open source project. It’s been a while since I did so. I’m excited though because it’s something I built for myself and which I’m using heavily in my day to day life. It’s not just some academic exercise or some feel-good effort after a larger abandoned project. I am doubly excited because the project itself is quite rough, and unfinished, and stupid in many places. Fighting that perfectionism bug one crappy release at a time.
The project is named jupiter and it’s a small application for goals management, task tracking, habit building, and all that jazz. More precisely it adds a bunch of magic to Notion.so - an already existing and quite good productivity app which is a sort of cross between Trello, Jira, and Confluence. The “magic” is just a bunch of conventions on how work is organized. There is a growing set of CLI scripts for maintaining these conventions and automating such things like recurring task creation, task archival, etc. But yeah, you read that right, it’s a CLI app right now. It’s a surprisingly convenient form given that most of the interaction happens via Notion. Realistically I would not have had the bandwidth for anything else - be it webapp, native app, desktop app, Electron, or any other form modern consumer facing apps take.
You can checkout the code itself on GitHub. There’s a short tutorial there too. But I’ll cover some of that material here as well. The rest of the post is divided in two. I’ll speak a bit about how the project came about, and then I’ll deep dive into the tutorial.
Origin
Jupiter had a convoluted birth. About a year ago I decided my current system(s) for keeping track of “life” weren’t cutting it. I was especially frustrated that there were many of them - Trello for recurring tasks, docs for ToDos and reading lists, spreadsheets for plans and researches, Google Keep for some other lists, Google Calendar for tasks with deadlines, and gmail(s) for yet other sorts of tasks, etc. It was hard to manage and I was not keeping up! So I set out to document what I’d need from a single tool, and try to buy or build a solution. The scope increased - to something to keep track of all of life, plan major life goals, establish habits, drive complex projects, and also help with paying the bills and doing the various chores of life. Of course no tool could satisfy the reqs, therefore I decided to build one. I did try to massively de risk the project and build it as a CLI app, with technology I knew well, simple design, etc.
In the end I built a bunch of stuff, some of it useful, but never enough to handle everything. And I never migrated to it. And there was never enough time to hack on it anyways.
There I was in limbo till I found Notion. It is an awesome and magical product. And massively more polished than anything I could build - it had multi platform apps, was fast, and had a good conceptual core for what I ai wanted to achieve. The support for collections with multiple views, including an elegant Kanban, calendar and plain ol database was golden. I could see myself using it. The only downside was there was no support for recurring tasks. I could not see the bank being understanding of missed payments because I forgot to do some bookkeeping here.
But there was an API. An unofficial one, but it existed and worked, After some hesitation I started building a small script to take some YAML definitions and sync them to a specially prepared Notion.so collection. It was interesting to pull off, and the singles hardest part of the whole project. But at the end ai had a script which could reliably and idempotently synchronize the local git repo with Notion. I immediately started using the system and began migrating everything to it ASAP. A bunch of big improvements later, there’s still something quite raw about it. But it was sufficiently nice that I could start publicly sharing it, etc.
Tutorial
In this last part, I’ll provide a quick tutorial. Checkout the official docs on GitHub too!
To startup, you’ll need a Notion account. It’s free to setup, but you’ll eventually need to sign up for the paid version if you want to use it properly. The first four months are free however, regardless, so you’ll get a good feel for wether it’s useful for you or not.
Once that’s done, you’ll need two crucial pieces of information - your space id, and a token for accessing the API. In order to do this, you’ll need to:
- Go over to notion.so - the website. You should be seeing your space and anything you’ve setup there manually.
- Open your browser’s inspector. Refresh the page and wait for things to calm down.
- Find the
/getPublicPageDataAPI call on the Network tab. - The response for this will be a JSON object with a
spaceIdproperty. That’s your space’s id. Write it down somewhere. - In the headers field there will be a
cookieset with the valuetoken_v2. That’s your token for accessing the API. Write it down somewhere.
The painful part should have passed. You’re ready for the proper part.
Go over and create a directory to act as a workspace and store of important script config and information. It’s a good idea to have this be managed by git too. Up to you though here - Dropbox, Google Drive, etc. or just regular storage on your machine might be enough. It should look something like this:
$ mkdir my-workspaces
$ cd my-workspace
$ git init
$ touch user.yaml
$ git commit -a -m "Initial commit"
You’ll need to then edit the user.yaml file and make it look something like this:
token_v2: "YOUR_TOKEN_HERE"
space_id: "YOUR_SPACE_ID_HERE"

name: "Plans" # This can be anything really
Finally, follow the installation instructions to get the Jupiter scripts locally. I’ll assume you did the Docker installation presented there.
To init the system you need to do a jupiter init like so:
$ docker run -it --rm --name jupiter-app -v $(pwd):/data --env TZ=Europe/Bucharest jupiter init /data/user.yaml
[Some output here]
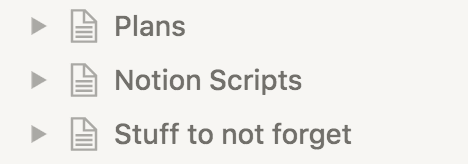
You should now see a folder named Plans in your Notion.so space.
Work in Jupiter is organised around projects. These contain an “Inbox”, which is where your day-to-day tasks live. Both the ones you create and the ones the system creates. This is essentially a Trello/Jira like board, with some fancier capabilities. Then there are “Big Plans”, which are longer-term projects, usually taking 1-6 months. They’re made up of tasks too, and these tasks will appear in the Inbox too. There’s more to say here, but as always, check the docs.
To create a project, you need to first create a file called tasks-works.yaml in your workspace dir. The name is arbitrary actually, and you can name it whatever and have however many of them. This file should look like this however:
name: "Work"
key: work

groups:
  ceremony:
    format: "{name}"
    tasks:
      - name: Send weekly newhires email
        period: weekly
      - name: Send news digest
        period: daily
  research:
    format: "{name}"
    tasks:
      - name: Read industry-site.com for latest news
        period: monthly
There’s a bunch of metadata at the top, of which key is the most important. Never change this once you’ve set it, because it’ll de-associate the file here from the Notion.so boards. The groups structure contains all the recurring tasks the system will manage. Hopefully its format is self-explanatory.
To create the project use:
$ docker run -it --rm --name jupiter-app -v $(pwd):/data --env TZ=Europe/Bucharest jupiter create-project /data/user.yaml /data/tasks-work.yaml
[Some output here]
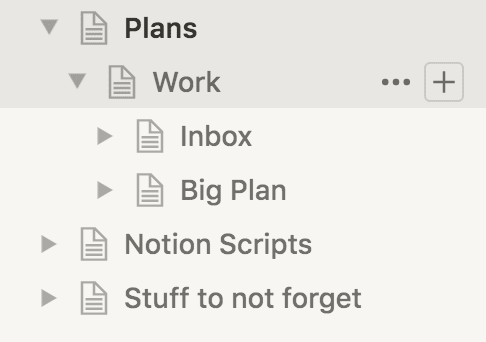
This will create a bunch of structures in Notion under your plan, looking like so:
Finally, run the upsert-tasks command to actually create some of the recurring tasks:
$ docker run -it --rm --name jupiter-app -v $(pwd):/data --env TZ=Europe/Bucharest jupiter upsert-tasks /data/user.yaml /data/tasks-work.yaml
[Some output here]
This will leave the inbox looking like:
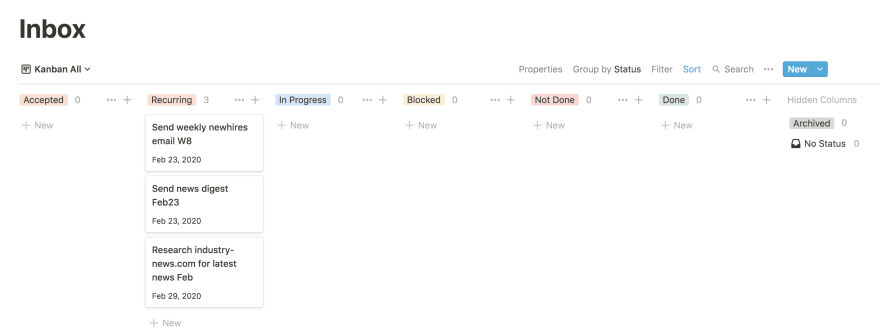
There’s a bunch more to explore, like big plans, various recurring options, vacations, task archival and removal, but head on over to the docs for those.
In the end, if you’ve used git, you should run the following too:
$ git add tasks-work.yaml
$ git add .system.lock
$ git commit -a -m "Setup some initial structures"
That’s it for now. There’s definitely a lot more stuff I wanna build, and I’ll do so slow and steady as I need it. There’s also a lot more I want to do to productionise and make the tool more robust. I’ll blog about these things as they happen though, to keep a sort of log of the development of the project.

Top comments (0)