Hey! I'm on a mission to make 100 React.js projects. Please follow my dev.to profile or my twitter for updates and feel free to reach out if you have questions. Thanks for your support!
Link to the repo: github
To begin part 2 on a short series on React Native, I thought I would explore some simple primitive components and generate a shopping list, which is a common first project in any new language or framework.
Setting Up
This part will be a slight recap of yesterday's project, which you should read first to understand what's happening. Before writing any code, you'll need to set up the React Native project on your machine. To do this I recommend Expo. You can read about that process in my post from yesterday or take it directly from the React Native docs link here.
First, with the Expo CLI tools installed, I type expo init ReactNativeList into my command line (Terminal on Mac). This will show a few options that we can select from to generate a boilerplate React Native template that's preconfigured to be served with Expo. We definitely want to choose a Managed option, because those have the built steps already set up for us. I chose Typescript but it doesn't matter much for this small application.
With that generated, we should then navigate into the folder and then run either npm start or yarn start to serve the application with Expo. When this is successful it should show a QR code and a few other details about what's running on your computer.
If you copy the URL that the developer tools are running on and paste that into your browser, you'll have access to the Expo Developer Tools, a very handy little GUI that shows a console for your application and a few options for which device you'd like to launch on. If you want to, at this point you could run the application on your phone by just scanning the QR code here with the Expo Go app installed on your device. But I did that yesterday, so today I chose the simulator.
Building A List
So now if you open up your project folder in a code editor, you'll see the directory and a file called 'App' with either a .js or .tsx extension depending on whether or not you chose vanilla JS or Typescript. I need practice with Typescript so I chose TS.
The code editor should look something like this with the file App open:
If you're familiar with React then you'll know about components in general. One major difference in React Native is that the components you write will have to be compiled and then run on multiple devices, so rather than writing everything for the web, the react-native package comes with a number of core components that we can use easily across devices. Today we'll use the FlatList component.
To import FlatList, simply include it in the import statement in App like so:
import { StyleSheet, Text, View, FlatList } from 'react-native';
Next, we'll need some data to actually render in the list, so I created an array of objects which have name and quantity properties that I've typed as strings. Again, this is in Typescript:
  const groceries: {
    name: string;
    quantity: string;
  }[] = [
    {name: 'Broccoli', quantity: '8oz'},
    {name: 'Pasta', quantity: '12oz'},
    {name: 'Crushed Tomatoes', quantity: '22oz'},
    {name: 'Basil', quantity: '4oz'},
    {name: 'Garlic', quantity: '3oz'},
    {name: 'Baguette', quantity: '1 Large'},
  ];
FlatList Required Props
Next, let's write a new <FlatList /> component into our JSX. This React Native component takes a few required props for it to work. First, we need to give it the data prop to tell the list what our data source is, in our case it's our object groceries.
Then, we need to use the renderItem prop to tell the component what JSX we want it to render for each list item. I know this is a bit confusing if you're used to plain React. Remember, we need this to compile into multiple languages on multiple devices, so we're trying to tell React Native how to do that. The prop you pass in should be a JSX component and it assumes you are iterating over the array passed into the data prop so you can pass a variable representing a single list item in as an argument, which I simply call item here. I'm going render a simple item with item.name and item.quantity as strings inside, and voila... here's what that prop should look like now:
renderItem={({item}) => {
  return <Text style={ styles.listItem }>{ item.name } - Quantity: { item.quantity }</Text>
}}
The last prop we need to pass to our ListItem component is called keyExtractor. Essentially, this assures each item in the array has a unique JSX element assigned to it. We could get around this by making sure there is a key property with unique values on each item in our groceries array, but that would be unlikely to happen if we were using a real data source. I'm going to use the name.
At this point our JSX should look something like this:
  return (
    <View style={styles.container}>
      <View style={ styles.headerSafe }></View>
      <Text style={styles.headerText}>My React Native Grocery List</Text>
      <FlatList
        data={ groceries }
        keyExtractor={ grocery => grocery.name }
        renderItem={({item}) => {
          return <Text style={ styles.listItem }>{ item.name } - Quantity: { item.quantity }</Text>
        }}
      />
    </View>
  );
As you can see I've thrown in some styling into the style props for my JSX elements. This is totally optional. I'll skip over that since styling elements is outside the scope of this article but it's just standard inline React styling with CSS in JS.
(Aside: You may notice I have a View component with nothing inside it as the first child of our main container View element. This was just a hacky workaround to make sure the other elements are shown below the hardware of an iPhone. Don't worry about it.)
Rendering our App
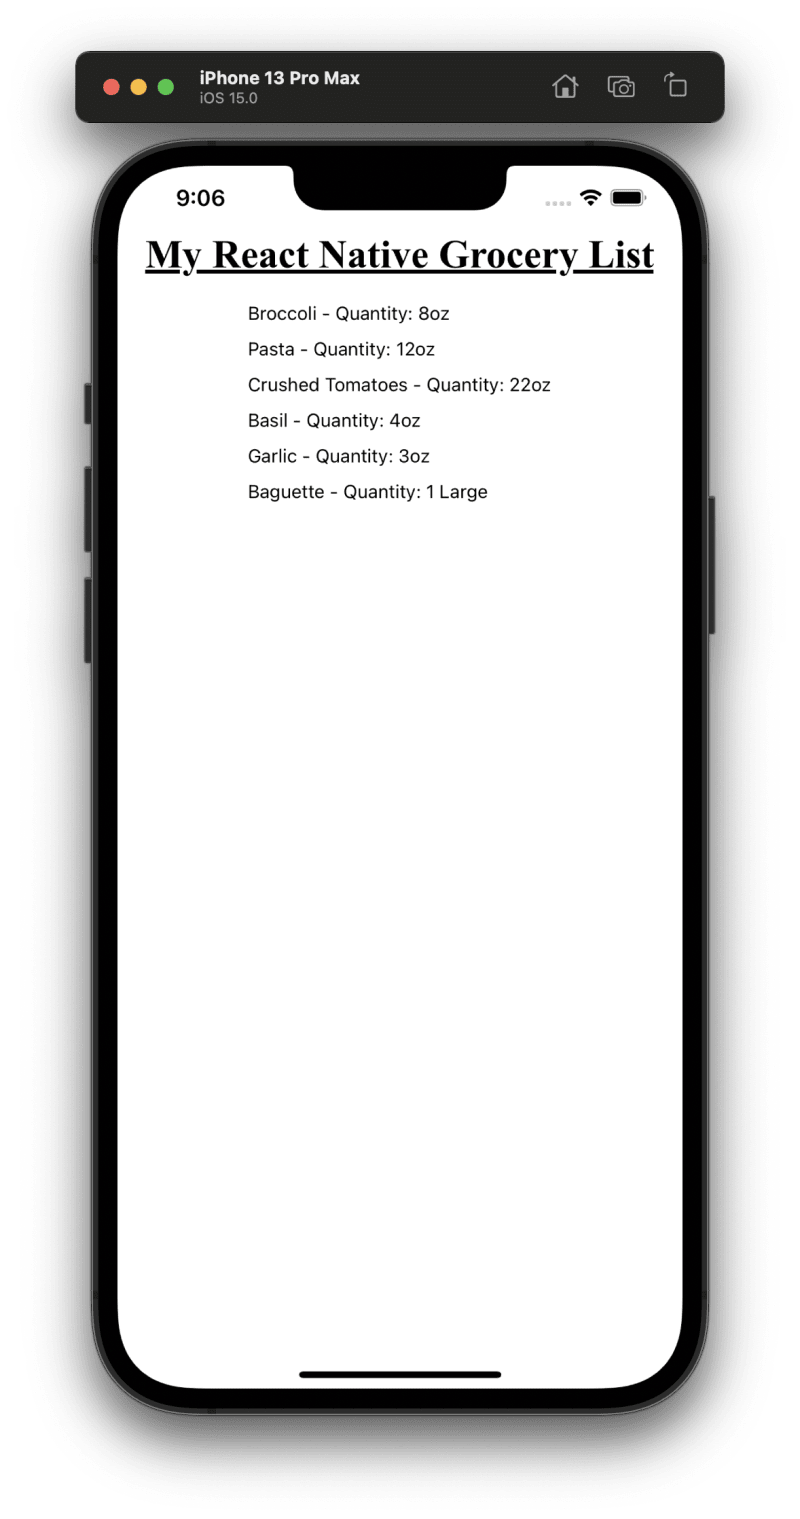
In the Expo Developer Tools, if you ran the app on your phone or if you chose to run it on a simulator, you should now have a list built in React Native. Good job!
If you like projects like this and want to stay up to date with more, check out my Twitter @jwhubert91, I follow back! See you tomorrow for another project.


Top comments (0)