
You can find a collection of k6 scripts and build specification for CodeBuild in this tutorial here.
📖What you will learn
- How to integrate load testing with k6 into AWS CodeBuild Platform.
- Different implementation paths, and when to use each.
Introduction
In this tutorial, we will look into how to integrate performance testing in your development process with AWS CodeBuild and k6.
k6 is an open-source load testing tool for testing the performance of APIs, microservices, and websites. Developers use k6 to test a system's performance under a particular load to catch performance regressions or errors.
AWS CodeBuild is a fully managed continuous integration service hat compiles source code, runs tests, and produces software packages that are ready to deploy. It uses a pay-as-you-go pricing model with 100 free build minutes per month on the AWS Free Tier plan.
Documentation for AWS CodeBuild is tightly bound with other AWS services which makes it difficult to understand AWS CodeBuild as a standalone product. To put it simply, AWS has multiple products in it's CI/CD offering which includes:
- AWS CodeBuild : continuos integration service
- AWS CodeDeploy : managed deployment service
- AWS CodePipeline : continuos deployment service
- AWS CodeCommit : managed source control service
You can read this blog post to understand how all these services are integrated to form a complete CI/CD pipeline. Fortunately for us, we only need to concern ourselves with AWS CodeBuild and Amazon EventBridge in order to automate k6 load testing. We recommend having a look at the following links:
Writing your performance test
In order to learn how to write a performance test, we'll work in small steps and improving the existing script as our knowledge develops. The test will be made up of the following:
- An HTTP request against our system under test.
- A load configuration controlling the test duration and amount of virtual users.
- A performance goal, or service level objective, expressed as a threshold.
Creating the test script
The test script we will write first will simulate a virtual user accessing a specified website. To ensure we don't overload the system under test, we'll put the virtual user to sleep for one second before continuing.
// ./test.js
import http from 'k6/http';
import { sleep } from 'k6';

export default function () {
    const res = http.get('https://test.k6.io');
    sleep(1);
}
Configuring the load
In this step, we'll look at how we can define parameters. For this example, we'll have 50 virtual users accessing the specified website for the duration of one minute. Due to the sleep we specified earlier, the script will generate 50 interactions per second, resulting in a total of about 2900 iterations.
// ./test.js
import http from 'k6/http';
import { sleep } from 'k6';

export const options = {
    duration: '1m',
    vus: 50,
};

export default function () {
    const res = http.get('https://test.k6.io');
    sleep(1);
}
If you have installed k6 in your local machine, you can run your test locally in your terminal using the command: k6 run test.js.
Configuring our thresholds
Next, we need to define our Service Level Objectives, also known as SLOs. This is basically a measurement that specifies the desired performance levels at a given load. With k6, this is done using Thresholds where you can define SLOs as Pass/Fail criteria.
If any of the thresholds you define fail your test, k6 will halt and return a non-zero exit code, communicating to the CI tool that the step has failed. Let's see how we can add a Threshold to our previous script. We'll ensure that the 95th percentile response time remains below 500ms.
// ./test.js
import http from 'k6/http';
import { sleep } from 'k6';

export const options = {
    duration: '1m',
    vus: 50,
    thresholds: {
        http_req_duration: ['p(95)<500'],
    },
};

export default function () {
    const res = http.get('https://test.k6.io');
    sleep(1);
}
Thresholds are powerful features that allow us to define different types of Pass/Fail criteria in the same test run. For example:
- The 99th percentile response time must be below 700 ms.
- The 95th percentile response time must be below 400 ms.
- No more than 1% failed requests.
- The content of a response must be correct more than 95% of the time.
Take a look at our Thresholds documentation for additional details on the API and its usage.
Setting up the CodeBuild workflow
We'll use Docker to run load testing in AWS CodeBuild's environment:
docker run -i loadimpact/k6 run - <scripts/test.js
In order to automate the build process, we'll need to create a buildspec.yml file with the following configuration:
version: 0.2

phases:
  pre_build:
    commands:
      - echo Pull loadimpact/k6 image..
      - docker pull loadimpact/k6
  build:
    commands:
      - echo Run performance test
      - docker run -i loadimpact/k6 run - <scripts/test.js
  post_build:
    commands:
      - echo Performance test complete
At the time of writing AWS CodeBuild supports repositories hosted on GitHub, BitBucket, Amazon S3 and AWS CodeCommit. For reference, we'll use GitHub for this tutorial. Once you've prepared a project containing the above files, you'll need to commit and push the changes to your remote repository.
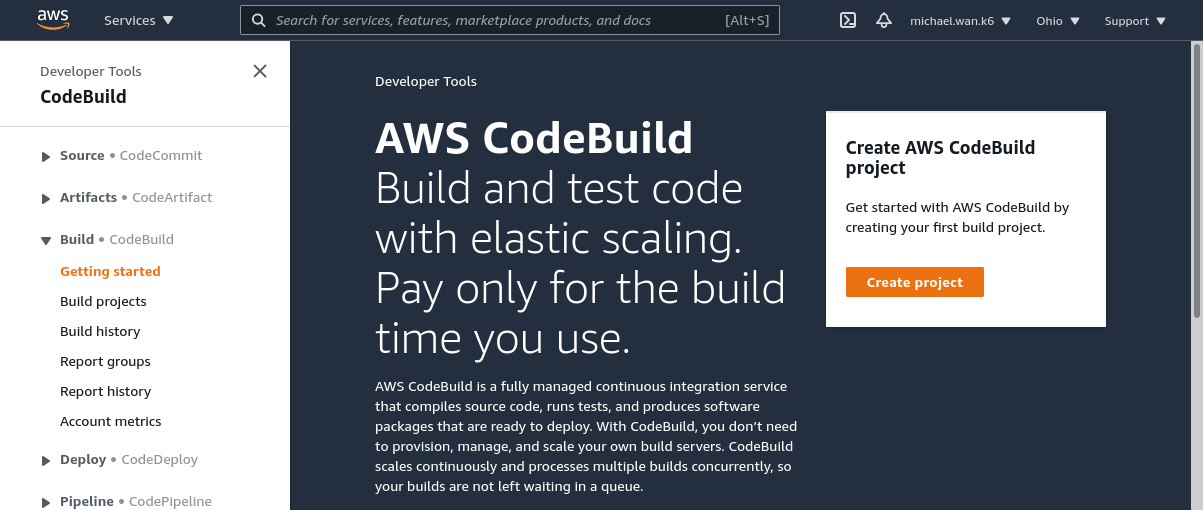
Once your remote repository is ready, you can start working on your AWS Console. Using the Services menu, locate AWS CodeBuild and open the page:
Click the Create project button and populate the form as follows:
-
Project Configuration
- Project name: Load-Test-Example
- Description: Load testing example with k6
-
Source
- Source provider: Github
- Repository: 'Public' or 'Repository in my GitHub account' for private
- Repository URL: https://github.com/brandiqa/k6-example-aws-codebuild
- Service Role Permissions: Set true for 'Allow AWS CodeBuild to modify this service role so it can be used with this build project'
-
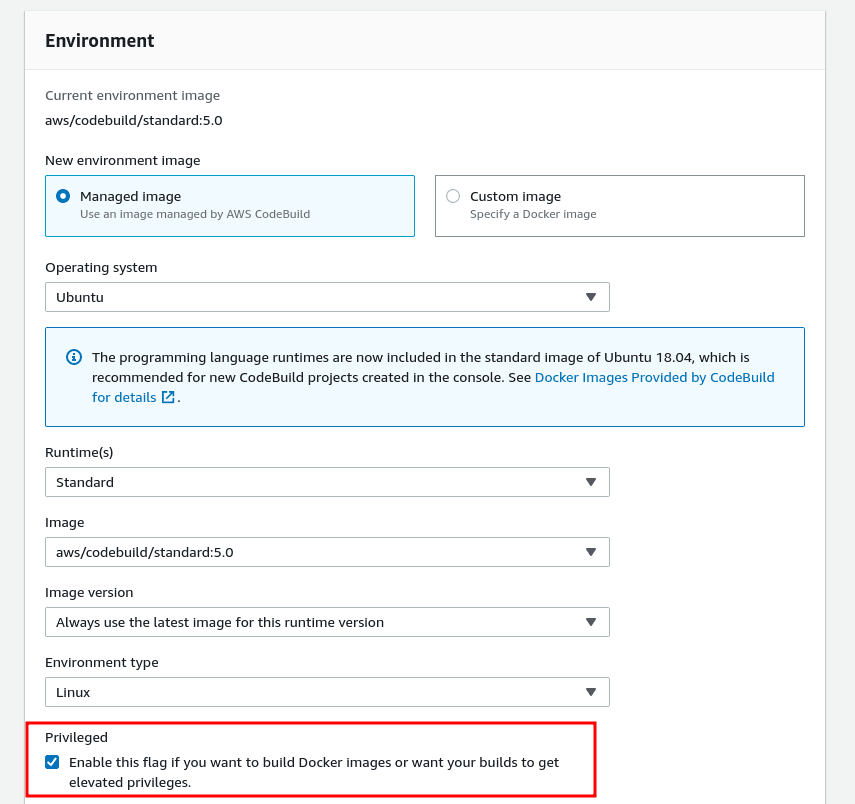
Environment
- Operating system: Ubuntu
- Runtime: Standard
-
Privileged: true. If you don't enable privilege, the docker command won't have the system level permissions to run.
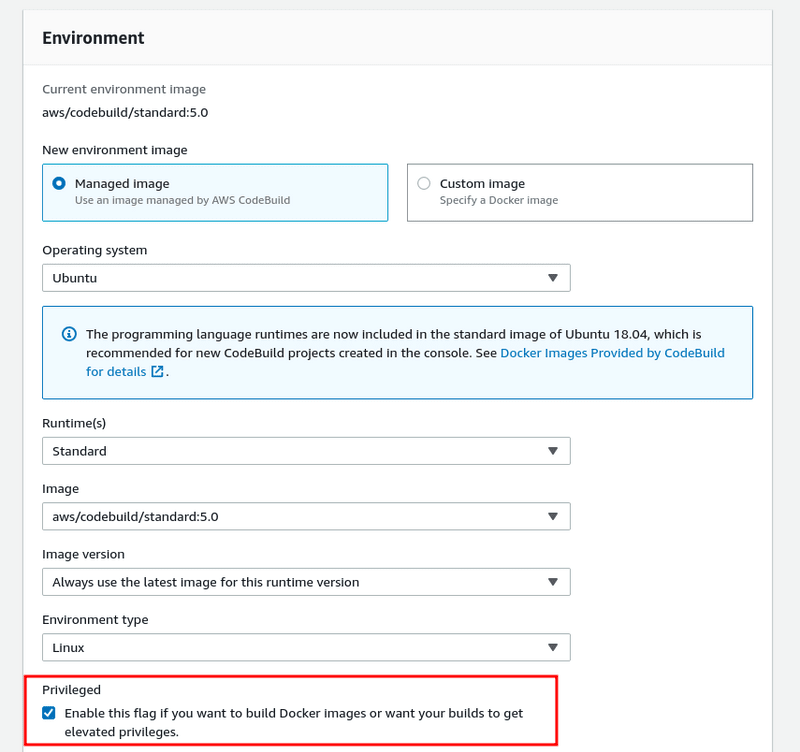
- Leave all other settings in their default state
-
Buildspec
- Select 'Use a buildspec file'

- Select 'Use a buildspec file'
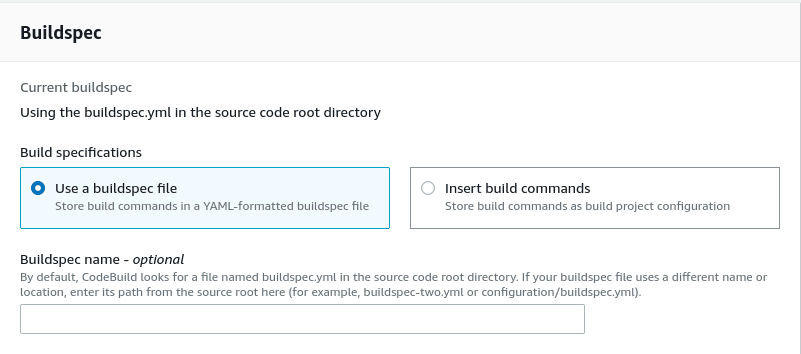
Leave all other settings in the default state. Ensure CloudWatch logs is enabled. Click the Create build project button.
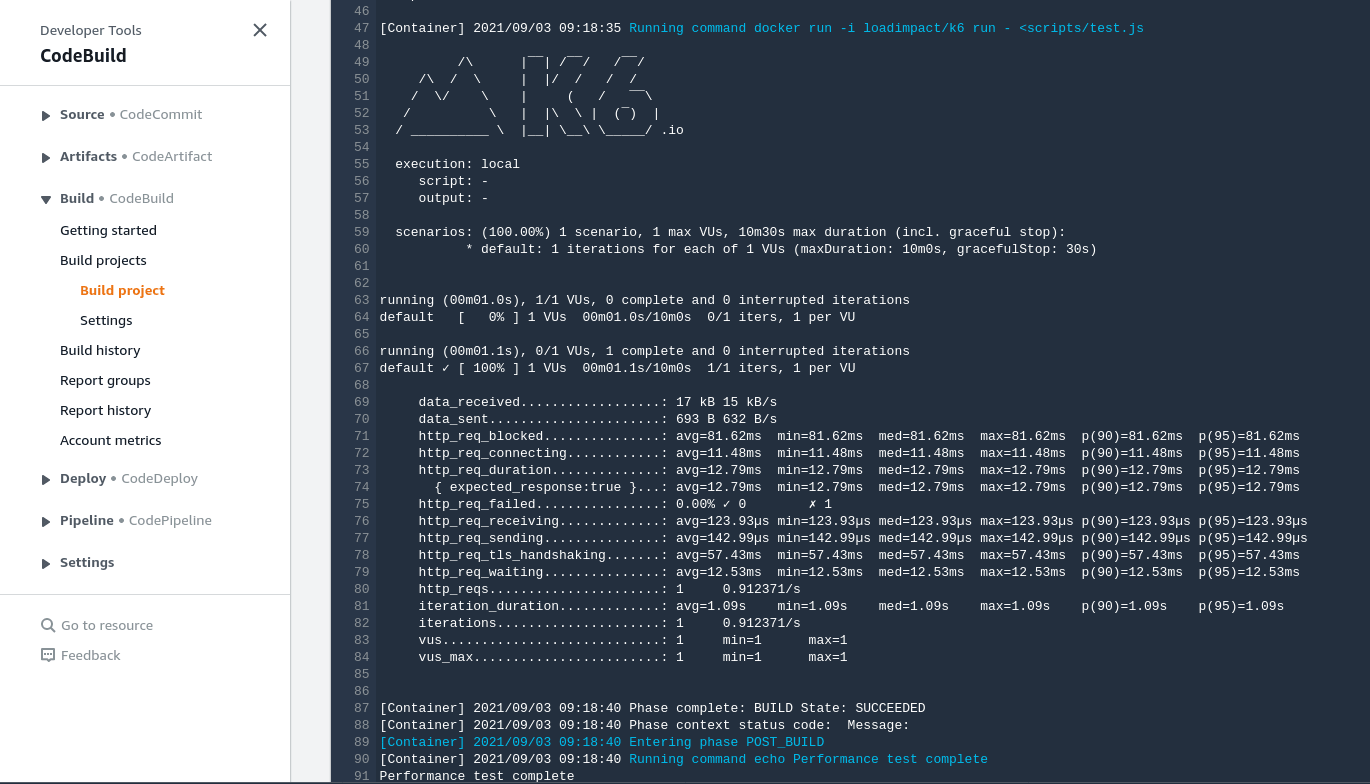
The next step is to run the project which you can do using the Start build project. Once it's complete, you should expect the following results:
Running k6 cloud tests
There are two common execution modes to run k6 tests as part of the CI process.
- Locally on the CI server.
- In k6 cloud, from one or multiple geographic locations.
You might want to use cloud tests in these common cases:
- If you're going to run a test from multiple geographic locations (load zones).
- If you're going to run a high-load test, that will need more compute resources than available in the runner.
If any of those reasons fit your needs, then running k6 cloud tests is the way to go for you.
⚠️ Try it locally first
Before we start with the configuration, it is good to familiarize ourselves with how cloud execution works, and we recommend you to test how to trigger a cloud test from your machine.
Check out the cloud execution guide to learn how to distribute the test load across multiple geographic locations and more information about the cloud execution.
Now, we will show how to trigger cloud tests using AWS CodeBuild. If you do not have an account with k6 Cloud already, you should go here and start your free trial. After that, get your account token from the cloud app and save it somewhere temporarily.
Next, let's create a modified version of the testing script and call it cloud-test.js:
import http from 'k6/http';
import { sleep } from 'k6';


export const options = {
    ext: {
        loadimpact: {
            name: 'cloud-test',
        },
    },
    duration: '1m',
    vus: 50,
    thresholds: {
        http_req_duration: ['p(95)<500'],
    },
};

export default function () {
    const res = http.get('https://test.k6.io');
    sleep(1);
}
The ext property enables passing of the script filename which is required for cloud execution. The next step is to update buildspec.yml as follows:
version: 0.2

env:
  exported-variables:
    - K6_CLOUD_TOKEN

phases:
  pre_build:
    commands:
      - echo Pull loadimpact/k6 image..
      - docker pull loadimpact/k6
  build:
    commands:
      - echo Run performance test
      - docker run -i -e K6_CLOUD_TOKEN=${K6_CLOUD_TOKEN} loadimpact/k6 cloud - <scripts/cloud-test.js
  post_build:
    commands:
      - echo Performance test complete
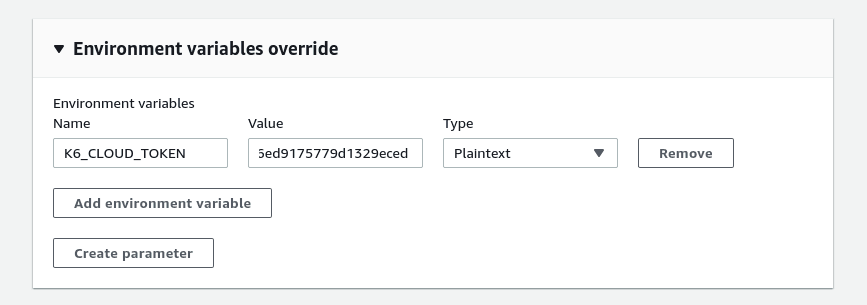
You'll need to commit and push the new changes to your remote repository. Next, we need to modify the current build and specify the K6_CLOUD_TOKEN as an environment variable:
After making these changes, run the build. In about a minute or so, you should expect the following output:
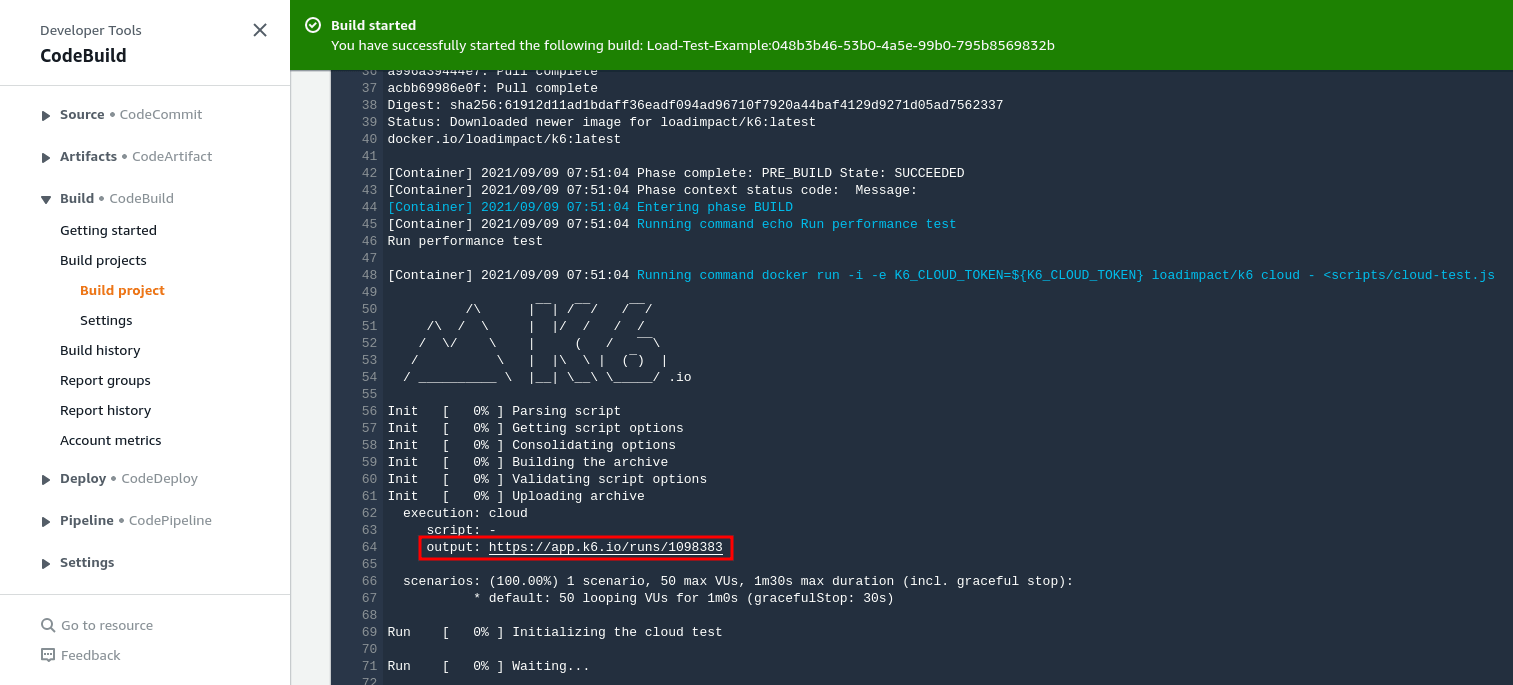
And if we copy the highlighted URL and navigate to it in a new tab

Scheduling Builds
It is highly recommended to perform load testing at a time when most users aren't accessing your system. This is because performance testing often places significant stresses on your infrastructure which may cause user experience issues.
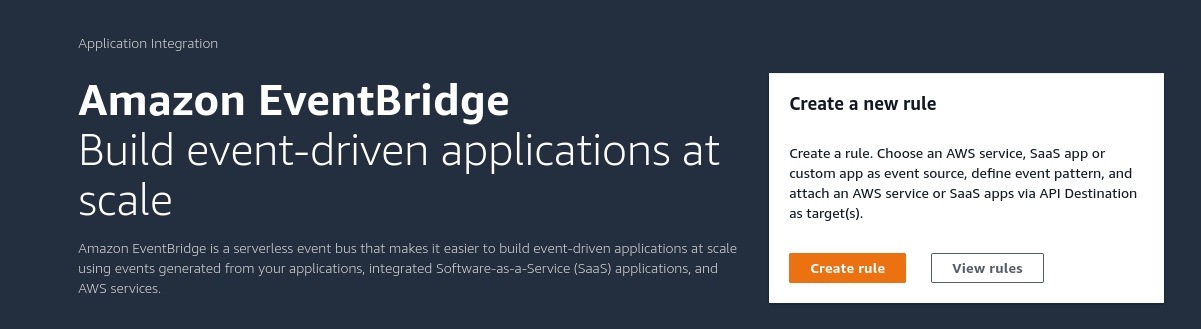
To configure scheduled nightly build that runs at a given time of a given day or night, head over to Amazon EventBridge.
Head over to the Amazon EventBridge console and click the Create rule button. Fill in the form as follows:
- Name: Schedule-Load-Test-Example
- Description: Nightly build
- Define pattern: Schedule
- Cron Expression: 0 12 * * ? *
- Target: CodeBuild project
- Project ARN: arn:aws:codebuild:region-ID:account-ID:project/project-name
For the Project ARN, simply replace the values in italics with values from your account i.e.
- region-ID: found at the top navigation bar, click the drop-down location menu to see your region id in the format 'us-east-1' or 'us-west-1'
- account-ID: follow this guide
- project-name: Load-Test-Example
Your fully constructed project ARN should look similar to this:
arn:aws:codebuild:us-east-2:123456789123:project/Load-Test-Example
AWS doesn't fully recognize the standard CRON format. Hence you'll need to use the format specified in their cron guide.
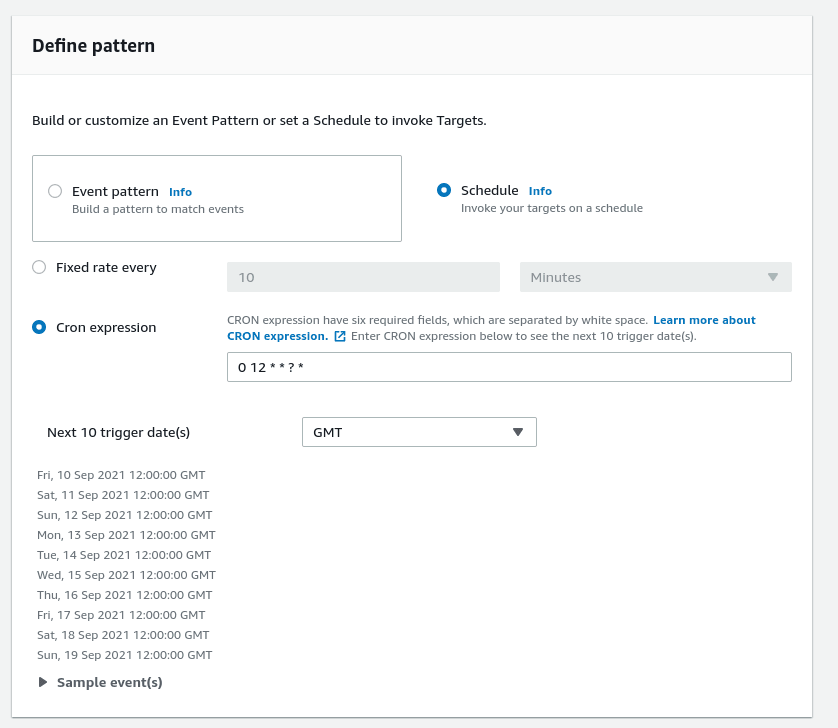
After filling the form, click the 'Create' button to save the changes. The Load-Test-Example CodeBuild project will run at the specified time.
Summary
Building your CI/CD pipeline on AWS platform can be overwhelming at first. Hopefully, this guide should help alleviate the pain by showing you exactly what you need you to configure in order to setup an automated load testing pipeline on AWS.
As demonstrated in this article, you can execute an AWS build that runs k6 either locally or on the cloud. Automating performance testing in your CI/CD pipeline will help you identify issues early before they affect your customers.

Latest comments (1)
[[Pingback]]
This article was curated as a part of 25th Issue of Software Testing Notes Newsletter.