
This small guidance will be useful for non-technical users who have limited knowledge of the SQL language and want to explore the data. And also for savvy SQL developers who might be struggling with a particular complex query. As the graphical tool can be an intuitive way to build the query’s logic.
Fortunately, we have dbForge Studio for MySQL whose graphic designer allows us to select fields from multiple related tables and views, use search conditions, build subqueries, insert MySQL functions, create aggregations sort by different orders and so on. And we come to talk about this tool.
Basically, when developing your query visually with dbForge, you can easily switch to the text view to see the SQL text that’s being generated. You can also check the data view to see the data returned. This is great for debugging purposes.
Once happy, you can save the query as an SQL script file, use it as a data source for creating a report or simply save the text as a code snippet.
Here is an example.
We are looking at a simple MySQL sample database called employees. It has a few tables typical of any HR system:
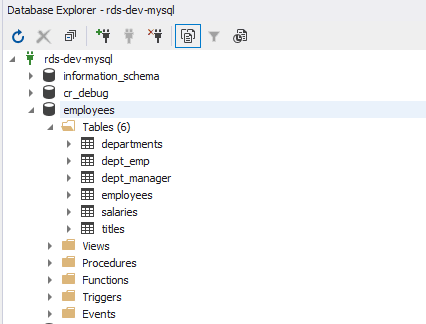
Let’s say, as HR users, we want to check the past employees of the company. We want to see the departments they have worked in. We want to see the job titles they held in those departments when employed, and the time they held each job title.
We can either write an SQL query, or we can click the “New Query” button in the toolbar:
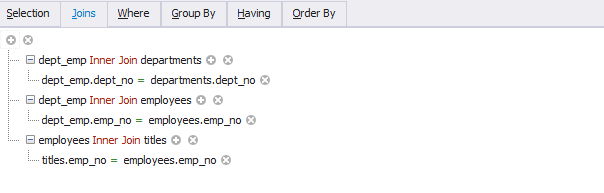
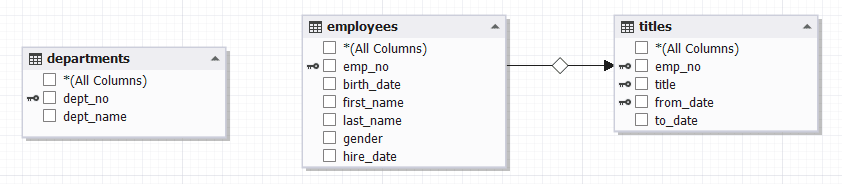
This opens a new query window with an empty palette. We can select the relevant tables from the “Database Explorer” pane to the palette. dbForge Studio automatically shows any existing relationship between tables:

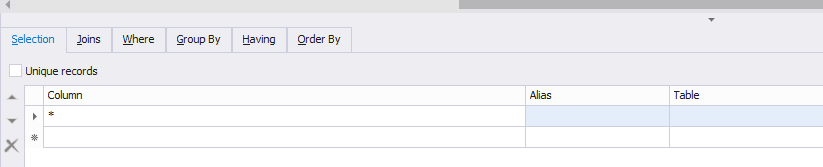
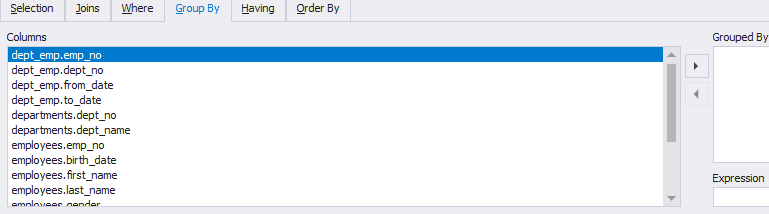
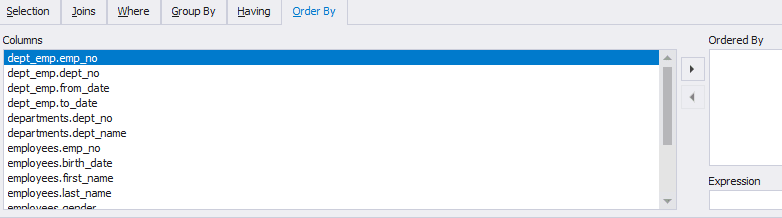
Under the palette, a tabbed dialog also appears. These tabs allow you to select one or more fields, change, insert or delete joining clauses and specify WHERE, GROUP BY, HAVING and ORDER BY clauses:


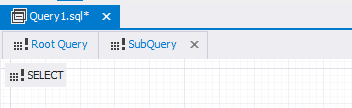
We will intentionally use a subquery here. We will select a subset of rows from the dept_emp table where the to_date field is not equal to ‘9999-01-01’ - in other words the employee is no longer active. To create a subquery, we right click on an empty space in the palette and choose “Create Subquery” from the context menu:

This opens another sub-tab under the main query tab. The original palette’s tab is shown as “Root Query” and the new palette’s tab is shown as “SubQuery”:
Next, we get rid of the dept_emp table from the “Root Query” palette by selecting it and pressing Delete:
In the “SubQuery” palette, we drag the dept_emp table only. For this table, we are selecting all fields. In the “Where” tab below it, we specify our selection condition:
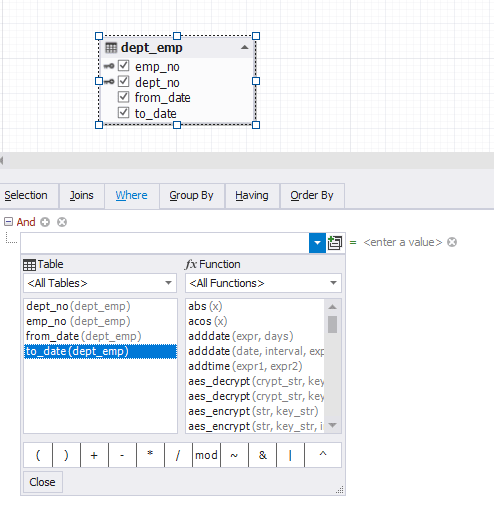


We double click on the box’s title “SubQuery”, change it to “dept_emp2”.
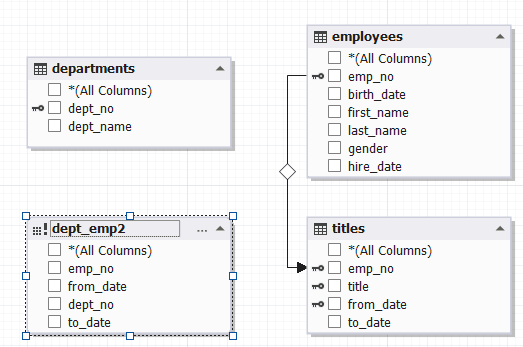
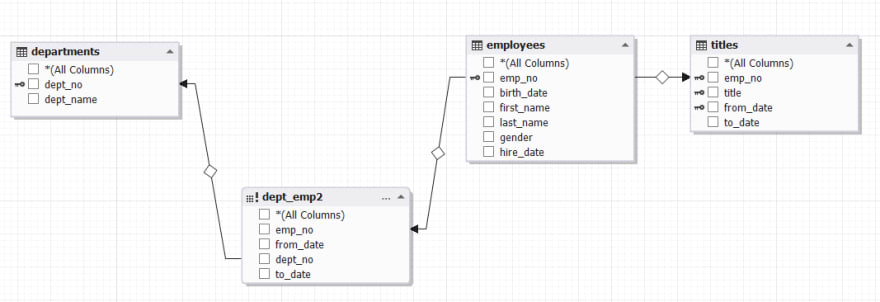
We then drag the “dept_no” field from the “departments” table’s box to “dept_emp2”, and drag the “emp_no” field from “employees” to “dept_emp2”. The palette should look something like the following:
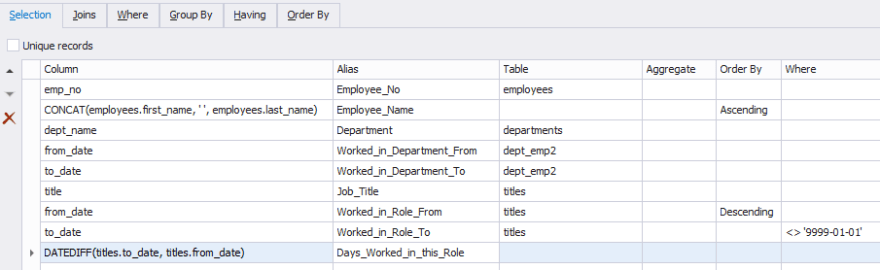
Next, we select different fields from the tables, create two calculated fields, specify a WHERE condition and order by two fields:
If we switch to the “Text” tab at the bottom of the query window:, we can see the SQL text that was generated:
SELECT
  employees.emp_no AS Employee_No,
  CONCAT(employees.first_name, ' ', employees.last_name) AS Employee_Name,
  departments.dept_name AS Department,
  dept_emp2.from_date AS Worked_in_Department_From,
  dept_emp2.to_date AS Worked_in_Department_To,
  titles.title AS Job_Title,
  titles.from_date AS Worked_in_Role_From,
  titles.to_date AS Worked_in_Role_To,
  DATEDIFF(titles.to_date, titles.from_date) AS Days_Worked_in_this_Role
FROM employees
  INNER JOIN titles
    ON titles.emp_no = employees.emp_no
  INNER JOIN (SELECT
      dept_emp.emp_no,
      dept_emp.from_date,
      dept_emp.dept_no,
      dept_emp.to_date
    FROM dept_emp
    WHERE dept_emp.to_date <> '9999-01-01') dept_emp2
    ON employees.emp_no = dept_emp2.emp_no
  INNER JOIN departments
    ON departments.dept_no = dept_emp2.dept_no
WHERE titles.to_date <> '9999-01-01'
ORDER BY Employee_Name, Worked_in_Role_From DESC
Clicking on the “Execute” button from the toolbar will show the data in a grid in the “Data” tab:

So this is how you can visually build queries in dbForge Studio for MySQL. Needless to say, production grade queries in a database application can be really complex, but once you know the basics, you can easily break those queries down and start building the subqueries in the query builder. Also, we have not touched on other types of joins (the example here showed only inner joins) and other query types (INSERT, UPDATE , DELETE etc.). All these can be set and configured from the query builder.
Cheers!

Latest comments (0)