
Intro
Learning how to use cloud servers and utilizing cloud computing is one of the must-have skills in current-day software development. There are plenty of options when it comes to cloud service providers, for example, Heroku, Google Cloud and Amazon Web Services etc. Today, I am going to show how to spin up a cloud server on AWS, one of the most popular options and is used by many software companies.
First of all, AWS is very complicated and it has many tools that you will never need to use. For the purpose of just hosting a cloud server, we are going to focus on the tool AWS EC2.
- Prerequisite: Make sure you already have an AWS account (duh)
Launch a EC2 Linux Instance
Step1: Login to AWS and search EC2 and create an instance
Once you logged in to AWS, you are very likely to get lost from all of its options and components. No worries, just search for EC2 and select "Launch instance". An instance is a virtual server, or you can think of it as a computer that is running constantly.
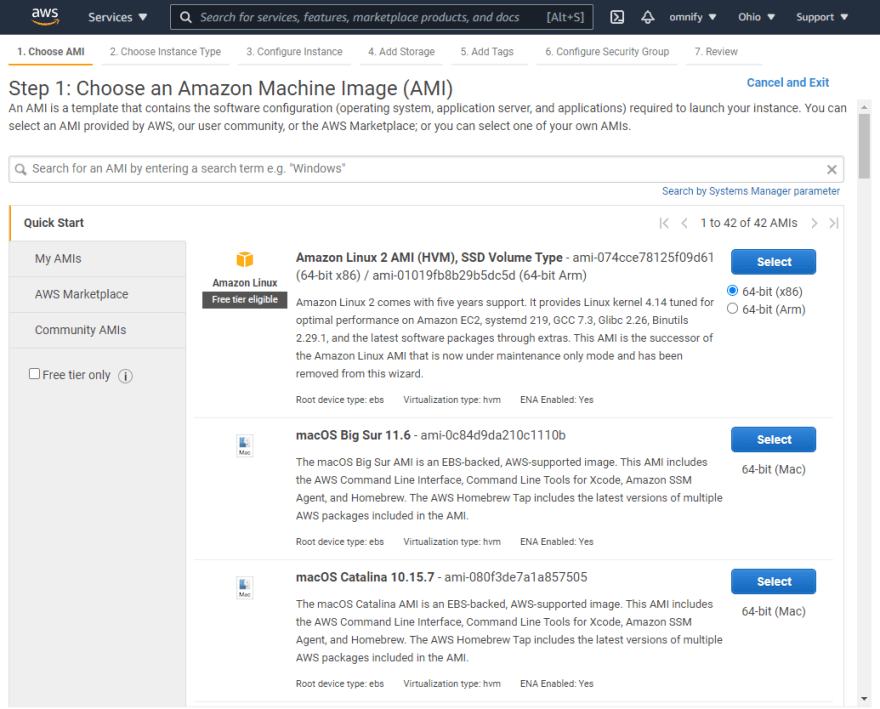
Step2: Use the default setting, it is free
AWS provides a free option for us to use, and it is best for small and personal applications. It is sufficient for building your own websites, school projects, experimental applications and custom APIs.
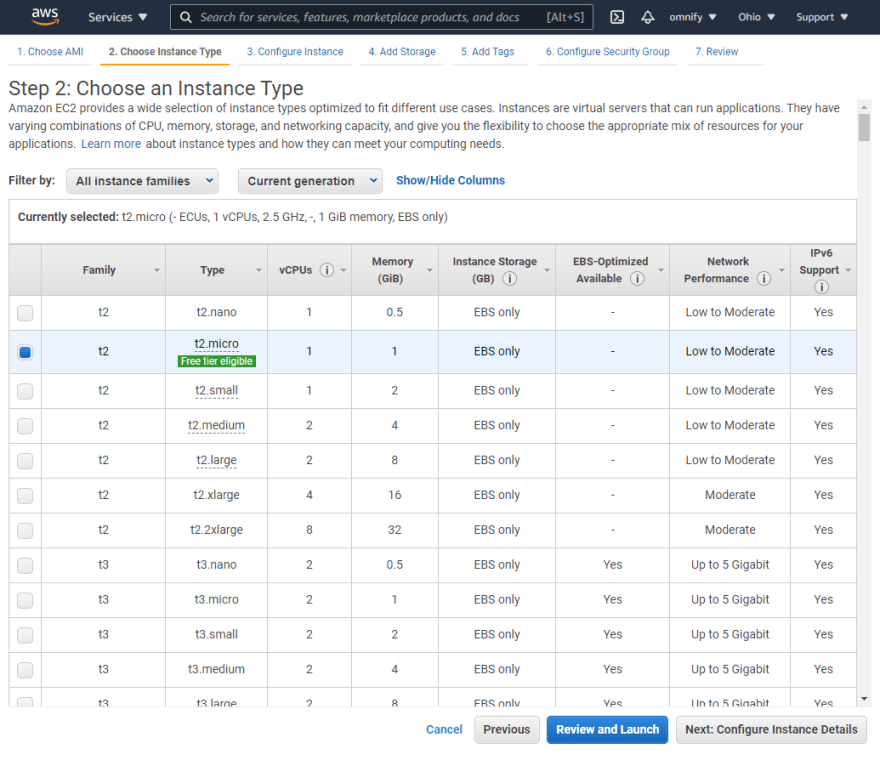
Step3: Press Next until you reach Configure Security Group
There is a bunch of selections and settings you can choose from. Just leave it as it is for the most part unless you are an expert and you know exactly what to do.


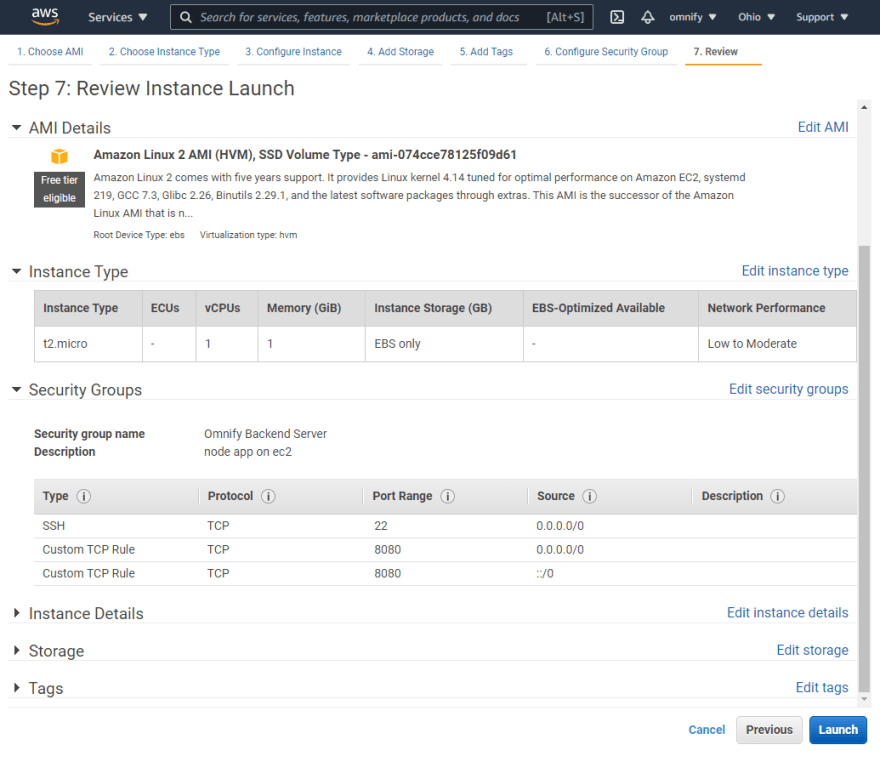
Step4: Add a new TCP rule that points to your app.
Now, this is a setting that you need to know. If your node js runs on 8080, configure a TCP protocol so that it is on 8080. This allows other computers to connect to your server via this port. Also, if you are hosting a website, make sure to configure an HTTP port 80 so that people can visit the website that is hosted on this server.


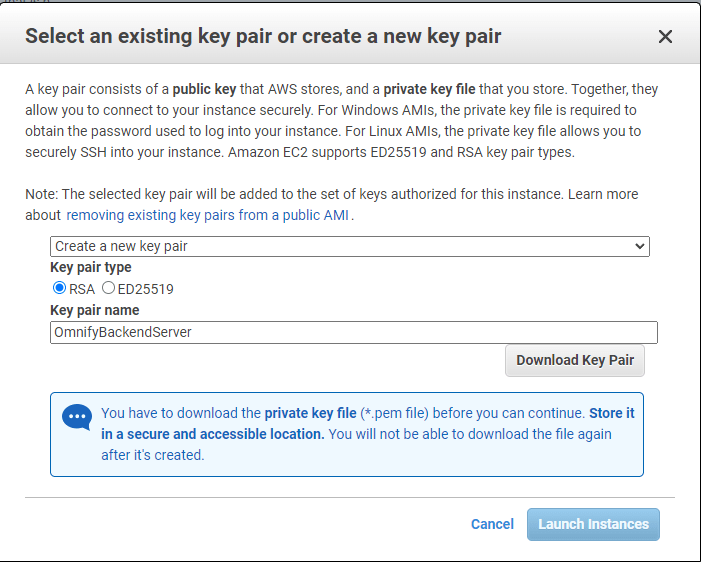
Step5: Select an existing key pair or create a new key pair.
This is the step where you create your pem file. Remember to store it somewhere save! You will use this to SSH into your server and make all the magic happen! You can also use existing key pairs so you don't have to switch keys when you SSH into your frontend server and backend server.
Step6: Review and launch your instance!
SSH into Your Running Instance
Step1: Rename the server.
Now you have your instance created, you can go onto EC2 and find your instance. You can rename it so you remember what this server is used for. Very important if you have multiple instances running.

Step2: Get ssh info for instance
Click on to instance ID and get more info about this server

Click Connect

Copy SSH info
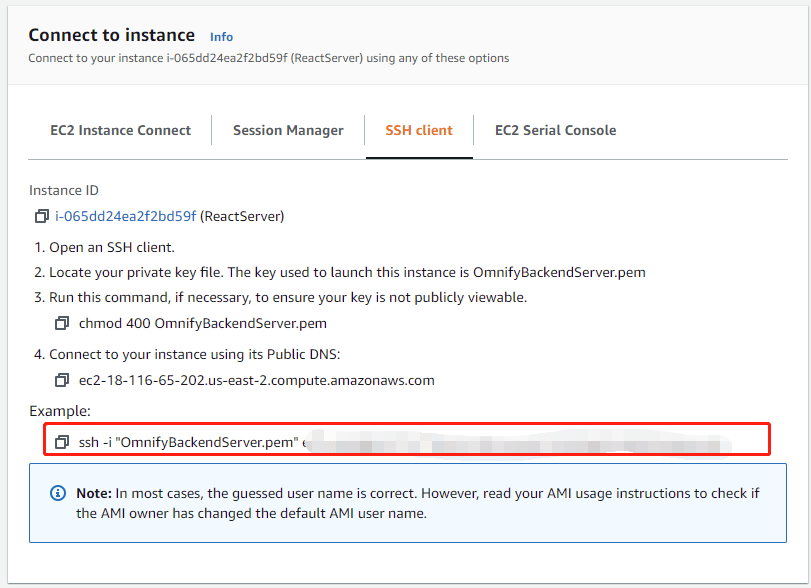
Step3: Open a terminal and ready to connect
I am using an ubuntu terminal, which uses Linux commands. Some commands might be different for other terminals.
Open up a terminal and go to the folder where you stored your pem file.
Move the file to .ssh by running. You can also use cp to copy it to ~/.ssh
mv OmnifyBackendServer.pem ~/.ssh/
Step4: Modify key permission
Since SSH uses this key, we need to modify the key permission for safety reasons. Most importantly your terminal is going to YELL at you if you don't do this.
Change the permission of the pem file by using:
chmod 400 ~/.ssh/filename.pem

Step5: Connect:
Connect to the running instance using the command you copied from EC2, you might have to modify it so that it points to the correct pem file location. For example:
ssh -i "~/.ssh/OmnifyBackendServer.pem" ec2-user@ec0-00-000-74-34.us-east-2.compute.amazonaws.com

Summary
That's it, you have created your first AWS EC2 instance and you know how to access it. The next step is to configure it so that it runs your application. You can install git to pull your code and install all the dependency that is needed. Then, you have to configure your instance to run your application in the background. Some common tools to use are systemctl, PM2, and Nginx. There are plenty of ways to play around with your instance, and I hope you have fun and enjoy reading this article!

Top comments (0)