Eleventy is a powerful and wonderfully simple static site generator. Netlify CMS is a simple, open-source content management system that makes adding, editing and deleting posts and other content a breeze. Today I'm going to show you how to create a basic blog using eleventy and Netlify CMS, entirely from scratch- no boilerplates, no templates, no nothing. Be aware that this tutorial will create an absolute bare-bones text blog for you to build upon- I'm not even adding CSS! Let's get to it.
Part 1: Setting up
Requirements:
- Node.js and NPM installed
- Git installed
- A Git provider such as GitLab or GitHub
- A free Netlify account
First, there're some things we need to get set up before we begin coding. First, create a git repository on your preferred service (I use and recommend GitLab) and clone the empty repo to your computer.
Enter the project root with your terminal and install eleventy by typing npm install @11ty/eleventy --save-dev. Once that is done, install luxon by typing npm install luxon. Luxon is the only special addition here and will allow us to format readable dates in our posts.
Create a new folder in the project's root and name it _includes. This folder will contain templates that our blog will use to render pages. Create another new folder in the root directory called images and another inside of that called uploads. Netlify CMS will use this folder to store images uploaded to your site. Create yet another folder in the root of your project called admin and finally, a folder in the root named posts. Once that's done, we're ready to start coding!
Create a file in the root of the project named .eleventy.js and write this in:
module.exports = function(eleventyConfig) {
  eleventyConfig.addPassthroughCopy('images')
  eleventyConfig.addPassthroughCopy('admin')

  const {
    DateTime
  } = require("luxon");

  // https://html.spec.whatwg.org/multipage/common-microsyntaxes.html#valid-date-string
    eleventyConfig.addFilter('htmlDateString', (dateObj) => {
      return DateTime.fromJSDate(dateObj, {
        zone: 'utc'
      }).toFormat('yy-MM-dd');
    });

    eleventyConfig.addFilter("readableDate", dateObj => {
    return DateTime.fromJSDate(dateObj, {
      zone: 'utc'
    }).toFormat("dd-MM-yy");
  });

};
The eleventy.js file is a configuration file. The addPassthroughCopy lines tell Eleventy to include those folders and their contents in the generated site. The rest is just some JavaScript to make the dates in the postslist more readable.
Now create another folder within _includes named layouts. Within that folder we can create a new file called base.njk. The base file forms the basis of every page on our website. We'll add add <head> elements and a site header here. Any element that should appear on every single page should reside in base.njk. Let's add the following to the file:
<html>
  <head>
    <title>Eleventy + Netlify CMS from scratch</title>
  </head>

  <body>
    <h1>
      Eleventy + Netlify CMS from scratch
    </h1>
    {{ content | safe }}
  </body>

</html>
Like I said: Bare bones. Note the line that says {{ content | safe }}: this is where page content for other pages will be rendered.
Now, create a file named index.njk at the root of your project. This will be your homepage. Add the following to index.njk:
---
layout: layouts/base.njk
permalink: /
---
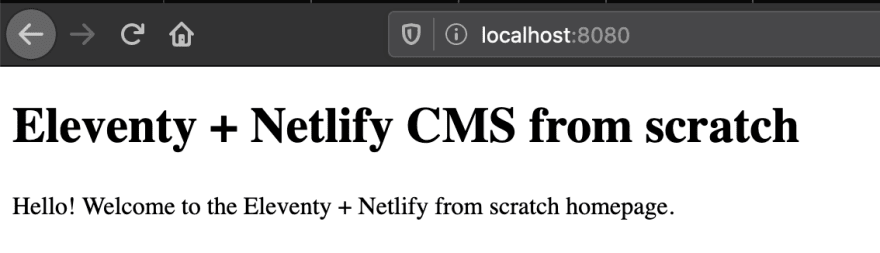
Hello! Welcome to the Eleventy + Netlify from scratch homepage.
Our Nunjucks (.njk) files will accept html, markdown and more. Between the sets of hyphens lies our page's frontmatter. This data tells Eleventy how to handle our page and provides other information as we need it to. layout tells it which template to use, in this case base.njk whilst permalink tells it what the URL for this page will be (in this case, /, or the homepage). Anything under the hyphens will be used as the main content on the page. You can use text, markdown or html to create the body. In this case I simply use a line of text.
Now open your terminal back up and run this command:
npx eleventy --serve
If your website doesn't open automatically, browse to localhost:8080 and you should see our homepage!
Part 2: Blog posts
Let's add a page that will be used for blog posts next. In the _includes/layouts folder, add a new file called post.njk. We'll come back to this in a minute, but first let's create a basic blog post. In the posts folder, create a file called posts.json and add the following:
{
    "tags": "posts"
}
This will ensure that every post in this folder has the correct tag attached. Now add a file in the posts folder named my-first-post.md. Even though this is a markdown file, we will still add some frontmatter here. Add the following code to my-first-post.md:
---
layout: layouts/post.njk
title: My first post
description: The first post on the Eleventy + Netlify CMS from scratch blog
date: 2020-04-18
featuredImage: /images/uploads/image1.jpeg
---
Hello, here is the body of the post.
Let's take a look at our frontmatter:
-
layouttells this post which template to use, in this caselayouts/post.njk -
titleis the title of the post -
descriptionis a short description of the post -
dateis the date the post was written -
featuredImageis an image for the post. Drop any image you want intoimages/uploadsand use its path- mine isimage1.jpeg
Again, anything underneath the frontmatter will be the blog post content. Note that we won't be creating posts like this in future since the Netlify CMS will take care of it for us!
Now that our post is ready, lets render it. Add the following to _includes/layouts/post.njk:
---
layout: layouts/base.njk
---
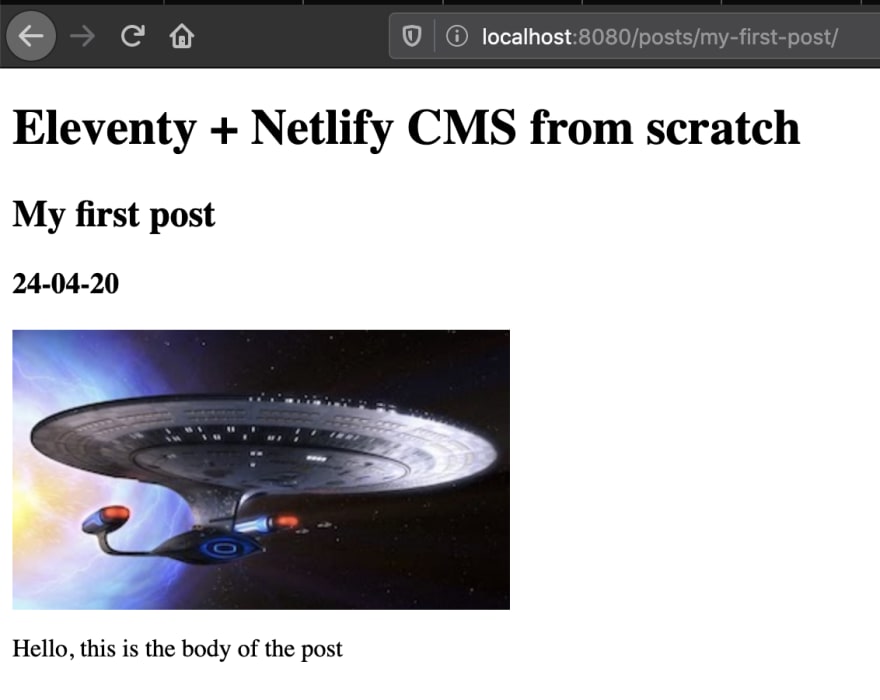
<h2>{{ title }}</h2>
<h3>{{ date | readableDate }}</h3>
<img src="{{ featuredImage | url }}" alt="{{ featuredImage }}"></img>
<p>{{ content | safe }}</p>
Our post page uses the layouts/base.njk template and renders blog post data in its body. We use double brackets {{ }} to refer to data in the post's frontmatter. In the case of my-first-post.md, the {{ title }} will end up being My first post, which we provided in the markdown file. Eleventy will create a blog post page for every markdown file in the posts folder. Neat!
We now have a working blog, but no way to see the posts. Let's fix that by adding a new file in the _includes folder called postslist.njk. This file will use a For Loop to create a list of all of our posts. Add this to the file:
<ul>
  {% for post in postslist %}
    <li>
      <strong>
        <a href="{{ post.url | url }}">{{ post.data.title }}</a>
      </strong>
      -
      <time datetime="{{ post.date | htmlDateString }}">{{ post.date | readableDate }}</time>
      -
      <span>{{ post.data.description }}</span>
    </li>
  {% endfor %}
</ul>
With the above code, Eleventy searches for every post in a variable called postslist and renders the title, date and description of each. To create the postslist variable, create a new file in the root of the project called posts.njk:
---
layout: layouts/base.njk
permalink: /posts/
---
{% set postslist = collections.posts %}
{% include "postslist.njk" %}
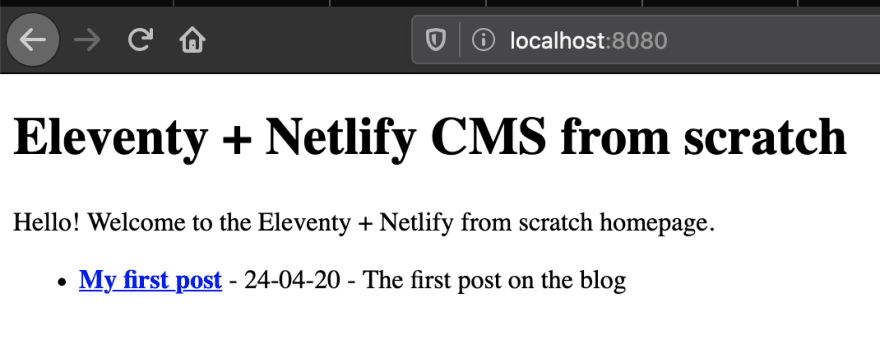
This file populates the postslist variable with every post that has the tag posts. Earlier we created posts.json to take care of the tagging for us! If all is well, you can now browse to localhost:8080/posts/ to see your list of posts! Feel free to add a couple more posts as .md files in the posts folder to see how they show up.
The very last thing to do with the blog portion of our website is to go back to index.njk at the project root and add this line at the bottom:
{% set postslist = collections.posts %}
{% include "postslist.njk" %}
The includes keyword basically embeds the file into the current page- we're rendering postslist.njk inside the homepage, which now shows your post list as well!
Whew! We're done with this part. Go over to your terminal and push the changes to your Git repository.
Part 3: Netlify CMS
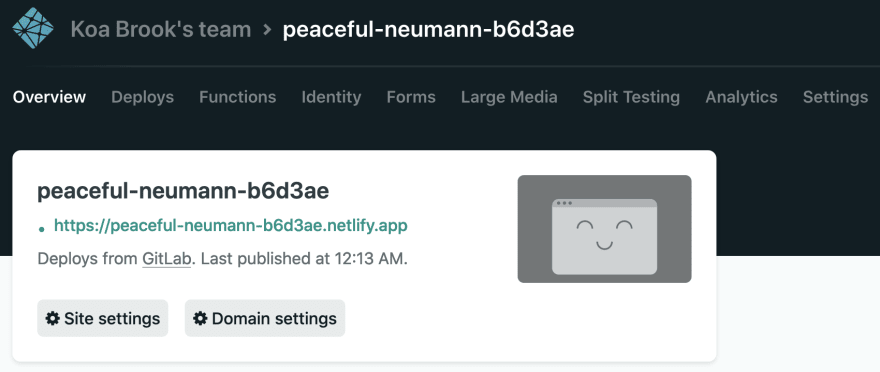
Now it's time to set up the Netlify CMS. First we'll have to get our website hosted with Netlify. Login to Netlify and click New site from Git. Login with your Git provider (I use GitLab) and authorize Netlify to access your repositories. Select your repo from the list. Under Basic build settings, set the Build command to npx eleventy and the Publish directory to _site. Click Deploy site.

After your deploy completes, you will see a link (ending with .app) that will take you to your live blog.
In the menu above your site URL, click Identity.
On the Identity screen, click Enable Identity. After it's enabled, click Settings and usage and find Services. Click Enable Git Gateway. Sign in again if prompted.
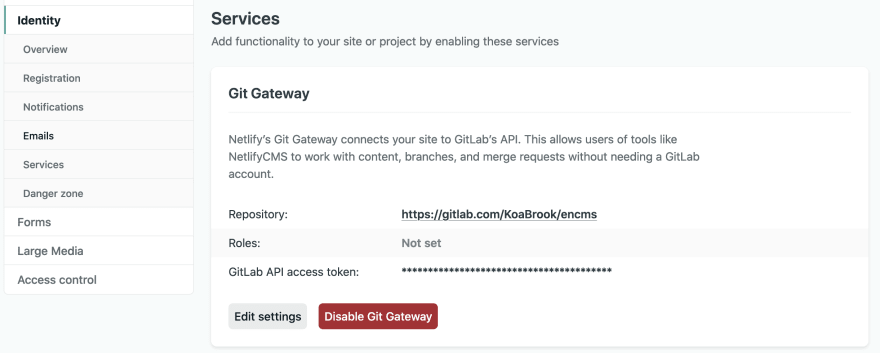
In the above steps we have successfully created a live website with Netlify. We also enabled Netlify's Identity feature which will take care of authentication and accounts for us. Finally, we enabled Git Gateway, which is an API that will let the Netlify CMS commit changes to the git repository without needing to re-authenticate or give anybody access to it directly.
Back in your project, create index.html inside the admin folder. In this file we will add some basic HTML provided by Netlify which loads the CMS UI and authorization widget:
<!doctype html>
<html>
<head>
  <meta charset="utf-8" />
  <meta name="viewport" content="width=device-width, initial-scale=1.0" />
  <title>Content Manager</title>
  <script src="https://identity.netlify.com/v1/netlify-identity-widget.js"></script>
</head>
<body>
  <!-- Include the script that builds the page and powers Netlify CMS -->
  <script src="https://unpkg.com/netlify-cms@^2.0.0/dist/netlify-cms.js"></script>
</body>
</html>
Create another file in the admin folder named config.yml. .YML files rely on accurate indentation. Be sure to use spaces to indent, not tabs! First, we will enable the Git Gateway API by adding the following:
backend:
  name: git-gateway
  branch: master # Branch to update
Now we'll point to our images/uploads folder, which is where pictures uploaded from the CMS will be stored, however since Eleventy stores our static site in the _site folder, we also need to add a public folder too. Add these lines underneath branch: master, making sure the lines are not indented:
media_folder: "_site/images/uploads"
public_folder: "/images/uploads"
The last thing to do is to create a collection for our posts. We'll use the config.yml file to create this collection, and it will match the frontmatter we set in our post markdown files earlier. Add this under the media_folder: line we just created:
collections:
 - name: "posts"        #The name of the collection and should match our posts.json file's tag
   label: "Posts"       #The name of the collection on the CMS itself
   folder: "posts"      #The folder that our blog posts will be loaded from and saved to
   create: true             #Tells the CMS that new posts can be created
   slug: "{{year}}-{{month}}-{{day}}-{{slug}}"  #this sets the URL for the post
   fields:
      - {label: "Layout", name: "layout", widget: "hidden", default: "layouts/post.njk"}
      - {label: "Title", name: "title", widget: "string"}
      - {label: "Description", name: "description", widget: "string"}
      - {label: "Date", name: "date", widget: "date", default: ""}
      - {label: "Post Body", name: "body", widget: "markdown"}
      - {label: "Featured Image", name: "featuredImage", widget: "image"}
Let's explore the fields section. Notice that each field matches the frontmatter of our my-first-post.md file. Let's also explore each part of each line:
-
labelis the name of the field that will appear in the CMS -
nameis the name of the field, it must match the frontmatter exactly -
widgettells the CMS which widget to display from a selection.stringis a single line of text and others are available, listed here.markdownis generally used for the post content. -
defaultsets a default value for the field
A full explanation of the collections section can be found here. A collection doesn't have to be for posts only- you can add one for individual pages or even individual datasets. That is beyond the scope of this article, however.
The last thing to do is to return to layouts/base.njk and add this line and add it before the closing </head> tag:
<script src="https://identity.netlify.com/v1/netlify-identity-widget.js"></script>
In the same file, add this before your closing </body> tag:
<script>
    if (window.netlifyIdentity) {
      window.netlifyIdentity.on("init", user => {
        if (!user) {
          window.netlifyIdentity.on("login", () => {
            document.location.href = "/admin/";
          });
        }
      });
    }
  </script>
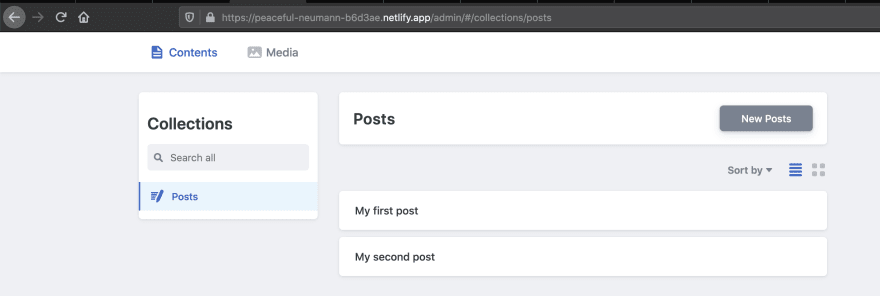
Great news: You're pretty much done! Save, commit your changes and push your project. Wait for the deploy to complete (make sure your commit says Published in Netlify under Production deploys) then go to your website's url. Add /admin to the url and you'll be transported to the login screen! Log in and you'll be taken to the Netlify CMS backend where you can create and edit posts and upload media! Please be aware that posts added via the CMS can take a few minutes to appear after you submit them. Netlify will re-deploy your site when a new post is added!
This tutorial was a very quick and crude integration of Eleventy and Netlify CMS, however it should help you to understand how the two connect, rather than using a boilerplate or template blog, which can easily be too cluttered from the get-go. I hope that this tutorial was helpful in showing you how you can build a simple blog with a back-end editor with very little time and effort. I encourage you to play around with frontmatter, different collections and pages. Please reach out to me on Twitter @koabrook with any questions or feedback, as well as to show you your attempts!

Resources
- 11ty.dev
- Netlify CMS
- Eleventy Base Blog: Provided the starting steps for my journey with Eleventy!

Top comments (5)
Hi I couldn't find you on Twitter so sorry for putting my question here, I followed your tutorial.
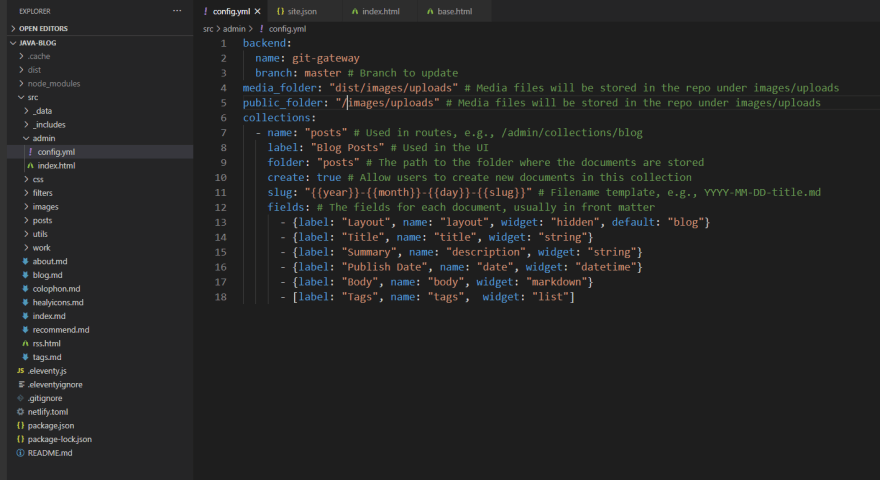
Here's the setup:
Dist is my equivalent of _site. Posts and admin are in src.
I tried changing the posts from src/posts to just posts and both yielded the same errors.
On localhost I get the error:
On Netlfiy smolnotes.netlify.app/admin/ I get this error:
Hi Koa do you know how display full posts in the homepage of eleventy?
Try using the .data property
for example if you follow this article you could show the featured image on the postslist.njk by using
post.data.featuredImage
I was able to follow this tutorial and the video to make my blog with my own css! Thank you so much for this!
Hi! Great tutorial, I'm excited to try it out! Do you think I would able integrate a blog like this (with my own css) to an existing portfolio site hosted on Netlify?