
One day, when you finish developing a project, you will need to send it to production. That is, find a hosting service, upload files, add settings, run the website, etc. So that you don’t have to worry about it later, I have prepared for you a full-fledged instruction that will solve all these problems.
Today, we will be deploying a project written in Svelte to Heroku, a cloud PaaS platform. We will refer to it simply as the host.
We will start with creating a basic structure, that is, from scratch.
Let’s use this boilerplate as the basis https://github.com/pankod/svelte-boilerplate.
Clone the project into the desired folder.
git clone https://github.com/pankod/svelte-boilerplate.git svelte
Go to the svelte directory and run the command to install the dependencies
cd svelte && npm install
Start the project
npm run start:dev
If all went well, the website will be available at this link: http://localhost:3000; open it in your browser.

Now let’s try to build a project. The idea is to create a folder public that will contain html, css, and js files; they will be compressed and optimized, and we will use them in production.
The command to build the project
npm run build
The result should be like this

Preparing the server
Files and pictures will not be optimized or compressed
The development server is not stable and not designed for heavy loads
It’s impossible to add settings to the server
And a lot of other problems.
We will do everything properly and run our project on a simple Express.js server.
Let’s install the package
npm i express
At the root of the project, create a server.js file and put the code below in it
const express = require('express');
const app = express();
const path = require('path');

const port = process.env.PORT || 5000;

app.use(express.static('public'));

app.get('*', (req, res) => {
res.sendFile(path.resolve(__dirname, 'public', 'index.html'));
});

app.listen(port, () =>
console.log(`Server is running on: http://localhost:${port}`));
The main thing is to specify the port variable so that Heroku can substitute the correct port at startup.
const port = process.env.PORT || 5000;
In general, our server is very simple; when you start it, it will only render the index.html file from the public folder. Let’s check it
node server.js
A successful start message should appear in the console
> node server.js
Server is running on: http://localhost:5000
And if we open this link in the browser http://localhost:5000, we will see the website’s home page.
The files for production are ready, and the server is prepared, so now let’s configure the Heroku CLI.
Installing and configuring the Heroku CLI
Let’s start with the installation. They have detailed documentation on their website at https://devcenter.heroku.com/articles/heroku-cli. Let’s go read it.
Usually, the “Download and install” section is sufficient

Try to install it. If everything is OK, type the heroku command in the console. The result should be something like this
> heroku
CLI to interact with Heroku

VERSION
  heroku/7.49.0 linux-x64 node-v12.16.2

USAGE
$ heroku [COMMAND]
COMMANDS
access          manage user access to apps
addons          tools and services for developing, extending,
and operating your app
apps            manage apps on Heroku
auth            check 2fa status
authorizations  OAuth authorizations
autocomplete    display autocomplete installation instructions
buildpacks      scripts used to compile apps
certs           a topic for the ssl plugin
ci              run an application test suite on Heroku
clients         OAuth clients on the platform
config          environment variables of apps
container       Use containers to build and deploy Heroku apps
domains         custom domains for apps
drains          forward logs to syslog or HTTPS
features        add/remove app features
git             manage local git repository for app
help            display help for heroku
keys            add/remove account ssh keys
labs            add/remove experimental features
local           run Heroku app locally
logs            display recent log output
maintenance     enable/disable access to app
members         manage organization members
notifications   display notifications
orgs            manage organizations
pg              manage postgresql databases
pipelines       manage pipelines
plugins         list installed plugins
ps              Client tools for Heroku Exec
psql            open a psql shell to the database
redis           manage heroku redis instances
regions         list available regions for deployment
releases        display the releases for an app
reviewapps      manage reviewapps in pipelines
run             run a one-off process inside a Heroku dyno
sessions        OAuth sessions
spaces          manage heroku private spaces
status          status of the Heroku platform
teams           manage teams
update          update the Heroku CLI
webhooks        list webhooks on an app
This tells us that now, heroku is available and ready to go. Let’s try to run our server with it. In the root of the project, where the server.js file is, run the command below
heroku local web
My result is as follows. The website is working
> heroku local web
[WARN] ENOENT: no such file or directory, open 'Procfile'
[OKAY] package.json file found - trying 'npm start'
8:10:03 PM web.1 |  > @pankod/svelte-boilerplate@0.0.1 start
8:10:03 PM web.1 |  > node server.js
8:10:03 PM web.1 |  Server is running on:http://localhost:5000
Next, a Procfile must be created in the root of the project. This will help determine how to start the application. Heroku will look for this file first. If you don’t have this file in your project, heroku will try to start the webserver using the start script (npm start) in your package.json.
Insert a piece of code into the Procfile
web: node server.js
And let’s try to get the website up and running again
> heroku local web
8:30:31 PM web.1 |  Server is running on:http://localhost:5000
This time, there are no errors in the console.
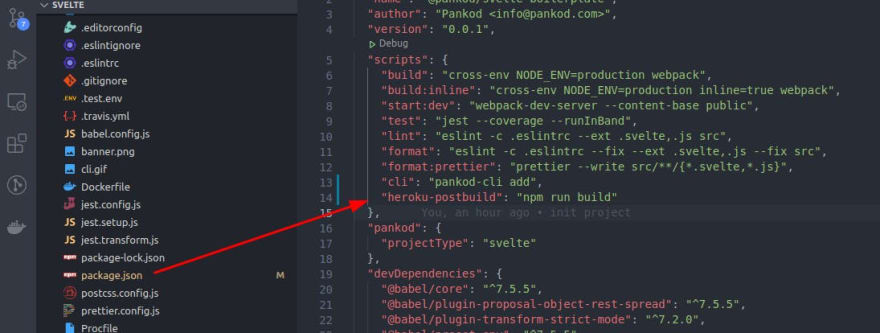
And the last step is to add a command to package.json to build the project on the heroku side
"heroku-postbuild": "npm run build"
Project preparation
There are two ways to do this:
Upload the project into the heroku repository, and it will add proper settings;
Upload to github and specify the link in the heroku settings.
We will do it the second way.
I hope I don’t need to tell you how to upload a project to github? I uploaded it here https://github.com/denisoed/svelte-heroku
If you want to read about the first method, here is the link: https://devcenter.heroku.com/articles/git. It’s not that different, except perhaps for the fact that the code will be stored on the heroku side.
Maybe you don’t have a github account, so this way is even easier. Try it out.
Setting up the host
When you upload the project to github, go to the heroku dashboard https://dashboard.heroku.com to create a new project.

This page will contain all your projects. To create a new one, click on the New button in the top right corner, then on Create new app. This will open a new page where you need to enter the details of the new project.
When you finish, the project will be created and we will be redirected to the Deploy tab. There, we go straight to the github settings.
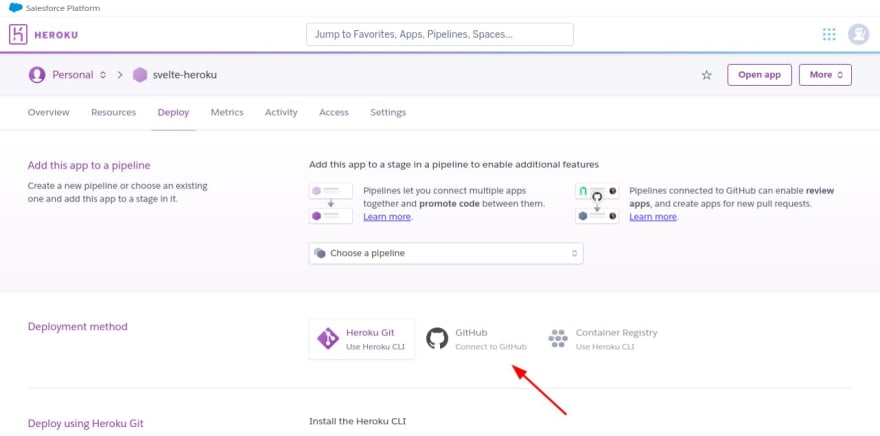
Find the repository you need and connect

Next, select the branch that heroku will be watching and press the big dark button.
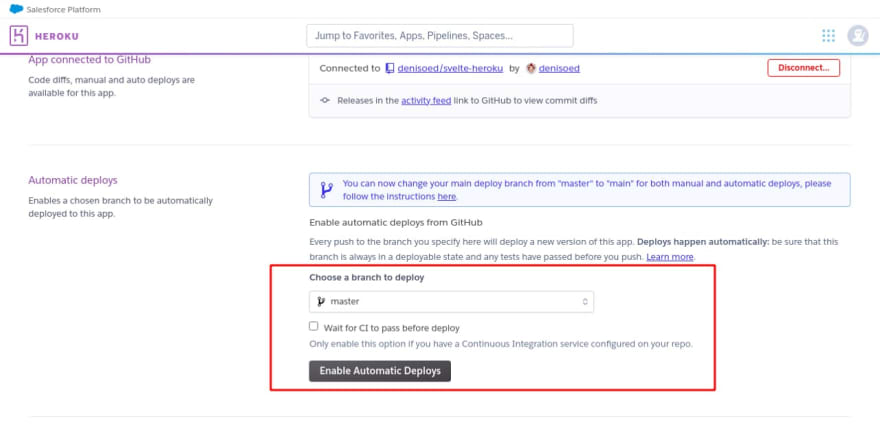
Now, when you upload something to the master branch, heroku will pull the changes and update the website.
At this point, heroku has not had a chance to pull anything yet, so we’ll use the manual update button

After the build is complete (the process can be tracked in the Activity tab), click on the Open app button

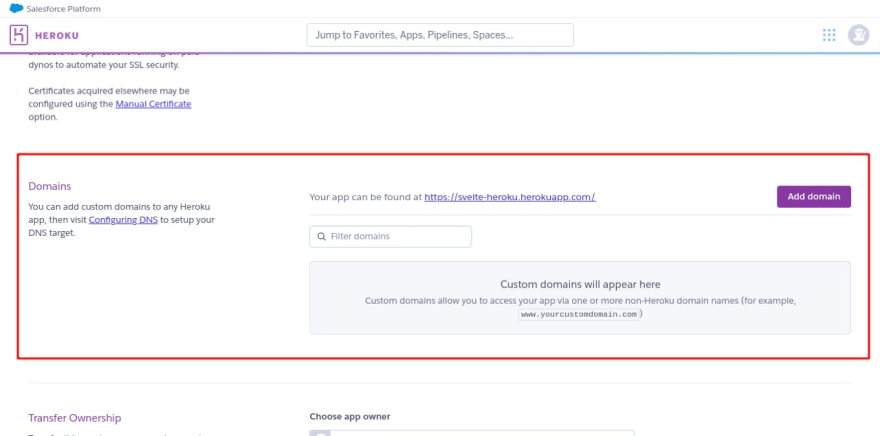
A new tab will open, and we’ll see the home page of our website again, but it’s now hosted on heroku. The website is ready for production; the only thing left is to buy the domain. You can buy one here: https://domains.google.
You can change it in the Settings tab, in the Domains section
In this tab, you can also configure env variables, install various plugins, etc. I advise you to study all the tabs to get the idea of what this hosting service can do.
I believe that the purpose of this article has been accomplished, and we can call it a day. For any other questions, please go to the official documentation at https://devcenter.heroku.com.
Thank you!
Previously published at maddevs.io

Top comments (0)