
I work on the development of a tool called Snipline, a utility created to scratch my own itch, increasing my shell command productivity.
I first started building the web version of Snipline in Ember JS and soon discovered Ember Electron which allowed me to create desktop clients of the web app for Windows, MacOS, and Linux really fast.
Although the addon does a great deal of work for you, there’s a lot of configuration that needs to be done as well - especially for releases. It’s taken me a long time as well as a lot of trial and error and wanted to share my discoveries with others.
This blog is part of an on-going series of posts that go into the details of building an Electron app in Ember JS. It will detail building for MacOS, Linux, and Windows, then I'll finish off with some closing thoughts and extra tips.
Initial setup
I’ve created a dummy app which you can download from Github and follow along with. Of course, if you already have an Ember app ready to use, checkout a new branch and give it a try!
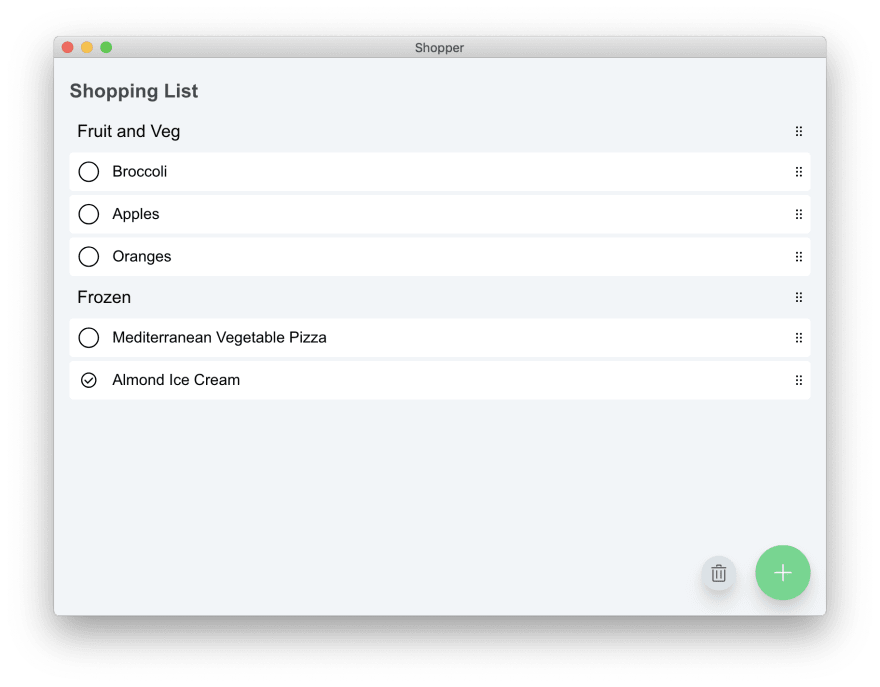
The app I’ve created is called Shopper and is a simple shopping list app. It lets you split groceries into different categories and keep track of the items you’ve added to your basket, as well as reorder and delete them.
It uses Ember Mirage for the backend storage - which is really convenient for development, but the data does not persist. If you wish to use this application for real then you will need to add your own backend API.
You’ll also need Yarn, Node (I’m using 10.15), and Ember CLI installed. After running yarn, you should be able view the web version with ember serve.
You will need MacOS to build the MacOS app and Windows to build the Windows app. You can build .deb (For Debian based operating systems) on MacOS with the correct tools installed, but it’s probably easier if you have access to a Linux machine. If you wish to build a Snapcraft package you will need Ubuntu 16.04.
Installing Electron
Run the following command to add Ember Electron to the app.
ember install ember-electron
This will install the addon and do the initial set up. This includes creating a new directory, ember-electron which is where we can place Electron related code, configuration and resources.
-
main.js- this file is the starting area for changing Electron app behaviour. For example, if you want to set the default window size, you can do it here. -
electron-forge-config.js- Under the hood, Ember Electron uses Electron Forge to build the app. This file is where we’ll put configuration related to building the app. This includes code signing for for MacOS/Windows. -
resources/- This is where you can place build related resources. We’ll place the Linux Desktop.ejsfile in here as well as the app icon files.
Without doing any modifications, let’s try running the Electron app in a development environment. Run the following command from the project root.
ember electron
You should be greeted with an app like the screenshot below (Or relatively similar if you’re on Windows/Linux).
Configuring the app
So before we go onto building the app for release, there are a few tweaks that we should make and a few to take into consideration.
- How to change the default window size
- (MacOS) Closing the app from the window and clicking the Dock icon doesn’t reopen the app.
- How to set a minimum width/height for the app.
- (MacOS) How to change the title bar style.
- How to add items to the menu bar.
To configure all of these we need to update the ember-electron/main.js file.
First of all, lets move the mainWindow stuff into it’s own function and call this function from the ready event.
app.on('ready', () => {
  loadApp();
});

// Create a new variable for the main window
var mainWindow = null;

function loadApp() {

  mainWindow = new BrowserWindow({
    width: 800,
    height: 600,
  });

  // If you want to open up dev tools programmatically, call
  // mainWindow.openDevTools();

  const emberAppLocation = 'serve://dist';

  // Load the ember application using our custom protocol/scheme
  mainWindow.loadURL(emberAppLocation);

  // If a loading operation goes wrong, we'll send Electron back to
  // Ember App entry point
  mainWindow.webContents.on('did-fail-load', () => {
    mainWindow.loadURL(emberAppLocation);
  });

  mainWindow.webContents.on('crashed', () => {
    console.log('Your Ember app (or other code) in the main window has crashed.');
    console.log('This is a serious issue that needs to be handled and/or debugged.');
  });

  mainWindow.on('unresponsive', () => {
    console.log('Your Ember app (or other code) has made the window unresponsive.');
  });

  mainWindow.on('responsive', () => {
    console.log('The main window has become responsive again.');
  });
}
To change the default window size and the minimum window size look for the loadApp function. You can see the default width and height is already set. To set the minimum add the following parameters. We’ll also set it to centre the app by default here as well.
    minWidth: 400,
    minHeight: 400,
    center: true,
If you’re on MacOS you can use the transparent title bar style which many apps prefer. If you do this, you will need to update your CSS to make the window draggable.
In the same loadApp method, add the following
titleBarStyle: 'hidden',
Then in your app css (For the Shopper app this is app/styles/app.css add the following:
html, body {
    -webkit-app-region: drag;
}
input, select, textarea, button, a {
    -webkit-app-region: no-drag;
}
In MacOS, if you try pressing the red close icon in the app window and reopen from the Dock nothing will happen. To fix this we need add an event hook. Place this above the loadApp function
app.on('activate', function () {
  if (mainWindow === null) {
    loadApp();
  }
});
Add this code below the mainWindow definition in the loadApp function
mainWindow.on('closed', () => {
  mainWindow = null;
})
We can keep the Dock icon loaded when all windows are closed by preventing it from quitting in the window-all-closed event.
app.on('window-all-closed', () => {
  if (process.platform !== 'darwin') {
    app.quit();
  }
});
For the sake of example, if you wish to modify the menu items (File, Help, etc) we can do this here as well. Note that I tend to only do this for production releases as it removes the Developer Inspector and other useful items. Put this inside the loadApp function below everything else and add a new variable called template near line 6.
// Add Menu to require('electron');
const { app, BrowserWindow, protocol, Menu } = require('electron');
// Add a new variable for the menu template.
var mainWindow, template = null;
// ...
function loadApp() {
 //mainWindow = ...
   if(process.env.ELECTRON_ENV !== "development") {
    template = [
      {
        label: "Edit",
        submenu: [
            { label: "Undo", accelerator: "CmdOrCtrl+Z", selector: "undo:" },
            { label: "Redo", accelerator: "Shift+CmdOrCtrl+Z", selector: "redo:" },
            { type: "separator" },
            { label: "Cut", accelerator: "CmdOrCtrl+X", selector: "cut:" },
            { label: "Copy", accelerator: "CmdOrCtrl+C", selector: "copy:" },
            { label: "Paste", accelerator: "CmdOrCtrl+V", selector: "paste:" },
            { label: "Select All", accelerator: "CmdOrCtrl+A", selector: "selectAll:" }
        ]
      },{
      label: 'Help',
      submenu: [
        {
          label: 'Learn More',
          click () { require('electron').shell.openExternal('https://dev.to/mitchartemis') }
        }
      ]
    }];
    if (process.platform === 'darwin') {
      template.unshift({
        label: app.getName(),
        submenu: [
          {label: 'Check for updates', click() { require('electron').shell.openExternal(`https://dev.to/mitchartemis`); }},
          {role: 'about'},
          {type: 'separator'},
          {role: 'quit'}
        ]
      })
    } else {
      template.unshift({
        label: "File",
        submenu: [
          {label: 'Check for updates', click() { require('electron').shell.openExternal(`https://dev.to/mitchartemis`); }},
          {type: 'separator'},
          {role: 'quit'}
        ]
      })
    }
    const menu = Menu.buildFromTemplate(template)
    Menu.setApplicationMenu(menu)
    }
}
There are a few things going on here, first we check if we’re in development mode, if we’re not then we create a Menu from our own template.
The label attribute allows us to specify the top level names and inside the submenu we place all of the menu options.
We can create links to external websites like so:
{label: 'Check for updates', click() { require('electron').shell.openExternal(`https://dev.to/mitchartemis`); }}
Create separators
{type: 'separator'},
Use predefined functionality with roles
{role: 'about'}
{role: 'quit'}
And specify shortcuts for pre-existing methods as well.
{ label: "Select All", accelerator: "CmdOrCtrl+A", selector: "selectAll:" }
Now it’s time to Ctrl+C the current running app and re-run it to see the results.

In MacOS you should be able to click-and-drag the whole app window (except form elements) and close and reopen the app from the dock. For all platforms there should now be a minimum of 400x400 window size.
Prepping for a release
If you’re using your own app, change the electron-prebuild-compile to use v3 rather than v4 in your package.json dev dependencies and run yarn upgrade.
"electron-prebuilt-compile": "3.0.13",
If you don’t do this you will be unable to use the electron make command.
The app icon
During development the Electron app uses the default Electron development icon, but when you build a production release you’re able to use your own icon.
The icon will need to be available for each platform.
-
.icnsfor MacOS - 256x256
.icofor Windows - 1024x1024
.pngfor Linux
The MacOS .icns file can be made a few ways, but at the very least you’ll need a 1024x1024 transparent png to convert from.
I highly recommend the free Mac app, Image2icon (Also available in Setapp). Plug in your image and export to .icns. As a bonus, you can also use this to create your Windows .ico file, too — although this comes at a cost. There are plenty of free online .png to .ico converters out there.
If you’d rather make the .icns file manually, there’s an excellent post on StackOverflow on how to do that.
Once you have all the images place them in the ember-electron/resources directory. It’s really important to give them the same name. I’ve included the icon files for Shopper in the Github repository.
Version number
Make sure before building to update your version number! You can do this from the ~/package.json. This will show in outputted build file and the MacOS About menu.
What we’ve done so far
That’s all for part one. We’ve covered a lot of ground in a small amount of time, including integrating Electron into an Ember App, configuring the app for it’s first release, and going over some extra details such as creating icons and menu items.
In part two we’ll create the first MacOS release with code signing.

Oldest comments (0)