
In this article, we are going to create a DevOps project where we'll use Terraform, Jenkins, GitHub, and EKS.
The first part of the article deals with setting up a Jenkins server through Terraform.
The second part will deal with EKS setup using Terraform and setting up the Jenkins pipeline.
Note: It is assumed that you have Terraform and AWS CLI installed and configured on your local system. Please check this page for Terraform installation and this page for AWS CLI installation.
Let's begin!!!
Part 1: Jenkins server setup using Terraform
Terraform needs to store state information somewhere. We are going to keep it in AWS S3 storage.
So head over to your AWS panel and create a bucket. The bucket name has to be unique. So I am going to create it with the name: mubin-devops-cicd-terraform-eks , you'll have to keep something else. I'll be using US North Virginia (us-east-1) as the region for the bucket and keeping the rest of the settings the same to create the bucket.
We'll be needing a key to login into the Jenkins EC2 instance.
So go to the EC2 dashboard and scroll down to the Key Pairs link inside Network & Security menu.
Click the "Create key pair" button. Give a name like "jenkins-server-key". With the rest of the form fields as default, download the pem file and set its permission to 400.
chmod 400 jenkins-server-key.pem

Let's utilize the S3 storage to store terraform state by creating a terraform state file like below:
#backend.tf
terraform {
  backend "s3" {
    bucket = "mubin-devops-cicd-terraform-eks"
    region = "us-east-1"
    key = "jenkins-server/terraform.tfstate"
  }
}
Since we will be using AWS as a cloud provider with the "us-east-1" region, let's configure Terraform with this information as well.
#provider.tf
provider "aws" {
  region = "us-east-1"
}
Now let's declare terraform variables that we will be using.
#variables.tf
variable "vpc_cidr_block" {
 type = string
 description = "To set cidr for vpc"
}
variable "subnet_cidr_block" {
 type = string
 description = "To set cidr for subnet"
}
variable "availability_zone" {
 type = string
 description = "To set AWS availability region"
}
variable "env_prefix" {
 type = string
 description = "Set as dev or prod or qa etc. based on desired environment"
}
variable "instance_type" {
 type = string
 description = "To desired instance type for AWS EC2 instance"
}
Initialize the above variables in the "terraform.tfvars" file.
vpc_cidr_block      = "10.0.0.0/16"
subnet_cidr_block   = "10.0.10.0/24"
availability_zone   = "us-east-1a"
env_prefix          = "dev"
instance_type       = "t2.small"
We are using 'dev' as environment. You can change env-prefix variable according to your preference.
We are going to use the latest image of Amazon Linux 2 for our Jenkins server instance. If you go to the EC2 dashboard and select Amazon Linux 2, you see the following details:

As you can see the AMI value is "amzn2-ami-kernel-5.10-hvm-2.0.20230612.0-x86_64-gp2" which can be generalized using a regex style expression like: "amzn2-ami-kernel--hvm--x86_64-gp2"
Now we'll set up infrastructure for Jenkins through code.
Add the following content to the "server.tf" file.
data "aws_ami" "latest-amazon-linux-image" {
  most_recent = true
  owners      = ["amazon"]
  filter {
    name   = "name"
    values = ["amzn2-ami-kernel-*-hvm-*-x86_64-gp2"]
  }
  filter {
    name   = "virtualization-type"
    values = ["hvm"]
  }
}

resource "aws_instance" "myjenkins-server" {
  ami                         = data.aws_ami.latest-amazon-linux-image.id
  instance_type               = var.instance_type
  key_name                    = "jenkins-server-key"
  subnet_id                   = aws_subnet.myjenkins-server-subnet-1.id
  vpc_security_group_ids      = [aws_default_security_group.default-sg.id]
  availability_zone           = var.availability_zone
  associate_public_ip_address = true
  user_data                   = "${file("jenkins-server-setup.sh")}"
  tags = {
    Name = "${var.env_prefix}-server"
  }
}
We have customized the above by using official references from here and here for the above data and resource blocks respectively.
Once the instance is created, let's get the public IP of this instance by appending the below snippet in the above file.
output "ec2_public_ip" {
  value = aws_instance.myjenkins-server.public_ip
}
In the resource block, we used the jenkins-server-setup.sh script file to initialize packages on our Jenkins server. Let's create that file
#!/bin/bash

# install jenkins

sudo yum update
sudo wget -O /etc/yum.repos.d/jenkins.repo \
    https://pkg.jenkins.io/redhat-stable/jenkins.repo
sudo rpm --import https://pkg.jenkins.io/redhat-stable/jenkins.io-2023.key
sudo yum upgrade -y
sudo amazon-linux-extras install java-openjdk11 -y
sudo yum install jenkins -y
sudo systemctl enable jenkins
sudo systemctl start jenkins

# then install git
sudo yum install git -y

#then install terraform
sudo yum install -y yum-utils
sudo yum-config-manager --add-repo https://rpm.releases.hashicorp.com/AmazonLinux/hashicorp.repo
sudo yum -y install terraform

#finally install kubectl
sudo curl -LO https://storage.googleapis.com/kubernetes-release/release/v1.23.6/bin/linux/amd64/kubectl
sudo chmod +x ./kubectl
sudo mkdir -p $HOME/bin && sudo cp ./kubectl $HOME/bin/kubectl && export PATH=$PATH:$HOME/bin
In the above script file, we are installing Jenkins, Git, Terraform, and Kubectl.
Now we need to set up the networking of our ec2 instance.
Let's start by creating "vpc.tf" file and entering the following content:
resource "aws_vpc" "myjenkins-server-vpc" {
  cidr_block = var.vpc_cidr_block
  tags = {
    Name = "${var.env_prefix}-vpc"
  }
}

resource "aws_subnet" "myjenkins-server-subnet-1" {
  vpc_id            = aws_vpc.myjenkins-server-vpc.id
  cidr_block        = var.subnet_cidr_block
  availability_zone = var.availability_zone
  tags = {
    Name = "${var.env_prefix}-subnet-1"
  }
}

resource "aws_internet_gateway" "myjenkins-server-igw" {
  vpc_id = aws_vpc.myjenkins-server-vpc.id
  tags = {
    Name = "${var.env_prefix}-igw"
  }
}

resource "aws_default_route_table" "main-rtbl" {
  default_route_table_id = aws_vpc.myjenkins-server-vpc.default_route_table_id
  route {
    cidr_block = "0.0.0.0/0"
    gateway_id = aws_internet_gateway.myjenkins-server-igw.id
  }
  tags = {
    Name = "${var.env_prefix}-main-rtbl"
  }
}

resource "aws_default_security_group" "default-sg" {
  vpc_id = aws_vpc.myjenkins-server-vpc.id
  ingress {
    from_port   = 22
    to_port     = 22
    protocol    = "tcp"
    cidr_blocks = ["0.0.0.0/0"]
  }
  ingress {
    from_port   = 8080
    to_port     = 8080
    protocol    = "tcp"
    cidr_blocks = ["0.0.0.0/0"]
  }
  egress {
    from_port   = 0
    to_port     = 0
    protocol    = "-1"
    cidr_blocks = ["0.0.0.0/0"]
  }
  tags = {
    Name = "${var.env_prefix}-default-sg"
  }
}
In the above code, we are creating VPC with the CIDR block initialized in our variable file. Then we are creating a subnet in this VPC with its own CIDR block. Then we create Internet Gateway (IG) in this VPC. Then Route table is associated with our created IG. Finally, we are creating a Security Group (SG) which is allowing SSH port 22 and Jenkins web application port 8080 from everywhere.
It's not a good practice to allow all traffic from everywhere, but we are just doing this for testing purposes. If you want you can add your local system's public IP as CIDR block in the ingress rule.
Alright now our terraform scripts are ready, let's execute them.
Now open your favorite terminal and navigate to the directory where our above terraform scripts are located.
The first command to run is initializing the Terraform terraform init
The first command to run is initializing the Terraform terraform init

The second command is to do a dry run i.e. to see what will happen when we apply the scripts. So run terraform plan . You should see output like this:

It implies that 6 resources will be created. One route table, one subnet, one internet gateway, one security group, one EC2 instance, and one VPC.
Cool! Let's apply this. Run: terraform apply - auto-approve Auto approve flag will not ask for confirmation. Once it is complete successfully, you can go to your AWS console and see all these 6 resources created.

Notice the EC2 public ip printed.
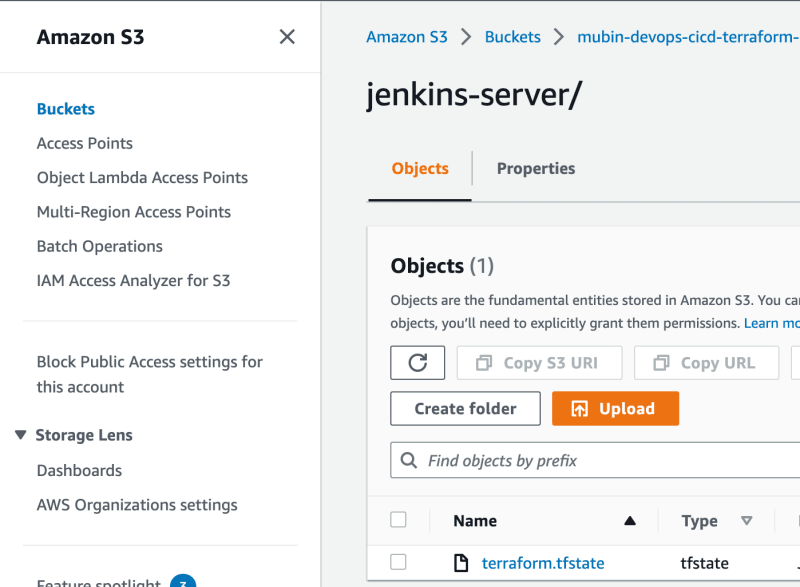
Most importantly you should see the S3 bucket containing Terraform's state file.
Let us set up the admin login of the Jenkins server. Copy the public IP of the EC2 instance and paste it into the address bar of your favorite browser. you should see the installation screen like this:

Log in to the instance via ssh by running:
ssh -i jenkins-server-key.pem ec2-user@<public-ip-of-instance> . Then copy the default password from /var/lib/jenkins/secrets/initialAdminPassword by running
sudo cat /var/lib/jenkins/secrets/initialAdminPassword and paste it into the input text box and click "Continue".
Click install selected plugins. Once done, create an admin user.

Now we need to establish a connection between Jenkins and GitHub. So go to Manage Jenkins by clicking on its link. Then click "Credentials".
Then in the tabular data, select the "global" link under the "Domain" column, as shown below:

Then in the Global credentials screen, click "Add Credentials".
Here we will first add our GitHub username and password to connect it to this Jenkins instance.
Select "Username and password" from the kind field. Ensure that "Global" is selected as the scope.
Enter your GitHub username and password. Give a recognizable ID, like "my-github-creds" and click create.
Once again back on the Global Credentials page click the "Add Credentials" button.
We need to add the AWS account access key id. Select "Secret Text" as the kind. In the ID field enter the "AWS_ACCESS_KEY_ID". And in the secret field enter your AWS account's access key id. Then hit create button.
Once again back on the Global Credentials page click the "Add Credentials" button. We need to add the AWS account secret key. Select "Secret Text" as the kind. In the ID field enter the "AWS_SECRET_ACCESS_KEY". And in the secret field enter your AWS account's secret key id. Then hit create button.
Next, we need to configure AWS CLI on this Jenkins EC2 instance. In the terminal connected to the instance via SSH, run aws configure and enter the values for AWS_ACCESS_KEY_ID and AWS_SECRET_ACCESS_KEY. Enter "us-east-1" for the AWS_DEFAULT_REGION.
This brings an end to our first part.
Part 2: Kubernetes setup using Terraform and Jenkins
Since two separate processes will be involved, one dealing with EKS setup and another for the pipeline, we will create two directories. Create the first one by the name "terraform-for-cluster" and another one by the name "kubernetes".
Navigate into the "terraform-for-cluster" directory. Let's start writing the required terraform files.
We will create the same "provider.tf" as the one created in part 1.
Also, we will use the same terraform state file but with a different key. Keeping the same key will overwrite the existing Jenkins infrastructure.
#backend.tf
terraform {
  backend "s3" {
    bucket = "mubin-devops-cicd-terraform-eks"
    region = "us-east-1"
    key = "eks/terraform.tfstate"
  }
}
Then we will create our custom VPC module in which our cluster will operate. We will use the code provided by Terraform here and tweak it a bit.
#vpc.tf
data "aws_availability_zones" "azs" {}
module "myjenkins-server-vpc" {
  source          = "terraform-aws-modules/vpc/aws"
  name            = "myjenkins-server-vpc"
  cidr            = var.vpc_cidr_block
  private_subnets = var.private_subnet_cidr_blocks
  public_subnets  = var.public_subnet_cidr_blocks
  azs             = data.aws_availability_zones.azs.names

  enable_nat_gateway   = true
  single_nat_gateway   = true
  enable_dns_hostnames = true

  tags = {
    "kubernetes.io/cluster/myjenkins-server-eks-cluster" = "shared"
  }

  public_subnet_tags = {
    "kubernetes.io/cluster/myjenkins-server-eks-cluster" = "shared"
    "kubernetes.io/role/elb"                  = 1
  }

  private_subnet_tags = {
    "kubernetes.io/cluster/myjenkins-server-eks-cluster" = "shared"
    "kubernetes.io/role/internal-elb"         = 1
  }
}
In the above script, we are setting our availability zone, public and private subnets with CIDR blocks value from the " terraform.tfvars" and NAT gateways.
The next step is to write a terraform module for the EKS cluster utilizing the above VPC module. We are going to be using the code provided here, by Terraform and tweak it to our requirement.
#eks-cluster.tf
module "eks" {
    source  = "terraform-aws-modules/eks/aws"
    version = "~> 19.0"
    cluster_name = "myjenkins-server-eks-cluster"
    cluster_version = "1.24"

    cluster_endpoint_public_access  = true

    vpc_id = module.myjenkins-server-vpc.vpc_id
    subnet_ids = module.myjenkins-server-vpc.private_subnets

    tags = {
        environment = "development"
        application = "myjenkins-server"
    }

    eks_managed_node_groups = {
        dev = {
            min_size = 1
            max_size = 3
            desired_size = 2

            instance_types = ["t2.small"]
        }
    }
}
Note the number of min, max, and desired nodes that we have set.
Let's configure terraform variables:
#terraform.tfvars
vpc_cidr_block = "10.0.0.0/16"
private_subnet_cidr_blocks=["10.0.1.0/24","10.0.2.0/24","10.0.3.0/24"]
public_subnet_cidr_blocks=["10.0.4.0/24","10.0.5.0/24","10.0.6.0/24"]
Define the above variables in its own file:
#variables.tf
variable "vpc_cidr_block" {
 type = string
}

variable "private_subnet_cidr_blocks" {
 type = list(string)
}
variable "public_subnet_cidr_blocks" {
 type = list(string)
}
Now, that Terraform part is complete, let's look at the Jenkins pipeline code that we would be running from the Jenkins web panel.
#Jenkinsfile
pipeline {
    agent any
    environment {
        AWS_ACCESS_KEY_ID = credentials('AWS_ACCESS_KEY_ID')
        AWS_SECRET_ACCESS_KEY = credentials('AWS_SECRET_ACCESS_KEY')
        AWS_DEFAULT_REGION = "us-east-1"
    }
    stages {
        stage("Create an EKS Cluster") {
            steps {
                script {
                    #Give the location of terraform scripts directory relative
                    #to the repo
                    dir('part2-cluster-from-terraform-and-jenkins/terraform-for-cluster') {
                        sh "terraform init"
                        sh "terraform apply -auto-approve"
                    }
                }
            }
        }
        stage("Deploy to EKS") {
            steps {
                script {
                    #Give the location of kubernetes scripts directory relative
                    #to the repo
                    dir('part2-cluster-from-terraform-and-jenkins/kubernetes') {
                        sh "aws eks update-kubeconfig --name myapp-eks-cluster"
                        sh "kubectl apply -f deployment.yaml"
                        sh "kubectl apply -f service.yaml"
                    }
                }
            }
        }
    }
}
Let's go through the overview of the above script.
We are first setting our environment variables related to AWS. Then we are creating two stages for the pipeline.
In the first stage, we are creating a cluster for Kubernetes by specifying from which directory the terraform scripts should run.
In the second stage, we are deploying the default Nginx app on Kubernetes. We specify "kubernetes" as the directory as that is where our scripts for deployment and service will be located.
In that directory, we have two files, one for deployment and another one for exposing it as a service of type LoadBalancer.
#deployment.yaml
apiVersion: apps/v1
kind: Deployment
metadata:
  name: nginx
spec:
  selector:
    matchLabels:
      app: nginx
  replicas: 1
  template:
    metadata:
      labels:
        app: nginx
    spec:
      containers:
      - name: nginx
        image: nginx
        ports:
        - containerPort: 80
#service.yaml
apiVersion: v1
kind: Service
metadata:
  name: nginx
  labels:
    app: nginx
spec:
  ports:
  - name: http
    port: 80
    protocol: TCP
    targetPort: 80
  selector:
    app: nginx
  type: LoadBalancer
Next, go to the Jenkins panel. From the dashboard click "New Item" from the left side menu. In the new screen, give a name and select "Pipeline" and click ok. This will create a pipeline. Scroll down to the Pipeline field. Select "Pipeline script from SCM". Then select "Git" as an option in the SCM field. Then enter the above repository URL in the "Repository URL" field. Then in credentials, select the git credentials that we created earlier in Jenkins. Then change the branch to "/main" instead of "/master". Then in the "Script" field give the location of Jenkinsfile e.g "part2-cluster-from-terraform-and-jenkins/Jenkinsfile"
Finally, click "Save".

Part 3: Witness the Action
Go to the created Jenkins pipeline in the web browser and click on "Build Now" from the left menu of the pipeline to set up EKS.
It will take about roughly 15 minutes to set up everything on AWS.
Once you see the "success" message of the build, go to EKS on the AWS console. You can see our cluster got created. Also when you go to S3 on the AWS console, you should be able to see one more folder by the name "eks" and a terraform state file inside it, which is related to the EKS cluster.

Then go to EC2, you should see our LoadBalancer also got created. Click on it and you should see the DNS name in the description section. Copy it and paste it in the browser and you should see nginx running


To clean up these resources created (things like LoadBalancers are not free in AWS), in your local system, navigate to the directory where the second part of terraform scripts are located. run:
terraform destroy - auto-approve
That's it! All your dynamically created resources will now be destroyed.
The Git repo for this article can be found here.
Hope you found the article useful.
Happy Coding!
If you found this post helpful, please like, share, and follow me. I am a developer, transitioning to DevOps, not a writer - so each article is a big leap outside my comfort zone.
If you need a technical writer or a DevOps engineer, do connect with me on LinkedIn: https://www.linkedin.com/in/mubin-khalife/.
Thank you for reading and for your support!

Top comments (0)