HTML is the markup language used for structuring and presenting content on the World Wide Web. Together with CSS and JavaScript, it enables us to have beautiful and interactive websites.
Since HTML is the foundation of the web, it is also the most essential language for any web development career path. In this article, I’ll teach you the very basics of it.
Alright, before we jump into the HTML, I want to start out by telling you a little bit about the architecture of the web. This will put the role of HTML into perspective for us.
Basic web architecture:
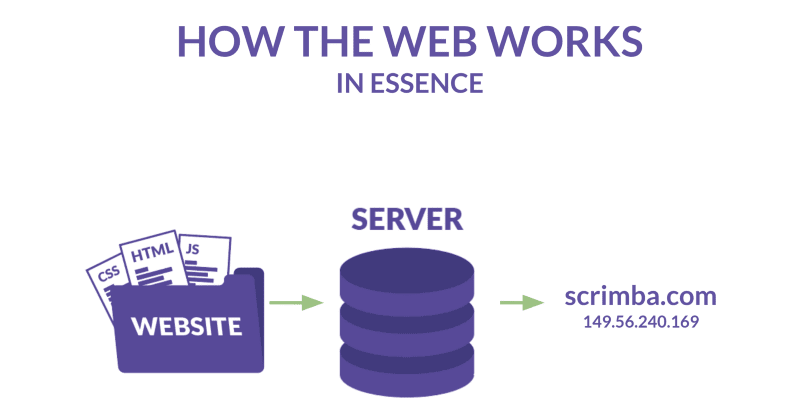
Once you’ve developed a website, you’ll need to host it on a server to make it accessible on the world wide web. All servers have an IP address (i.e 149.56.240.169) which you can think of like a phone number. We normally put a domain name (i.e. scrimba.com) over that IP address, so that it’s easier to remember.
When you type that domain name in the browser, it’ll give the server a call. The server will then send over a bunch of HTML, CSS, and JavaScript files, like this:
What is HTML?
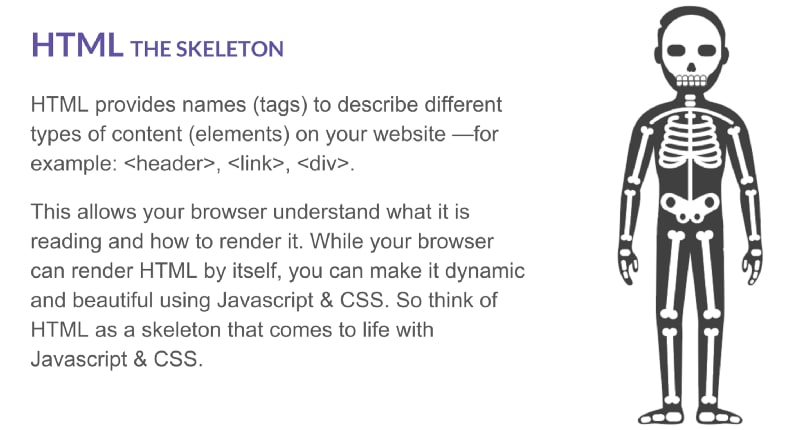
Let’s imagine a website as a person. We’ll use this analogy to understand our website. The HTML is best described as the skeleton:
10 common HTML tags that any web developer should know about
- Headings:
HTML headings are titles or subtitles that you want to display on a webpage.
You can choose from <h1> which is the most important, to <h6> which is the least important heading.
Syntax:
<!DOCTYPE html>
<html lang="en" dir="ltr">
<head>
  <meta charset="utf-8">
  <title></title>
</head>
<body>
  <h1> This is a level 1 Heading Tag created using H1 Tag</h1>
  <h1>Heading level 1</h1>
  <h2>Heading level 2</h2>
  <h3>Heading level 3</h3>
  <h4>Heading level 4</h4>
  <h5>Heading level 5</h5>
  <h6>Heading level 6</h6>
</body>
</html>
Output:
2. Paragraph tag:
The <p> tag defines a paragraph (some text)
Browsers automatically add a single blank line before and after each <p> element.
Syntax:
<!DOCTYPE html>
<html lang="en" dir="ltr">
<head>
  <meta charset="utf-8">
  <title></title>
</head>
<body>
  <p>This is a paragraph.</p>
  <p>This is another paragraph.</p>
</body>
</html>
Output:
3. Anchor tag:
The <a> tag defines a hyperlink, which is used to link from one page to another.
The most important attribute of the <a> element is the href attribute, which indicates the link's destination.
Syntax:
<!DOCTYPE html>
<html lang="en" dir="ltr">
<head>
  <meta charset="utf-8">
  <title></title>
</head>
<body>
  <a href="https://hashnode.com/">Visit Hashnode</a>
</body>
</html>
Output:
4. Unordered list:
An unordered list starts with the <ul> tag. Each list item starts with the <li></li> tag.
The list items will be marked with bullets (small black circles) by default.
Syntax:
<!DOCTYPE html>
<html lang="en" dir="ltr">
<head>
  <meta charset="utf-8">
  <title></title>
</head>
<body>
  <ul>
    <li>Coffee</li>
    <li>Tea</li>
    <li>Milk</li>
  </ul>
</body>
</html>
Output:
5. Ordered list :
An ordered list starts with the <ol> tag. Each list item starts with the <li></li> tag.
The list items will be marked with numbers by default.
Syntax
<!DOCTYPE html>
<html lang="en" dir="ltr">
<head>
  <meta charset="utf-8">
  <title></title>
</head>
<body>
  <ol>
    <li>Coffee</li>
    <li>Tea</li>
    <li>Milk</li>
  </ol>
</body>
</html>
Output:
6. Image Tag:
The <img> tag is used to add an image to an website.
It usually used with the "src" attribute, which specifies the path to the image we want to use.
Syntax:
<!DOCTYPE html>
<html lang="en" dir="ltr">
<head>
  <meta charset="utf-8">
  <title></title>
</head>
<body>
    <img src="https://cdn.hashnode.com/res/hashnode/image/upload/v1592977386906/ovfhUTMtA.png?auto=compress" alt="Hashnode" width="300" height="300">
</body>
</html>
Output:
7. Input tag:
The <input> tag specifies an input field where the user can enter data and it's also the most important form element.
It can be displayed in several ways, depending on the type attribute (button, checkbox, submit, etc)
Syntax:
<!DOCTYPE html>
<html lang="en" dir="ltr">
<head>
  <meta charset="utf-8">
  <title></title>
</head>
<body>
  <form action="/action_page.php">
  <label for="fname">First name:</label>
  <input type="text" id="fname" name="fname"><br><br>
  <label for="lname">Last name:</label>
  <input type="text" id="lname" name="lname"><br><br>
  <input type="submit" value="Submit">
</body>
</html>
Output:
8. Division tag:
The <div> tag defines a division or a section in an HTML document.
It is used as a container for HTML elements - which is then styled with CSS or manipulated with JavaScript.
Any sort of content can be put inside the <div> tag!
Syntax:
<!DOCTYPE html>
<html lang="en" dir="ltr">
<head>
  <meta charset="utf-8">
  <title></title>
</head>
<body>
  <div>
    <p>Hashnode is a free developer blogging platform that allows you to publish articles on your own domain</p>
    <p>It helps you stay connected with a global developers across the world</p>
  </div>
</body>
</html>
Output:
9. Label tag:
The <label> tag defines a label for several input elements.
Inside this tag, we usually put the text we want to display next to the input
The for the attribute of <label> to work must be equal to the id attribute of the input.
Syntax:
<!DOCTYPE html>
<html lang="en" dir="ltr">
<head>
  <meta charset="utf-8">
  <title></title>
</head>
<body>
  <form>
    <!-- Starts label tags from here -->
    <label for="student">
      Student
    </label>
    <input type="radio" name="Occupation" id="student" value="student"><br>
    <label for="business">Business</label>
    <input type="radio" name="Occupation" id="business" value="business"><br>
    <label for="other">Other</label>
    <!-- Ends label tags here -->
    <input type="radio" name="Occupation" id="other" value="other">
  </form>
</body>
</html>
Output:
10. Span tag:
The <span> tag is an inline container used to mark up a part of a text, or a part of a document.
It is much like the <div> element, but <div> is a block-level element and <span> is an inline element.
Syntax:
<!DOCTYPE html>
<html lang="en" dir="ltr">
<head>
  <meta charset="utf-8">
  <title></title>
</head>
<body>
  <p><span>Hash Node</span></p>
</body>
</html>
Output:
The End
I hope you found this article valuable. If yes do let me know in the comments 😊
Also if you got any question feel free to ping me on Twitter
You can now extend your support by buying me a Coffee.😊👇
Thanks for Reading 😊


Top comments (2)
can you please remove the JS tag since your post is only related to HTML/CSS
Done will avoid this is in future 😀