
In this tutorial will see how to connect to Firebase Firestore Database and persist data using rest web services.
For this will start from the rest web service that we built using spring boot in the previous blog post Build Restful web service using Spring boot and Java.
If you are a video guy here is the video which demonstrates connecting to Firebase and persists data
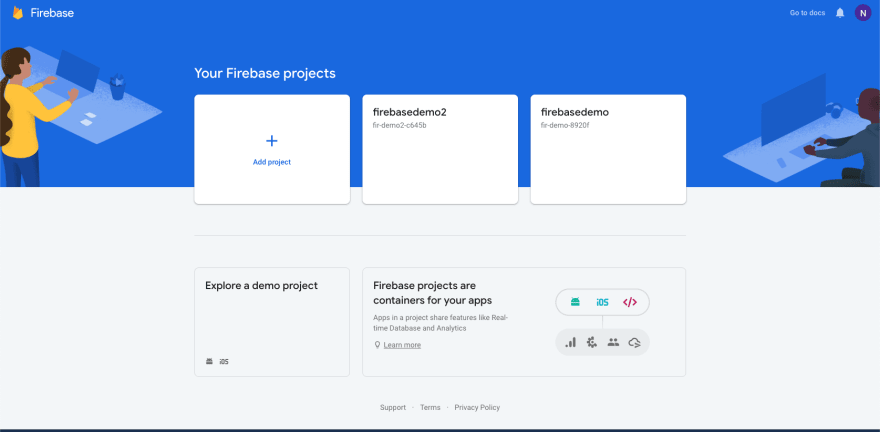
Go to firebase.google.com and click on the got to console on the top right corner, it will take you to the console as shown below. Click on Add project and give it a name.
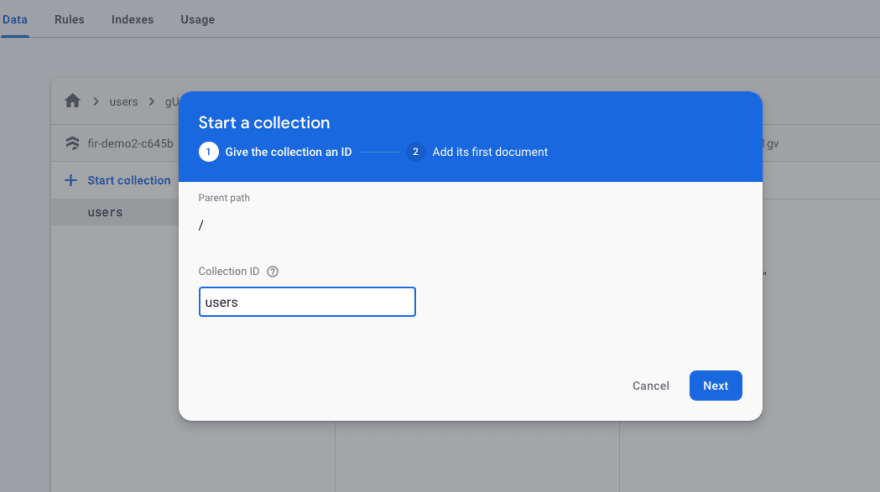
Once created it will take you to your project console page as shown below, click on the database and create a collection named "users".

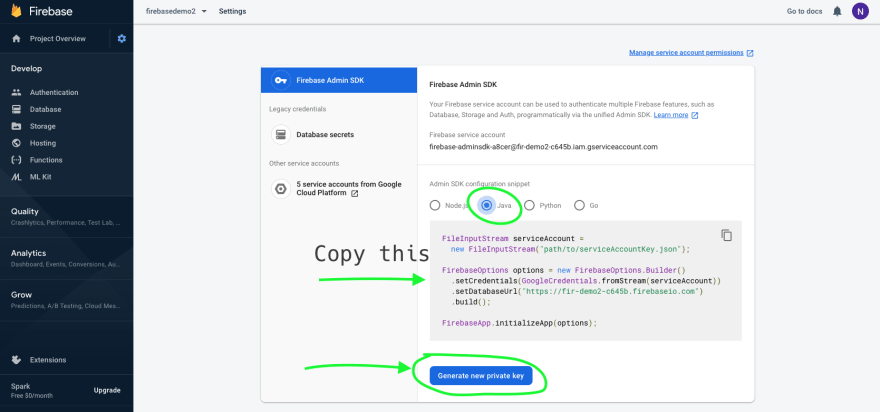
Once created the collection, we will go to project settings -> service Accounts tab to generate the key and save it in your project, that we will use to connect to the firebase firestore database. We will also grab the admin SDK configuration snippet for java.
Now open the pom.xml and add the google firebase admin SDK dependency
<dependency>
    <groupId>com.google.firebase</groupId>
    <artifactId>firebase-admin</artifactId>
    <version>6.11.0</version>
 </dependency>
Add a file named FirebaseInitialize which we will use to make a connection to firebase during the application startup. The class looks like this.
package com.example.demo.service;

import java.io.FileInputStream;

import javax.annotation.PostConstruct;

import org.springframework.stereotype.Service;
import com.google.auth.oauth2.GoogleCredentials;

import com.google.firebase.FirebaseApp;
import com.google.firebase.FirebaseOptions;

@Service
public class FirebaseInitialize {

    @PostConstruct
    public void initialize() {
        try {
        FileInputStream serviceAccount =
                  new FileInputStream("./serviceAccount.json");

                FirebaseOptions options = new FirebaseOptions.Builder()
                  .setCredentials(GoogleCredentials.fromStream(serviceAccount))
                  .setDatabaseUrl("https://fir-demo-8920f.firebaseio.com")
                  .build();

                FirebaseApp.initializeApp(options);
    } catch (Exception e) {
        e.printStackTrace();
    }

}
}
@Service Annotation lets the spring bootup know that it is a service class and needs to be bound.
@PostConstruct Annotation specifies that the function initialize() should run before the launch of the application, so it creates a firebase connection.
We have the code that we copied from the firebase console in the earlier step pasted here.
The first line reads the serviceAccount.json which we generated on the firebase project settings page from step 1.
It connects to firebase with FirebaseApp.initializeApp using the options build using FirebaseOptionsBuilder which will have credentials that we extracted from serviceAccount.json and the databaseURL.
We will now write a Firebase Service class which will have four functions to do crud operations, createUser (to create new User), updateUser (to update existing User), getUserDetails(to retrieve user details), deleteUser (to delete existing User) the class looks like below.
package com.example.demo.service;

import java.util.concurrent.ExecutionException;

import org.springframework.stereotype.Service;

import com.example.demo.objects.Person;
import com.google.api.core.ApiFuture;
import com.google.cloud.firestore.DocumentReference;
import com.google.cloud.firestore.DocumentSnapshot;
import com.google.cloud.firestore.Firestore;
import com.google.cloud.firestore.WriteResult;
import com.google.firebase.cloud.FirestoreClient;

@Service
public class FirebaseService {

    public String saveUserDetails(Person person) throws InterruptedException, ExecutionException {
        Firestore dbFirestore = FirestoreClient.getFirestore();
        ApiFuture<WriteResult> collectionsApiFuture = dbFirestore.collection("users").document(person.getName()).set(person);
        return collectionsApiFuture.get().getUpdateTime().toString();
    }

    public Person getUserDetails(String name) throws InterruptedException, ExecutionException {
        Firestore dbFirestore = FirestoreClient.getFirestore();
        DocumentReference documentReference = dbFirestore.collection("users").document(name);
        ApiFuture<DocumentSnapshot> future = documentReference.get();

        DocumentSnapshot document = future.get();

        Person person = null;

        if(document.exists()) {
            person = document.toObject(Person.class);
            return person;
        }else {
            return null;
        }
    }

    public String updateUserDetails(Person person) throws InterruptedException, ExecutionException {
        Firestore dbFirestore = FirestoreClient.getFirestore();
        ApiFuture<WriteResult> collectionsApiFuture = dbFirestore.collection("users").document(person.getName()).set(person);
        return collectionsApiFuture.get().getUpdateTime().toString();
    }

    public String deleteUser(String name) {
        Firestore dbFirestore = FirestoreClient.getFirestore();
        ApiFuture<WriteResult> writeResult = dbFirestore.collection("users").document(name).delete();
        return "Document with ID "+name+" has been deleted";
    }
}
We will have this class also defined with @Service annotation so it will be available for auto wiring.
Since having the connection to the database initialized earlier we will extract the DB here to perform operations on that.
Firestore dbFirestore = FirestoreClient.getFirestore();
this will instantiate the firestore client object which we will use to access the collections we created.
ApiFuture collectionsApiFuture = dbFirestore.collection("users").document(person.getName()).set(person)
this line of syntax gets the collection "users" and tries to document with id (In our case I'm setting the id as the user's name) if it didn't find the document with specified id it will create the new document with Person object.
If there is an id already exists it will update the document, if you observer the function updateUser it will have the same logic as createUser.
For deleteUser the syntax would be
dbFirestore.collection("users").document(person.getName())
If you have a problem following the tutorial, here is the video which demonstrates the complete tutorial.

Top comments (0)