
AWS Lambda?
AWS Lambda is one of the numerous services offered by Amazon Web Services(AWS), an on-demand cloud computing platform. AWS Lambda lets you upload your code and it takes care of everything required to run and scale your code with high availability without you having to provision or manage servers and you only pay for the compute time you consume.
Github Actions?
GitHub Actions makes it easy to automate your workflows like build, test, and deploy when using Github, a platform that provides hosting for software development version control using Git.
In this post, we will go through:
- How to create a Lambda function on the AWS Console
- How to write a typescript app and compile it to
es2017for the Lambda function. - How to configure our Github actions to automatically deploy changes to the Lambda function.
Before we get started, you need to have:
- A Github account.
- An AWS Account
This exercise can be accommodated within the
AWS Free Tier
Setup Lambda Function on AWS Console
After logging into your AWS Account,
- Click on
Lambdain theComputesection or you can search for it in the search bar.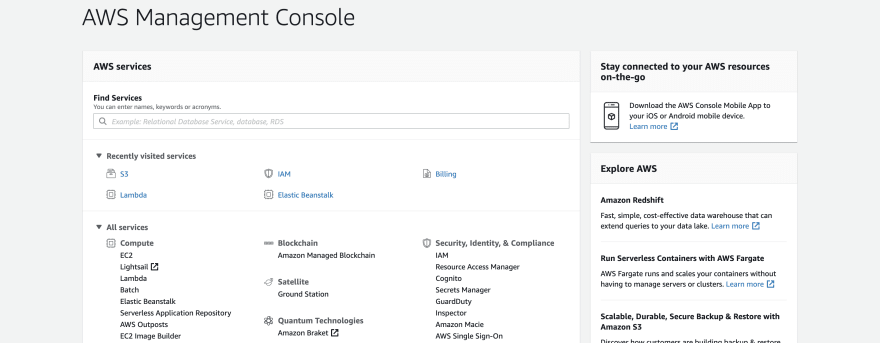
- On the
AWS Lambdapage, click onCreate Functionbutton - Add a name to the lambda function, set
RuntimetoNode 12.x, and click onCreate Function.N/B: You won't have to make any other changes, we will be using the defaults. AWS Lambda supports other runtimes like Java, Ruby, Go, .Net.
After the function has been successfully created, you will be redirected to a new page.

You can write your lambda function directly on the Function Code IDE section. However, we want to:
- Write the code on our local machine
- Push it to a Github branch
- Let Github Actions update AWS Lambda function with the new changes.
Setup a Typescript App Repository
In the following commands, we will:
- Create a new directory
aws-chat-randy, - Initialize
gitandnpm - Install
typescriptdependency. - Initialize
typescript
$ mkdir aws-chat-randy
$ cd aws-chat-randy
$ git init
$ npm init -y # generate a package.json file
$ npm install typescript
$ tsc --init  # generate a tsconfig.json file
Make an src directory and add an index.ts file with the following code:
export const handler = async (): Promise<any> => {
  const response = {
    statusCode: 200,
    body: JSON.stringify('Hello from aws-chat-randy AWS Lambda Function!'),
  };
  return response;
};
This code will always send a JSON response containing the Hello from aws-chat-randy AWS Lambda Function!. Because Node cannot run a Typescript code, we will have to compile the code to JavaScript.
Open the tsconfig.json file that was generated when you ran tsc --init and overwrite the default config with the snippet below. This config sets the target ECMAScript version we want to compile to and sets the output directory among other things.
{
  "compilerOptions": {
    "module": "commonjs",
    "outDir": "./dist",
    "target": "es2017",
    "strict": true,
    "baseUrl": "./src",
    "esModuleInterop": true,
    "inlineSourceMap": true,
    "forceConsistentCasingInFileNames": true
  }
}
In the package.json file, add a build script that will run tsc which will compile our TS code to JS using the config above.
...
"scripts": {
    "build": "tsc"
  },
Create a Github Repository
- Log in to your Github account, then create a Github repository.
- Add the remote URL of the new Github repository to your local repository and push your code to the
masterbranch.
$ git remote add origin https://github.com/<github-username>/<repo-name>.git
$ git push -u origin master
Setup Github Actions
- On the Github repository for your application, click on the
Actionstab to open the Github actions page.

There are sample workflows that already have every day-to-day action that is performed by developers. But for this post, we will be writing our workflow.
- Click on
Set up this workflowbutton.

- Clicking on
Set up this workflowwill open a web editor with some boilerplate code. We'll get rid of that an add our workflow code.
First, let's give a name to the workflow file

Copy and paste the code snippet into the Github editor in the browser.
name: lambda-depl

on:
  push:
    branches:
      - master

jobs:
  deploy_source:
    name: build and deploy lambda
    strategy:
      matrix:
        node-version: [12.x]
    runs-on: ubuntu-latest
    steps:
      - uses: actions/checkout@v2
      - name: Use Node.js ${{ matrix.node-version }}
        uses: actions/setup-node@v1.4.2
        with:
          node-version: ${{ matrix.node-version }}
      - name: Install dependencies, Build application and Zip dist folder contents
        run: npm install && npm run build && zip -qq -r -j ./bundle.zip ./dist/*
      - name: deploy zip to aws lambda
        uses: appleboy/lambda-action@master
        with:
          aws_access_key_id: ${{ secrets.AWS_ACCESS_KEY_ID }}
          aws_secret_access_key: ${{ secrets.AWS_SECRET_ACCESS_KEY }}
          aws_region: ${{ secrets.AWS_REGION }}
          function_name: aws-chat-randy
          zip_file: bundle.zip
Mehhnnn! So many lines!!🥶
Now, let's breakdown the code snippet above.
name: We define the name of this action. This will be used to identify the action amid may others you may have.on: We define trigger withon:pushalso the branch. This workflow will run anytime youpushcode to themasterbranch.-
job: We define only one job calledbuild and deploy lambda. It uses node version 12.x and it runs on the latest version of Ubuntu.-
steps: A job contains a sequence of tasks called steps. Steps can run commands, run setup tasks, or run action in your repository. Each step starts either with auses:or aname:. - actions/checkout@v2: This action checks-out your repository, so your workflow can access it.
- Use Node.js...: This step block installs node on fresh Ubuntu instance created earlier.
-
Install dependencies, build application and Zip dist folder contents: This step block installs the node packages in the
package.jsonfile, runs thebuild scriptwhich creates adistfolder in the root directory of our app, thenzipthe content of thedistfolder tobundle.zip. -
deploy zip to aws lambda: This deploys the newly created bundle.zip to the Lambda named
aws-chat-randy(you have to use the name of your lambda function created earlier).
-
Get AWS Authorization
To complete our workflow, we need to provide the AWS_ACCESS_KEY_ID and AWS_SECRET_ACCESS_KEY.
On the AWS Console:
- Click on
IAMunder theSecurity, Identity, & Compliancesection. - Click on
Usersand select your preferred user. - Under
Security Credentials, click onCreate Access Key. This will create anAWS_ACCESS_KEY_IDandAWS_SECRET_ACCESS_KEY, copy these values. You can make all so manage key access by either deleting or make inactive.
Even with a confidante, you do not what to share your access keys. Your confidante might have a confidante. Who knows! 🤷🏻♂️.
So that's why we will be passing some very important values as Secrets then later access them in the workflow file using the expression syntax. ${{ <expression> }}
Back to Github
Click on the Settings tab, Select Secret on the left menu, then click on New Secret to add a secret providing the Name and Value.
| Name | Value |
|---|---|
| AWS_ACCESS_KEY_ID | your-aws-access-key-id |
| AWS_SECRET_ACCESS_KEY | your-aws-secret-access-key |
| AWS_REGION | your-aws-lambda-region |

Make a change to your in your local repository, commit and push to Github.

Our changes have been compiled to JavaScript and successfully deployed to our AWS Lambda function. You can check your lambda function to see the update.

Awesome work getting here. You can go on to work with Github Actions by triggering an action on Pull Request that might run some CI tests and perform several steps.
Thank you. 🎊

Oldest comments (3)
How can we use one github repository to have multiple lambda functions?
You can duplicate this job, but scoping another branch.
If anyone is struggling with adding
node_modulesto the zip, here's my command:run: npm install && npm run build && cp -r ./node_modules dist && cd dist && zip -qq -r ./bundle.zip . && mv bundle.zip ..