Wouldn’t be great to get some insights on the behavior of your App users. This will allow you implement data driven features to drive customer adoption, engagement, and retention.
This is where AWS Amplify can help, in this post I will show you how you can integrate your Android App with AWS Amplify to achieve this. Let’s get started.
- Create a new Android Studio project using the Empty Activity template
- We are going to use MyAuthApplication for the name field
- Update build.gradle (Project: MyAuthApplication) as below
// Top-level build file where you can add configuration options common to all sub-projects/modules.
buildscript {
    repositories {
        google()
        jcenter()
        // ******* Add this line *******
        mavenCentral()
    }
    dependencies {
        classpath "com.android.tools.build:gradle:4.0.1"

        // NOTE: Do not place your application dependencies here; they belong
        // in the individual module build.gradle files
    }
}

allprojects {
    repositories {
        google()
        jcenter()

        // ******* Add this line *******
        mavenCentral()

    }
}

task clean(type: Delete) {
    delete rootProject.buildDir
}
- Update build.gradle (Module:app) as below
apply plugin: 'com.android.application'

android {
    compileSdkVersion 29

    defaultConfig {
        applicationId "com.offlineprogrammer.myauthapplication"
        minSdkVersion 23
        targetSdkVersion 29
        versionCode 1
        versionName "1.0"

        testInstrumentationRunner "androidx.test.runner.AndroidJUnitRunner"
    }

    buildTypes {
        release {
            minifyEnabled false
            proguardFiles getDefaultProguardFile('proguard-android-optimize.txt'), 'proguard-rules.pro'
        }
    }

    // ******* Add these lines *******
    compileOptions {
        sourceCompatibility JavaVersion.VERSION_1_8
        targetCompatibility JavaVersion.VERSION_1_8
    }
}

dependencies {
    implementation fileTree(dir: "libs", include: ["*.jar"])
    implementation 'androidx.appcompat:appcompat:1.1.0'
    implementation 'androidx.constraintlayout:constraintlayout:1.1.3'
    testImplementation 'junit:junit:4.12'
    androidTestImplementation 'androidx.test.ext:junit:1.1.1'
    androidTestImplementation 'androidx.test.espresso:espresso-core:3.2.0'

    // ******* Add these lines *******
    implementation 'com.amplifyframework:core:1.1.1'
    implementation 'com.amplifyframework:aws-auth-cognito:1.1.1'

}
- Make sure to run Gradle Sync
- Run the command below on Android Studio Terminal
amplify init
- You will prompted for few details as below
? Enter a name for the project MyAnalyticsApplicati
? Enter a name for the environment amplify
? Choose your default editor: None
? Choose the type of app that you're building android
Please tell us about your project
? Where is your Res directory:  app/src/main/res
Using default provider  awscloudformation

For more information on AWS Profiles, see:
<https://docs.aws.amazon.com/cli/latest/userguide/cli-multiple-profiles.html>

? Do you want to use an AWS profile? Yes
? Please choose the profile you want to use default
Adding backend environment amplify to AWS Amplify Console app: d36t9ma8gt1tb8
- Once complete you will get the confirmation below
Your project has been successfully initialized and connected to the cloud!
- Create a new class and name it MyAnalyticsApplication
- We will use this class to initialize Amplify as below - note how the class extends from Application
public class MyAnalyticsApplication extends Application {
    private static final String TAG = "MyAnalyticsApplication";

    @Override
    public void onCreate() {
        super.onCreate();
        try {
            Amplify.addPlugin(new AWSCognitoAuthPlugin());
            Amplify.addPlugin(new AWSPinpointAnalyticsPlugin(this));
            Amplify.configure(getApplicationContext());
            Log.i(TAG, "Initialized Amplify");
        } catch (AmplifyException error) {
            Log.e(TAG, "Could not initialize Amplify", error);
        }
    }
}
- Update AndroidManifest.xml to add a
android:nameattribute with the value of.MyAnalyticsApplicationas below
<?xml version="1.0" encoding="utf-8"?>
<manifest xmlns:android="http://schemas.android.com/apk/res/android"
    package="com.offlineprogrammer.loginwithamazon">

    <application
        android:name=".MyAnalyticsApplication"
                ....
- Run the command below to configure the analytics Category
amplify add analytics
- Set the details below when prompted
? Select an Analytics provider Amazon Pinpoint
? Provide your pinpoint resource name: myanalyticsapplicati
Adding analytics would add the Auth category to the project if not already added.
? Apps need authorization to send analytics events. Do you want to allow guests and unauthenticated users to send analytics events? (we recommend you allow this when getting started) Yes
Successfully added auth resource locally.
Successfully added resource myanalyticsapplicati locally
- Publish those changes by running the command below
amplify push
- Once complete it will display your Pinpoint Url as below
✔ All resources are updated in the cloud

Pinpoint URL to track events <https://us-east-1.console.aws.amazon.com/pinpoint/>.....
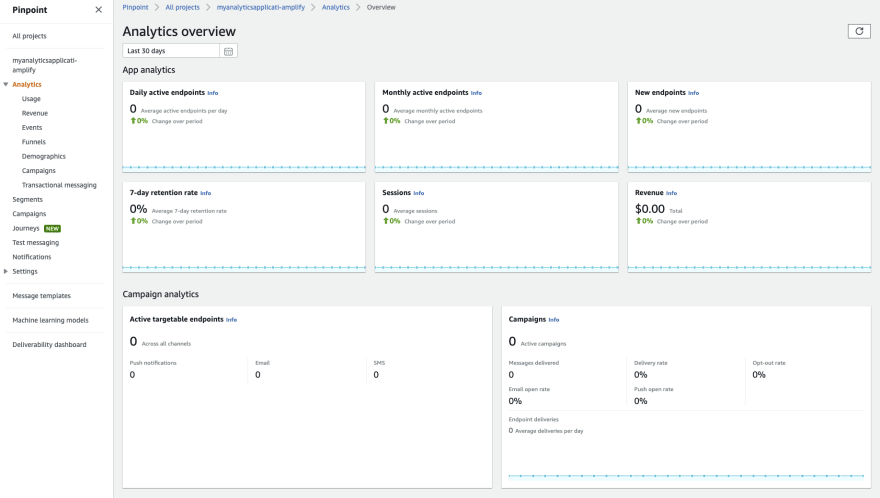
- The Pinpoint console will look like this
- Update the activity_main.xml to add a button & textview as below
- Update the MainActivity.java to capture the click event the user click on the button. below is the final code of MainActivity.java
public class MainActivity extends AppCompatActivity {
    private static final String TAG = "MainActivity";
    Button clickMeButton;
    TextView helloTextView;

    @Override
    protected void onCreate(Bundle savedInstanceState) {
        super.onCreate(savedInstanceState);
        setContentView(R.layout.activity_main);

        clickMeButton = findViewById(R.id.clickMeButton);
        helloTextView = findViewById(R.id.helloTextView);

        clickMeButton.setOnClickListener(new View.OnClickListener() {
            @Override
            public void onClick(View view) {
                AnalyticsEvent event = AnalyticsEvent.builder()
                        .name("clickMeButton")
                        .addProperty("timeClicked", Calendar.getInstance().getTime().toString())
                        .build();
                Amplify.Analytics.recordEvent(event);
                helloTextView.setText("Button Clicked");
            }
        });

    }
}
- Run the App and click the button multiple times
- Run the command below to open the Pinpoint console
amplify console analytics
- On the console go the events and you will find the clickMeButton event as below
Check the full code on github and follow me on Twitter for more tips about #coding, #learning, #technology, #Java, #JavaScript, #Autism, #Parenting...etc.
Check my Apps on Google Play


Oldest comments (0)