
Automating daily tasks with Python is easy. With a combination of APIs and easy-to-understand libraries, you can easily set up systems that scrape websites, send emails, and manage data and analytics.
One very common task you'll need to automate in the corporate world is the ability to scrape public government data. This usually comes from sites like data.gov and other end points to get information on healthcare, trade, transportation, legal, and so much more.
There are actually a lot of government agency sites that are somewhat hidden that are still producing a lot of valuable data that billion dollar companies rely on to make million-dollar decisions.
In this article, we'll outline how you can write a Python script that can download a specific set of government data and then upload that to an email and send it to whomever you want.
This will get you comfortable with using the Python Requests library as well as using the Gmail API. So if you're looking to automate future emails with Python, this is a great place to start.
Downloading the File With Python
For step one, we will need to actually download the data file using an HTTP request.
What's great about Python is much of the complexity of writing code like HTTP requests has been removed. Instead, you can import the Requests library and use it to post and get requests.
In this case, the file we'll be downloading even has an easy end point at the link below. So you won't need to use a library like Selenium to try to click a download button.
Even if there's a download button, you should consider checking if it has an URL attached. Typically, if there's an URL, then it's really easy to download using a link versus creating a web crawler that looks for a button to click.
https://data.medicaid.gov/api/views/u72p-j37s/rows.json?accessType=DOWNLOAD
This file provides information about Medicaid and individual enrollees. This can be valuable to healthcare providers that can tie it to their internal data to help better understand their market.
In order to download it, we'll use the function requests.get(). This will let us pull data using an HTTP request to the URL we specify.
For example, you can look at the script below:
# Part 1: Fetch the data.

# Get the webpage, store it in a Response object and assign the text
# About: https://requests.readthedocs.io/en/master/api/#requests.Response

# This URL contains the .csv download of
# 'https://catalog.data.gov/dataset/' \
#   'share-of-medicaid-enrollees-in-managed-care'
# used to send to the destination e-mail.
csvFileURL = 'https://data.medicaid.gov/api/' \
    'views/u72p-j37s/rows.csv?accessType=DOWNLOAD'
csvFileRequest = requests.get(csvFileURL)
csvFile = csvFileRequest.content
It's short and sweet and will return the CSV as part of the request you've now set as the variable. We'll use this later when we build the email. But next, we need to set up the credentials for the Gmail API.
Setting Up Your Gmail API
Google has made it really easy for you to set up APIs. You can go to the Google API console. From there, you can select ENABLE APIS AND SERVICES and then search for the Gmail API.
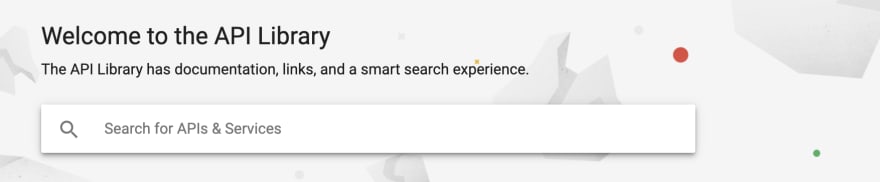
The API console looks like the image below.

After clicking that button, you're provided with a search engine that allows you to search various APIs. It'll look like the image below.
You can type in Gmail, and it should be the only one that shows up.
Then you can select the Gmail API, and it'll have an ENABLE button by it.
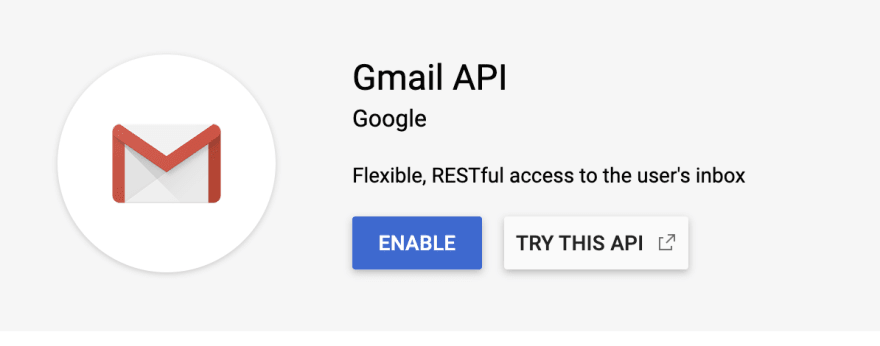
Once you click ENABLE on the Gmail API, you can download your credentials or use an API key and secret.
Our code will use the JSON download but then convert it into a pickle if that's what your prefer.

With that all set up, we can now start building your functions to set up and then send your email automatically.
Sending Emails With The Gmail API
Now that we've found a way to pull this data, we need to figure out how to actually send an email.
In order to do this, we'll use the email library. This library will let us set up the various parts of en email: the sender, the recepient, the subject, etc.
We do this using the [MIMEBase](https://docs.python.org/2/library/email.mime.html) class in email, which makes it easy to set up the correct data points and provides an easy class for the Gmail API to use in the future to parse.
It's really simple to use the MIMEBase class, as you can initiate a new class and then reference many of the needed components like:
# Function required for Part 2: Send e-mail with Google API.
# a) Create the message
def create_message(sender, to, subject, csv):
    #message = MIMEMultipart()
    message = MIMEMultipart()
    message['from'] = sender
    message['to'] = to
    message['subject'] = subject

    # Send the time it was updated as the body of the e-mail
    dt_object = datetime.utcnow() - timedelta(hours = 7)
    msg = MIMEText('Hi! Your file was updated.' \
        '\nTime of update: ' + dt_object.strftime('%m/%d/%Y, %I:%M:%S %p') \
        + ' (Los Angeles Time)')

    message.attach(msg)

    # Attach the .csv file
    record = MIMEBase('application', 'octet-stream')
    # print(csv)
    record.set_payload(csv)
    encoders.encode_base64(record)
    record.add_header('Content-Disposition', 'attachment', filename='medicare.csv')
    message.attach(record)

    # Return the message
    raw = base64.urlsafe_b64encode(message.as_bytes())
    raw = raw.decode()
    return {'raw': raw}
message['from'] = test@gmail.com
You can see the entire function where we set these parameters below.
You'll notice at the end, we use the function urlsafe_b64encode. This will set the message to bytes. This will be used to easily transfer the email data to the Gmail API. So it'll be easy to pass along.
Now it's finally time to send your first automated email.
Sending Your First Automated Email With Python
Now that you've set up your Gmail API credentials, we can send our first email.
We'll use the service variable we've set up with the Gmail API and credentials.
This is shown below in the function send_message.
# b) Send the message
def send_message(service, user_id, message):
    try:
        message = service.users().messages(). \
        send(userId=user_id, body=message).execute()
        print('Message Id: %s' % message['id'])
        return message
    except Exception as e:
        print('An error occurred: %s' % e)
        return None
From here, all we need to do is pass in the message and execute.
With that, we've sent our first email.
The whole script looks like the code below.
# 1. Pull data from a URL whenever there is a new data set.
# 2. Send an e-mail using Google API

# Pre-requisites:
# 1) Create a project at the Google API console at the top-left of GDC
# 2) Enable Gmail API by clicking 'Library' on the left sidebar
# 3) Create OAuth client ID credentials at the top sidebar
# 4) Quickstart guide for Python in URL (see below)
# 5) pip install --upgrade google-api-python-client \
# google-auth-httplib2 google-auth-oauthlib
# 6) Access to Gmail
# 7) Create the e-mail

# Download a text file with the last updated date, or even data!
# If different, send an e-mail.

# Google API required modules
from __future__ import print_function
import pickle
import os.path
from googleapiclient.discovery import build
from google_auth_oauthlib.flow import InstalledAppFlow
from google.auth.transport.requests import Request

# Ability to download the page
# Also, the ability to read files without downloading them
# allowing us to check for real-time updates.
import requests

# Ability to run a loop using the time module
import time

# Ability to convert a time value to a datetime object
from datetime import datetime, timedelta
import math

# Ability to create the e-mail
from email import encoders
from email.mime.base import MIMEBase
from email.mime.multipart import MIMEMultipart
from email.mime.text import MIMEText
import base64
import os

# If modifying these scopes, delete the file token.pickle.
# You need this scope in particular for full access to Google Mail API.
SCOPES = 'https://mail.google.com/'

# Function required for Part 2: Send e-mail with Google API.
# a) Create the message
def create_message(sender, to, subject, csv):
    #message = MIMEMultipart()
    message = MIMEMultipart()
    message['from'] = sender
    message['to'] = to
    message['subject'] = subject

    # Send the time it was updated as the body of the e-mail
    dt_object = datetime.utcnow() - timedelta(hours = 7)
    msg = MIMEText('Hi! Your file was updated.' \
        '\nTime of update: ' + dt_object.strftime('%m/%d/%Y, %I:%M:%S %p') \
        + ' (Los Angeles Time)')

    message.attach(msg)

    # Attach the .csv file
    record = MIMEBase('application', 'octet-stream')
    # print(csv)
    record.set_payload(csv)
    encoders.encode_base64(record)
    record.add_header('Content-Disposition', 'attachment', filename='medicare.csv')
    message.attach(record)

    # Return the message
    raw = base64.urlsafe_b64encode(message.as_bytes())
    raw = raw.decode()
    return {'raw': raw}

# b) Send the message
def send_message(service, user_id, message):
    try:
        message = service.users().messages(). \
        send(userId=user_id, body=message).execute()
        print('Message Id: %s' % message['id'])
        return message
    except Exception as e:
        print('An error occurred: %s' % e)
        return None


# Part 1: Fetch the data.

# Get the webpage, store it in a Response object and assign the text
# About: https://requests.readthedocs.io/en/master/api/#requests.Response

# This URL contains the .csv download of
# 'https://catalog.data.gov/dataset/' \
#   'share-of-medicaid-enrollees-in-managed-care'
# used to send to the destination e-mail.
csvFileURL = 'https://data.medicaid.gov/api/' \
    'views/u72p-j37s/rows.csv?accessType=DOWNLOAD'
csvFileRequest = requests.get(csvFileURL)
csvFile = csvFileRequest.content

# COMMENTED OUT: The below is necessary if file is not .csv.
# Now we add the important SEP metadata command.
# This tells Excel to use a delimiter.
#decoded = csvFile.decode('utf-8')
#decoded = 'SEP=,\n' + decoded
#csvFile = decoded.encode('utf-8')

# This URL contains the .json download of
# 'https://catalog.data.gov/dataset/' \
#   'share-of-medicaid-enrollees-in-managed-care'
# used to compare files.
jsonOfFile = 'https://data.medicaid.gov/api/views/u72p-j37s/' \
    'rows.json?accessType=DOWNLOAD'

r = requests.get(jsonOfFile)
firstJSON = r.text

# Part 2: Use the Google API to send an e-mail with the updated metadata

# Find out whether the file was changed or not.
# Originally it checked for the last updated date,
# but it then occurred to me that there could be
# multiple changes made in one day.
# Old code: print(BeautifulSoup(URL, 'html.parser). \
# find_all('td')[0].get_text())
# returns the last updated date based on the current site's layout.

# Now, the new code compares the .json version of the files every minute.

# This will run the code every 60 seconds (except for the first iteration)
# instead of time.sleep(60) which only runs the loop every 60 seconds.
# In the latter case, the code may take some time "x" to finish executing
# so your total time would have been 60 + x seconds (bad).

r = requests.get(jsonOfFile)
secondJSON = r.text

# If the site was updated or the script just began, send the message.
if firstJSON != secondJSON:

    # Create the message
    sender = 'test1@gmail.com'
    to = 'test2@gmail.com'
    subject = 'The Medicare metadata has been updated'
    message = create_message(sender, to, subject, csvFile)

    # Send the message using the Google API
    creds = None
    # The file token.pickle stores the user's access and refresh tokens, and is
    # created automatically when the authorization flow completes for the first
    # time.
    if os.path.exists('token.pickle'):
        with open('token.pickle', 'rb') as token:
            creds = pickle.load(token)
    # If there are no (valid) credentials available, let the user log in.
    if not creds or not creds.valid:
        if creds and creds.expired and creds.refresh_token:
            creds.refresh(Request())
        else:
            flow = InstalledAppFlow.from_client_secrets_file(
                'credentials.json', SCOPES)
            creds = flow.run_local_server(port=0)
        # Save the credentials for the next run
        with open('token.pickle', 'wb') as token:
            pickle.dump(creds, token)

    service = build('gmail', 'v1', credentials=creds)
    send_message(service, sender, message)

    # Update the variable
    firstJSON = secondJSON

    print('Message sent')
Time to Start Automating
We hope this script helps you automate future emails with Python as well as look for other tasks you can automate.
In the examples above, we're manually scheduling this script. However, in the future, if you wanted to automate this more effectively, you could use a framework like Airflow. Then instead of manually running the script, you could instead run this script on a daily basis.
We don't recommend trying to build your automation framework, especially when there are so many great options out there. That's why we really just show the script.
With that, good luck and happy automating!
If you would like to read more about data science or cloud computing, then please click below.
Data Engineering 101: Writing Your First Pipeline
Data Engineering 101: An Introduction To Data Engineering
What Are The Different Kinds Of Cloud Computing
4 Simple Python Ideas To Automate Your Workflow
4 Must Have Skills For Data Scientists
SQL Best Practices --- Designing An ETL Video

Latest comments (2)
This post is awesome, I'm going to try this way to automate some emails! Thanks.
This is very informative. I've done something similar to test email layouts for email blasts.