When updating the DOM with new information, you really get two options:
1) Have all the HTMl already sitting in your file, which you then can select and edit, or
2) Build from scratch and append it to the DOM.
In my latest application, I utilized both methods, sometimes at the same time. I'm not the ultimate knowledgeable source on the best method, but for getting started I have pulled together a few basic pros and cons.
Hiding in plain HTML view
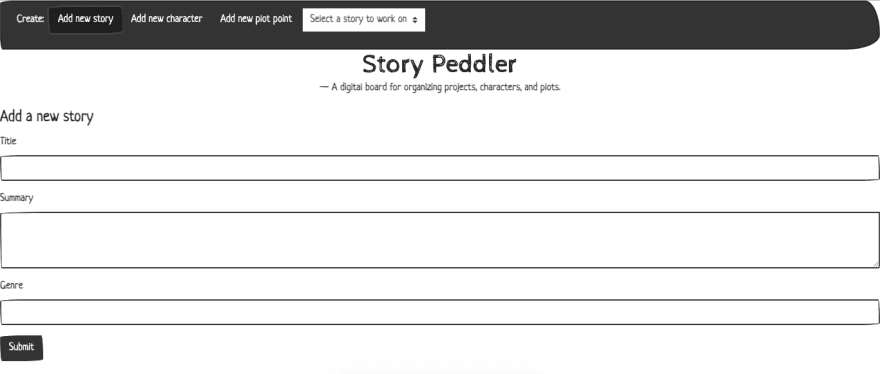
One of the first things I created when I starting building were the forms I wanted to add new objects to the database. If you aren't sure what the HTML should look like, the easiest thing to do is just write it out directly in plain HTML. I also knew I didn't want the forms cluttering up the page all the time, so I added a 'hidden' attribute. This wasn't intended to be a feature of the application at all; I wrote the forms directly into the index file because it was easier than trying to JS code them in and then hide them because I wasn't ready to deal with them further.
But then I realized I kind of liked it like that. For some things, this might be a security issue, but any of these forms is unhidden with a simple click of a button, and there are validations for any data sent through. For these forms it seemed a safe enough bet to just have them there, hiding until the user wanted to create a new object.

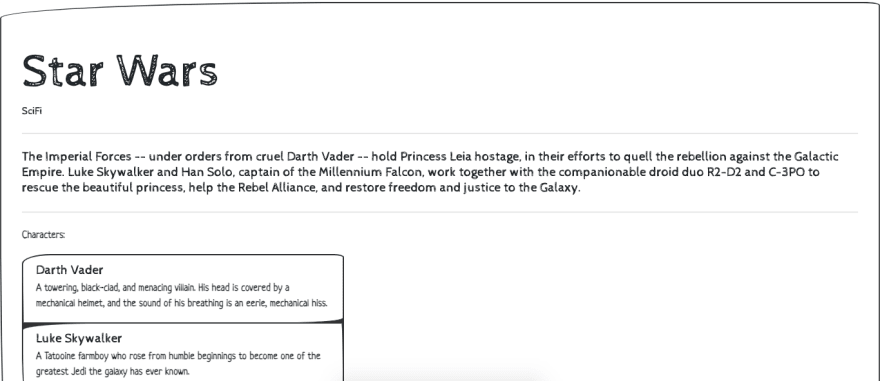
The application at the start
The hidden attribute is removed with the click of a button
I followed the same system as I started to build out other parts of the application. Writing it in plain HTML, and then hiding it if I wasn't ready to work on it more or if I only wanted it to appear at certain times. It worked great for my forms, which remain static and never need to be changed. And it was so much easier than spending time finding every element and making sure it was appended to the correct parent, in the correct order.
The Jumbotron
For displaying all of the information for a specified object, I coded in a jumbotron in the middle of the page. I started off with almost all of the HTML hardcoded, with the idea that I would just select the elements I wanted to manipulate and edit them according to whichever object the user wanted to view. This is very possible but I ran into problems when switching to viewing one object to another.
If my objects were more identical in their structure, I probably could have kept on this way. But my structure allows for a user to have some, many, or no attributes for their object. One fix would be a series of 'ifs'. 'If this data is present, replace the element value, otherwise clear the element value.' But you know what's easier?
document.querySelect().innerHTML = ""
That little line of code became my new best friend. I started moving elements out of my index.html and creating them in my code instead.
Almost immediately I'd make a complete mess of the page. Finding the right parent, appending it in the correct order... I did not do these things correctly at first. But that's fine! It's all trial and error, right? But there is something that can make it smoother...
So it turns out 'div' elements actually are helpful!
Who would have thought! I built a nice little skeleton of HTML using div elements, and then it became a lot easier to put all the information in the correct place by just grabbing that div element and appending a new child element to it.
<div class="jumbotron" hidden="">
      <div class="storyInfo">
    </div>
      <p>Characters:</p>
      <ul class="list-group" id="storyCharacters">
      </ul>
      <hr class="my-4">
      <p class="lead">
        <div class="list-group">
          <ol id="plot-points">
            <li class="list-group-item list-group-item-action active">Plot Points:</li>
          </ol>
        </div>
      </p>
      <div class="buttons"></div>
    </div>
In this particular example, it doesn't look quite as barebones, because of the CSS tags I'm using (thanks bootswatch!) but trust me, this is a great middle man. As you can see, I'm still utilizing the 'hidden' attribute to hide the entire 'jumbotron' div element until I'm ready for it, and I've also got just a couple of specifics hardcoded in, that stays the same for any object that gets displayed.
You can't hard code for x
There were of course places where my hardcoded HTML is basically nonexistent. Some of my divs have nothing at all between them, but having the div there as a placeholder makes it way easier to append the element in the exact right spot.
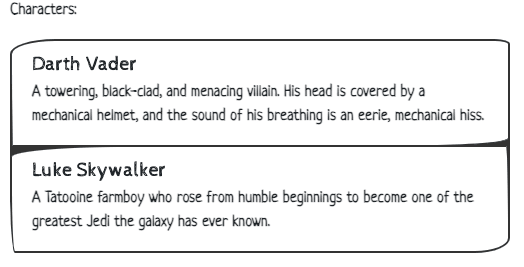
Like for my character list here:
<ul class="list-group" id="storyCharacters"></ul>
There is no way of knowing how many items are going to be appended to the list. So even though each character object is getting 4 different elements created for it, in this instance it is better practice to create and append those in JS. Otherwise, you are hard coding in the list elements, then grabbing them to edit their values. If each user was only allowed to have 3 characters, I could make that work. But what kind of user experience is that?
let characterList = document.querySelector('#storyCharacters')
        characterList.reset

        let newLi = document.createElement('li')
        newLi.className = "list-group-item flex-column align-items-start"
        newLi.id = `${this.name}-${this.story_id}`

        let newDiv = document.createElement('div')
        newDiv.className = "d-flex w-100 justify-content-between"

        let charName = document.createElement('h5')
        charName.className = "mb-1"
        charName.id = `${this.id}-editName`
        charName.innerText = this.name

        let charDes = document.createElement('p')
        charDes.className = "mb-1"
        charDes.id = `${this.id}-editDes`
        charDes.innerText = this.description

        characterList.append(newLi)
        newLi.append(newDiv)
        newDiv.append(charName)
        newLi.append(charDes)
In addition to the li element, each character is getting its own div element, making it easier to ensure that the character name and description are appended correctly.
And now I've seen the #D3D3D3
Previously when coding HTML I didn't have patience for putting id tags on elements, or wrapping elements in divs. I really only would add on an id for styling purposes, and usually only after the fact. A couple of things helped me get into better practice with this application:
1) starting out with a good CSS file (thanks bootswatch!) meant that as I was adding elements to the dom, I already knew what I wanted them to look like and added the appropriate tags early on.
2) Coding with the next step in mind. If you know you're going to need to access the value of an input field, it's a good idea to go ahead and give it an id that makes sense (no 'input-tag-002' in this project). Of course, you can always use inspect to find that element you've misplaced, but I had a lot easier time using the same naming conventions throughout the project.
And honestly, these are two of the biggest takeaways I have from this application. Obvious? Possible. But once in a while, even a master needs a reminder that the simplest best practices make a world of difference

Top comments (0)