
This article was published on my personal blog
Role-Based Access Control, or RBAC, is the ability to add roles or restrict actions for users. It can be done in a general, high-level way, for example, to disallow some users from login into the admin panel. It can also be done more specifically, for example, allowing users to view a post but not edit it.
In this tutorial, you'll learn how to implement RBAC in Laravel using Bouncer. Bouncer is a PHP package that lets you add roles and abilities to your Eloquent models.
You'll build an editor that lets the user create private posts with the ability to allow other users to view and edit their posts. You can find the code for this tutorial in this GitHub repository.
Prerequisites
You need to download Composer to follow along in this tutorial.
In addition, this tutorial uses Laravel 8 with PHP 7.3. To run Laravel 8, you need your PHP version to be at least 7.3.
You can check your PHP version in the terminal:
php -v
NPM is also used in some parts of this tutorial, but it's not important for implementing RBAC. If you want to follow along with everything, make sure you have NPM installed. NPM is installed by installing Node.js.
Project Setup
The first step is to set up the Laravel project. In your terminal, run the following command:
composer create-project laravel/laravel laravel-rbac-tutorial
Once that is done, switch to the directory of the project:
cd laravel-rbac-tutorial
Then, you need to add your database configuration on .env:
DB_CONNECTION=mysql
DB_HOST=127.0.0.1
DB_PORT=3306
DB_DATABASE=laravel
DB_USERNAME=root
DB_PASSWORD=
Now migrate Laravel's default migrations to your database:
php artisan migrate
This will add Laravel's default tables as well as the users table.
Implement Authentication
To implement authentication easily, you can use Laravel UI. Install it with this command:
composer require laravel/ui
Then, run the following command to add the UI for authentication:
php artisan ui bootstrap --auth
This will add the directory app/Http/Controllers/Auth with the controllers needed to implement authentication. It will also add the necessary view files resources/views to add pages like login and register.
Then, compile the CSS and JavaScript assets added by the previous command:
npm install && npm run dev
This command might end in an error. If so, run the dev script again:
npm run dev
Finally, go to app/Providers/RouteServiceProvider.php and change the value for the constant HOME:
public const HOME = '/';
Now, run the server:
php artisan serve
Then, go to localhost:8000. You'll see the login form.

This is added by Laravel UI. Since you don't have a user yet, click on Register in the navigation bar. You'll see then a registration form.
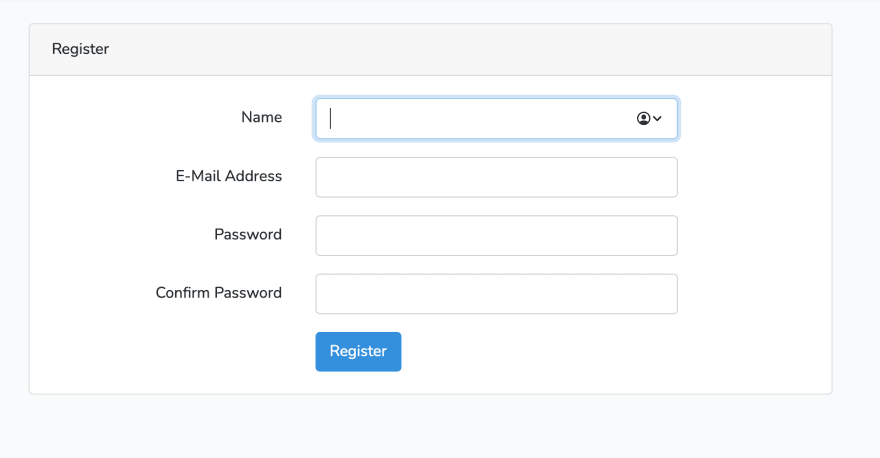
After you register as a user, you'll be logged in.

Add Posts
Now, you'll add posts that the user will be able to create.
Start by creating a migration:
php artisan make:migration create_posts_table
This will create a new migration file in database/migrations with the file name's suffix create_posts_table.
Open the migration file and replace its content with the following:
<?php

use Illuminate\Database\Migrations\Migration;
use Illuminate\Database\Schema\Blueprint;
use Illuminate\Support\Facades\Schema;

class CreatePostsTable extends Migration
{
    /**
     * Run the migrations.
     *
     * @return void
     */
    public function up()
    {
        Schema::create('posts', function (Blueprint $table) {
            $table->id();
            $table->string('title');
            $table->longText('content');
            $table->foreignId('user_id')->constrained()->cascadeOnUpdate()->cascadeOnDelete();
            $table->timestamps();
        });
    }

    /**
     * Reverse the migrations.
     *
     * @return void
     */
    public function down()
    {
        Schema::dropIfExists('posts');
    }
}
Now, migrate the changes to create the posts table:
php artisan migrate
Next, create the file app/Models/Post.php with the following content:
<?php

/**
 * Created by Reliese Model.
 */

namespace App\Models;

use Carbon\Carbon;
use Illuminate\Database\Eloquent\Model;

/**
 * Class Post
 *
 * @property int $id
 * @property string $title
 * @property string $content
 * @property int $user_id
 * @property Carbon|null $created_at
 * @property Carbon|null $updated_at
 *
 * @property User $user
 *
 * @package App\Models
 */
class Post extends Model
{
    protected $table = 'posts';

    protected $casts = [
        'user_id' => 'int'
    ];

    protected $fillable = [
        'title',
        'content',
        'user_id'
    ];

    public function user()
    {
        return $this->belongsTo(User::class);
    }
}
Add Post Form Page
You'll now add the page the user will use to create a new post or edit an old one.
In your terminal, run:
php artisan make:controller PostController
This will create a new controller in app/Http/Controllers/PostController.php. Open it and add a constructor method:
/**
 * Create a new controller instance.
 *
 * @return void
 */
public function __construct()
{
    $this->middleware('auth');
}
This adds the auth middleware to all methods in this controller. This means that the user must be logged in before accessing any of the routes that point at this controller.
Next, add the postForm function that renders the post form view:
public function postForm ($id = null) {
    /** @var User $user */
    $user = Auth::user();

    $post = null;
    if ($id) {
        /** @var Post $post */
        $post = Post::query()->find($id);
        if (!$post || $post->user->id !== $user->id) {
            return response()->redirectTo('/');
        }
    }

    return view('post-form', ['post' => $post]);
}
Notice that this receives an optional id paramter, then retrieves the post based on that ID. It also validates that the post exists and belongs to the current logged-in user. This is because this method will handle the request for both creating a post and editing a post.
Then, create the view resources/views/post-form.blade.php with the following content:
@extends('layouts.app')

@push('head_scripts')
    <link rel="stylesheet" href="https://cdn.jsdelivr.net/npm/trix@1.3.1/dist/trix.css">
@endpush

@section('content')
<div class="container">
    <div class="row justify-content-center">
        <div class="col-md-8">
            <div class="card">
                <div class="card-header">{{ $post ? __('Edit Post') :__('New Post') }}</div>

                <div class="card-body">
                    <form method="POST" action="#">
                        @csrf
                        @error('post')
                            <div class="alert alert-danger">{{ $message }}</div>
                        @enderror
                        <div class="form-group">
                            <label for="title">{{ __('Title') }}</label>
                            <input type="text" name="title" id="title" placeholder="Title" required
                               value="{{ $post ? $post->title : old('title') }}" class="form-control @error('title') is-invalid @enderror" />
                            @error('title')
                                <span class="invalid-feedback">{{ $message }}</span>
                            @enderror
                        </div>
                        <div class="form-group">
                            <label for="content">{{ __('Content') }}</label>
                            @error('content')
                                <span class="invalid-feedback">{{ $message }}</span>
                            @enderror
                            <input id="content" type="hidden" name="content" value="{{ $post ? $post->content : old('content') }}">
                            <trix-editor input="content"></trix-editor>
                        </div>
                        <div class="form-group">
                            <button type="submit" class="btn btn-primary">{{ __('Submit') }}</button>
                        </div>
                    </form>
                </div>
            </div>
        </div>
    </div>
</div>

<script src="https://cdn.jsdelivr.net/npm/trix@1.3.1/dist/trix.js"></script>
@endsection
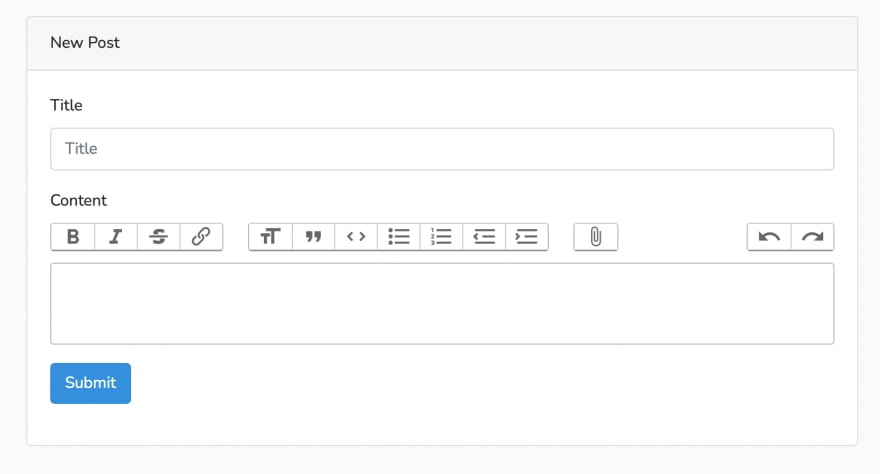
This shows a form with 2 inputs. A title text input, and a text editor for the content. The text editor is Trix, an easy-to-use open-source editor.
You still need to add the link to the page. So, in resources/views/layouts/app.blade.php add the following menu item in the ul under the comment <!-- Left Side Of Navbar -->:
<li class="nav-item">
    <a class="nav-link" href="{{ route('post.form') }}">{{ __('New Post') }}</a>
</li>
Finally, add the route to the page in routes/web.php:
Route::get('/post/{id?}', [PostController::class, 'postForm'])->name('post.form');
If you go to the website now, you'll notice a new link in the navbar that says "New Post". If you click on it, you'll see the form you created for the posts.
Save Posts
Before you implement the save functionality for posts, it's time to use Bouncer to implement RBAC.
In your terminal, run the following to install Bouncer:
composer require silber/bouncer v1.0.0-rc.10
Then, in app/Models/User.php make the following changes:
use Silber\Bouncer\Database\HasRolesAndAbilities;

class User extends Authenticatable
{
    use HasApiTokens, HasFactory, Notifiable, HasRolesAndAbilities;
Next, run the following command to add the migrations that Bouncer needs:
php artisan vendor:publish --tag="bouncer.migrations"
Finally, migrate these changes:
php artisan migrate
Bouncer is now ready to use. You can now add the save post functionality.
In app/Http/Controllers/PostController.php add the new savePost method:
public function savePost (Request $request, $id = null) {
    /** @var $user */
    $user = Auth::user();

    Validator::validate($request->all(), [
    'title' => 'required|min:1',
    'content' => 'required|min:1'
    ]);

    //all valid, validate id if not null
    /** @var Post $post */
    if ($id) {
        $post = Post::query()->find($id);
        if (!$post) {
        return back()->withErrors(['post' => __('Post does not exist')]);
        }
    } else {
        $post = new Post();
    }

    //set data
    $post->title = $request->get('title');
    $post->content = $request->get('content');
    if (!$post->user) {
        $post->user()->associate($user);
    }
    $post->save();

    if (!$id) {
        Bouncer::allow($user)->toManage($post);
    }

    return response()->redirectToRoute('post.form', ['id' => $post->id]);
}
In this method, you first validate that both title and content were entered in the form. Then, if the optional parameter id is passed to the method you validate if it exists and if it belongs to this user. This is similar to the postForm method.
After validating everything, you set title and content. Then, if the post is new you set the current user as the owner of the post with $post->user()->associate($user);.
The important bit is here:
if (!$id) {
    Bouncer::allow($user)->toManage($post);
}
Using the Bouncer facade, you can use functions like allow, which takes a user model. Then, you can give different types of permissions to the user. By using toManage, you give the user all sorts of management permissions over the $post instance.
Now, add the route for this method in routes/web.php:
Route::post('/post/{id?}', [PostController::class, 'savePost'])->name('post.save');
Finally, change the form action in resources/views/post-form.blade.php:
<form method="POST" action="{{ route('post.save', ['id' => $post ? $post->id : null]) }}">
If you go now the New Post page and try adding a post by filling the title and content fields then clicking Submit, you'll be redirected back to the form with the content filled in which means the post has been added.
Show Posts
To make the posts added visible to the user, change the index method in app/Http/Controller/HomeController.php to the following:
/**
* Show the application dashboard.
*
* @return \Illuminate\Contracts\Support\Renderable
*/
public function index()
{
    /** @var User $user */
    $user = Auth::user();
    //get all posts
    $posts = Post::query()->where('user_id', $user->id)->get();
    return view('home', ['posts' => $posts]);
}
This will retrieve the posts that are made by the currently logged-in user.
Next, change resources/views/home.blade.php to the following:
@extends('layouts.app')

@section('content')
<div class="container">
    <div class="row justify-content-center">
        <div class="col-md-8">
            <h1>{{ __('My Posts') }}</h1>
            @forelse ($posts as $post)
                <div class="card">
                    <div class="card-header">{{ $post->title }}</div>

                    <div class="card-body">
                        {!! $post->content !!}
                    </div>

                    <div class="card-footer">
                        {{ __('By ' . $post->user->name) }} -
                        <a href="{{ route('post.form', ['id' => $post->id]) }}">{{ __('Edit') }}</a>
                    </div>
                </div>
            @empty
                <div class="card">
                    <div class="card-body">
                        {{ __('You have no posts') }}
                    </div>
                </div>
            @endforelse
        </div>
    </div>
</div>
@endsection
This will show the list of posts that the user has added if there are any.
If you open the home page now, you should see the post you added earlier.

Add View and Edit Access
In this section, you will be adding the functionality to allow access to other users either to edit or view a post. This will show how RBAC implementation works and how you can restrict or give access to a certain model for users.
In resources/views/home.blade.php change the element with class .card-footer that holds the Edit link to the following:
<div class="card-footer">
  {{ __('By ' . $post->user->name) }} -
  <a href="{{ route('post.form', ['id' => $post->id]) }}">{{ __('Edit') }}</a> -
  <a href="{{ route('post.access', ['id' => $post->id, 'type' => 'view']) }}">{{ __('Change view access...') }}</a> -
  <a href="{{ route('post.access', ['id' => $post->id, 'type' => 'edit']) }}">{{ __('Change edit access...') }}</a>
</div>
This adds 2 links for a new page which is access form. This page allows the user to change view or edit access for other users to the post.
In app/Http/Controllers/PostController.php add a new method accessForm:
public function accessForm ($id, $type) {
    /** @var App/Models/User $user */
    $user = Auth::user();

    /** @var Post $post */
    $post = Post::query()->find($id);
    if (!$post || $post->user->id !== $user->id) {
        return response()->redirectTo('/');
    }

    //get all users
    $users = User::query()->where('id', '!=', $user->id)->get();

    return view('post-access', ['post' => $post, 'users' => $users, 'type' => $type]);
}
This route receives 2 parameters: id which is the post ID, and type which is the type of access. The type of access can be view or edit.
In this method you first validate the post and make sure it exists and it belongs to the current logged in user. Then, you retrieve all other users and send them to the view post-access which we'll create now.
Create resources/views/post-access.blade.php with the following content:
@extends('layouts.app')

@section('content')
<div class="container">
    <div class="row justify-content-center">
        <div class="col-md-8">
            <h1>{{ __("Change " . ucwords($type) . " Access to Post") }}</h1>
            <div class="card">

              <div class="card-body">
                <form method="POST" action={{ route('post.access.save', ['id' => $post->id, 'type' => $type]) }}>
                  @csrf
                  @forelse ($users as $user)
                    <div class="form-group">
                      <label for="user_{{ $user->id }}">
                        <input type="checkbox" name="users[]" id="user_{{ $user->id }}" value="{{ $user->id }}"
                        class="form-control d-inline mr-3" @if ($user->can($type, $post)) checked @endif
                        style="width: fit-content; vertical-align: middle;" />
                         <span>{{ $user->name }}</span>
                      </label>
                    </div>
                  @empty
                    {{ __('There are no users') }}
                  @endforelse
                  <div class="form-group">
                    <button type="submit" class="btn btn-primary">{{ __('Save') }}</button>
                  </div>
                </form>
              </div>
          </div>
        </div>
    </div>
</div>
@endsection
This shows the list of users with checkboxes. Those who already have access will already by checked, others unchecked.
Now, you'll create the route that handles saving the access for the post. In app/Http/Controllers/PostController.php add the new method saveAccess:
public function saveAccess (Request $request, $id, $type) {
    /** @var User $user */
    $user = Auth::user();

    /** @var Post $post */
    $post = Post::query()->find($id);
    if (!$post || $post->user->id !== $user->id) {
        return response()->redirectTo('/');
    }

    $users = $request->get('users', []);
    $disallowedUserNotIn = $users;
    $disallowedUserNotIn[] = $user->id;
    //disallow users not checked
    $disallowedUsers = User::query()->whereNotIn('id', $disallowedUserNotIn)->get();

    /** @var User $disallowedUser */
    foreach ($disallowedUsers as $disallowedUser) {
        $disallowedUser->disallow($type, $post);
    }

    //allow checked users
    $allowedUsers = User::query()->whereIn('id', $users)->get();

    /** @var User $allowedUser */
    foreach($allowedUsers as $allowedUser) {
        $allowedUser->allow($type, $post);
    }

    return back();
}
This route also receives 2 parameters id and type, same as accessForm. You also validate the post by checking that it exists and that it belongs to the current user.
Then, you retrieve the checked users from the request. There are 2 actions to do here: disallow unchecked users to perform the action type on the post, and allow checked users to perform the action type on the post.
So, you first retrieve the users that are not in the array $users which holds the checked user IDs. Then, you loop over them to perform the following method on each of them:
$disallowedUser->disallow($type, $post);
When the trait HasRolesAndAbilities is added to a model, which we did earlier to the model User, a set of methods are added to that m0del. One of them is disallow which disallows the user a certain ability and you can specify a model to be more specific about what that ability is disabled on.
So, here you are disallowing the user in the loop to perform the action $type on the post $post.
Next, you retrieve the users that are in the $users array and that should be granted the ability to perform action $type on them. You loop over them and perform the following method:
$allowedUser->allow($type, $post);
Similar to disallow, allow is another method that is added by the trait HasRolesAndAbilities. It allows the user to have the ability $type either in general or on a given model that is specified as a second parameter.
Here, you allow the user to perform the action $type on the post $post.
Now, add the new routes in routes/web.php:
Route::get('/post/access/{id}/{type}', [PostController::class, 'accessForm'])->name('post.access');

Route::post('/post/access/{id}/{type}', [PostController::class, 'saveAccess'])->name('post.access.save');
Now, there are some changes left to do. First, you need to change the condition in postForm which allows users who have the permission to edit or view the post to access the page:
if (!$post || ($post->user->id !== $user->id && !$user->can('edit', $post) && !$user->can('view', $post))) {
    return response()->redirectTo('/');
}
You also need to allow users who have edit permission to edit the post in savePost:
if (!$post || ($post->user->id !== $user->id && !$user->can('edit', $post))) {
    return back()->withErrors(['post' => __('Post does not exist')]);
}
In app/Http/Controllers/HomeController.php in the index method change the method to also retrieve the posts that the user has edit or view permissions on:
/**
     * Show the application dashboard.
     *
     * @return \Illuminate\Contracts\Support\Renderable
     */
    public function index()
    {
        /** @var User $user */
        $user = Auth::user();
        //get all posts
        $posts = Post::query()->where('user_id', $user->id);
        //get posts that the user is allowed to view or edit
        $postIds = [];
        $abilities = $user->getAbilities();
        /** @var \Silber\Bouncer\Database\Ability */
        foreach ($abilities as $ability) {
            $postIds[] = $ability->entity_id;
        }
        $posts = $posts->orWhereIn('id', $postIds)->get();
        return view('home', ['posts' => $posts]);
    }
This is done using the getAbilities method that is added on the User model like allow and disallow. Each ability holds the id of the model it represents under entity_id. We use that to get the ID of posts that the user has view or edit permissions on and retrieve them to show them on the home page.
In resources/views/home.blade.php change the element with class .card-footer to the following:
<div class="card-footer">
    {{ __('By ' . $post->user->name) }} -
    <a href="{{ route('post.form', ['id' => $post->id]) }}">{{ __('View') }}</a>
    @can('manage', $post)
        - <a href="{{ route('post.access', ['id' => $post->id, 'type' => 'view']) }}">{{ __('Change view access...') }}</a> -
        <a href="{{ route('post.access', ['id' => $post->id, 'type' => 'edit']) }}">{{ __('Change edit access...') }}</a>
    @endcan
</div>
You now only show the change access links to the user that manages the post so that not everyone that has access to the post can make changes to its access settings. This can be done by using the @can blade directive which accepts the ability name and optionally a model instance. In this case, we check if the current user can manage the post $post.
Finally, you need to make changes to resources/views/post-form.blade.php to ensure that if the user has view permission only they can't make edits on the post. This means that the form will become read-only.
Change the content of the element with the class card to the following:
<div class="card-header">{{ $post ? __('View Post') :__('New Post') }}</div>

<div class="card-body">
    <form method="POST" action="{{ route('post.save', ['id' => $post ? $post->id : null]) }}">
        @csrf
        @error('post')
            <div class="alert alert-danger">{{ $message }}</div>
        @enderror
        @if ($post && !Auth::user()->can('edit', $post))
            <div class="alert alert-info">{{ __('You have view permissions only') }}</div>
        @endif
        <div class="form-group">
            <label for="title">{{ __('Title') }}</label>
            <input type="text" name="title" id="title" placeholder="Title" required
            value="{{ $post ? $post->title : old('title') }}" class="form-control @error('title') is-invalid @enderror"
            @if($post && !Auth::user()->can('edit', $post)) disabled="true" @endif />
            @error('title')
                <span class="invalid-feedback">{{ $message }}</span>
            @enderror
        </div>
        <div class="form-group">
            <label for="content">{{ __('Content') }}</label>
            @error('content')
                <span class="invalid-feedback">{{ $message }}</span>
            @enderror
            @if($post && !Auth::user()->can('edit', $post))
                {!! $post->content !!}
            @else
                <input id="content" type="hidden" name="content" value="{{ $post ? $post->content : old('content') }}">
                <trix-editor input="content"></trix-editor>
            @endif
        </div>
        @if(!$post || Auth::user()->can('edit', $post))
            <div class="form-group">
                <button type="submit" class="btn btn-primary">{{ __('Submit') }}</button>
            </div>
        @endif
    </form>
</div>
This makes the title input disabled, shows the content of the post readable rather than in an editor, and hides the submit button when the user does not have edit permissions.
Let's test all of this together. You first need to create another user to test this out so go ahead and register as a new user. Then log in again with the user you previously created and click on "Change view access..." on one of the posts you created. You'll see a form with the user you created and a checkbox.

Check the checkbox and click save. This will give the new user the ability to view the post.
Now, log out and log in again with the new user. You'll see the post in the home page.

Click on View. You'll see the same form that you saw before when creating a post but the title input is disabled and the editor is not available anymore.

Let's try giving the user edit permissions now. Log out and login with the first user again. This time, click on "Change edit access" on the post. Give the new user access and click Save.
Again, logout and login as the new user. Then, click on View on the post in the home page. You should now be able to edit the post.

You can even try going back to the first user and removing the edit access for the new user on the post. They will no longer be able to edit the post.
Conclusion
RBAC adds abilities and roles to users which allows you to manage permissions in your app. In this tutorial, you learned how to use Bouncer to implement RBAC in Laravel, allowing or disallowing permissions and abilities for users.
Be sure to check out Bouncer's documentation to learn more about what you can do with the package.

Latest comments (0)